
After reading this article, you will learn how to build a non-expensive quadrocopter controlled from an android device, remote control or computer. There are many steps in this project that you can skip. For example, you can skip construction quadcopter and buy ready-made on the Internet, but you will still use Arduinoto control it from your tablet or laptop. However, if you go this route, you will lose the pleasure of combining Chinese bamboo sticks and cheap plastic from manufacturers electronic toys. This is a cheap project, the most expensive part of which is ArduinoDUE, although you can use something cheaper.
What do you need in order to collect and launch your quadrocopter into the air:
Laptop or computer with Processing [/ b]You can download. What is “Processing”? Here is what Wikipedia writes about this:
Processing is an open source Java programming language. It is an easy and fast toolkit for people who want to program images, animations and interfaces. Used by students, artists, designers, researchers and amateurs to study, prototype and produce. It was created to study the basics of computer programming in a visual context and serves as landscape software (meaning that each * .pde file of the Processing visual shell is a separate image or animation, etc.) and a professional production tool.
Arduino Software (IDE) [/ b]
Android device [/ b]that supports modeUSB host [/ b](tested on MotorolaXoom.
And also a soldering iron, straight arms, scissors.
What you need to make a frame
Quadrocopter frame made of bamboo skewers

Engine mounts to the frame are made from cocktail sticks.

Electrical tape - is used to fasten the receiver board, electric motors to the frame. Threads are needed for fastening parts before gluing. Cyanoacrylic adhesive. Elastic band for attaching the battery to the frame.
List of electronics for quadrocopters.
All of these parts may be damaged during test launches or during flights, so order with reserve. Links are given as an example. There are many suppliers.
EnginesI did not find engines with dimensions of 4x7 mm on Aliexpress found. Motors should be brushless.
This board contains all the components - a gyroscope, accelerometer, ESC (Electronic Stability Program), a CPU that combines all these components. Lithium polymer battery: 1 x 240mAh 1S 'LiPo. You can use different batteries with a smaller or larger capacity. If you decide to build an octocopter, then you need a more capacious battery.
List of quadcopter hardware control.
These are the parts of your future helicopter that will allow it to take your commands.
Please note that there must be two modules in the kit. And this is not the same as the NRF24L01, no matter what is claimed to be sold.
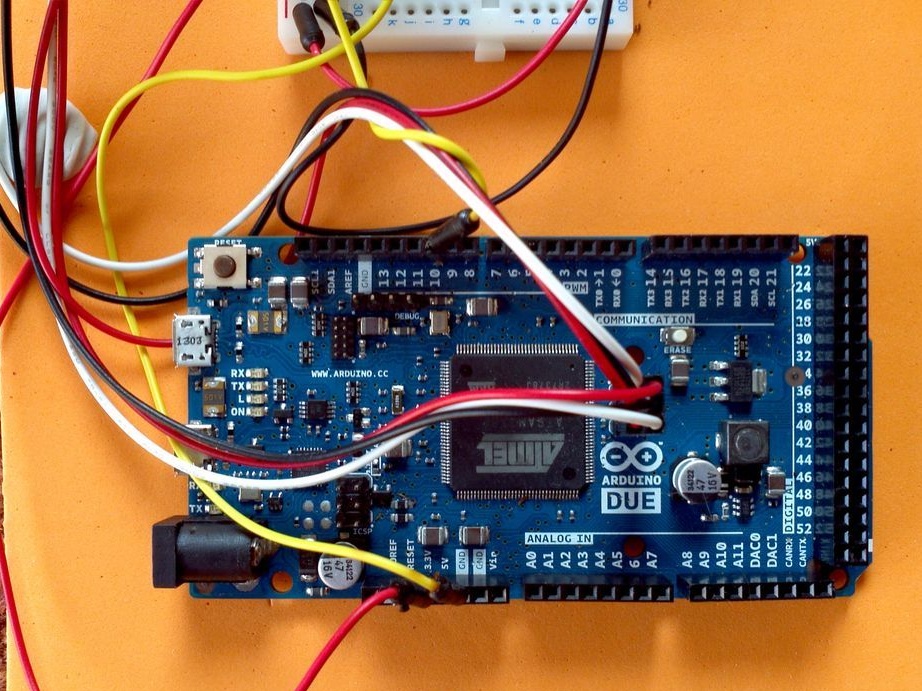
Arduino DUE [/ b]or similar, it will be used to connect your Android device and A7105. The author used this particular Arduino board because it has a USB connected to the serial port and can work with 3.3v logic, although you can use a 5-3.3v level converter.
Development board - on it you will mount the radio module and connect it to the Arduino. Resistor 22kOhm - its value is not particularly critical. Wires to connect the radio module. OTG adapter for your android device.

The hubsan-remote control is optional, but convenient.
Wireframing.
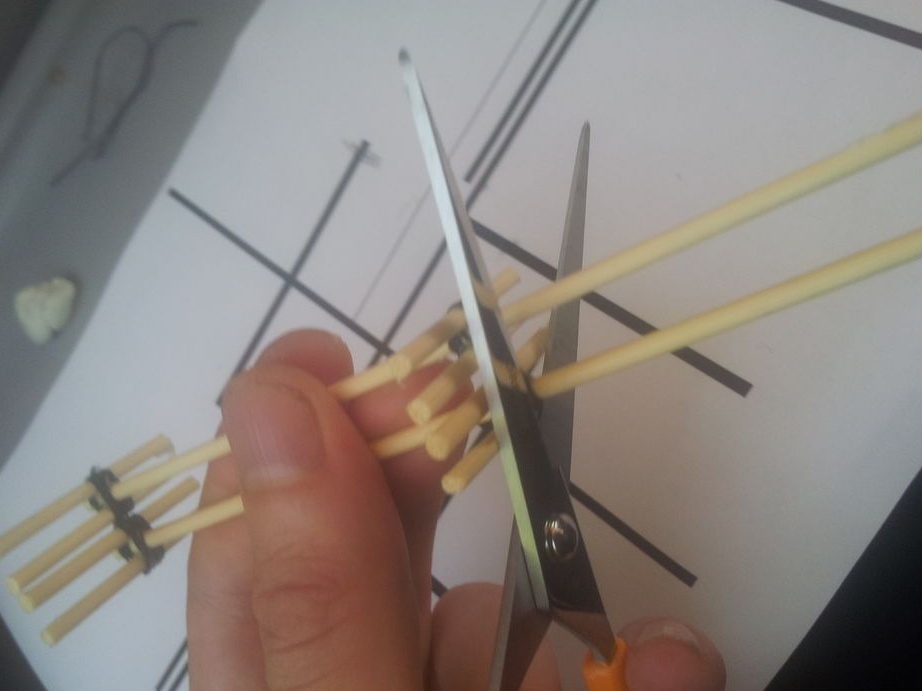
The frame is made of bamboo sticks, fastened cross to cross with straws from cocktails. All this sticks together with super glue.
1: Print the SVG template in the attached. It is more complicated than it should be, but it is also used to build an octocopter. The pattern is needed to make the correct square.
2. Cut the thread along the length of your forearm.
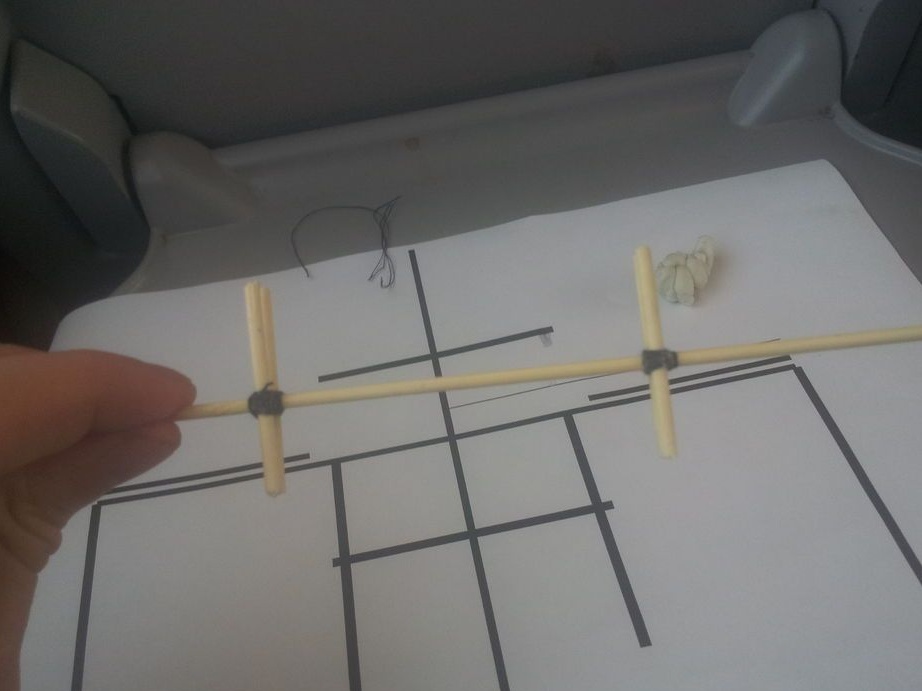
3 Take two sticks for cocktails and hold them so that the barbecue stick divides them in half and they are on top of each other.


4 Start wrapping the thread first on one diagonal, then on the other, wind evenly until the thread ends. Do not worry that the sticks are moving, you will glue them later. Take a thread the length of your forearm. Do not worry about the sticks being too long; later they will be used as motor mounts and quadrocopter legs.
5. Take two more sticks for canapes and fix them as in the previous step, only at a distance of 4 fingers from previously attached. The exact distance is not important, you will correct it further.
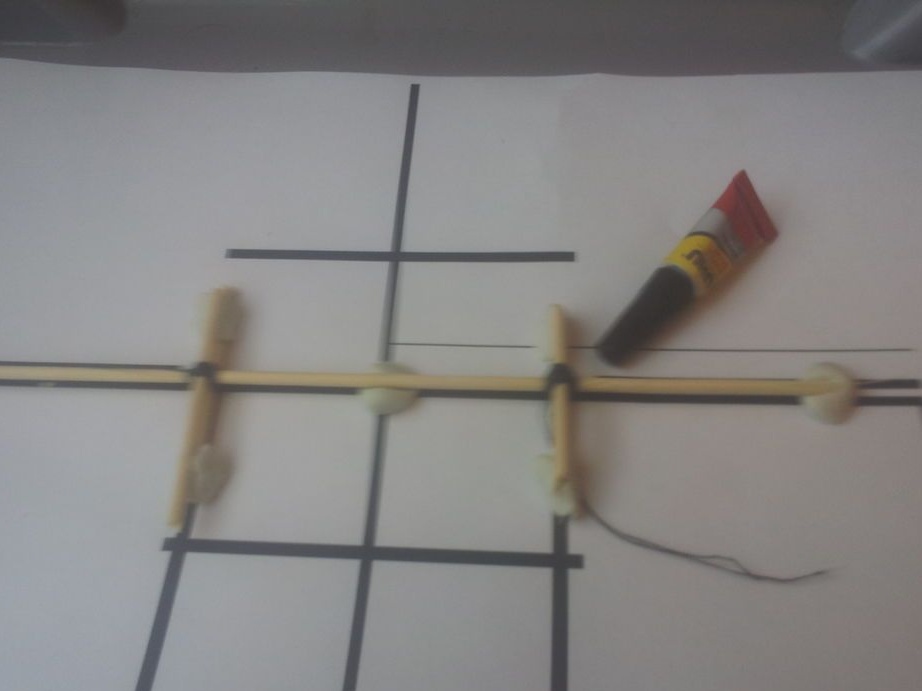
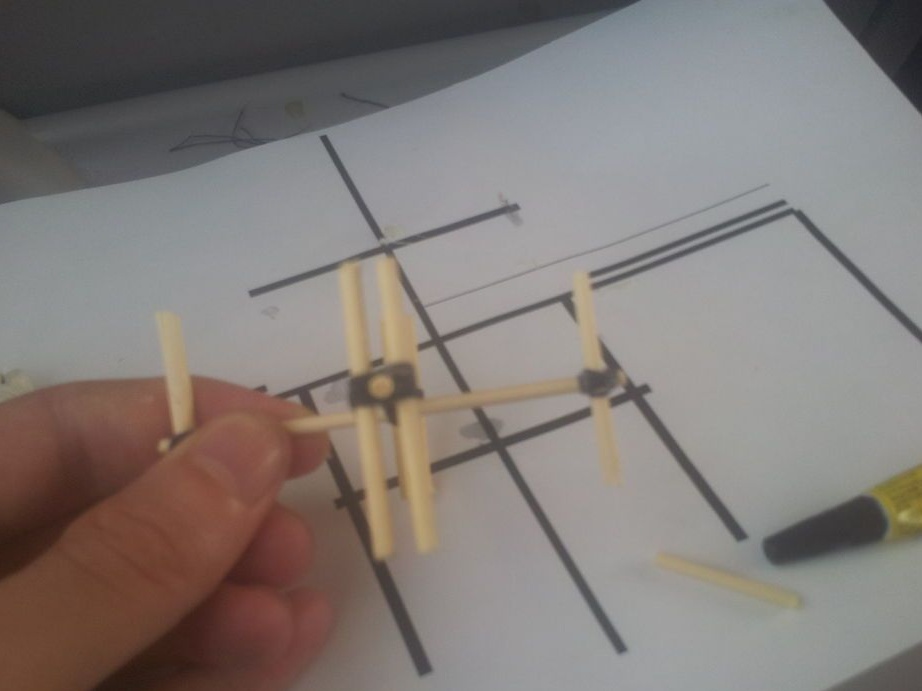
6. Put the template on a flat surface, it is better to use glass.
7. Place your sticks tied together as shown in the photo.
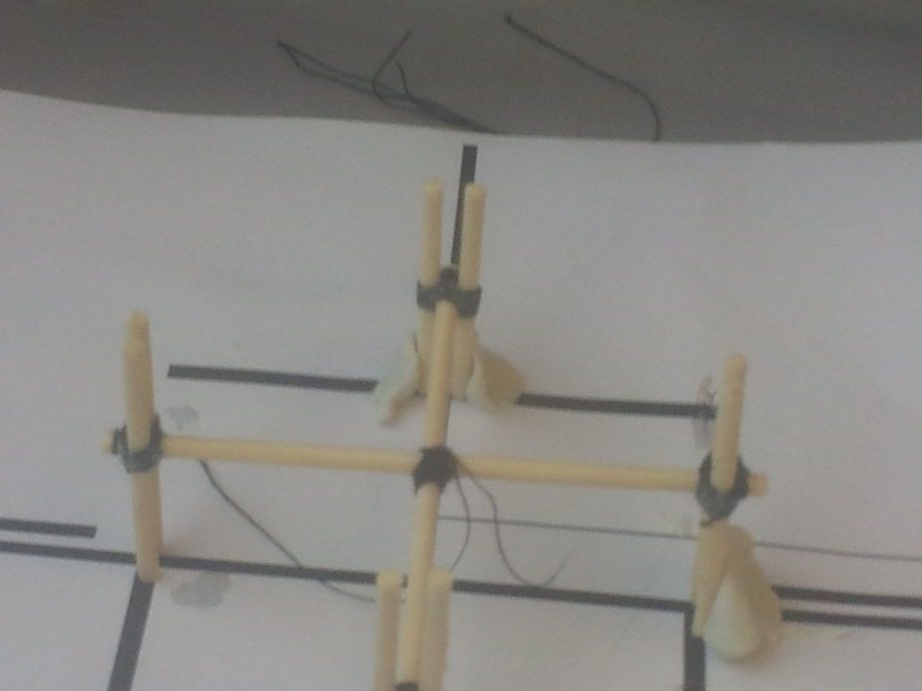
At this stage, it is important to do everything as accurately as possible. Quadcopters are not very sensitive to weight distribution, but if your motors are not pointing vertically, the helicopter will not fly very well, so check all two times. To mount the motors were strictly vertical, and all diagonals are the same.
8 Soak all your yarn-binding threads with super glue. It is necessary to impregnate the threads through, try not to shift your frame at the same time. Wait 2 minutes and turn your template over to saturate the threads with glue from the back. After another two minutes, the first square bracket will be ready.
9. Repeat the same process for the second bracket.
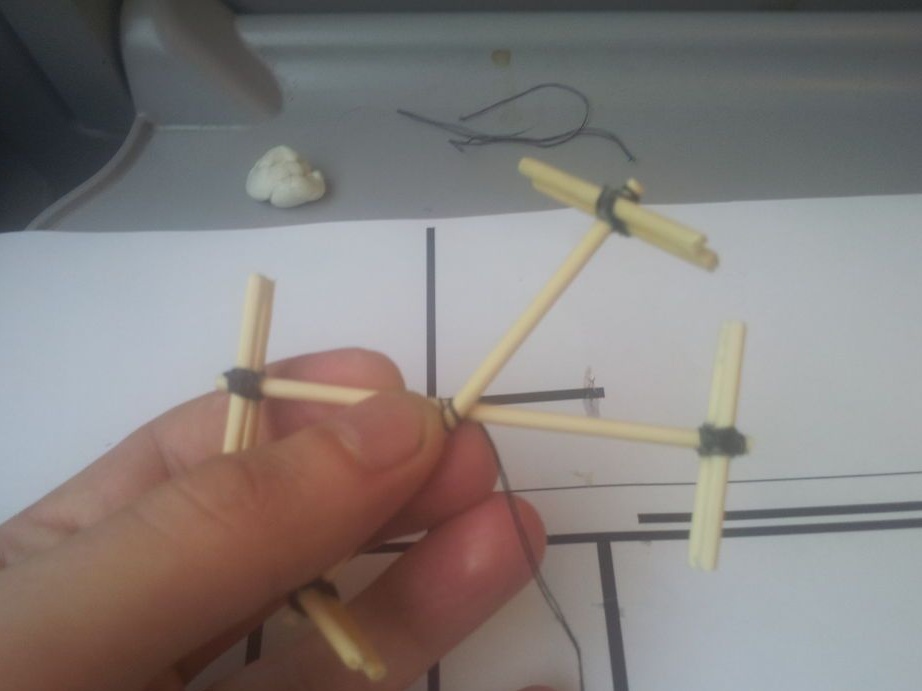
10. Next, you need to fasten together two brackets, as already described. Once again, make sure that all motor mounts are vertically aligned and that the brackets are fastened exactly in the middle.
11. Cut the sticks approximately 2 cm long on both sides.
12. Cut 4 sticks of 1.5 cm each, glue them together with a square, especially strong gluing is not needed, it will be a bracket for the board and battery.
The next step consists of soldering your 4 motors to a 4X receiver board. The first thing you need is to solder the power wires to the bottom of the board. Further we will refer to this orientation (the board lies on the “back”)
How to connect the motors.
The Hubsan x 4 boards have pads for connecting LEDs and motors. Those that have LED designation LED, there is no need to connect the motors. Motor contacts are marked+ ve [/ b]and–Ve. [/ B]
Take one of your 4 motors with black and white wires and solder them toLEFT LEFT [/ b]board contacts, white wire to the left pin of the pair. Take the motor with the red and blue wires and solder it toLEFT TOP [/ b]pins, red wire to the left pin of the pair .. Take the motor with black and white wires and solder them toRIGHT TOP [/ b]pins, black wire to the left pin. Take the motor with the red and blue wires and solder it toRIGHT LOWER [/ b]pins, red wire to the left pin of the pair.
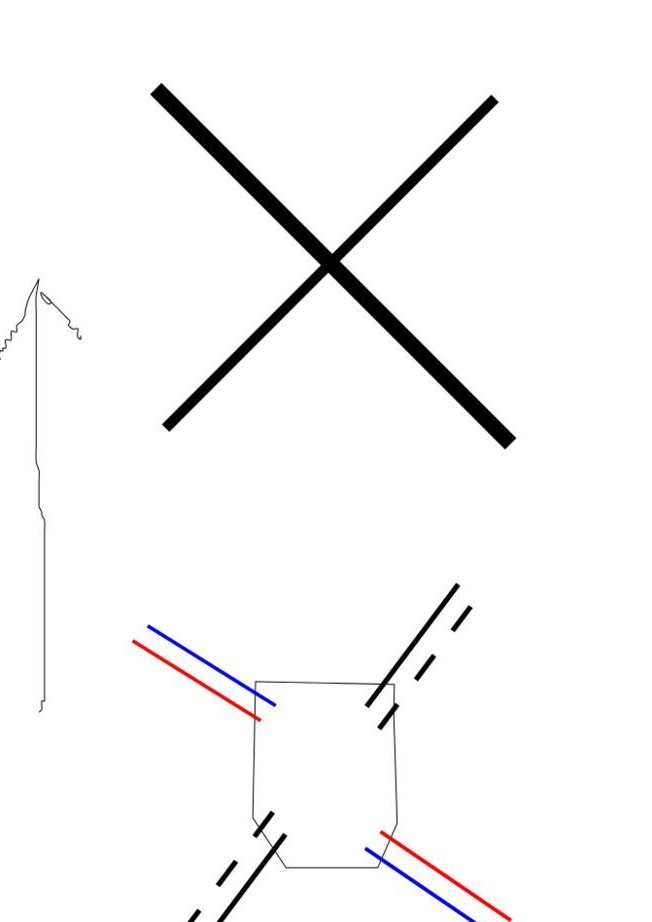
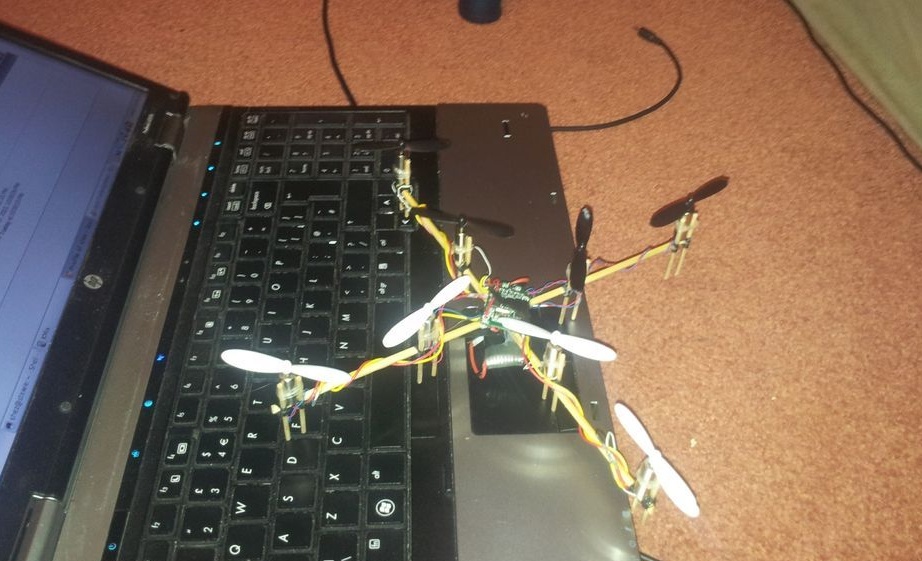
In the wiring diagram, the white wire is a black dashed line. The wires must be fixed with a drop of hot glue. Fasten the motors with two strips of electrical tape 5 mm wide. Do not really worry about the same arrangement of motors in height. After the motors are fixed, you need to wear propellers on the axis. Use a white propeller to “front” on the opposite side of the battery wires) and a black propeller to “rear”. It is not as simple as it seems. how some blades are made to rotate clockwise, and others to rotate counterclockwise. There are signs on the blades. Use the blades with the letter "A [/ b]"for the left upper and lower right motors. With the letter"In [/ b]", respectively, for the upper right and lower left motors. Now you can attach the battery to the bottom of the board, the author uses an elastic band for this part. If you have an original hubsan controller, you can raise the quad in the air. If the helicopter shakes in the air, this means that the motors are not standing strictly upright. By laying pieces of folded paper, you can align the motors.
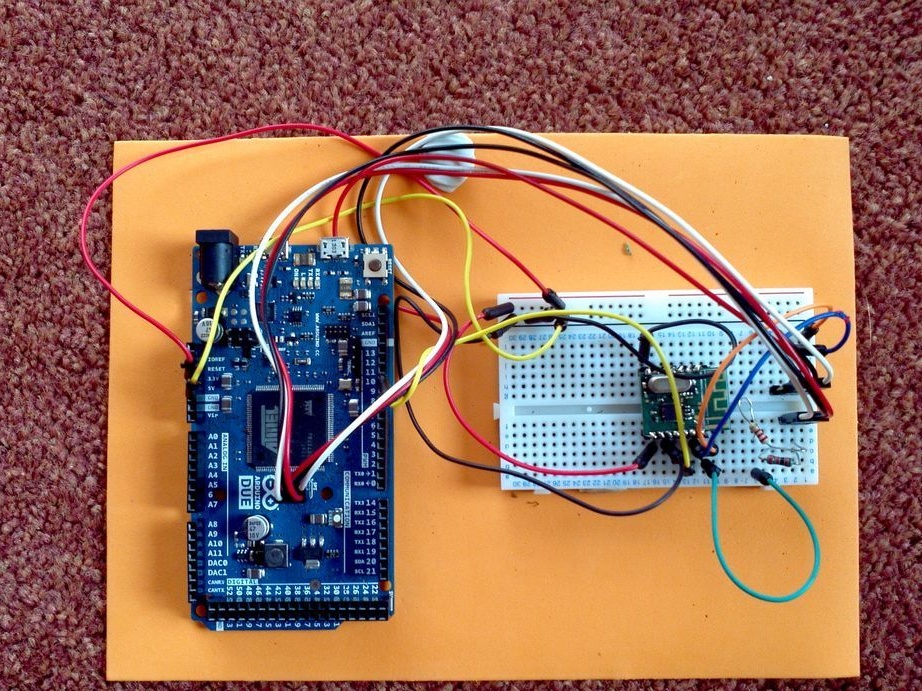
Radio control assembly on arduino.
This point of the project will tell you how to control a helicopter using an Android device via the Arduino serial port.
You need 6 pins on the A7105 board. Left is GND. On the right is SDIO, SCK, SCS, GND, VCC.
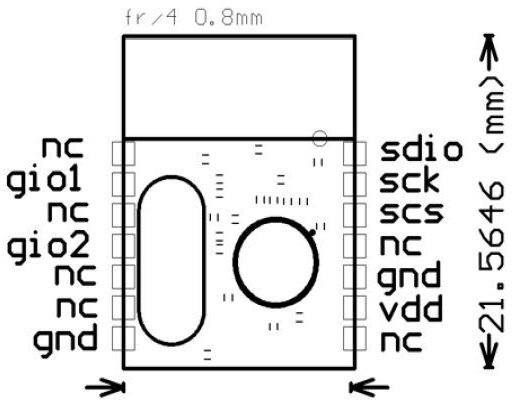
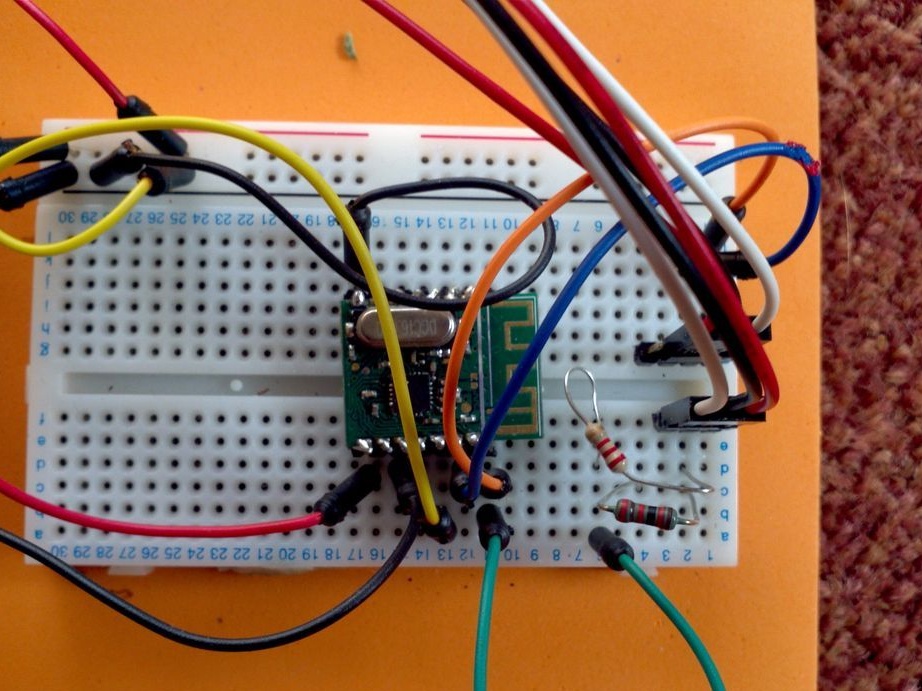
Solder a solid single-core wire, 2 cm long, to each indicated pin. Insert the A7105 into the breadboard as shown in the photo. Connect the GND pins on the arduino board and two on the A7105. Connect the 3.3V pin on the Arduino to the VCC pin on the A7105 board. On the SPI Arduino connector, connect the MOSI pin to one of the resistor pins, connect the other end of the resistor to the SIDO pin on the A7501.
This link allows you to see where it is located
Arduino SCK pin with A7105 SCK pin, SCS from A7105 board to pin 10 of Arduino. The blue resistor in the photo is not part of the project.
Arduino software
The following sketch uses a hacked version of PhracturedBlue's hubsan X4 and A7105 original code is possible.
Connect your DUO to the computer through the 'Programming Port'. Download the zip file, upload the sketch to Arduino and upload it to DUO. This sketch processes the commands from the serial port and converts them into the commands of the control board of your quadrocopter. This sketch communicates with the Hubsan board via radio without a serial port, so if you turn on your copter and then Arduino, and the lights on the copter stop blinking, then everything is in order.
Android software
This is softwaresecuritygives you a simple flight controller based on an android device. The accelerometer and touch screen of your device are used for control. The tablet or phone will communicate with the Arduino via the USB port.
Software Installation:
1 You must enable USB debugging and enable the installation of non-google play applications. Download the application here
2Plug inyour device through an OTG to Arduino adapter, it willbe fedfrom your phone or tablet, so make sure the battery is fully charged.
3 Connect the battery to the copter and lay it on a flat surface. If the lights stop blinking, then everything is in order.
4 The thumb of the left hand slowly slide on the screen, the propellers should begin to rotate. Remove your finger and the propellers will stop.
5 Do the same, just place your right thumb on the screen too. This will allow you to control the helicopter using the accelerometer, tilting your device forward / backward, left / right. By moving the thumb of your right hand left or right, you will spin the helicopter left or right around the axis. If you remove your right hand from the screen, the helicopter should align, regardless of the position of the accelerometer. Give it a try. Move the finger of your left hand until the helicopter takes off. Remember - if you remove both fingers, the motors will stop.
PC software
The archive program that controls the copter through the serial port. The copter is controlled using the cursor buttons, and the “A” / ”Z” buttons are the throttle. The author made an attempt to force the copter to follow an object of a certain color, but this does not work yet. He promised to upload updates.