
Materials and tools:
- microcontroller Arduino (in this homemade applies Arduino Uno Rev 3);
- Two servos from Parallax;
- joystick (also from Parallax);
- circuit board) small);
- connectors for connection;
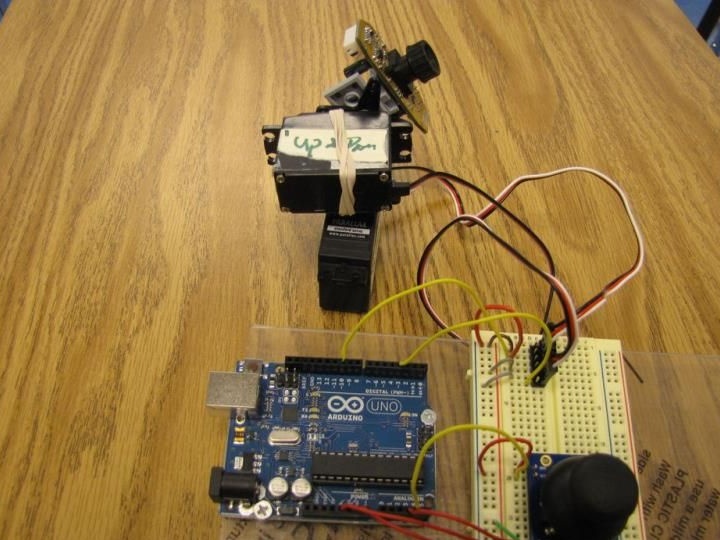
- A device for tracking the movement of servomotors (a broken webcam and lego cubes are used).
Homemade assembly process:
Step one. We connect servomotors
The homemade assembly process begins with connecting the servomotors. In order to assemble a preliminary layout, a circuit board is used. Then it will be possible to make a separate shield. In the figure you can see how exactly everything is connected.
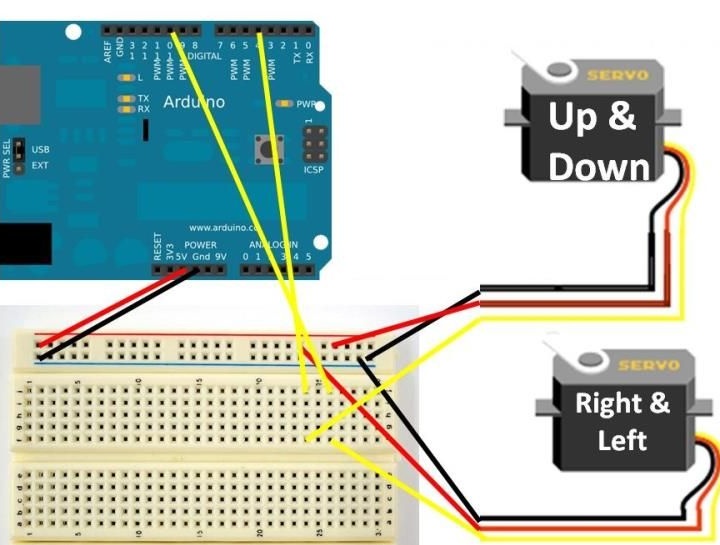
The red cable is the power, it connects to the 5V pin on the Arduino controller.
The black wire is a minus (ground), it connects to the Arduino output called GND.
The yellow cable from the Right & Left servomotor must be connected to pin 11. On some models, it can be white.
A similar yellow Up & Down cable must be connected to pin 4. It can also be white on some engine models.
It is important to remember that the signal connectors used to control the motor come from the PWM outputs.
Step Two Connect the joystick
How the joystick is connected can be seen in the picture. At first, the scheme may seem rather complicated, but in fact there is nothing complicated here. As with motors, a wiring board is used here.
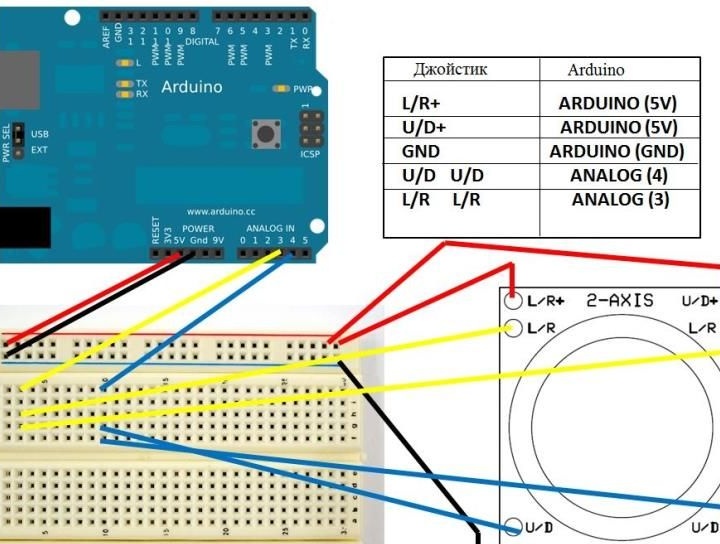
1. On the joystick module, you can find the outputs U / R + and L / R +. Through these outputs, power is connected. Accordingly, you need to apply + 5V voltage from the corresponding pin to the Arduino.
2. There are also two connectors under the joystick called L / R and two U / D connectors. They need to be connected to the analog outputs A3 and A4.
3. Well, in conclusion, the earth on the joystick must be connected to the earth on the Arduino.
After assembly, the connection must be double-checked. It is because of connection errors that in most cases problems arise. This is especially true when a circuit board is used and there are many connections on it.
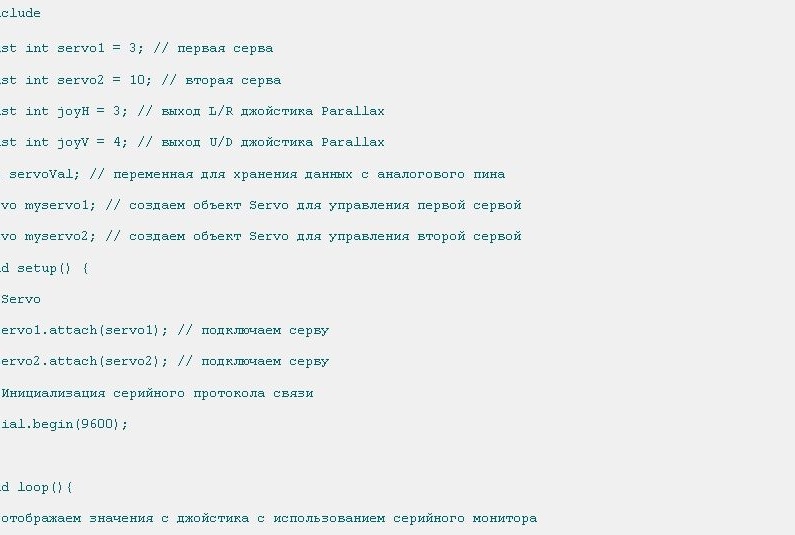
Step ThreeSketch for Arduino
The code is very simple and contains detailed comments. The above code just needs to be copied to the Arduino IDE. Once the code is loaded, the engines should not move. They should only start moving when the button on the joystick is pressed.
Problems that may arise and how to solve them
1. If the engines do not turn on, double-check the connection. PWM outputs are used to connect motors, and analog outputs are used to connect joysticks.
2. It happens that immediately after loading the code, the engines begin to vibrate. This happens if you incorrectly connect the pins U / D + L / R +. Connection needs to be checked carefully. In order not to burn the board during the test, it must be disconnected from the computer.
3. If everything is rechecked, but the engines still do not want to work, you can try reconnecting the joystick. It must be removed from the circuit board, and then installed back with some effort. Joystick connectors should go well into the layout.
If everything turned out, now you can start creating any home-made items with control via the joystick. For example, you can make a robot that can be controlled with a joystick, and much more.