
When creating this solar panel, the author set the task to make lightweight, portable model, but at the same time quite powerful, preferably about 100 watts. This should be enough to power a laptop, phone and other electronics. The result was a powerful and easy to transport solar panel consisting of several parts.
Materials used to create the solar panel:
1) acrylic glass
2) a special film for outdoor advertising
3) adhesive tape
4) photocells
5) ammeter
6) voltmeter
Consider the main stages of work on a solar panel.
To begin with, the author decided to read articles on the Internet on the assembly and operation of solar panels. After reviewing the materials, the author found that almost all articles use ordinary glass, which is not acceptable for creating a portable model, since the glass itself has a lot of weight and can also easily break.
Then he decided to consider options with org. glass, which is much stronger and lighter than usual. Problems org. Glass for solar panels consists in the fact that it tends to cloud in the sun, which will reduce the throughput of sunlight for solar cells, which in turn reduces the efficiency of the generated electricity. As a result, from the majority of brands viewed org. glass, the author settled on acrylic glass, as the manufacturer guarantees the preservation of all its qualities up to ten years of operation. In addition, acrylic glass has no problems with prolonged exposure to sunlight, that is, it does not deform and does not cloud.
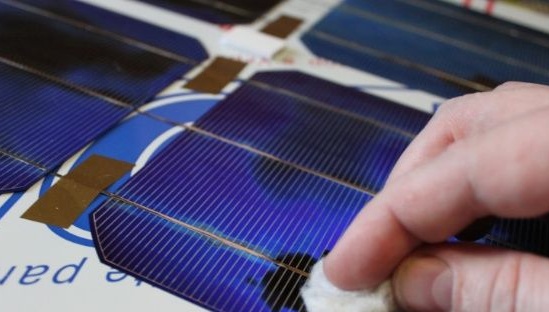
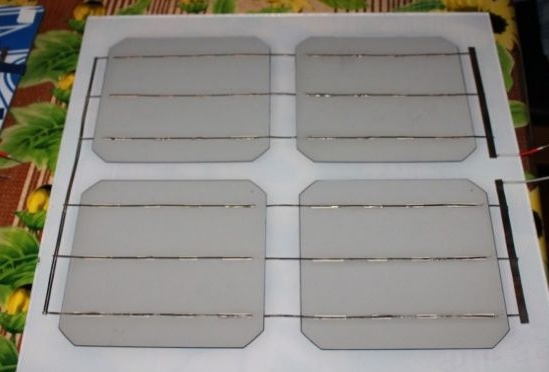
Then the author began assembling the solar panel. For this, 4 pieces in series were soldered. After soldering, the author cleaned the elements with alcohol and cotton wool from dust and flux residues.
For greater convenience, the stripping of elements, the author distributed them initially on the eco-bill. Items were temporarily attached to regular tape.
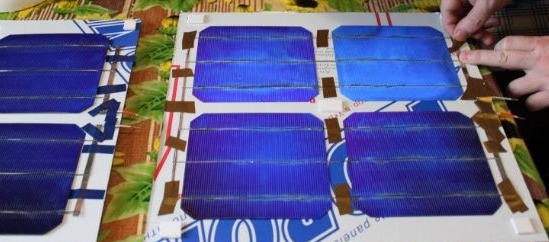
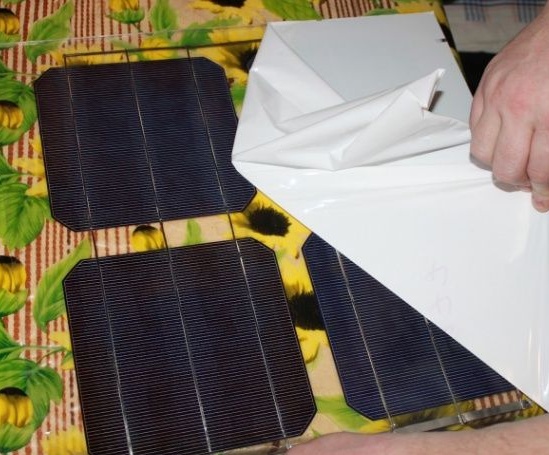
After which the author proceeded to fix the elements on the glass with their subsequent sealing.
Acrylic glass film was removed on one side.
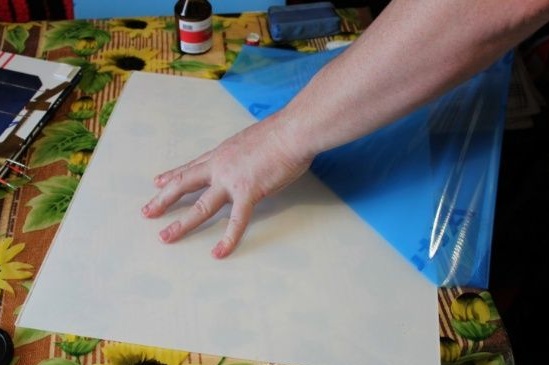
Then the author applied acrylic glass to the elements so that they were on the glass, and the substrate remained on top.
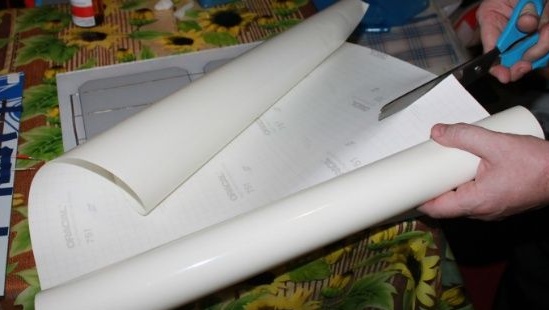
Then he began preparations for rolling the elements themselves into film.
To fix the photo of the elements on the glass, the author decided to use a film that is used for outdoor advertising. The option of the film with the highest declared service life was selected. In addition, at the same time, the photo elements themselves are sealed with such a film and are protected from moisture and dust.
The film was marked and cut off a piece of the necessary length for fixing the elements.
The process of gluing the film itself was very slow and accurate. Particular care must be taken to ensure that wrinkles or bumps do not form, as this may damage the throughput. In addition, the elements themselves are quite fragile and it is impossible to exert strong pressure on them when gluing the film, which significantly complicated the work.
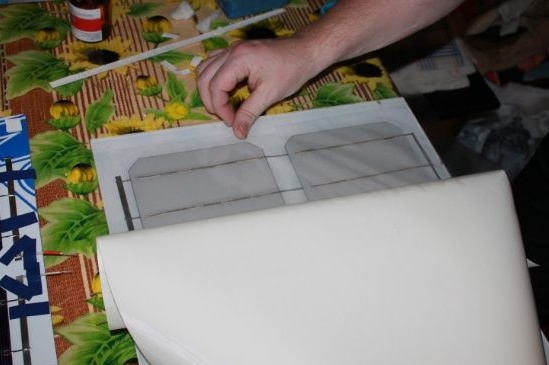
For the convenience of working with the film, it is best to wear gloves, since in this way the hand glides better on the film and it is much easier to remove defects of irregularities. After gluing the film, cuts were made for the conclusion of the wires from the elements.

After the main assembly, the remaining protective film was completely removed from the acrylic glass.
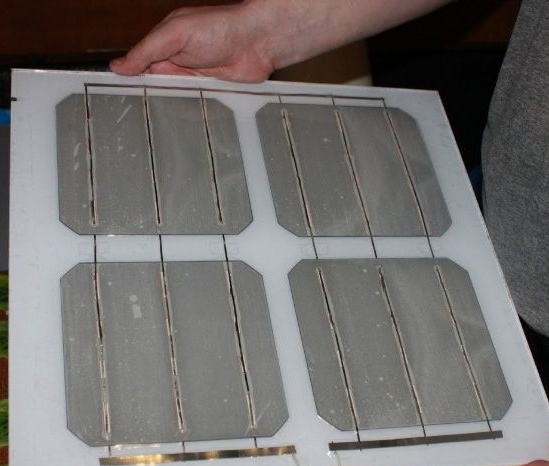
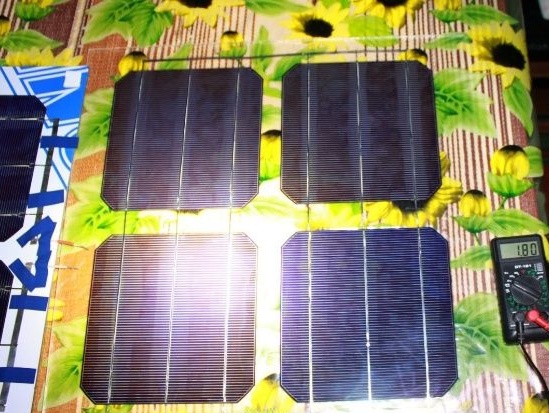
Then the first test was performed on the design, which showed a voltage of 1.8 V. Therefore, the battery is working. By the same principle, three more similar panels were assembled.
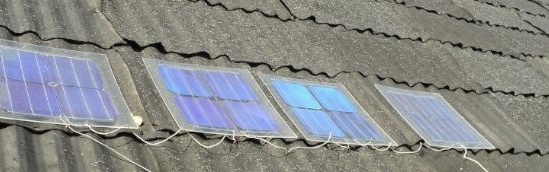
To test the system, solar panels were placed on the roof of the house, and the wires were led out to the attic, where the main measurements of testing the solar battery took place.
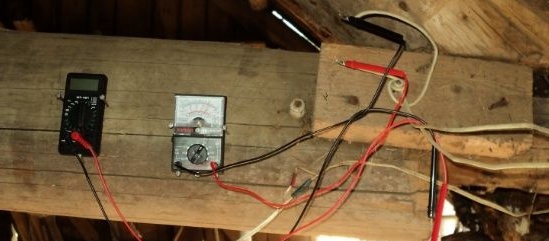
Measuring instruments were placed in the attic, one of which was pointer on volts, and digital on amperes. According to the results of the main tests, the maximum recorded current was 7.2 A.
As you can see in the previous photos, these four panels can generate about 2 V each, which gives a minimum of 6.5 V even in non-sunny weather. Under good weather conditions, it is already more than 8 V. In bright sunshine, the maximum current strength reached 7 A, which is a very high efficiency indicator for a portable solar panel.