
This article describes the creation of a sufficiently powerful solar panel with minimal cost. The author really liked the idea of using solar energy in his needs in places where there is no electricity, and I would like to use a phone or laptop. Therefore, the author began to search for the necessary materials and instructions for creating a solar panel in home conditions.
The materials, parts and tools used to create this solar panel:
1) set of photocells
2) tire for soldering
3) flux pencil
4) 25 W soldering iron
5) POS-61 solder
6) org. glass 4 mm and 2 mm thick.
7) plywood sheet
8) double-sided adhesive tape
Consider the steps for creating a solar panel.
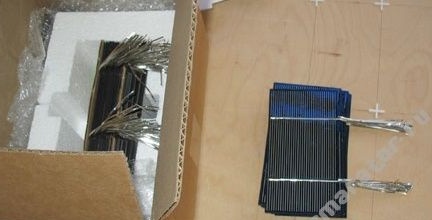
Since the author had no experience in assembling such structures until this moment, he decided to order the cheapest set of elements that he found in online stores. A soldering tire and a flux pencil were also purchased separately.
Photo of items delivered from the store:
It is not difficult to find such components, on eBay there are a huge number of sellers from whom you can buy a set directly, without intermediaries, which significantly affects the price.
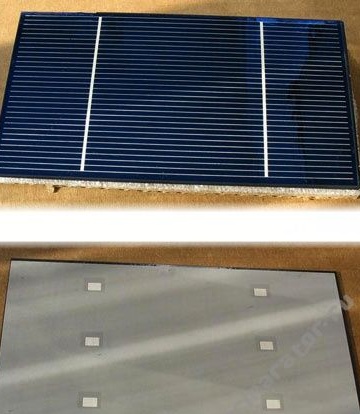
Since the cheapest set of elements that the author could only find was ordered, there were no conductors on the front of the plates. They had to be soldered on their own, which took quite a long time and expended a lot of energy. Therefore, he recommends paying attention to this detail when ordering a kit, if you are not ready to spend a lot of time soldering the conductors to the elements.
As a result, these are the elements to which the contact bars were soldered:
Then the author began to choose the material that will serve as the basis for mounting the solar panel. Options such as film lamination, the use of a special epoxy resin composition with maximum transparency, and so on were considered. Most of the options were either very difficult to manufacture for the beginner and home, or expensive, as is the case with the special composition of the epoxy resin.
As a result, the author decided to do without any fill at all, but simply to fix the elements on the org. glass.
The author immediately refused ordinary glass, since sintered glass with a film is used in the factory panels, which significantly increases the strength.Ordinary glass can easily break during transportation.
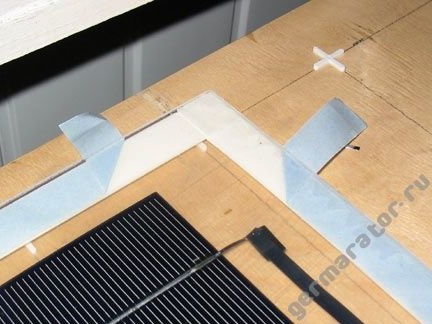
It was acquired by org. glass with a thickness of four millimeters for the back of the product, the front part will be only 2 mm thick. For a more even and high-quality fixing of the elements, the author made a template from a sheet of plywood, which was laid out according to the arrangement of the photocells, and plastic crosses, which are usually used for laying tiles, were pasted on it. With this approach, the appearance of the panel will look very high quality, almost like a factory one.
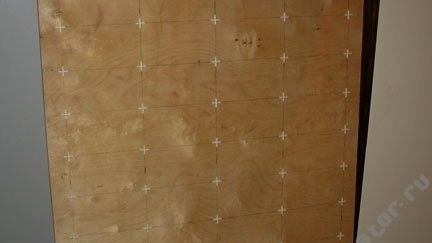
Since the size of org. glass was 68 by 76 cm, then not all the elements of the set turned out to be placed. The distance between each element is five millimeters, and the size of the photocells themselves is 80 by 150 mm, so instead of the planned 36 elements, 32 panels were used, 8 elements per row. However, this did not play any serious role, since so many photocells are enough to charge the battery.
Below are photos of the location of the solar cells:
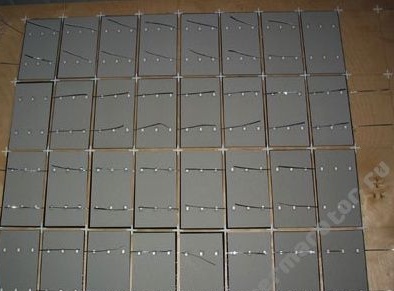
And in this photo, the author has already soldered all the elements into one design:
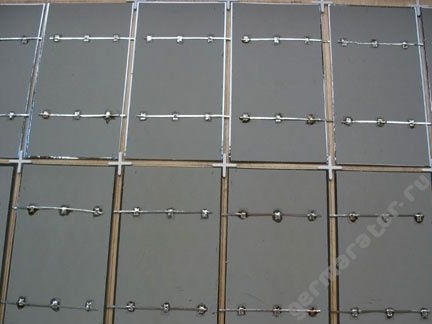
Each circuit of the terminals of the elements is connected using a thicker bus:

To fix the elements, the author used a double-sided mounting tape, which was previously cut into pieces for each photocell.

Each piece of duct tape was located in the center of the element and thus secured it. After these manipulations, the org. glass and pressed them down for better fixation.
Below is a photograph of the front of the solar panel:

Then, strips of double-sided tape were pasted around the perimeter, and the front sheet of org was laid on top. glass. Then he gently pulled the protective film from under the org. glass. Thanks to this approach, I managed to stick org. glass exactly the first time.
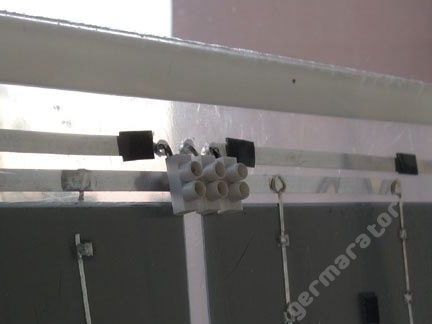
Three contacts were drawn from the back of the solar panel, the middle of which is responsible for half of the entire panel. Thus, if the author needs a voltage of 7 V, then there will be no need to open the panel itself, which adds to the variability of the use of batteries with light changes from the fastening of the contact connections.
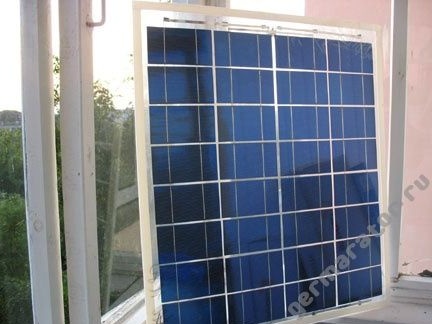
In this photo you see a ready-to-use solar panel:
The power of the solar panel was about 50 watts. At the same time, the author spent about $ 160 on all materials, while a factory solar panel of similar power can cost up to $ 300. Thus, the author created a powerful and high-quality, not expensive panel, and besides, he still had a few elements that could go to create the next solar panel.