According to the author, the power of such a collector was 530 watts. If in numbers, then 20 liters of water was heated in one hour from 24 degrees to 47. Such figures are achieved with a collector size of 2400x550mm. If higher performance is needed, then the collector can be made larger or made several, and then connected in series.
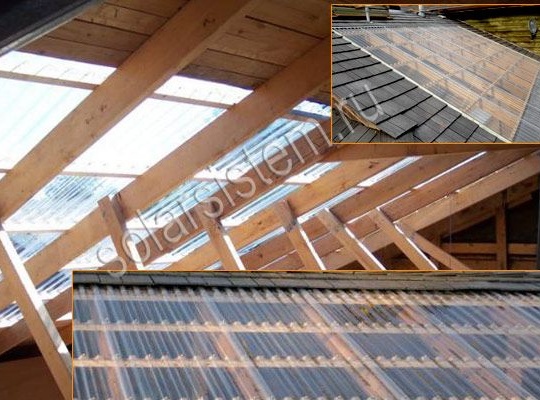
The collector does not have its own frame; rafters in the roof act as it. This makes it quick and easy to install the collector. However, in case of leakage of the collector, water will enter the house, so everything needs to be done efficiently.
Materials and tools for manufacturing:
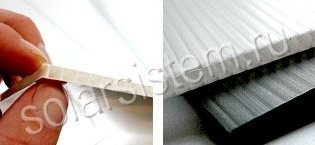
- cellular polypropylene;
- Styrofoam;
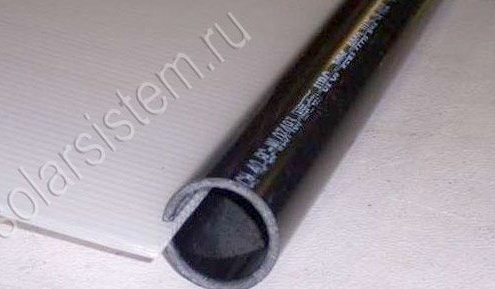
- ABS pipe with a diameter of 1 1/4 ";
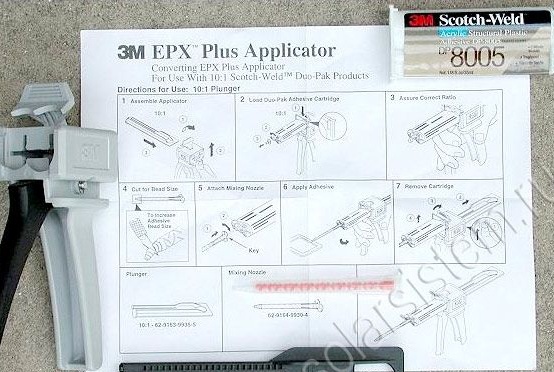
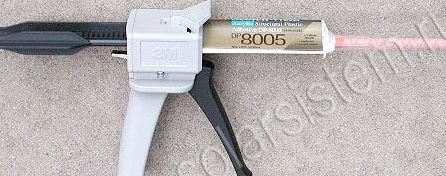
- 3M Scotch-Weld ™ DP-8005 glue;
- glue gun;
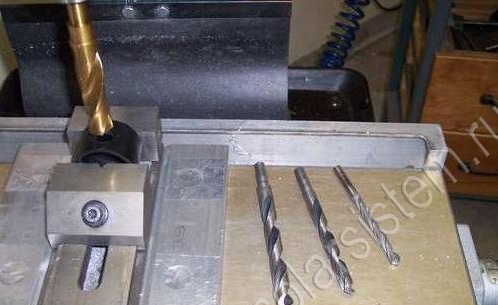
- drill;
- vise;
- circular;
- plywood 5-10mm thick;
- polyethylene film;
- black paint.
Manufacturing process:
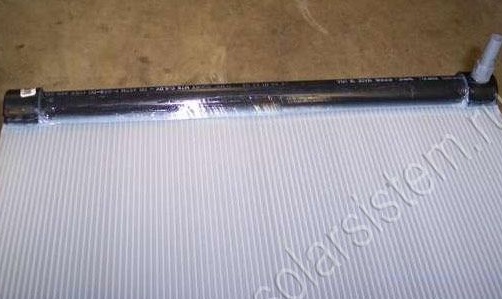
Step one. Preparation of plugs and pipes
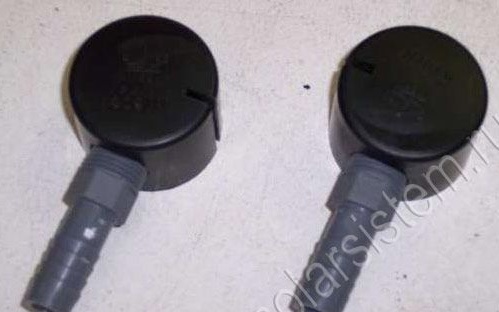
The collector will be made end-to-end, so the process of assembling it must be accurate, which complicates the task a bit. Drill holes in the plugs. Hose tips are then installed here.
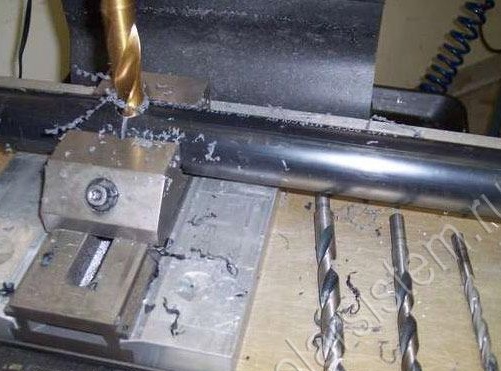
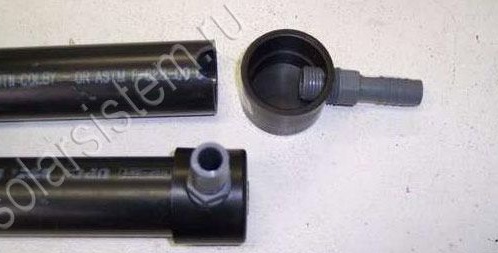
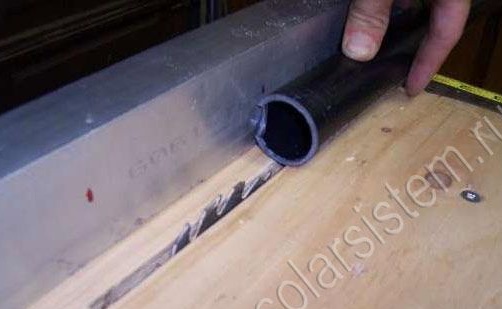
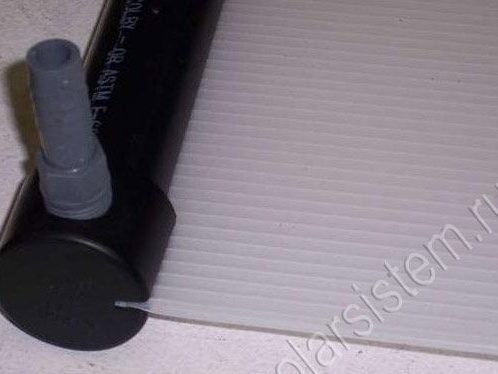
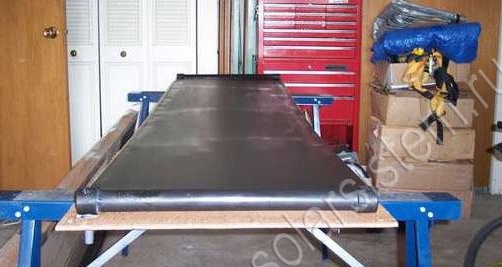
Next, you need to take the pipes and use a circular saw to make longitudinal cuts in it. The cut width should be such that a sheet of cellular polypropylene can be inserted into it. In this case, the sheets should go into the cut with some tension. Similar cuts will need to be done in the stubs.
After that, you can insert a sheet of polypropylene into the pipe and check whether everything is done correctly.

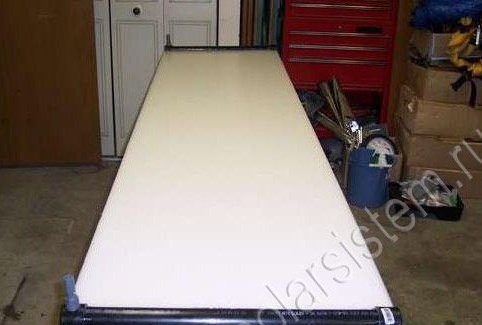
Step Two Collector glue
The process of gluing the collector begins with the degreasing of the materials to be bonded. For these purposes, acetone is used. Work needs to be done quickly, because the glue quickly sets. In conclusion, glue will need to carefully grease the corners of the collector.
Now the glue should dry, it will take a day. After drying, the collector must be checked for leaks; for this, water must be poured into it. The easiest way to do this is by connecting the collector to the garden hose. If a leak is found, dry the collector, degrease the leak, apply glue and then let it dry again for 24 hours. After the leaks are completely eliminated, you can begin to make a housing for the collector.
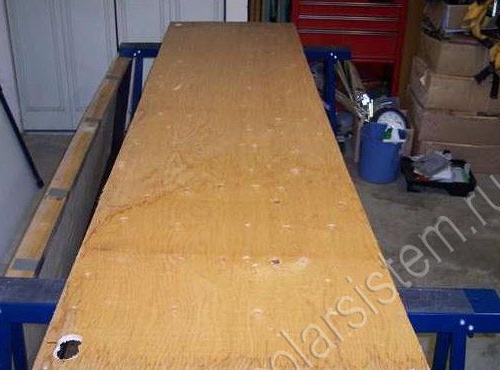
Step Three Making the manifold body
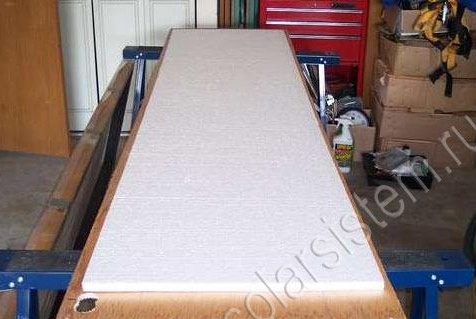
As a basis for the collector, a plywood sheet of suitable sizes with a thickness of 5-10 mm is used. First of all, in plywood, you need to drill holes through which collector bends will exit. In order to ensure thermal insulation, it is necessary to put a sheet of foam on the plywood with a thickness of at least 2 cm.
So that the collector can better absorb solar heat, its surface must be painted black.
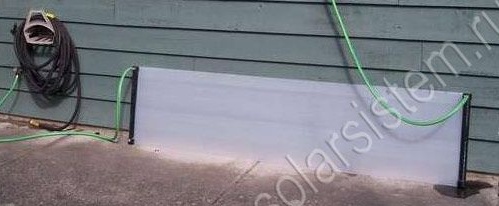
Step Four Collector Installation and Testing
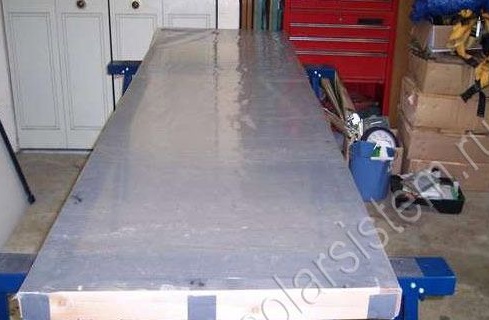
This collector does not have its own frame, since it is installed directly between the rafters in the roof, they serve as its frame. However, if the collector will be installed in another place, for it you can make a frame of beams. The entire structure can then be covered with a transparent film of polyethylene, while the collector efficiency will increase.
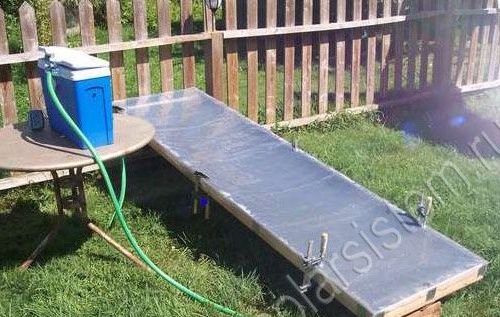
The collector is tested as follows. It must be installed at an angle so that the fluid can circulate through it naturally. The water tank is installed higher in level to the collector. Thus, cold water will sink and fill the collector, and when heated, it will be displaced into the water tank. In addition, the collector's suction hose should be at the very bottom of the tank, only in this case the water in the tank will be heated entirely, and not just its upper part.

In conclusion, it should be noted that during testing, all air bubbles must be expelled from the collector, otherwise it will not work at full capacity. As can be noted, the collector collects quite quickly and simply with all the necessary materials and tools. A significant drawback of such a collector is that the glue and glue gun for gluing polypropylene costs a lot, so the manufacture of such a collector is somewhat costly.
What results the collector showed during testing can be seen on the graph.