
Materials and tools for homemade:
- old boiler (its internal tank);
- hammer;
- a chisel;
- brush for metal;
- black paint (heat resistant);
- glass;
- bars 50x50mm;
- thin plywood;
- foam 50 mm thick;
- boards;
- antiseptic, paint on wood;
- reflective elements (foil or mirrors);
- branch pipes for connection;
- polyurethane foam;
- minimal set of tools.
The process of manufacturing a solar-powered boiler:
Step one. Remove the lining from the boiler
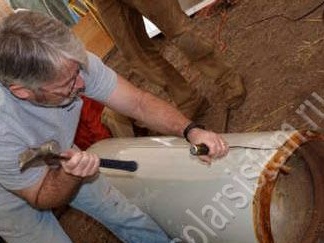
For homemade work you will need an internal tank of the boiler or any other capacity suitable in size and shape. To get to the tank, you need to remove the lining. For these purposes, you need to use a chisel and a hammer. In principle, you can use metal scissors or a grinder, you do not need to spare the lining, since it will not come in handy.
Step Two Put the tank in order
After removing the tank, it may turn out to be rusty. If so, remove the rust with a metal brush or large sandpaper. Also at this stage, you need to find the leak and eliminate it in any convenient way. After all the work, the tank must be painted with heat-resistant black paint, this will allow the tank to heat well under sunlight.
Step Three Making a housing for the collector
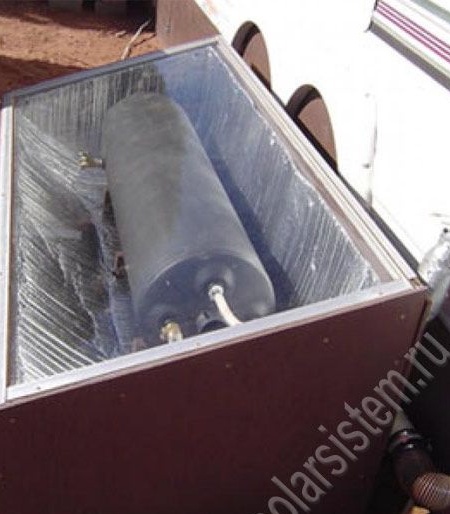
In order for the collector to have a high level of efficiency, the tank must be well insulated. And it’s best to insulate any device by restricting air circulation. For these purposes, a box is created that tightly closes. The box is assembled from a bar measuring 50x50 mm. Its width should be twice the diameter of the boiler tank. After the frame is made, the box is studded with plywood from the inside.Now you need to take polystyrene foam 50 mm thick and lay it on the outside of the box. In conclusion, the foam is sewn on top with plywood, thus forming a double wall with an insulator in the middle.
Thanks to such insulation, the heater will work even with a sharp change in weather and in the autumn period, since the device will not depend on external temperature, but only on the intensity of sunlight.
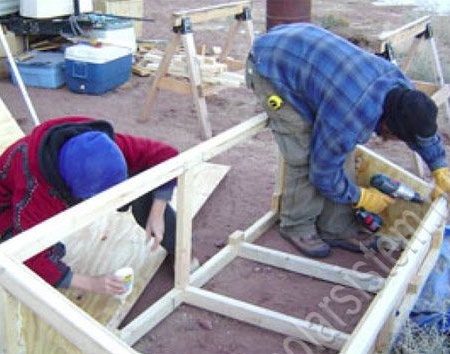
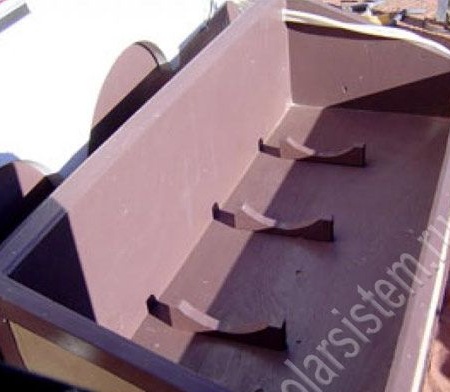
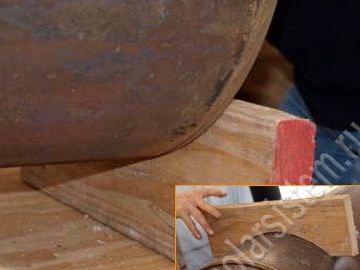
In order for the tank to lie securely in the housing, stands must be made for it. First, templates are made, and then they are sawn out of the board with a jigsaw.
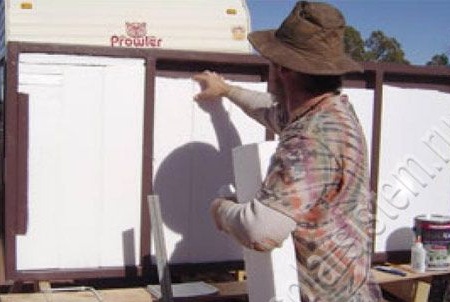
At the final stage, all wooden elements must be carefully treated with an antiseptic, since the device will always be in the open. After this, the box needs to be painted, this will give it beauty and will be additional protection. You need to paint from the inside and outside.
Step Four Reflector Installation
To maximize the performance of the device, reflectors are installed inside the box, it can be foil or mirrors. They are positioned at an angle so that the sun's rays bounce off the walls and fall on the tank. In this case, the efficiency will increase.

Step Five Connection of branch pipes. Final work
In order for the water to circulate naturally, the outlet pipe of the tank must be higher in level to the inlet. Electric boilers already have all the pipes necessary for these purposes and do not need to weld anything to the tank. It is only necessary to place the tank at the required angle and connect two hoses.
It is also important to correctly place the hoses in a container of water that needs to be heated. The hose leaving the tank (with hot water) must be placed on top of the tank, and the incoming hose should be lowered to the bottom. In this case, cold water will be taken from the bottom of the tank, and warm water will flow upward. Thus, uniform heating of the water will be ensured. If you place both hoses on top of the tank, then only the top ball will heat up.
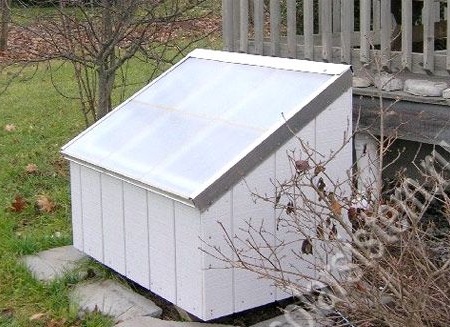
After installing the glass, you need to go through the mounting foam on all the cracks and ensure maximum tightness of the device. As a safety measure, the author recommends installing a valve for emergency water discharge, in case the water boils in the tank. In order to reduce losses during the transfer of warm water to the room, the hoses must be properly insulated. Naturally, in cold weather, you must not forget to drain all the water from the system, otherwise the tank will break.
In conclusion, the device can be sheathed with plastic or siding. This will give it a more solid look.