
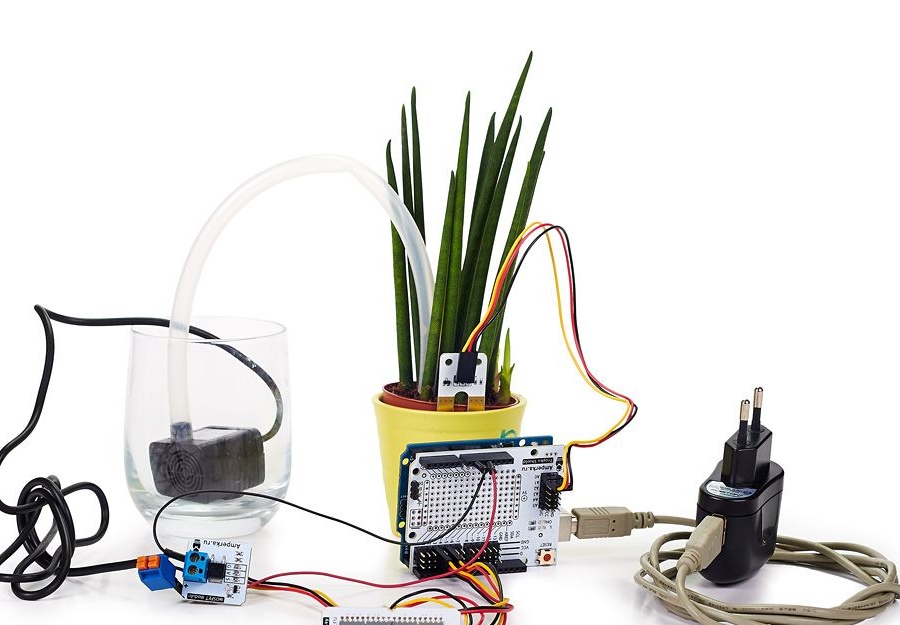
This article will describe how to assemble a small unit for automatic watering of plants based on Arduino with humidity control. The need for watering itself will be determined by the soil moisture sensor. If desired, it will be possible to water several plants at once.
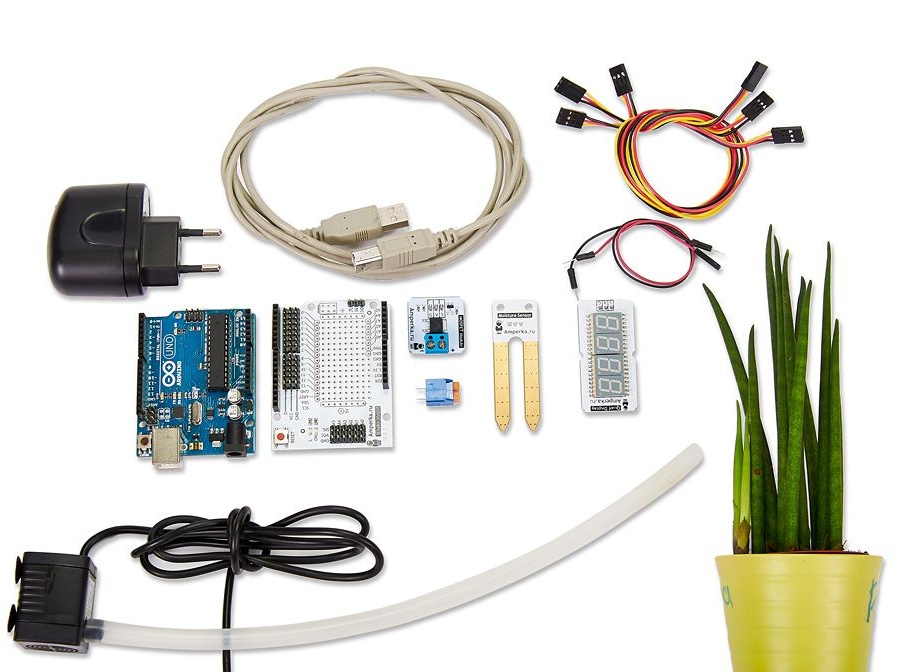
Materials and tools:
- Arduino Uno
- Potted plant with dry soil
- Water pump
- Soil moisture sensor with a loop
- Power key (three) with a loop
- Push-in terminal block
- Dad-dad wire × 1 pc
- Mom-dad wire × 1 pc
- Power supply with a USB connector
- USB cable
Assembly:
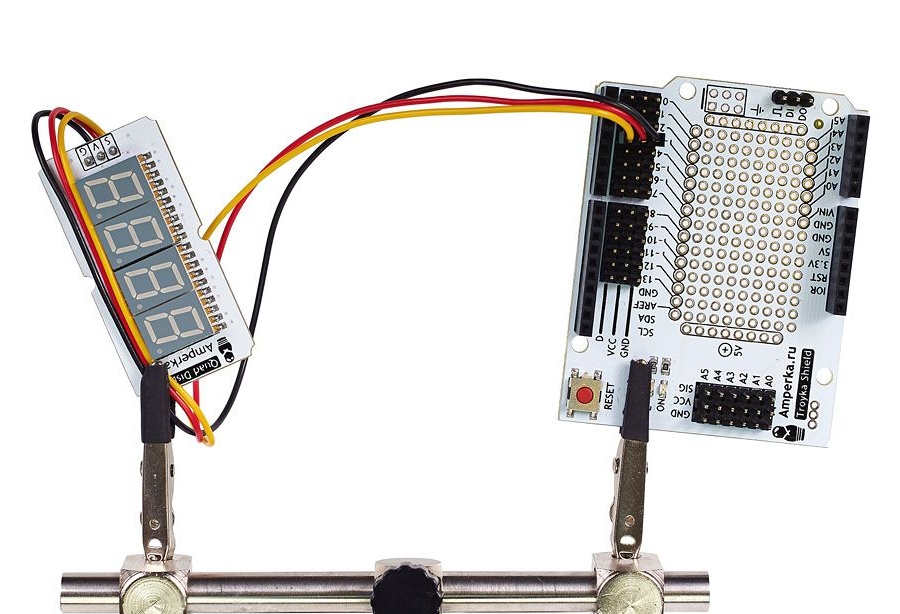
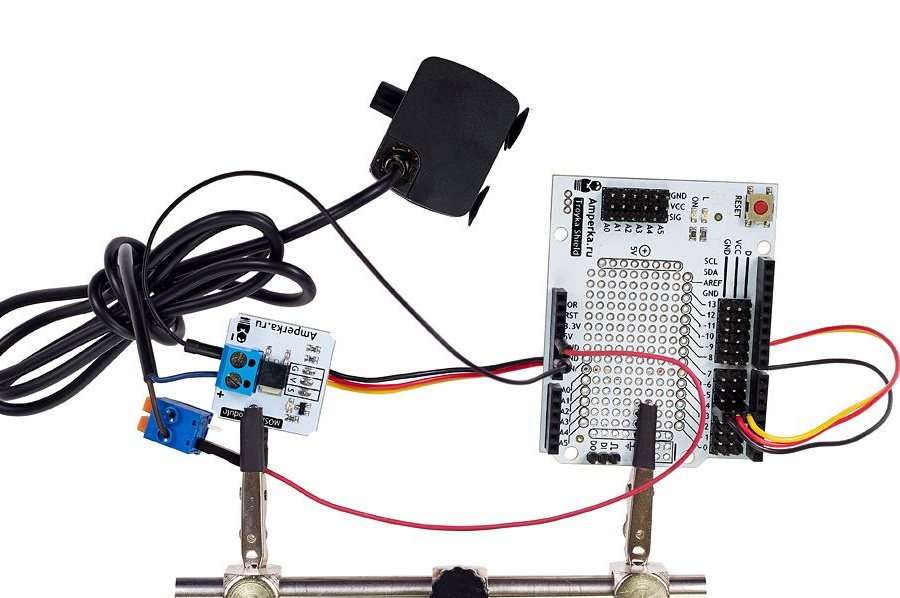
The display is connected to pin 3 of the triple shield. When connecting all wires of this type, it is important to make sure that the black wire is connected to the GND pin.
Next, the power switch is connected to pin 5.
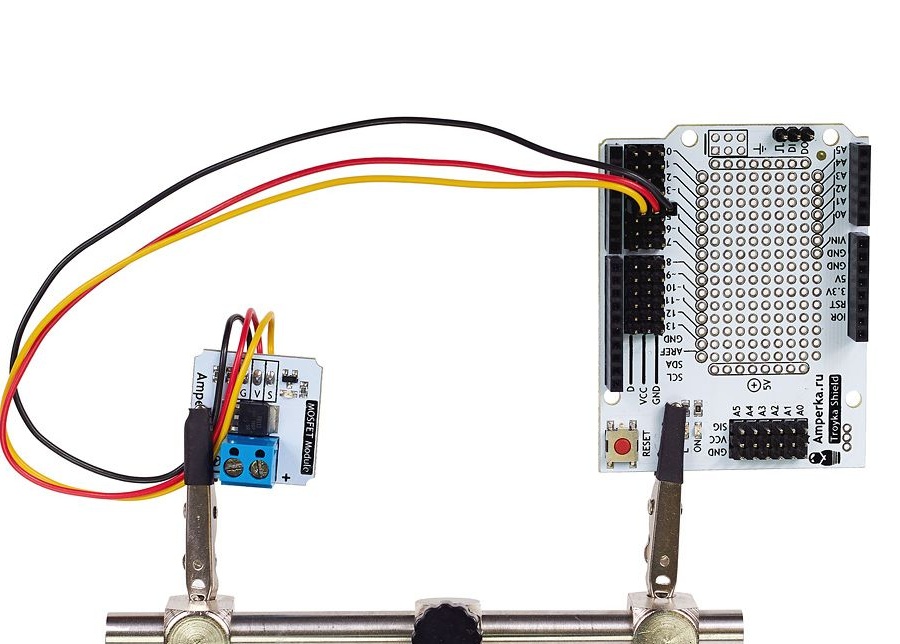
The pump has no contacts at the ends of the wires, so a terminal block is used. If there is a skill in soldering contacts, then it is more correct to solder “Pin Connectors” to the wires.
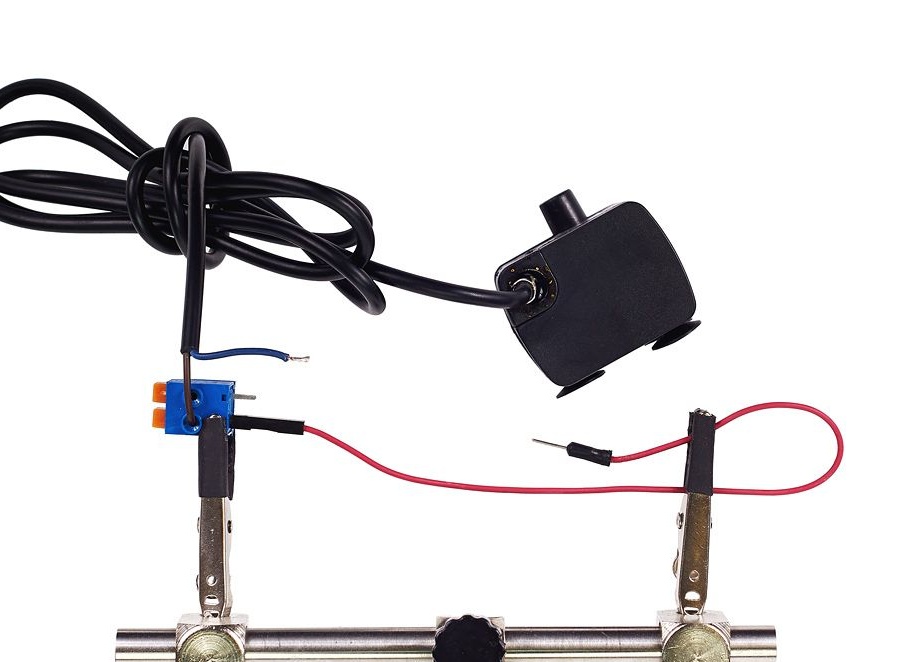
This is how the connected power looks:
Next, connect the soil moisture sensor.
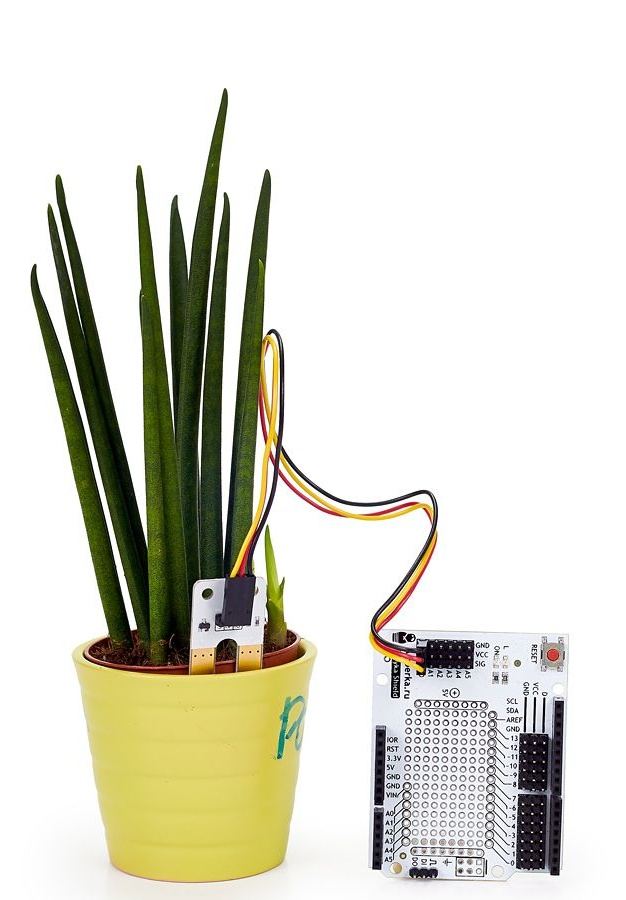
Using the Arduino IDE, the Arduino Uno is programmed with the attached file below. The humidity sensor itself, of course, sticks into the soil. The end of the water pipe is connected to the ground. If the pot weighs a little, then the author recommends securing the tube separately so that the plant is not upside down. Next, the pump is lowered into a convenient container with water, and the power is connected.
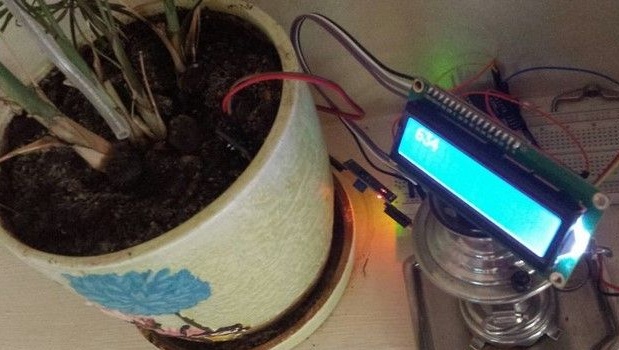
Calibration:
In order for the sensor readings to be correct, a simple calibration procedure is required. Because the accuracy of the readings directly depends on the acidity of the soil.
1. With the sensor stuck in a dry pot, readings from the display are recorded. This value is nothing less than a minimum of humidity.
2. Water the flower and wait until the water is completely absorbed into the ground, and the sensor readings stop at one value. Data is recorded and labeled as maximum humidity.
3. The values of the HUMIDY_MIN constants are changed in the firmware file; the minimum humidity is set, and HUMIDY_MAX, respectively, the maximum humidity. Arduino Uno is flashing again.
Project scaling
This article describes a method of watering for just one flower. But often it is required to water several plants at once. Of course, you can connect more pumps and humidity sensors to the Arduino, but how expensive it will be. The author in this case offers a cheap and simple solution. In the tube that is connected to the pump, holes are made with an awl, the distance between them is about 30 centimeters, the rods from the used ballpoint pen are stuck into these holes.
Pots in a house, as a rule, stand in a row, for example, on a windowsill. The tube rests on the pots so that each hole matches the pot. Only here the decision on watering will be made by the device only one pot. This will work best if pots of the same size often happen on window sills. Drying the soil in them will be approximately the same. If desired, and a large number of plants in your home, you can connect additional pumps, and divide all the pots into groups of equal size.