
The author came up with the idea to create a charger for his phone based on a solar battery. Usually, in order to charge a mobile phone, a constant voltage of 5 V is required. The voltage generated from solar panels is not constant and largely depends on the light. Finding a way out of this situation, the author drew attention to the voltage regulator KR142EN5A, which will allow the phone's battery to be powered by the energy reported by the solar battery.
Materials necessary to create a charger based on a solar battery:
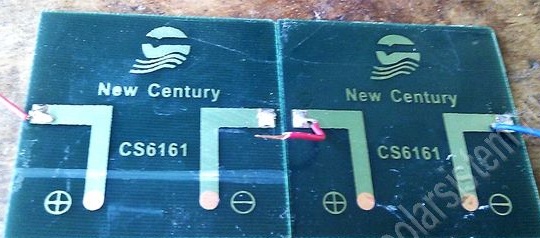
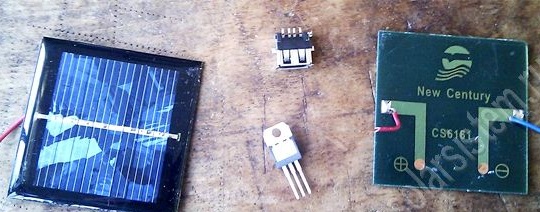
1) solar panels with a voltage of 3V 2 pieces
2) a voltage regulator at 5 V, in this case, the chip KR142EN5A
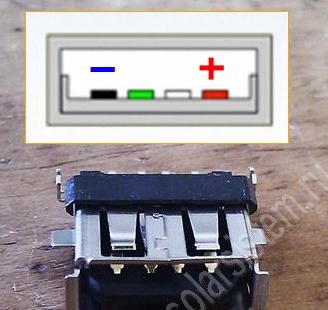
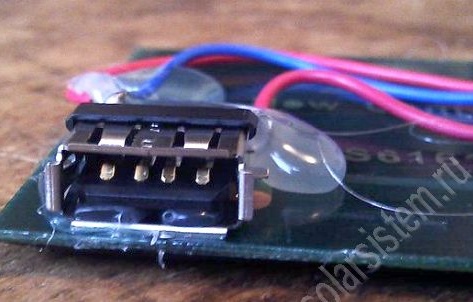
3) USB connector for phone power cable
4) wires
5) solder
6) hot glue
7) soldering iron
Consider the main points of creating this device.
The KR142EN5A stabilizer is a foreign analog of the L7805CV, you can order them via the Internet or see in the radio parts store of your city. The main advantage of such a stabilizer is that when a voltage of 5 V to 15 V is applied to the input, it outputs a stable 5 V.
This, in turn, means the possibility of using a solar panel with a generated voltage from 5 V to 15 V, corresponding to the range of operation of the stabilizer.
However, this circuit has a minus, which consists in the fact that if the supplied voltage from the solar battery is less than 5 V, the device will not charge the phone’s battery.
In addition to this stabilizer, a solar battery, a USB connector, wires and other minor things were also purchased.
After all the necessary elements were prepared, the author began assembling the components of the charger.
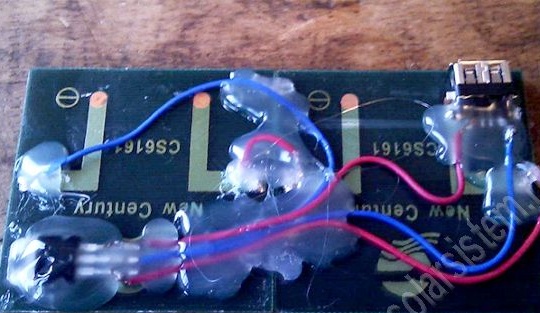
Below you can see an approximate diagram of a solar charger:
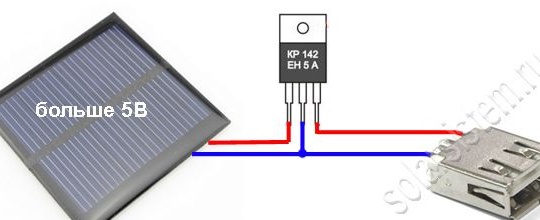
The author notes that it is very important not to confuse the contacts of the microcircuit and the USB connector when soldering.
The author had two solar panels with an operating voltage of 3 V.Since the device requires a voltage of at least 5 V for operation, the author simply connected these two batteries in series.
After that, all the elements were soldered into one circuit.
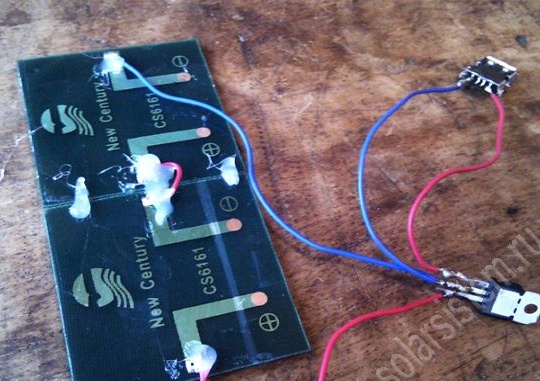
Next, hot-melt adhesive was applied to the chip, and it was glued to the back of the solar panel.
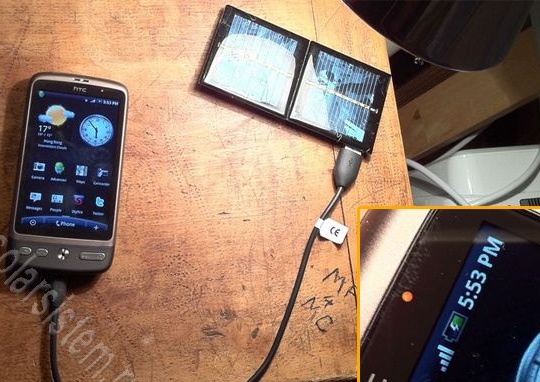
After assembling the device, the author tested his work on the phone. The solar battery was placed under the light, a mobile phone was connected to it via a USB connector.
As you can see in the photos, the phone’s battery started to charge, which means that this device is working properly. This charger was very easy to assemble, it contains a minimum of work with a soldering iron, but at the same time it is very useful. Since its dimensions are minimal, it is quite convenient to take with you and charge your phone if necessary.