This name was given to the generator in honor of the Dutch physicist R.J. Van de Graaff, who created this interesting machine in 1931. Today, such installations are actively demonstrated at school in physics classes, they are called electrophore machines. This article will talk about how do it yourself You can make a small copy of such a generator from improvised materials.
Materials and tools for homemade:
- a small nail;
- empty aluminum cans from drinks;
- ring elastic (about 0.5 cm wide and 8-10 cm in diameter);
- a small electric motor (from toys, hair dryers, etc.);
- glass fuse (size 5x20 mm);
- “crocodile” (clip);
- battery lock;
- a paper cup or cup made of polystyrene foam;
- a tube of glue for plastic or a gun with hot glue;
- two pieces of copper wire;
- two pieces of plumbing PVC pipe with a diameter of 3/4 inch;
- 3/4 inch PVC sleeve;
- plumbing tee 3/4 inch;
- wooden stand and islet.
Generator assembly process:
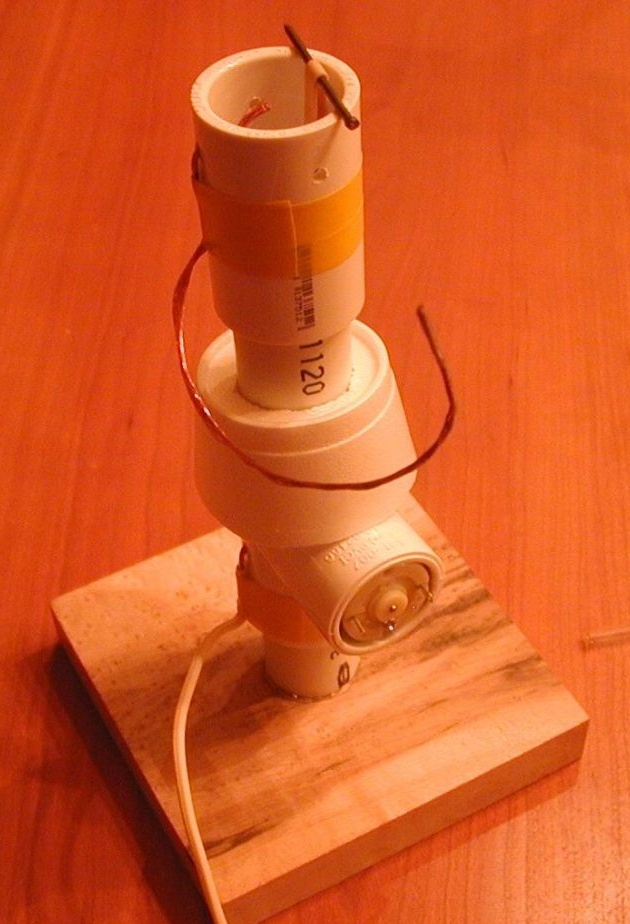
Step one. Assembling the generator housing
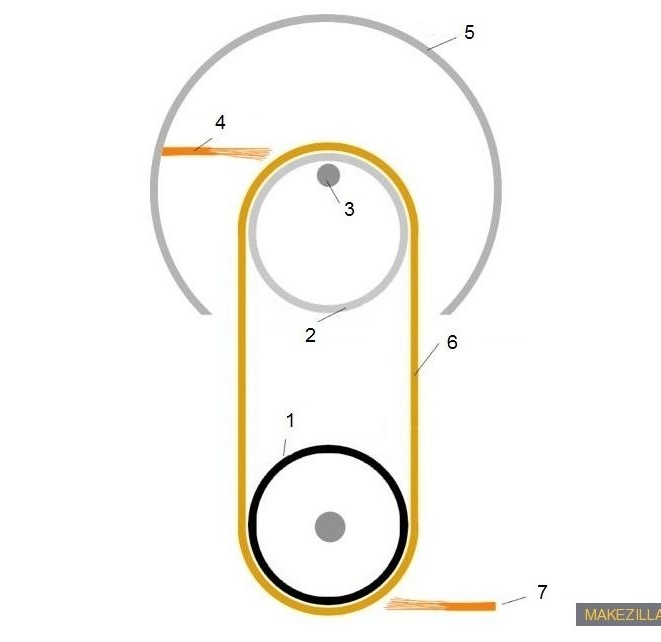
The generator case consists of PVC pipes, a wooden stand is used as the basis. First you need to take the base and stick to it a piece of plastic pipe 5-7 cm long (the diameter of the pipes used is 3/4 inch). Further, a PVC plumbing tee is put on this pipe. Thanks to this design, the device can be easily disassembled if it is necessary to replace the gum or to carry out any other work inside.
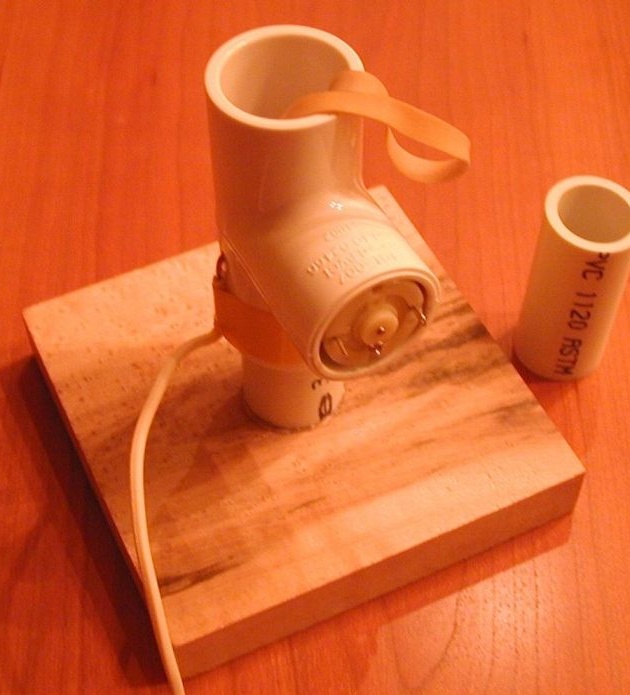
Now you can install the engine, it is inserted into the hole of the tee and is located horizontally. If it turns out that the diameter of the motor is too small, it must be wrapped with electrical tape, it must go into the body of the tee with some effort. In order for the motor shaft to interact with the rubber, a piece of tubing must be put on it. An ampoule of a helium pen or a soft rubber cambric from a wire is best, this will provide excellent adhesion to the tape.
After installing the engine, you need to take a drill and drill a small hole in front of the engine shaft. Then, you need to insert a piece of stranded wire, broken up at the end, into it. He will remove the electric charge from the tape. The wire can be fixed with hot glue or tape. Now it remains only to put on the rubber shaft of the engine and pull its other end through the upper part. After that, you can proceed to the next step.
Step Two Making the second axis
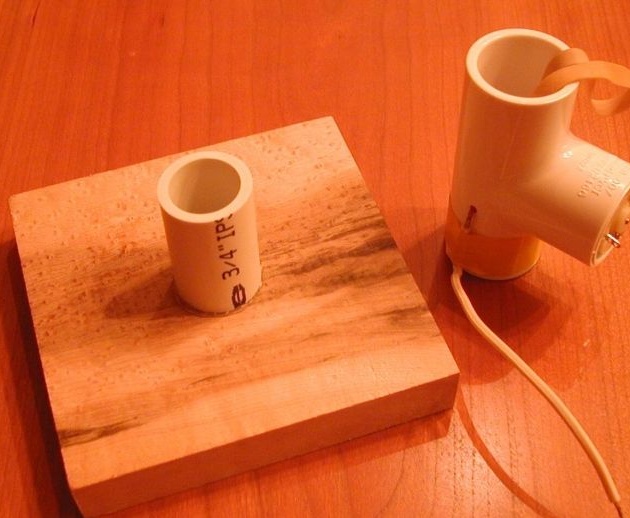
Now you need to take another piece of PVC pipe and cut a piece of 5-7 centimeters from it, it will be inserted into the top of the tee. The length of this piece of pipe should be such that the elastic is not too tight, otherwise it will not be able to rotate. But the tape should not sag much. After a certain length is reached, the gum can be temporarily fixed with a nail at the top.
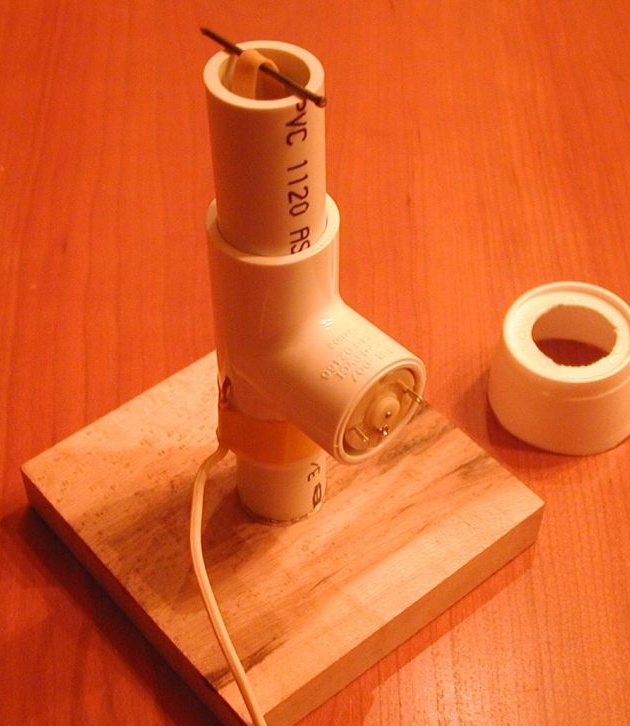
Next, you need to take a polystyrene cup and make a 3/4 inch hole in its lower part. The glass is put on the tube upside down, the pipe should go into it tightly. It is needed in order to install an aluminum can at the final stage.
After installing the cup on the top of the pipe, you need to drill three holes. Two are needed in order to insert a second shaft, and a third is for making contact. As a shaft, a nail is used, on which a piece of a glass tube is put on. During rotation, it has the smallest friction. The author made such a tube from a glass fuse. To remove the metal caps, they must first be heated with a soldering iron, and then carefully pulled off with pliers.
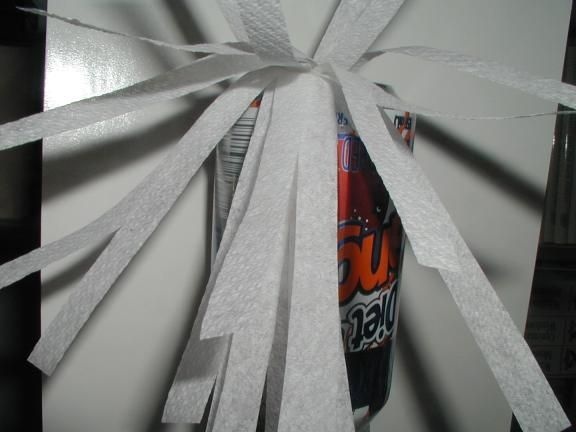
Well, then it remains to connect the second brush, as in the first case, you need to spread the bristles on the wire and make it so that it is at a minimum distance from the tape, but does not touch it. The wire is fixed with tape or glue.
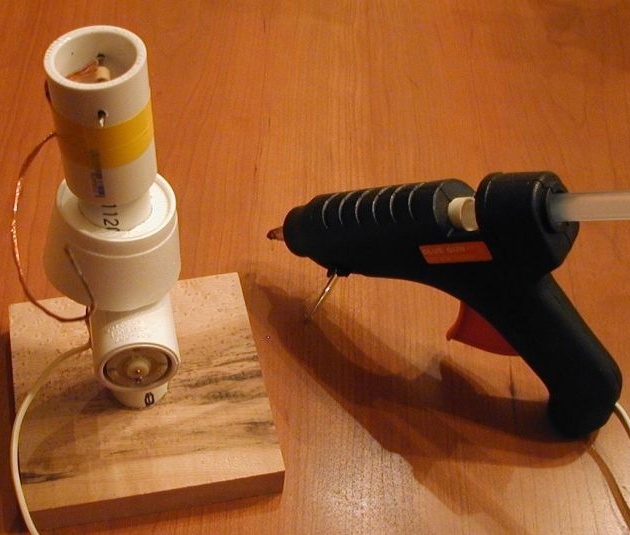
Again, to make the system easier to understand, you can make the upper part removable using a sleeve for a plastic pipe. How to do this can be seen in the photo.
Step Three Final build process
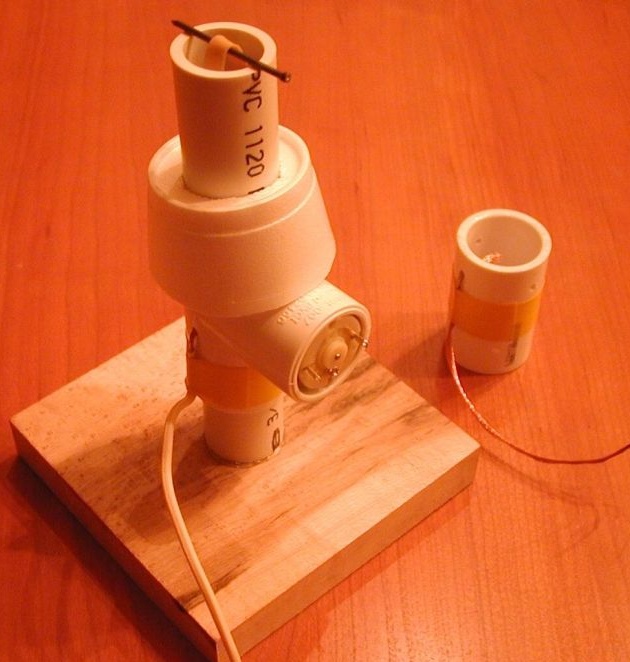
At this stage, the structure will be fully assembled. First you need to fix the cup, for this you can use hot glue or special glue for plastic.
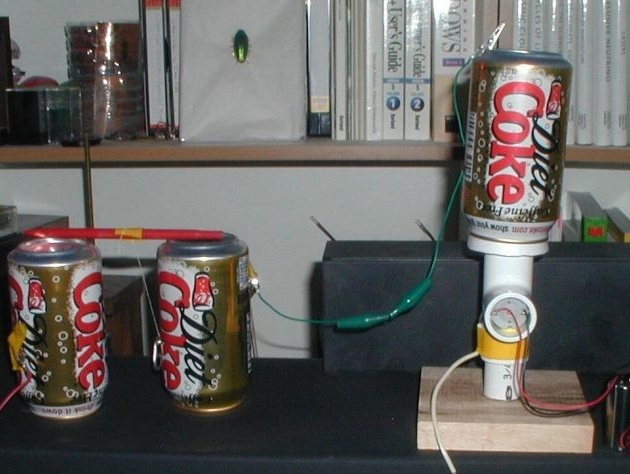
After that, you can install an aluminum can, for this in its upper part you need to cut a hole that is suitable in diameter to the cup. The can should sit tightly on it.
Due to the rounded edges, such a jar is perfect for working with high voltage, since the “corona discharge” is minimized. Also, do not forget to let the free end of the wire from the upper brush inside the can.
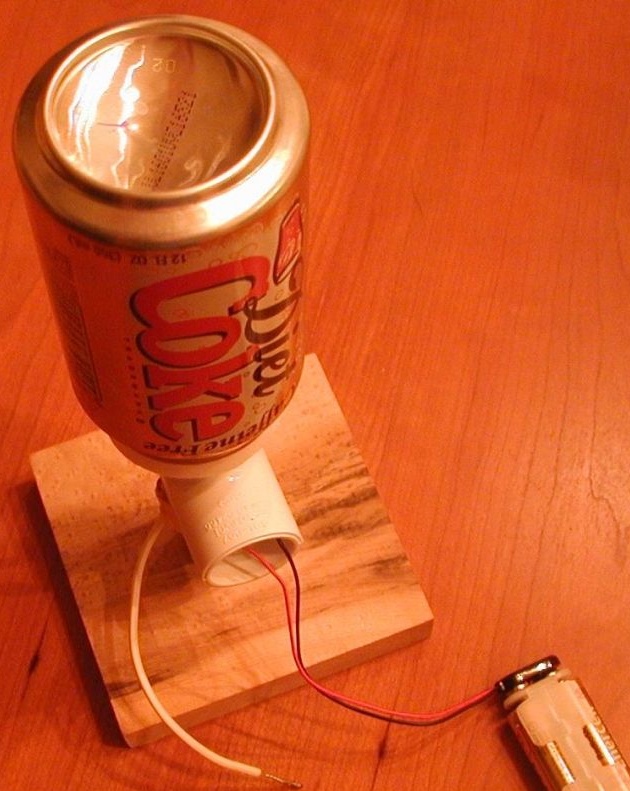
Well, now it remains only to connect the system to a power source, it can be either a battery or any other power source of suitable voltage. If the design is assembled correctly, pieces of paper should be attracted to the jar, and to the touch the discharge of current feels like a slight tingling sensation. If these phenomena are not observed, then perhaps somewhere a mistake has been made. You can try using another gum and check the contact gap between it.