
This homemade Ideal for those who are used to leaving messages on the refrigerator by sticking stickers on it. This project also uses an Android-based mobile phone to send messages wirelessly.
Materials:
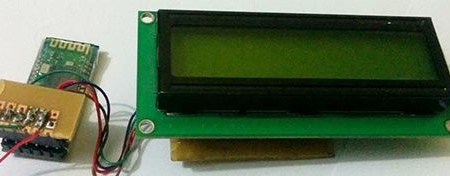
- LCD display with a resolution of 16x2
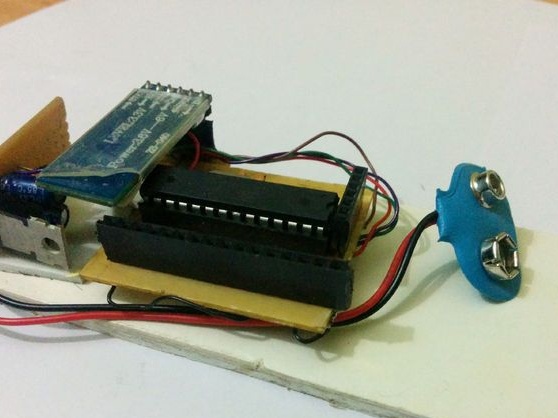
- Arduino
- bluetooth module
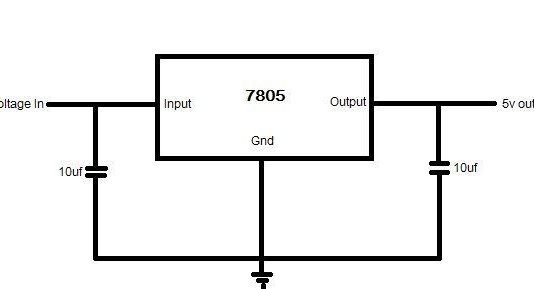
- Stabilizer L7805
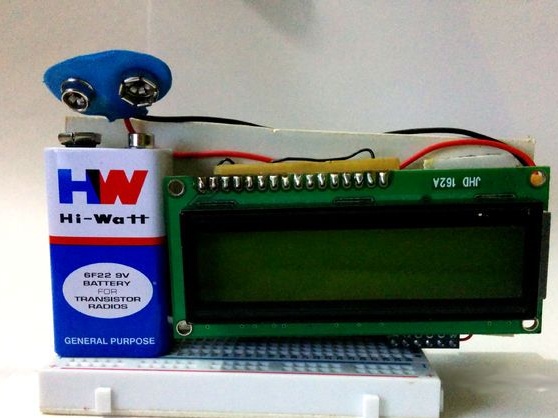
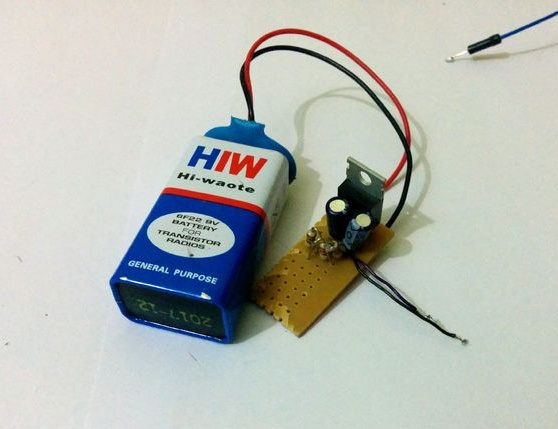
- Battery type "crown"
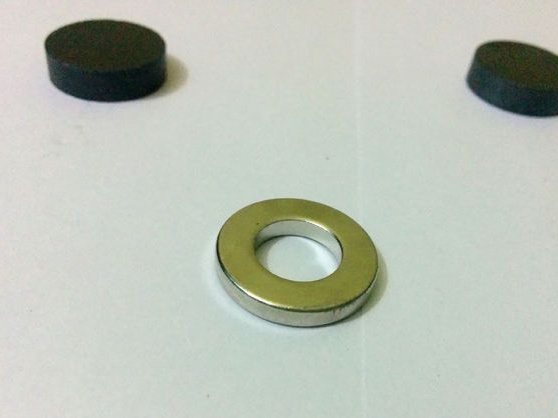
- magnets
- a piece of plywood
- glue or double-sided tape
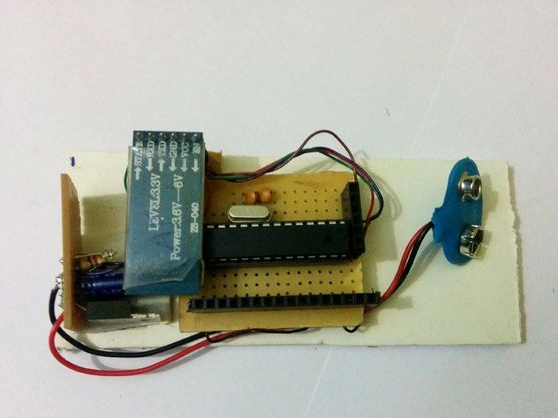
Step 1 Arduino:
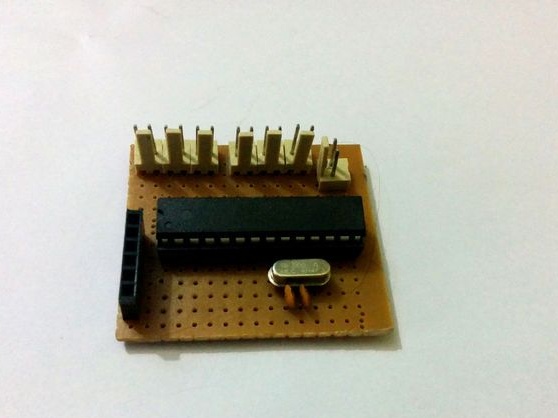
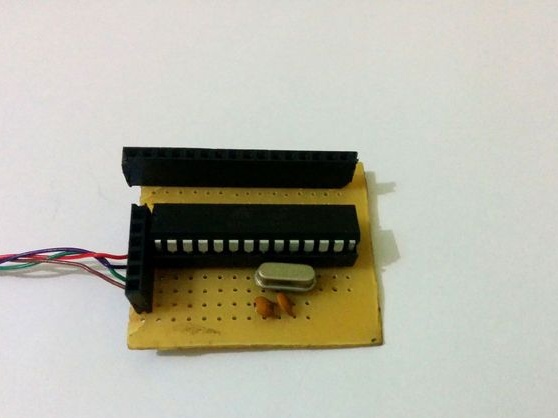
For this project, it is better to use Arduino UNO or mini, but the author, without having them, as well as to save money, made it on his own. He was going to be as small as possible. A programmer may be required to download the code.
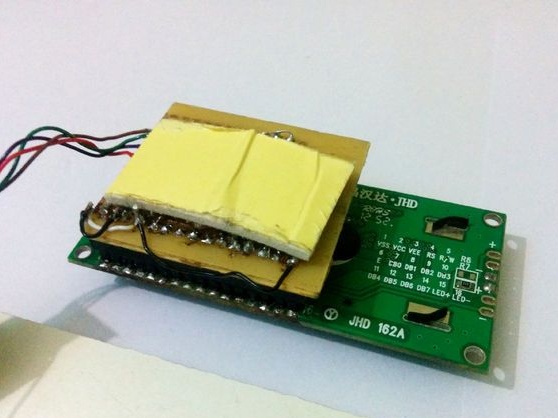
Step 2 display:
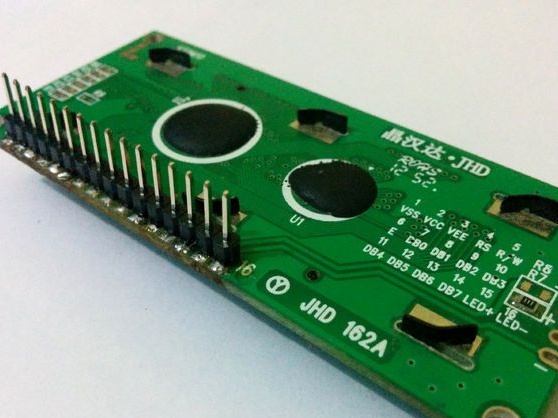
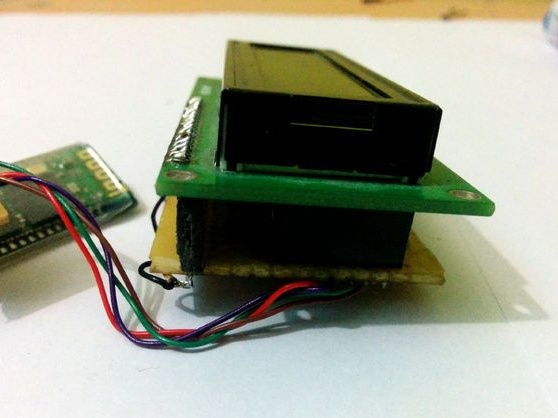
The connector pin is soldered to the display board and connectors of the same type to the Arduino, in order to then connect them together. It is not necessary to use all the contacts that are used in the circuit.
Step 3 diagram:
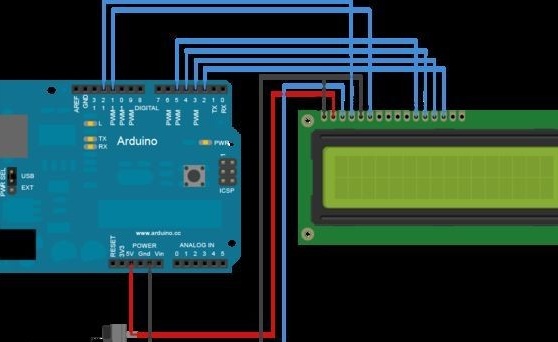
After soldering, the LCD is connected to the Arduino as shown in the diagram. If you use a UNO microcontroller, then it is better to solder it to the prototype shield. A variable resistor will be responsible for adjusting the contrast. Further, the author completely performs circuit connections. For example, the “Hello World” code is loaded. The circuit is powered and the contrast level is adjusted using a variable resistor. After setting the required level, a variable resistor is evaporated, and the resistance between the ground and pin 3 of the LCD display is measured. After all these operations, a constant resistor is already installed.
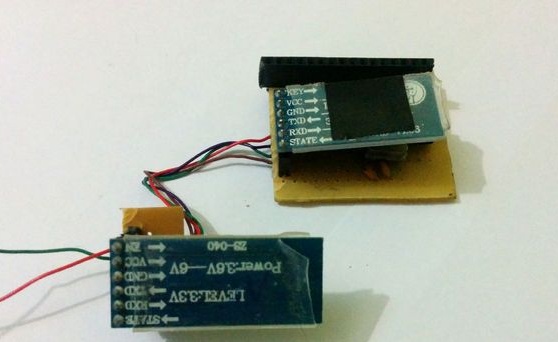
Step 4 Bluetooth module:
It is important to check the execution of the Hello World code. Next, you need to check the connection of the circuit to the smartphone. For communication between the circuit and the phone, a Bluetooth module is installed.
Step 5 program code:
For a more detailed setting of message output, the program code for this project can be found in examples of the IDE development environment called “Serial LCD”. The author also provided the code that he used, it will be attached at the end of the article.
Step 6 voltage:
This step does not require the use of an Arduino module. To connect, you need to use a 5V power regulator, since the ATmega328 uses exactly this amount of voltage. The UNO module has a built-in stabilizer. Further, the author collects the circuit according to the drawing, and solders it on the board.
Step 7 substrate:
In this step, the breadboard is simply attached to a wooden backing. It is not necessary to use wood as a substrate, even thick cardboard will do, it will facilitate the finished structure.

Step 8 gluing:
The board is attached with glue to the substrate.Magnets are glued to the back side for contact with the refrigerator. Glue can be replaced with double-sided tape.

Step 9 Android:
For the “smart magnet”, the author independently created an Android application, it will be attached to the homemade product. The application was created in the MIT App Inventor, so you can edit it if you wish.
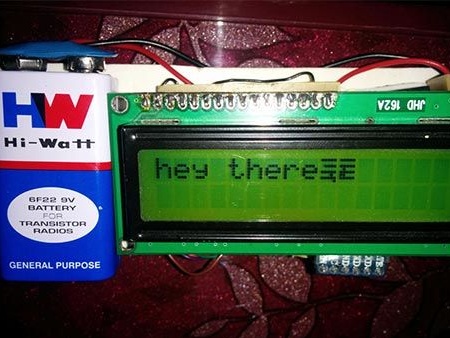
Step 10 finished device:
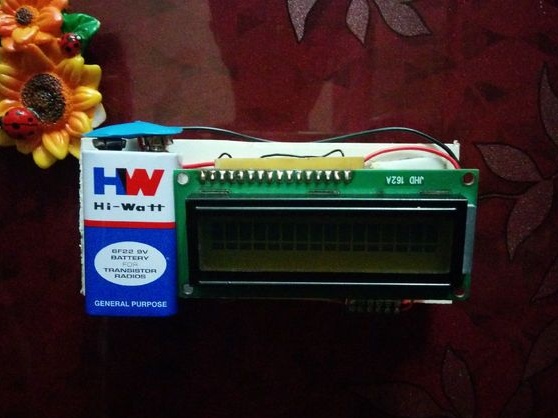
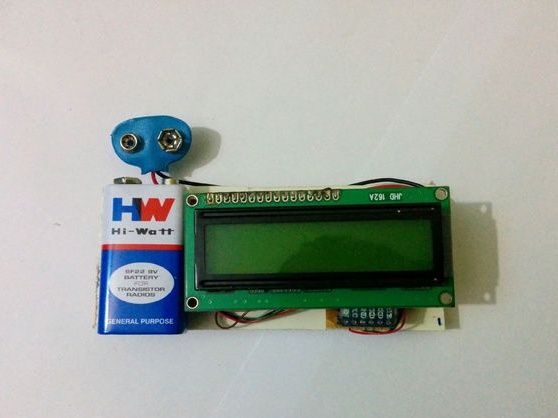

After assembly and testing, leaving messages leaving messages on the refrigerator will not be a problem.