Aluminum cans from beer or other drinks are an excellent material for creating a solar collector. Firstly, it is a thin metal that heats up very quickly and as a result quickly heats the air. Secondly, such cans are made of aluminum, and this metal conducts heat very well. Perhaps this is the best material for the solar collector, which you can get for free.
For the manufacture of the collector body, the author used plywood 15 mm thick. And as glass, you can use plexiglass, polycarbonate or ordinary glass with a thickness of 3 mm. In order to insulate the collector, glass wool or polystyrene with a thickness of 20 mm is used. The design is assembled quite quickly and simply. With this device you can heat any room, whether it’s a barn, garage or even an apartment.
Materials and tools for manufacturing:
- empty aluminum cans;
- matte paint (heat resistant);
- silicone or heat-resistant adhesive;
- a drill with a nozzle for cutting large holes;
- plywood;
- a board for creating a box (case);
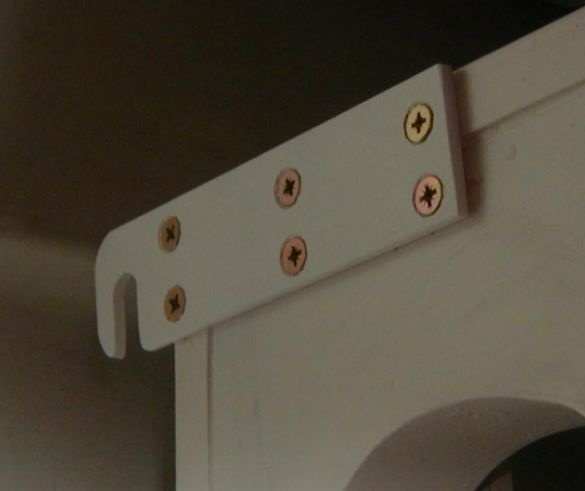
- fixture type "ears" for mounting the collector to the wall;
- glass or polycarbonate;
- a small fan (possible from a computer power supply);
- differential thermostat;
- punch.
Collector manufacturing process:
Step one. We prepare cans
First of all, cans should be washed and dried well, otherwise all this “aroma” will go into the room when the collector works. It is best to use aluminum cans; they absorb heat better. It is possible to check from which can the magnet can be; a magnet will not stick to aluminum.
Next, you need to make holes in the banks, for this you need to adhere to the scheme proposed by the author. First, with the help of a nail or other suitable object in the marked areas, you need to punch three small holes. Next, a large Phillips screwdriver or a special punch is taken and holes are made with it, as in the photo. With such a scheme, maximum collector performance will be ensured.
The upper part of the jar needs to be cut and bent so that a “fin” is formed. Thanks to it, air vortices will form inside the collector, which will allow the air to warm up better.
Step Two Glue cans
To glue cans you need to use glue that can withstand temperatures of at least 200 degrees Celsius. Jars are glued together with the bottom to the neck, they are perfectly suited to each other in diameter. The glue must be applied evenly around the circle, if the tightness is broken in the collector, its performance will greatly decrease. How cans connect, can be seen in the photo in section.
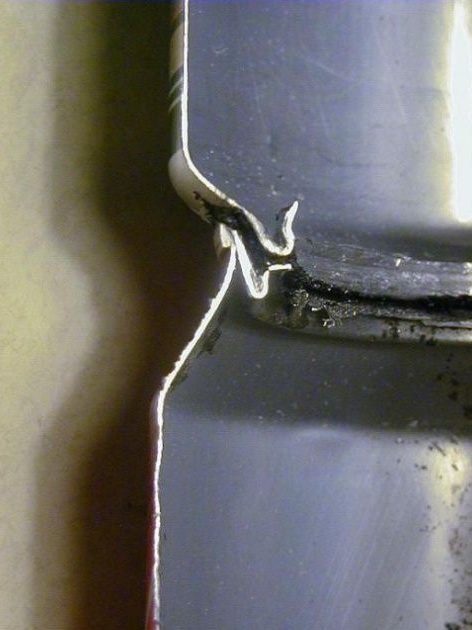
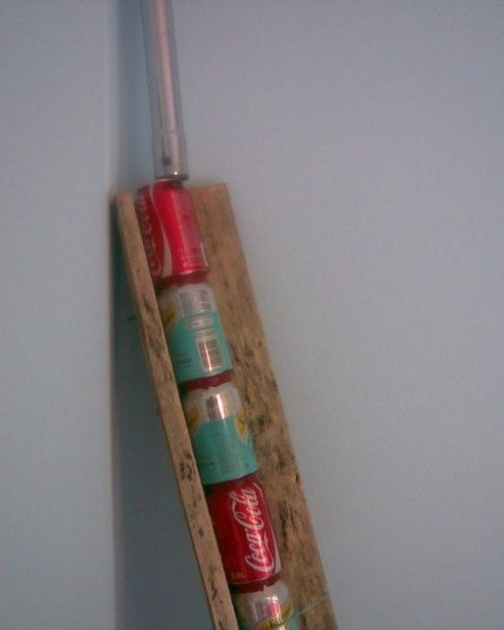

Thus, it is necessary to form pipes of the desired length from the cans. In order for the pipe to be even, it is necessary to make a template from the boards, in which the structure will be located until the glue completely dries.
Step Three Assembling the frame for the collector
To create the inlet and outlet parts of the box, a board was used in which holes were drilled using a drill and a special nozzle. Also for these purposes, you can use an aluminum sheet.
The box itself is also made of plank, and plywood was used to create the bottom.
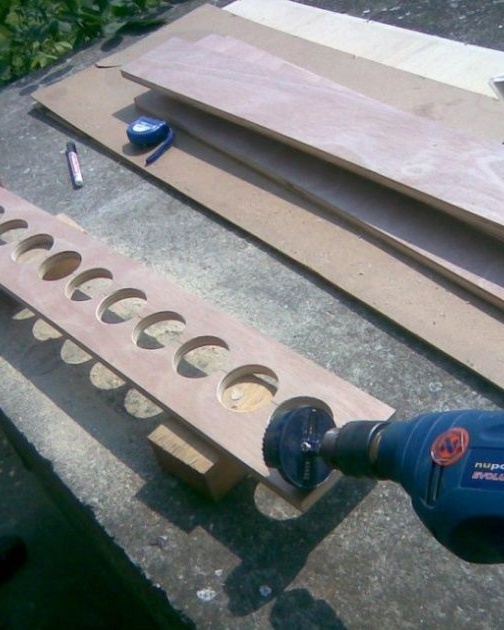
After the case is assembled, it must be insulated. For this, fiberglass or polystyrene is suitable. From above, the insulation is covered with a thin sheet of plywood so that the banks do not have direct contact with the insulator.
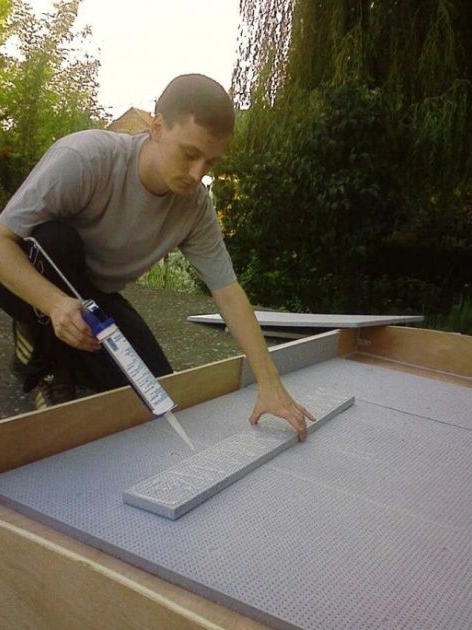
Step Four We install banks
Now the cans can be stacked in a case. They are fixed at both ends by two boards in which holes are cut along the diameter of the cans. Boards are attached to the glue. To make the structure stronger, you can make the inner wall.
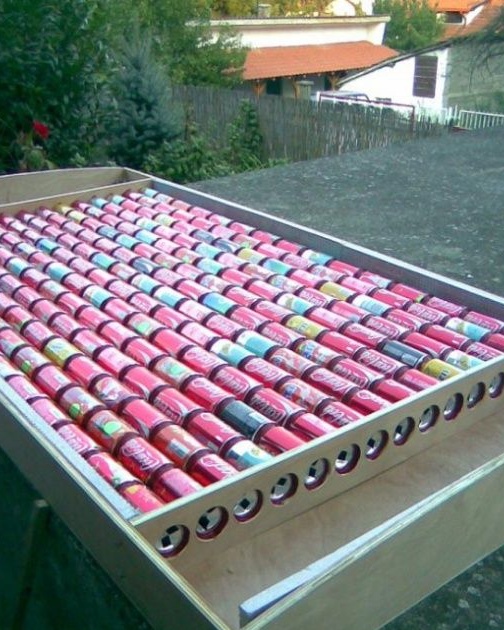
Step Five Manifold mount
So that the collector can be conveniently installed and removed, you need to install a special bracket.
Step Six Final build phase
At the final stage, the collector must be painted. The absorber (cans) must be painted with heat-resistant black matte paint. This is necessary for maximum heating of the absorber. The housing must also be painted to protect it from moisture. Now it only remains to glaze the structure, while it is important to remember that everything must be airtight. When using polycarbonate, the sheet must be installed so that it is slightly curved, this will increase its strength.
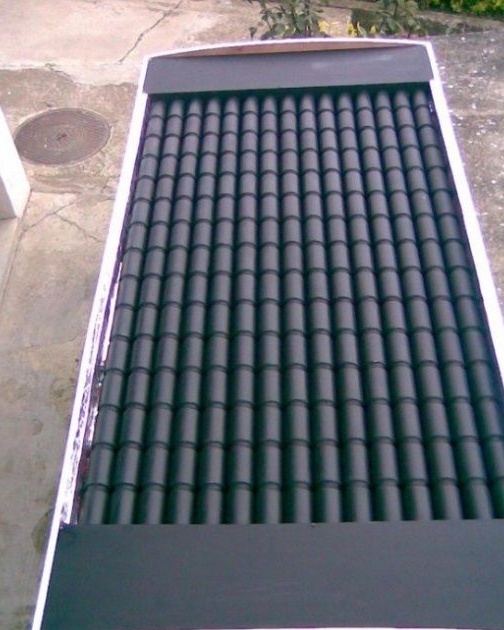
In order to connect the collector, two pipes are used, one is connected to the top, and the second to the bottom. In order for air to actively circulate, the system needs a small fan, a computer cooler is suitable for this. It can be connected to the solar battery, then it will automatically turn on during the day when the sun is shining. The author used a thermostat to control the operation of the fan, which turns the system on and off depending on the temperature of the air inside the collector.
In practice, the device showed pretty good results. On average, such a collector is able to produce about 1-2 kW of energy for heating. At an outdoor temperature of -3 degrees, a collector with a working fan gave out a temperature of +72 degrees. The volume of air in this case amounted to 3 cubic meters per minute.

