As for another area of application of such a material, the installation of such a coating also allows you to hide various kinds of defects on the body, these can be chips, scratches and other types of damage to the paintwork. In addition, this tuning makes the car pretty beautiful, in practice it becomes like new and does not need regular painting. You can also install the film in the cabin, but you will have to pay a lot for this. This article will discuss how to install a carbon film. do it yourself.
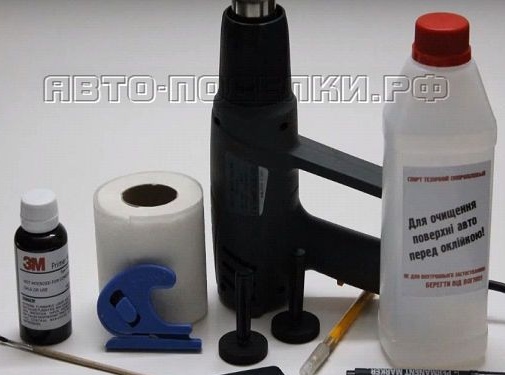
Materials and tools:
- industrial dryer;
- marker;
- dense napkin;
- isopropyl alcohol;
- a snail knife;
- brush;
- combined squeegee;
- primer 3m Primer 94;
- two magnets (holders);
- carbon film.
Work must be done in a clean, well-lit room. For this type of work you will need an assistant, since one will be quite hard to work.
The process of work:
Step one. Taking measurements
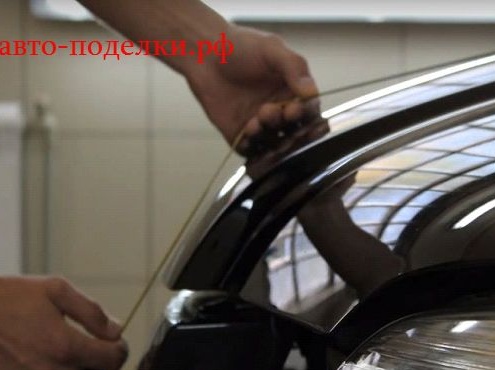
Since specifically in this article we will focus on bonding the hood, then first of all it must be carefully measured. Measurements must be made at the coordinates of the farthest points. First you need to measure the width and length of the hood. In the photo you can see where the reference points are for measuring the width and length of the hood.
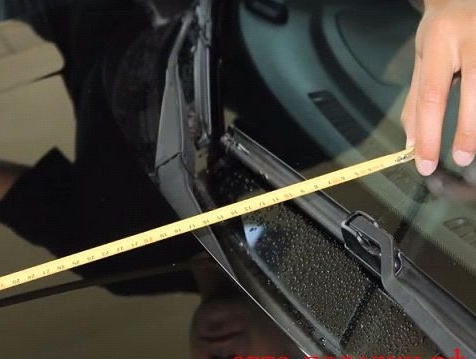
At least five centimeters for stock will need to be added to the numbers obtained. For example, if the hood has dimensions 1.40 * 1.50 cm, then the size of the film for installation should be at least 1.45 * 1.55 cm. After this, you need to measure the film and cut the desired piece.
Step Two Prepare the hood for pasting
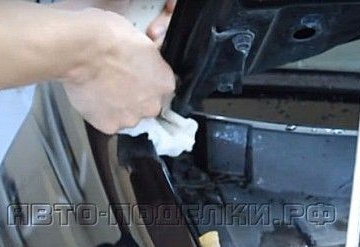
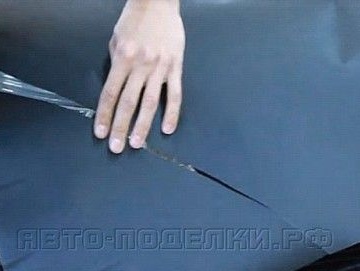
First, the hood needs to be washed, it should not have any contaminants, it should shine. After the hood has dried, it must be degreased with isopropyl alcohol. To do this, you first need to wipe it with a cloth soaked in alcohol, and then dry. The napkin should be lint-free. In addition to this, it is also necessary to process those places where the film will be wrapped. Hard-to-reach spots must also be thoroughly degreased.The elements closest to the pasting must also be washed, otherwise the dirt from them can get under the film and ruin the whole process.

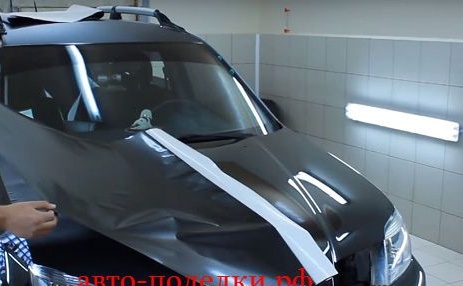
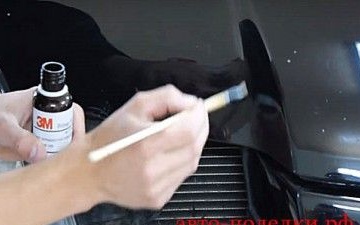
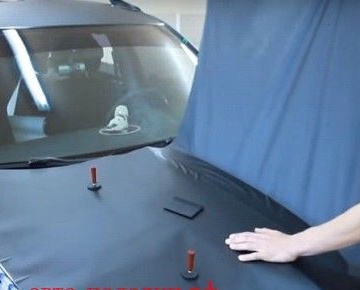
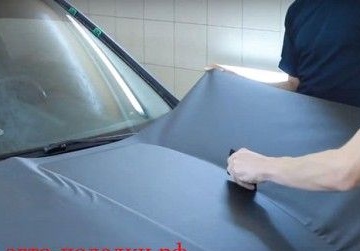
Then the prepared piece of film must be put on the hood, insert everything as it should be, fix with magnets and cut off the excess parts. In the photo you can see that the film is installed on the hood of a complex design, it has ribs. With this design, the film will undergo tension and may peel off over time. To prevent this, the ribs are processed using a primer.
Step Three We proceed to the process of pasting
Due to the fact that there are ribs on the hood, the film is installed from right to left. If you glue the film on a regular hood without ribs, then it is easier to install from the windshield and then move down to the radiator grille. Before installing the film, you need to consider how to install the film better.
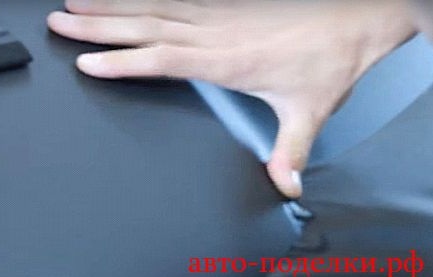
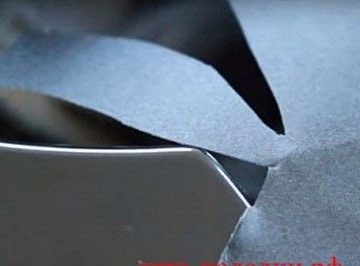
It is necessary to begin pasting from the most even surface. It is necessary to separate part of the film from the substrate, cut off excess paper, and tuck the edge of the substrate under the film. It will be necessary to pull for it in the process to separate the remaining part of the paper from the film. The first steps of installing the film are very important, because if the film is installed crookedly, then it may not be enough at the edges. In this regard, you need to make more stock.
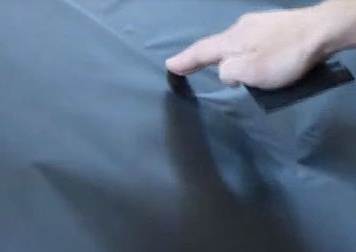
The film boundary needs to be rolled up with a finger and then the remaining air can be driven out of it with a squeegee. If it so happened that the film adhered more than required, it can be carefully torn off and started from the right place.
It is also important to note that in this case, the matte Luxon structural film is used, which has microchannels. In this regard, such a film is glued exclusively to a dry surface.
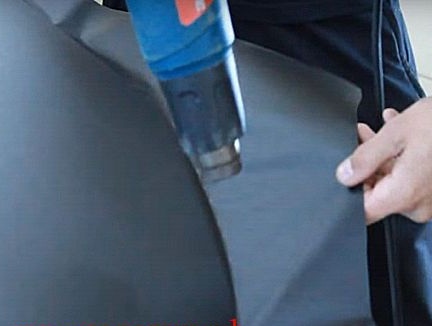
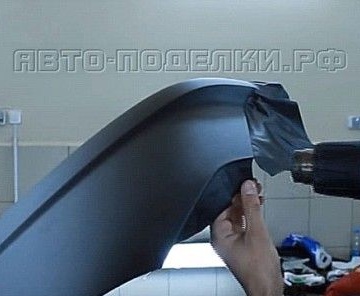
In the process of gluing, a hair dryer is needed only in those places where there are bends. Thanks to heating, the film becomes more elastic. Also, using a hairdryer, you can eliminate various defects, for example, irregularities. When installing the film, it is important that it is constantly in a slight tension. Also, the film should be at a certain angle relative to the hood. What exactly this angle can be seen in the photo.
After the film is glued, you can proceed to the next step - turning the film.
Step Four Tuck the film
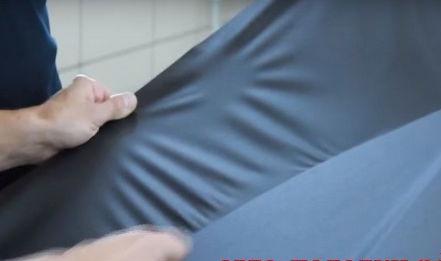
First, the corners of the film need to be trimmed as shown in the photo.
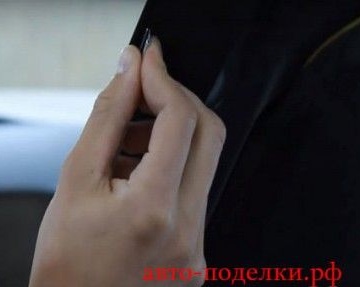
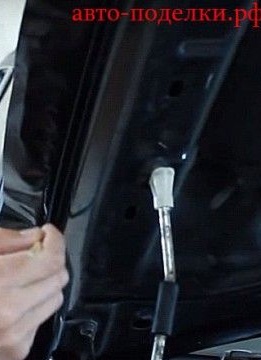
Before opening the hood, you need to make sure that the film does not stick anywhere, otherwise it can be torn. So that the film does not peel off at the doorway, it must be treated with a 3m primer. Instructions on how to apply the primer are written on its packaging. Tuck the film start from the corners. First, it is laid on the side edge of the hood, and then tucked on the hood itself. In difficult places you need to use a squeegee.

That's all, now the film is installed. It is important to know that for a quality installation, the place of work must be warm, otherwise the film will become stiff. It is best to heat it with a hairdryer when installing. Also, all those places where there are bumps, you also need to thoroughly warm with a hairdryer, this will reduce the tension of the film.