
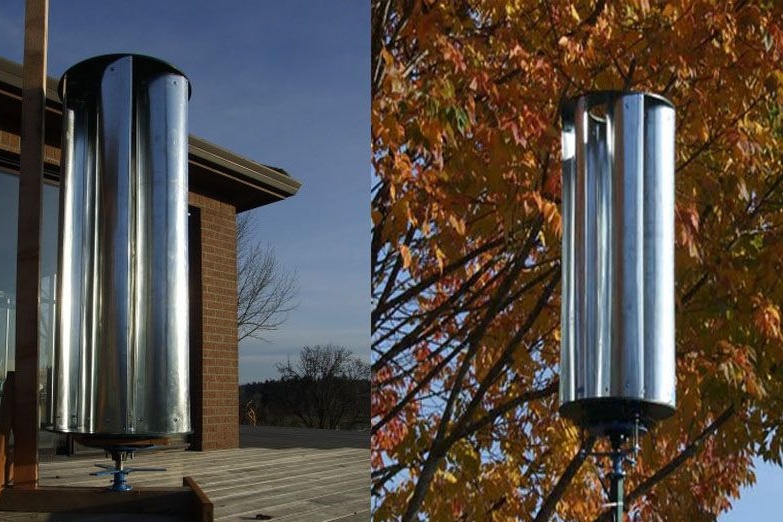
Vertical wind turbines are gaining more and more popularity. The main advantages of the vertical design is the good efficiency and reliability of the product. In addition, a vertical wind generator is much easier to assemble in home conditions.
Materials and tools used to create a vertical wind generator:
1) strips of sheet metal with a length of 1160 mm
2) plywood sheets 10 mm thick
3) jigsaw
4) drill
5) the hub of the car
6) liquid nails
7) epoxy adhesive
8) 0.51 mm thick copper wire
9) stainless steel bolts
Consider the main characteristics of this design and the stages of its construction.
To begin, consider the main advantages of this design of a windmill.
When installing this design, the direction of the wind does not matter, that is, there is no need to orient the wind turbine in the air flow. Also, this windmill does not require its high location, therefore it can be lighter and more accessible for maintenance. Due to the fact that the design has fewer moving parts than a standard wind turbine, it is more reliable. The optimal profile of the blades used increases the efficiency of the wind generator, and the use of a multi-pole generator to generate electricity makes this design even less noisy.
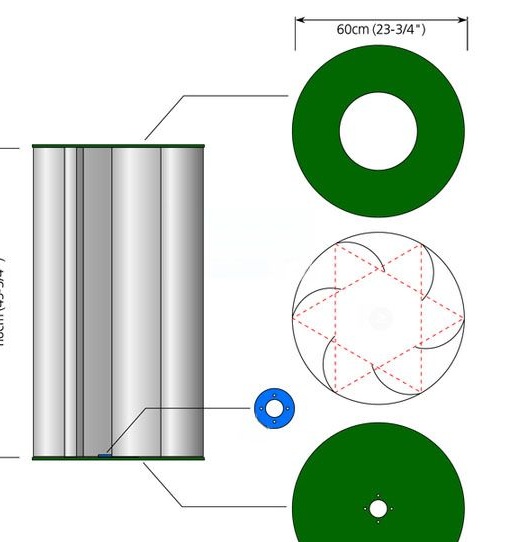
It is for these reasons that the author decided to make the wind generator exactly of a vertical design. And the first step, he decided to make the support of the blades. The supports are two circles of the same size. The author decided to make them out of ABS plastic. For this, a marking of a circle was made on a sheet of plastic, along the contour of which the author cut them with a jigsaw. In that support, which will be the top, the author made a hole with a diameter of 300 mm.
The author used a hub from a car as a hub. It is in this hub that the lower support of the windmill will abut. 4 holes were made, which are necessary to connect the structural parts.
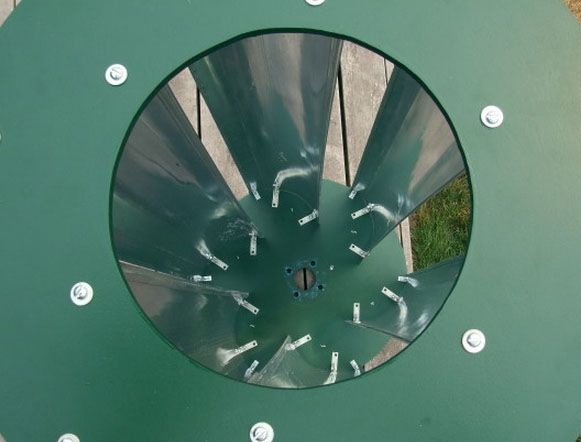
Particular attention should be paid to fixing the blades. It’s best to use a template to place each blade at the right angle. The author drew a marking on the lower support of the windmill, making a regular six-pointed star, the angles of which fall on the edges of the support of the windmill. Exactly the same markings were made on the upper support of the windmill.
For the manufacture of blades, the author used strips of thin sheet metal. The width of the strip for the blade should be slightly larger than the side of the ray of the star.
The fastening of the blades is one of the most exacting stages of creating such a windmill. Therefore, the markup made by the author on both supports is so important. The blade is attached with two angles below and above, at which it should be bent so as to form a quarter circle. Each blade sets on the edges of the rays of the drawn star on the structural supports.
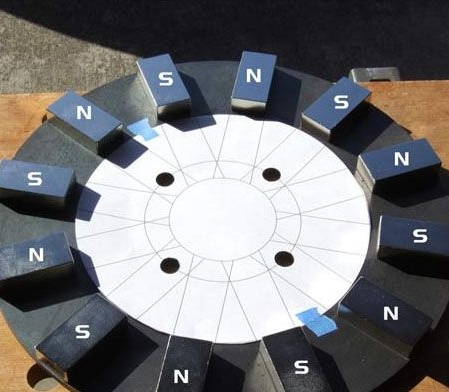
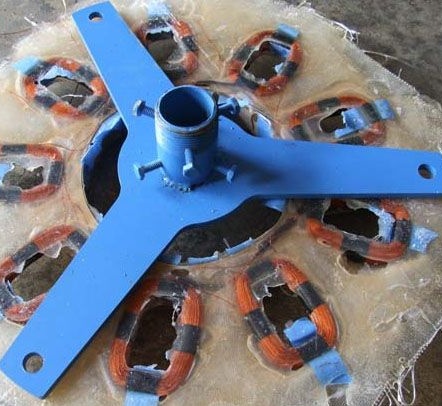
Further, the author began to create a rotor. The base for it with a diameter of 400 mm was sawn from a plywood sheet 10 mm thick. Permanent neodymium magnets with high inductance were attached along the outer radius of this circle. The magnets were fastened with liquid nails and epoxy glue. The author used 12 such magnets arranged according to the numbers on the watch dial. To maintain polarity, the magnets were marked with a marker. Before the magnets were fixed using epoxy glue, the author secured them with spacers made of wooden wedges, this helped to maintain the exact fixation of the magnets.
The author made the second part in the same way, leaving the difference only in the polarity of the magnets, which should be opposite to the polarity of each magnet on the first rotor.
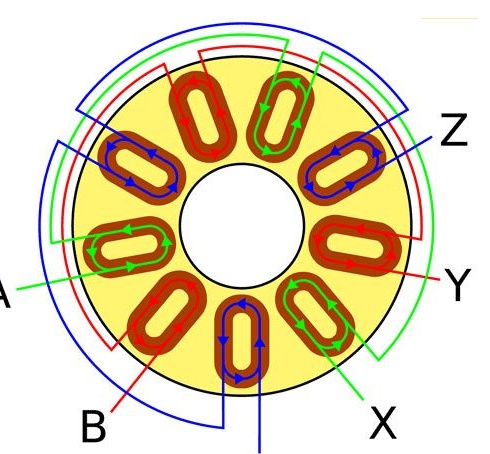
After creating the rotor, the author proceeded to the manufacture of a stator from 9 inductors. The coils are arranged in three consecutive groups, the end of which is connected to the beginning of the next. coils are located symmetrically at the vertices of three triangles that are inscribed in a circle. winding coils consists of a copper wire 0.51 mm thick. 320 turns of such wire were spent on each coil.
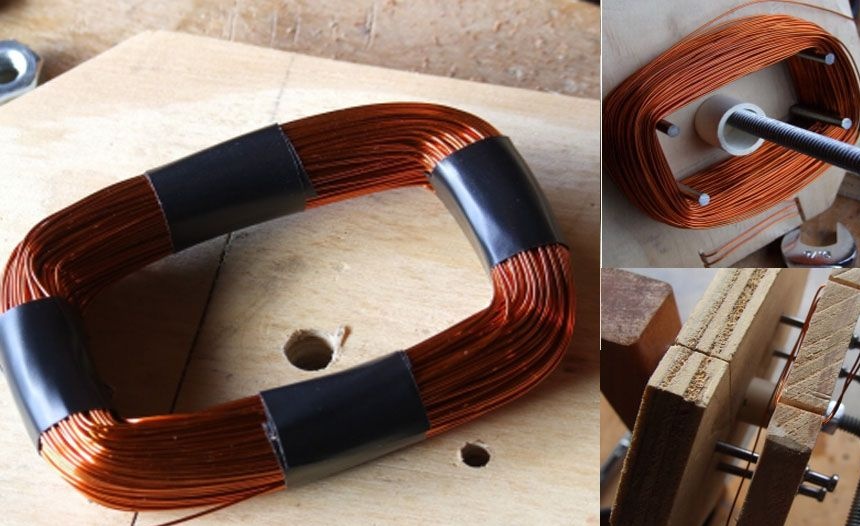
With this approach, the voltage at the generator output should be 100 V at a turbine speed of about 120 per minute. You can adjust the output voltage by reducing or adding the number of turns in the generator coils, or by changing the diameter of the wire, which serves to winding the stator. It is important to observe the direction of the winding, as well as mark its end and beginning. Epoxy adhesive is applied on top of the outer turn, and electrical tape was wound in four places to prevent unwinding of the coils.
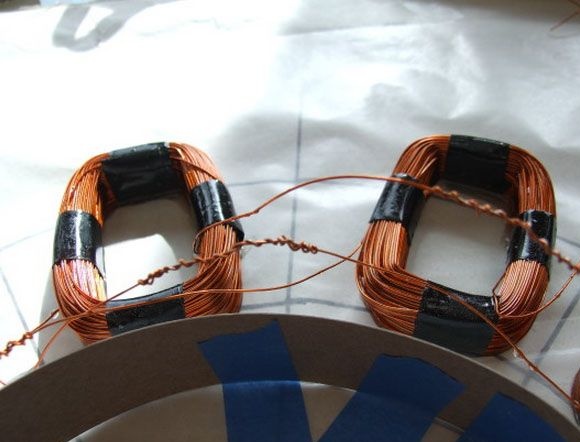
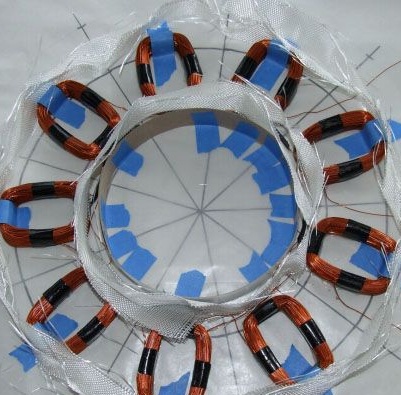
You should also pay attention to several details. The ends of the coils must be cleaned of varnish insulation. After soldering, all the coils are located on a sheet of cardboard or paper, where they are attached with tape and all paper fields except the central are sealed with fiberglass. After that, epoxy resin with hardener is poured. All winding leads must be located outside or inside the stator, and holes are made to fix the bracket in the stator.
After preparing all the details, the author proceeded to assemble the entire structure together. To do this, on one axis are the lower support of the blades, a disk with permanent magnets, a stator and a lower base of the rotor with a hub.
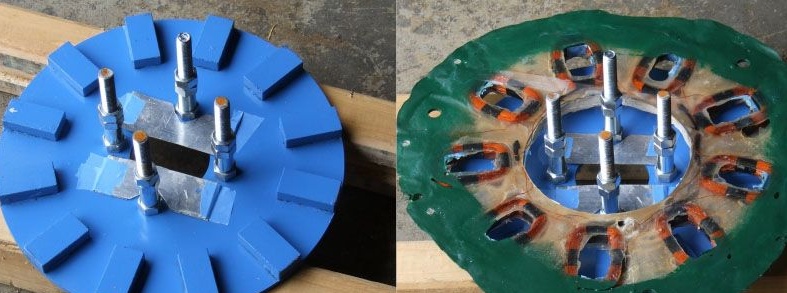
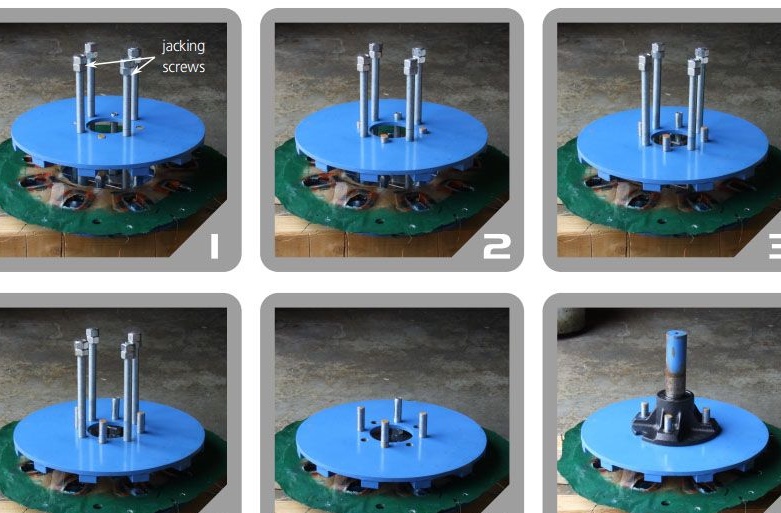
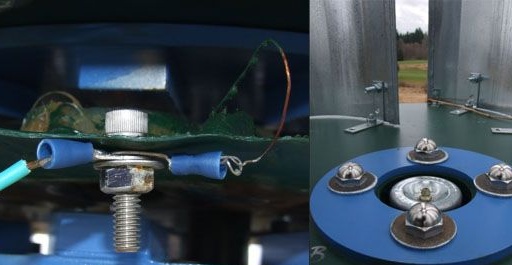
All components are attached to the bracket using studs. For better contact, the author used stainless steel bolts. After assembling and fixing all the parts, a finished windmill turned out, which should be installed in an open area, where the wind power is greatest. This will allow the generator to work most efficiently.