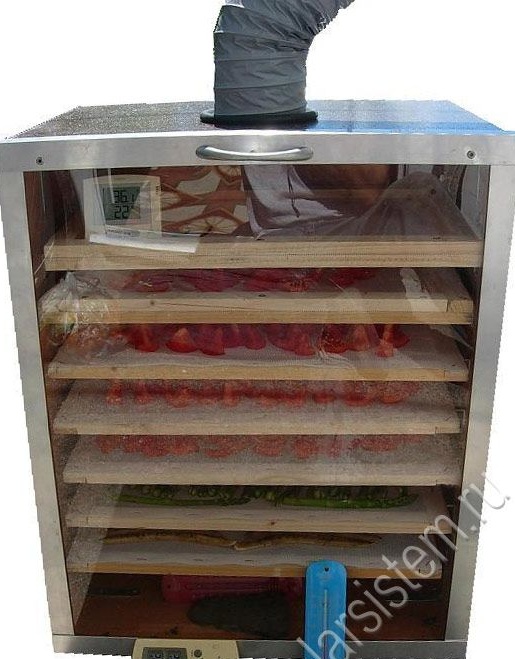
Dehydrator means dehydrator, that is, this device is designed to dry vegetables and fruits. Various raw food dishes are also prepared using a dehydrator, including bread rolls, cookies, pancakes, desserts. In addition, this thing can be used in needlework to create papier-mâché, dry bouquets of flowers, figures from the dough, and more.
Materials needed to build a similar dehydrator model:
1) voltage stabilizer KR142EN8B
2) wooden bars or metal corners
3) wooden slats
4) mosquito or metal mesh
5) 12V fan with a diameter of 120 mm
6) 12v solar battery
7) aluminum sheet
8) glass
Let us consider in more detail the design of the dehydrator and its main points of its assembly.
The main difference between a dehydrator and a dryer is that, due to more precise temperature control during cooking of raw food dishes, the enzyme is not destroyed. Because of this, there is a strong difference in price category, while an average electric dryer costs $ 50, a dehydrator can cost 10 times more. The cost of the model, the manufacture of which is mentioned in this article, may be even greater.
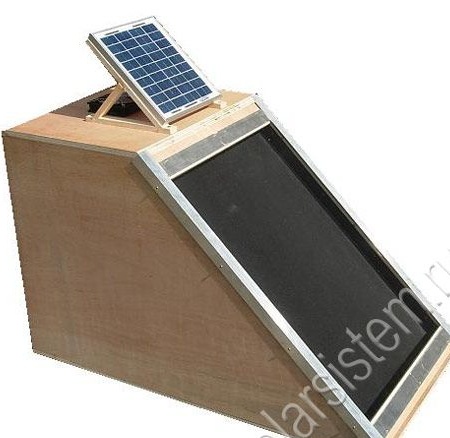
First you need to understand the principle of operation of such devices. The dehydrator itself is divided into two parts: a heating zone and a drying zone. The heating zone consists of an air solar collector. Street air through the lower part of the collector approaches the aluminum plate, the plate heated by the rays of the sun transfers heat to the air. After that, the heated air passes through the second compartment of the dehydrator - the drying chamber. With the circuit shown in the figure, heat loss is minimized.
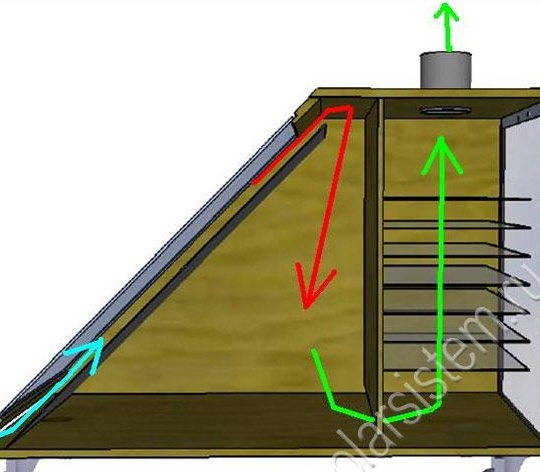
The blue arrow indicates the flow of air from the outside, then along the red arrow the heated air enters the drying chamber, where it passes from it along the green arrow.
This model The dehydrator has the following dimensions: length 100 cm, height 60 cm and width 53 cm.
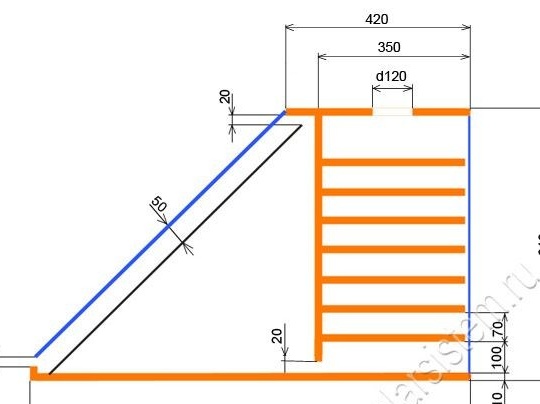
Wooden beams and plywood are used as the main material for the manufacture of a dehydrator.
From the wooden beams is the frame of the dehydrator design. Then the frame is sheathed with moisture-resistant plywood, thus creating a dehydrator body. sometimes aluminum corners are used instead of bars.
After the housing is assembled, it is necessary to seal it so that hot air does not exit through the cracks in the dehydrator chambers. To do this, all cracks in the housing are covered with sealant.
Since during the day the dehydrator must be deployed with an aluminum plate to the sun, usually 38-100 mm wheels are attached to the bottom of the structure, depending on the evenness of the surface on which the dehydrator will stand.
In order to observe the cooking and drying process, the rear door is made of glass. The door should also be sealed against the dehydrator body.
The number of shelves inside the drying chamber is determined depending on the height of the dehydrator. In this case, they were installed 7 pieces at a distance of 7 cm from each other. The trays on which products and things will be laid for drying are made of wooden slats on which a mosquito net is stretched, or steel. With a denser arrangement of shelves, heating of objects in the drying chamber will not be carried out so evenly, so this is not recommended.

As a heating element, it is best to use an aluminum plate painted black with heat-resistant paint. Aluminum has excellent heat dissipation, so the thickness is not so important, you can use almost any available sheet of this metal.
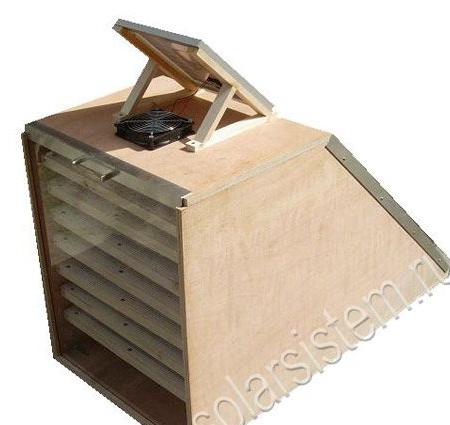
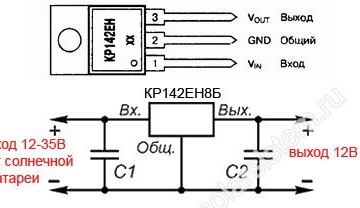
A fan with a diameter of 120 mm is placed above the drying chamber, which operates on a voltage of 12 V. A low-power solar battery is used in this model of dehydrator to power it. Moreover, the battery is directly connected to the fan, since the dehydrator in any case can work only in good weather conditions. The only thing the author did was to insert a voltage regulator KR142EN8B into the circuit. Thus, the dehydrator is completely autonomous and works only due to solar energy.
Wiring diagram:
Since the solar energy is used in this model, adjusting the temperature and its constancy is very difficult. Therefore, to solve it, the author used electronic a temperature controller consisting of a thermostat and a temperature controller. it is best to use temperature controllers with two temperature sensors, this will help to more accurately control the temperatures in the lower and upper parts of the dryer. The temperature controller is also powered by a solar panel located on the roof of the dehydrator design.
After the controller is connected, it is necessary to choose convenient temperature limits and then it will regulate the operation of the fan to create optimal conditions in the drying chamber. If you manage to connect the controller so that it not only commutes the fan relay, but also can change its speed by limiting the current to the fan, this will allow for even better control of the temperature inside the dehydrator.
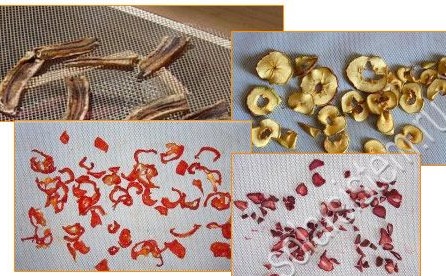
Below are the main temperatures for the drying chamber:
1) Herbal plants 34 ° C
2) Plant products 41 ° C
3) Yeast bread 43 ° C
4) Yoghurts 46 ° C
5) Vegetables 52 ° C
6) Fruit 57 ° C
7) Meat and fish products 68 ° C
8) Bulk products 68 ° C
9) Raw food specialties 40 ° C
The author also provides some tips on using a solar dehydrator.
Do not use unripe or overripe fruits and vegetables. It is necessary to thoroughly wash the products before laying them in the drying chamber, it is also worth removing damaged areas and bones. Fruits and vegetables should be cut into pieces of 2-10 mm, the thinner - the faster they dry. During drying, the dehydrator must be turned towards the sun.
