

Many drivers are faced with the problem of parking in garages, especially if this garage they have recently appeared. Mastered car enthusiast In a new place, a simple parking sensors for a garage can help, which can be easily assembled.
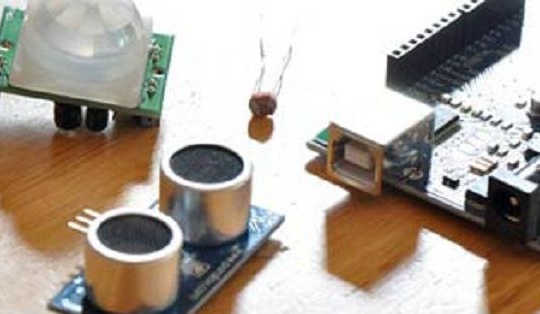
Materials:
- controller Arduino (author used Duemilanove)
- Ultrasonic Sensor
- wires
- Plastic box
- 9V power supply
- Three-color LED
- glue
- Bread board
Assembly:
Arduino is glued to the bottom of the plastic box with glue (you can use silicone). Power from the board is brought to the controller.
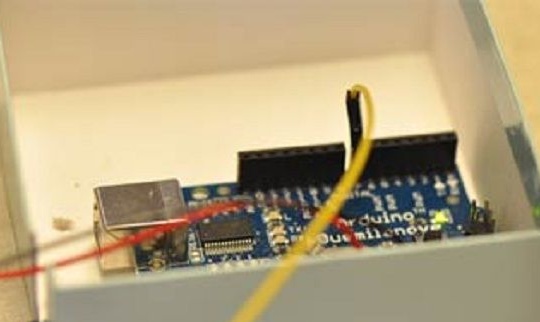
Next, the power of the 5V ultrasonic sensor is connected.
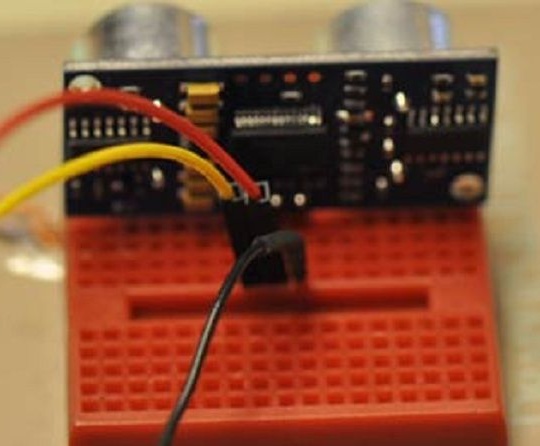
The output of the SIG ultrasonic sensor is connected to the Arduino PWM output (this is done to send pulses to the sensor and read their return later). The author used the 7th output of the controller.
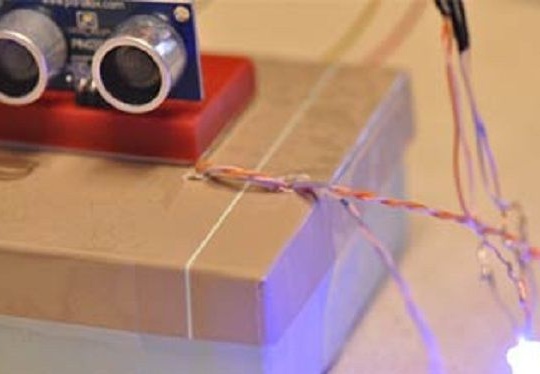
Before connecting the LED, it is determined which wiring for which color is responsible. Red, green, and blue connect to Arduino's 11, 12, and 13 pins.
Now it remains to prepare the software part of this homemade.
Program:
Because the Arduino software already contains an example for working with ultrasonic sensors, nothing else needs to be downloaded. An example should be sought in this location: File -> Examples -> Sensors -> Ping example. All code is copied to a new project, and it is given an arbitrary name.
First of all, the interval of sendings to the sensor changes; the value from 100ms changes to 1000ms in the line with the value “delay”.
Next, the pin numbers for the LED are set. Before the line "const int pingPin = 7;" value data is added:
pinMode (13, OUTPUT); // blue
pinMode (12, OUTPUT); // green
pinMode (11, OUTPUT); // red
Now comes the adjustment of the LED itself, that is, at what distance what colors will be turned on. The author made it so that when the car is farther than 60 cm from the wall, the LED burns green, less than 60 cm the color changes to blue, and when less than 15 cm remains the LED changes its color to red.
Code subject to the changes described above:

As a result, using the code, the Arduino will control the outputs to indicate the color of the LED, which will depend on the distance to the car, and the distance will be determined by an ultrasonic sensor. The final version of the code can be downloaded at the bottom of the article.
After checking the correct operation of the program, parking sensors are fixed on the rear wall of the garage, and the LED is displayed on a convenient and visible place.
