
This homemade will automatically turn on and off the light in the room. The balcony became such a room for the author, as he is a smoker and often goes to it. The system independently recognizes the movement of a person using sensors and then makes a decision - turn on or off the light. By this principle, you can make lighting anywhere, not only lighting, but also organize the operation of any electrical devices.
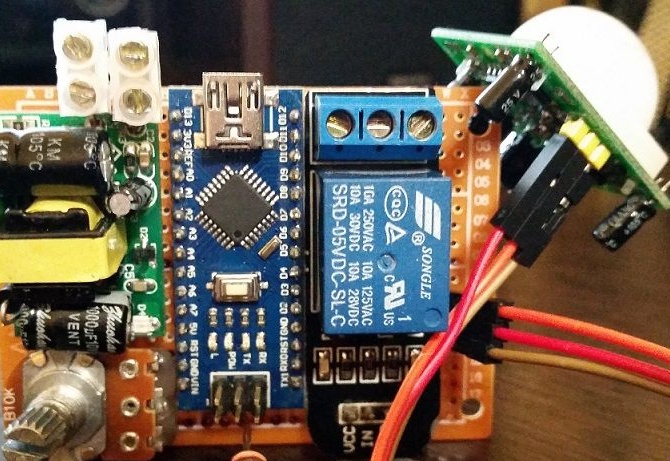
As a controller, an inexpensive version is used here Arduino Nano.
Materials and tools for homemade:
- Arduino Nano controller;
- textolite layouts;
- motion sensors;
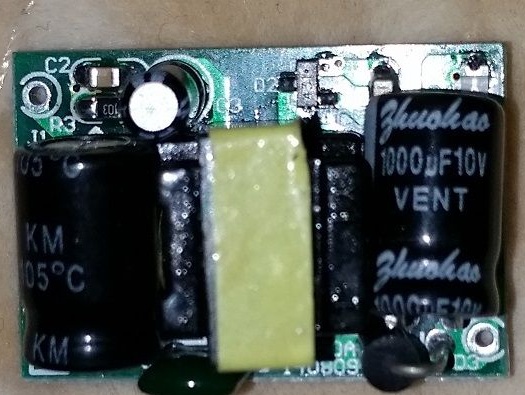
- 5V power supply;
- relay;
- soldering iron with solder;
- wires;
- materials for the manufacture of electronics enclosures (plexiglass);
- file.

Manufacturing process:
Step one. Finalization and installation of the relay
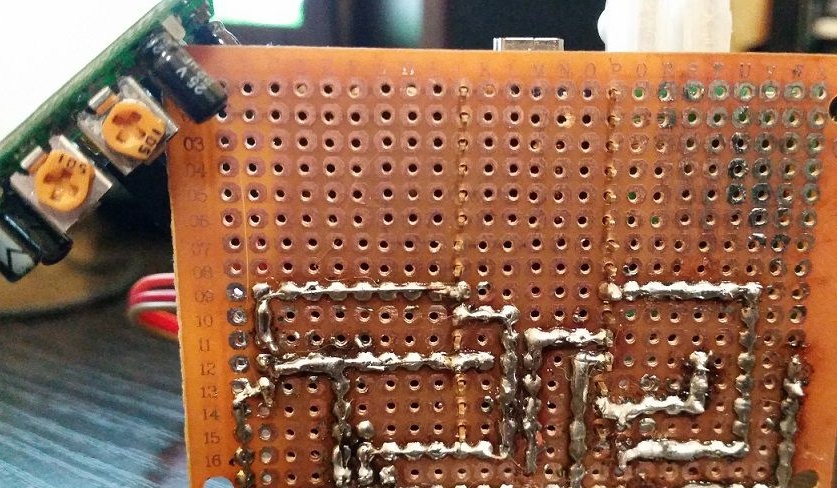
First, the entire circuit is assembled and tested on a delusion board. Everything worked fine, a potentiometer was added to adjust the sensitivity to light. But when installing all the elements on the board, a small problem arose. The relay turned out to be too large and did not fit on the breadboard. In this regard, it was necessary to slightly modify it with a file. Since there were no contacts or tracks there, no problems arose with this.
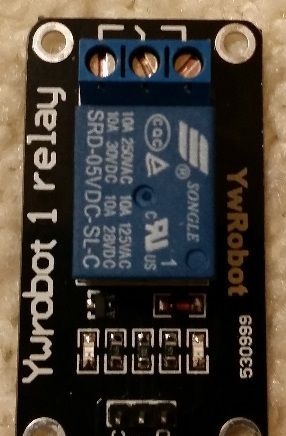
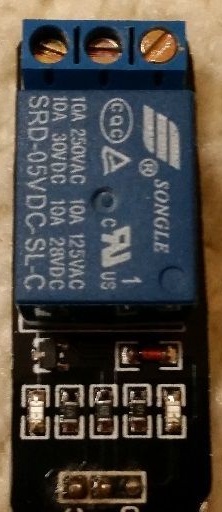
There was still a problem with the soldering of relay contacts, they had to be moved to the other side. What eventually happened can be seen in the photo. The most difficult, according to the author, was to make the tracks on the board. For these purposes, a thin wire, flux and tin are used. Everything turned out pretty rude, but as an experiment everything was done perfectly. As a result, everything fit perfectly on a 5x7 cm board. The advantage of the board was that it has holes on it that can be used when attaching a plexiglass case.
Step Two A few words about the motion sensor
The author did not make the motion sensor fixed, since there was an idea to make it on the "horns", this will allow changing its direction if necessary. Also, it has not yet been clearly decided where exactly the device will be mounted. The feature of the sensor is that at the first start it must be given a time of the order of 10-30 seconds. During this time, he will tune himself, calibrate and work as it should. In principle, this point is not so important.
Step Three Electronics firmware
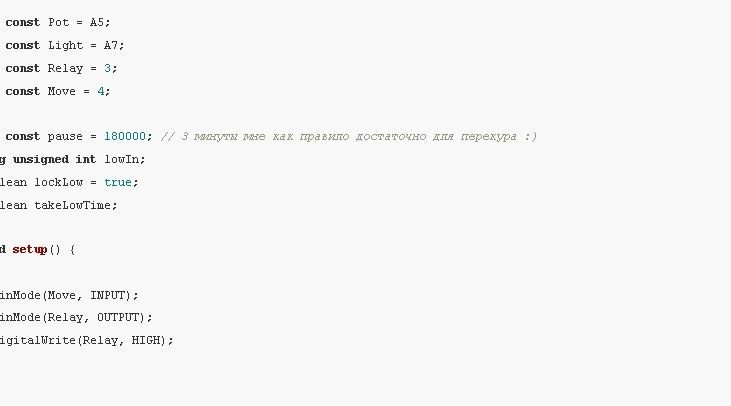
The firmware is assembled from pieces of various “tutorials” for sensors. Works electronics very simply, when the sensor detects movement, the photoresistor is compared with the threshold value that is necessary for the relay to operate. This value is adjustable using a potentiometer. If all the requirements are met, the relay turns on for three minutes, you can set another time period. Further, if there is no movement, the system turns off the light.
To check the threshold values of the photoresistor, he was covered with a finger and then the author directed a flashlight with a power of 2000 lumens at him.
In total, taking into account the holidays and the help of a reliable colleague - a cat, about 12-15 hours were spent on the entire assembly. For the system to work, a 4-Watt power supply is sufficient; it cost the author 200 rubles.
Connecting a system is also very simple. It is enough to connect the lighting through a relay and apply 5V to the electronics through the source.
After assembling the system, all the electronics are hidden in the case, it can be made of plexiglass or pick up any other box suitable in shape and size. Well, the device is mounted in any convenient place so that it does not interfere, and is not exposed to dampness. Naturally, it is important to consider where to install the motion sensor.