

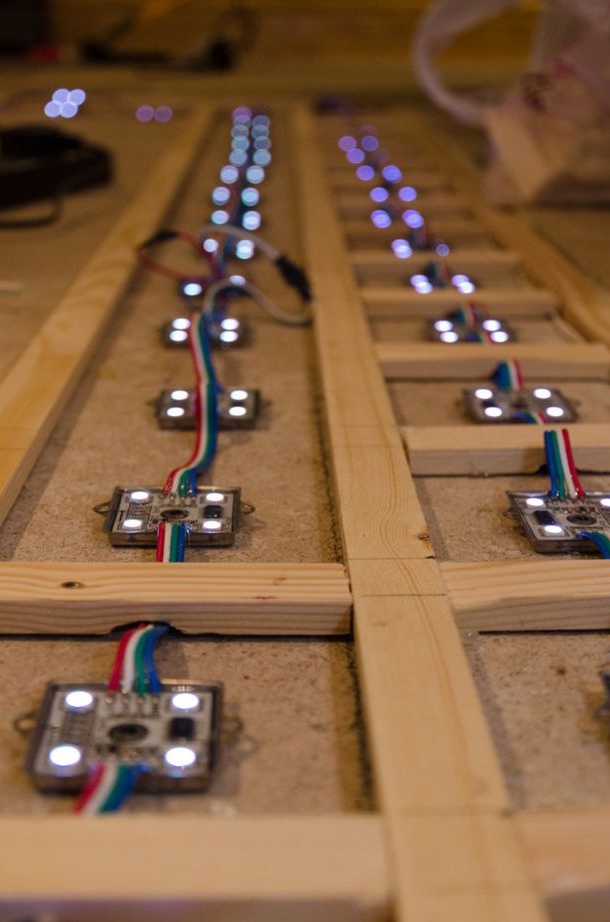
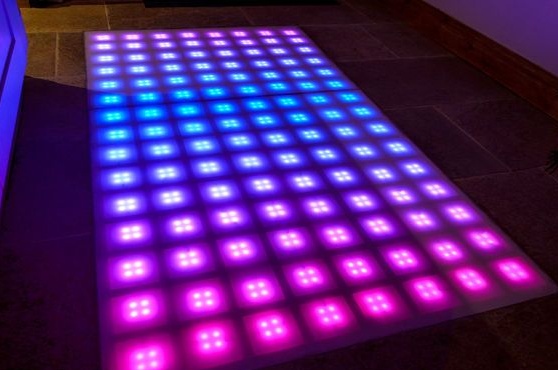
A feature of this floor are WS2801 RGB LEDs 36 mm, the choice fell on such LEDs, because they have a fairly low profile (depth 5 mm). This size is ideal for planting along floor tiles.
Materials:
- Arduino Uno
- Arduino Proto Board
- USB 2.0 cable
- Bread board
- Power cord and plug
- WS2801 LEDs 36 mm
- Power switch 12V 5A
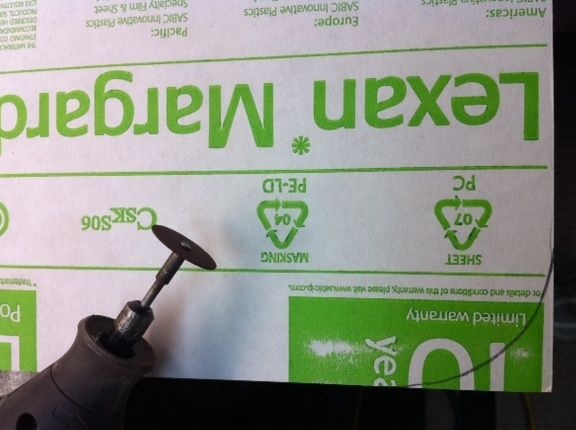
- Polycarbonate transparent sheets Lexan MARGARD 5 mm
- Wooden slats 9 x 21 mm
- Self-adhesive transparent vinyl
- PC / laptop for the Jinx program!
- Wires for LEDs

The author indicates that the materials can be replaced at will. Lexan MARGARD sheets, in his opinion, fit perfectly because of their strength and durability. The matted material perfectly diffuses the luster of the LEDs located close to it.
Step one. Electrical circuit.
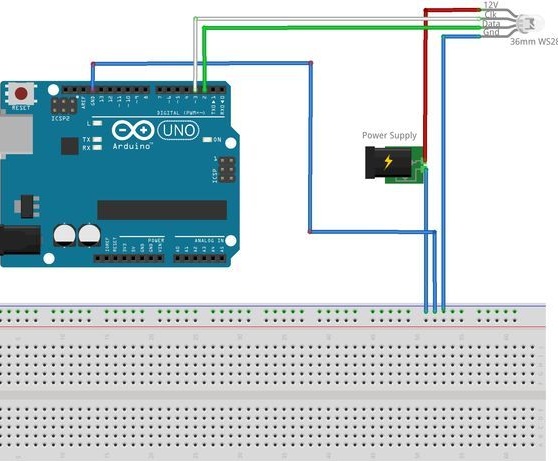
The project uses a small breadboard to separate Arduino, ground conductors, and LEDs. This solution allowed the use of only 4 conductors for LEDs. A positive conductor to the LEDs directly goes from the power source. To connect the plug to the power switch, the author invited an electrician. You can also use the power supply from the computer to 12V.
Step Two Programming.
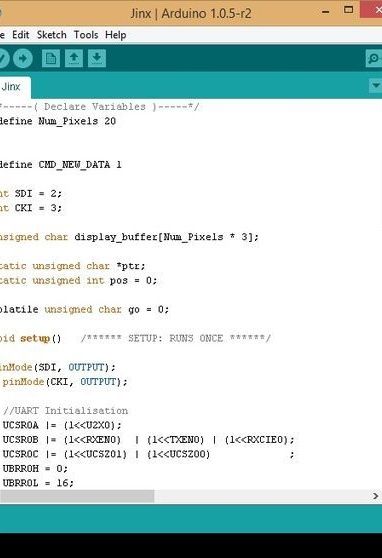
For lighting effects, Arduino decided to program with the Glediator sketch, which will be attached under the article. Arduino connected to the laptop directly via USB and uploaded the sketch to the microcontroller. Only the number of pixels in this line has been changed in the code:
"#Define Num_Pixels 120", pin numbers:
int SDI = 2;
int CKI = 3;
Step Three Jinx!
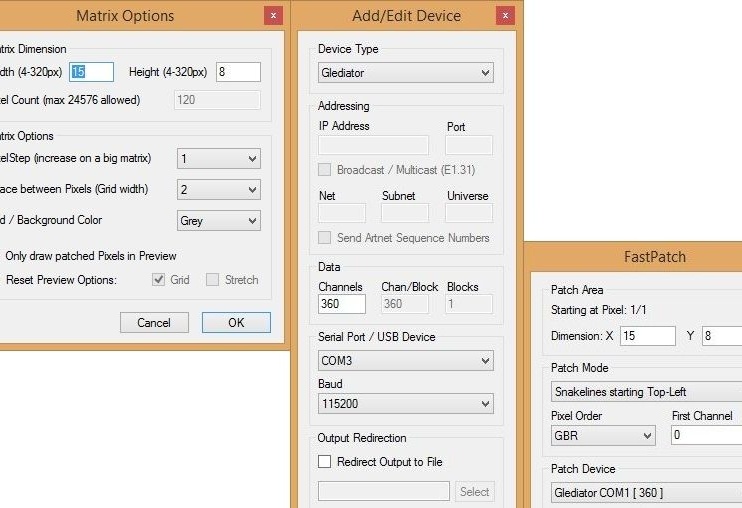
For this project, it is most convenient to use the Jinx program! with a Glediator sketch. The author did not use Bluetooth to connect Arduino and launched it by directly connecting to a laptop. The screenshots below show the settings used for 120 LEDs. It should be noted that the number of channels used for pixels / LEDs needs to be multiplied by 3. On the Fast Patch tab, the Snakelines option is selected, it is suitable for this type of LEDs. Also, the channel order is indicated as GBR, since these LEDs have exactly this sequence. To select the desired effect, the Setup menu is selected, and there the Start Output is immediately checked and how the LEDs are lit. Jinx program! It has the ability to program several zones at once, this function is used by the author for a different floor glow You can download the program here:
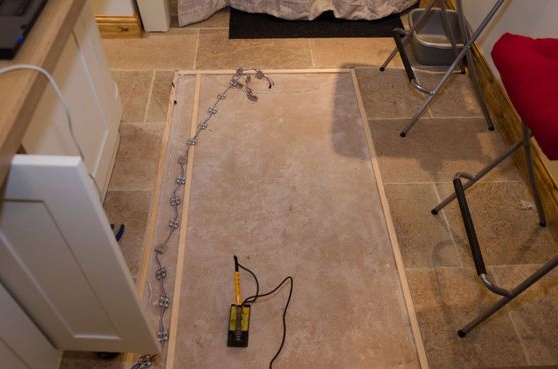
The fourth step. Floor frame.
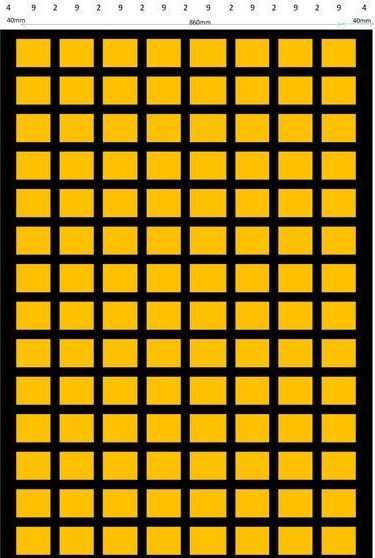
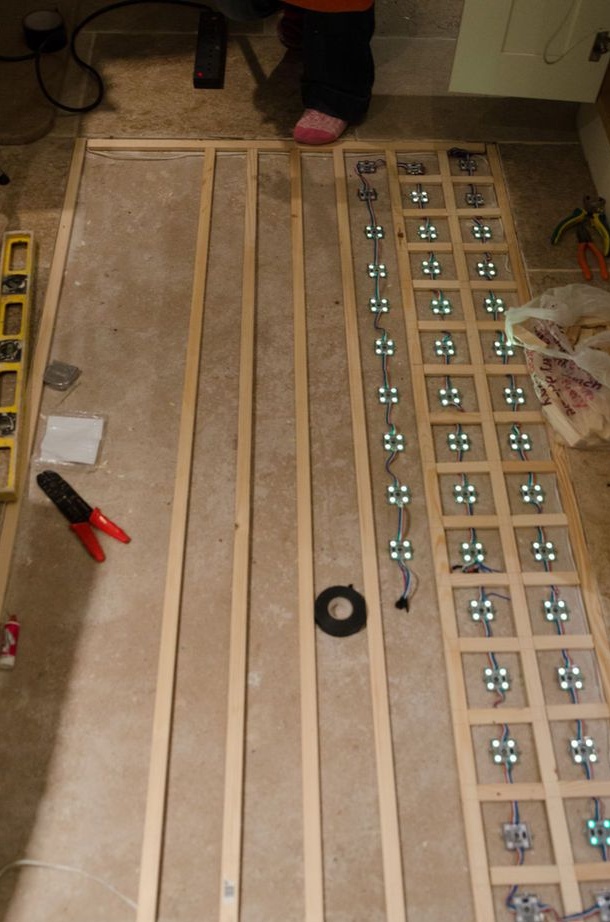
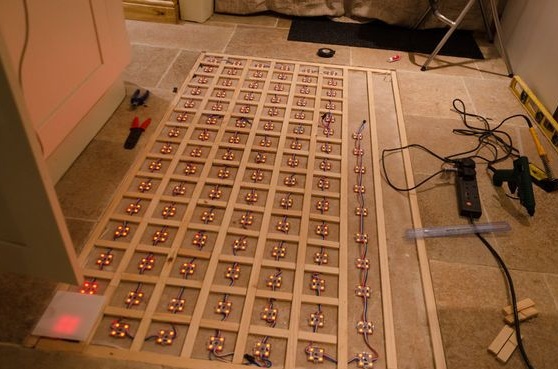
The floor frame is built in the form of pixels, as this will allow you to evenly distribute the weight when someone is standing on the floor, and will help to more accurately and sharply display the light from the LEDs in each pixel. The floor size went 1640x930 mm, it fit exactly 120 pixels, they are organized in the form of an 8 by 15 matrix. For wooden planks, the width is 21 mm, this made it possible to make each square from 90 to 100 mm around each pixel.
Small slots are made under each pixel to accommodate the wires. All wooden planks and pixels are glued with a gun.
Step Five Floor surface.
After much deliberation, the author settled on Lexan Margard sheets, which have protection against rubbing and do not break. Thanks to the design with 10x10 cells, the floor can support the weight of chairs and high heels. Sheets selected with a thickness of 5 mm for installation flush with floor tiles. Sheets
Step Six Vinyl.
In this step, the transparent floor surface material is coated with self-adhesive scattering vinyl. Such material allows LEDs to shine brightly, and at the same time not to hit in the eye. You can also use matte vinyl.
Seventh step. Fastening.
Lexan sheets with vinyl under them are laid on the frame and glued with silicone around the edges.
I'm using Jinx software! and changing various glows you can experiment a lot. The author made a different sequence for turning on the glow. The program can change the desktop shortcut to launch effects, this shortcut can be added to Windows startup. This will allow the LEDs to light up in the correct sequence when you turn on the computer.
Video with the work of the disco floor: