
Materials and tools for assembly:
- rotary controller;
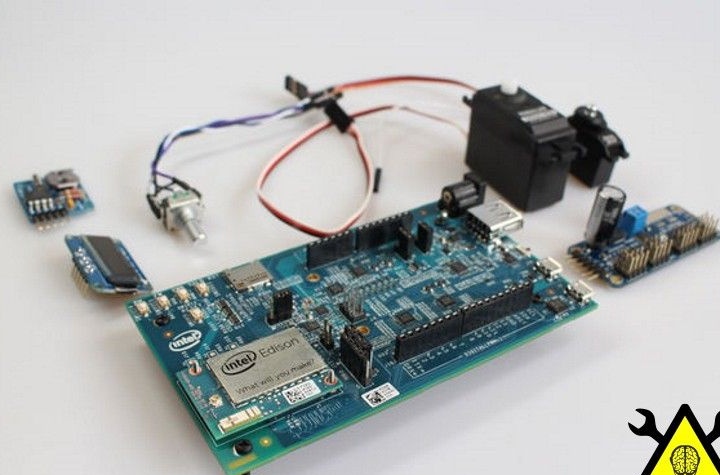
- intel Edison with Arduino Breakout Board
- I2C PWM driver;
- real-time clock breakout;
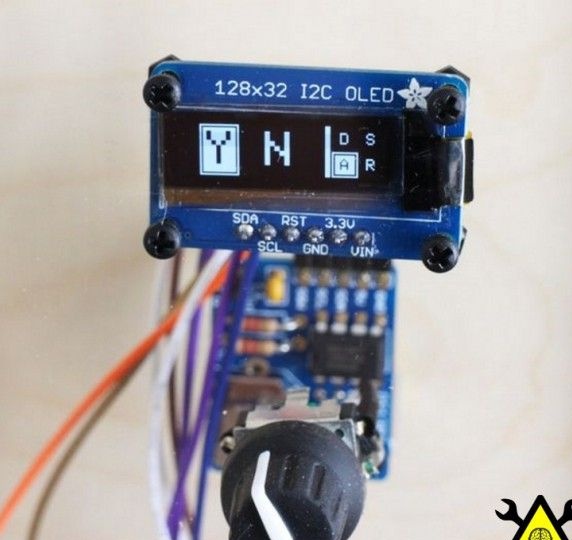
- mini I2C OLED;
- two servos;
- Three servos with metal gears;
- two wires for a servo drive 30 cm long;
- mounting socket for plug;
- two-position toggle switch;
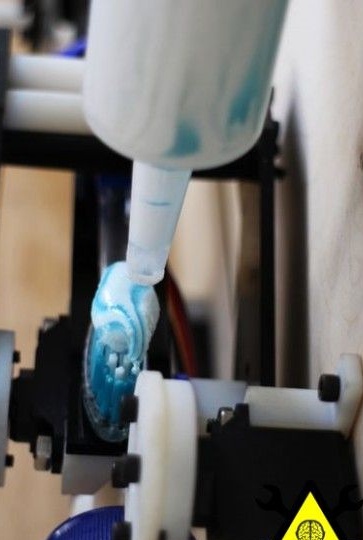
- brush and toothpaste;
- power supply for 5V 3A;
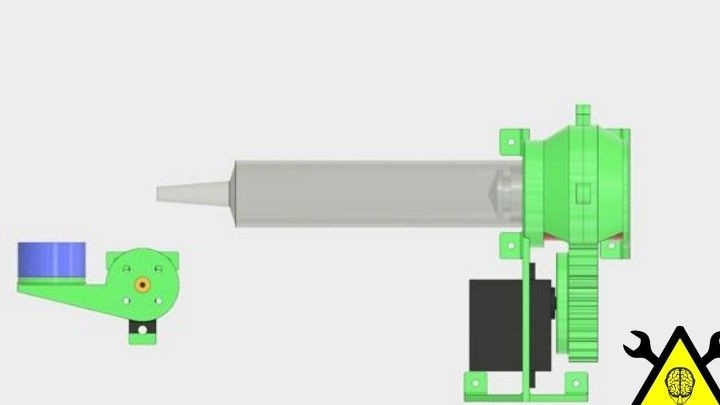
- a plastic syringe;
- nuts and screws;
- nut and threaded rod;
- a piece of transparent acrylic measuring 61 cm x 61 cm x 3 mm;
- plywood measuring 91 cm x 61 cm x 6 mm;
- 3D printer.
Robot assembly process:
Step one. Mechanical part
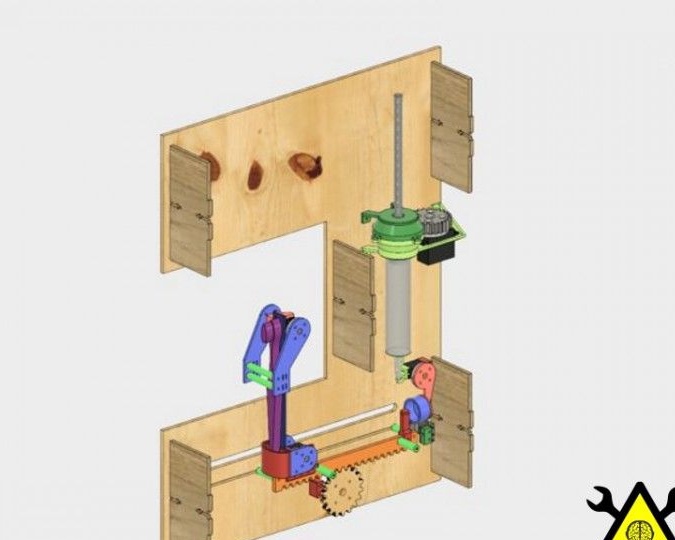
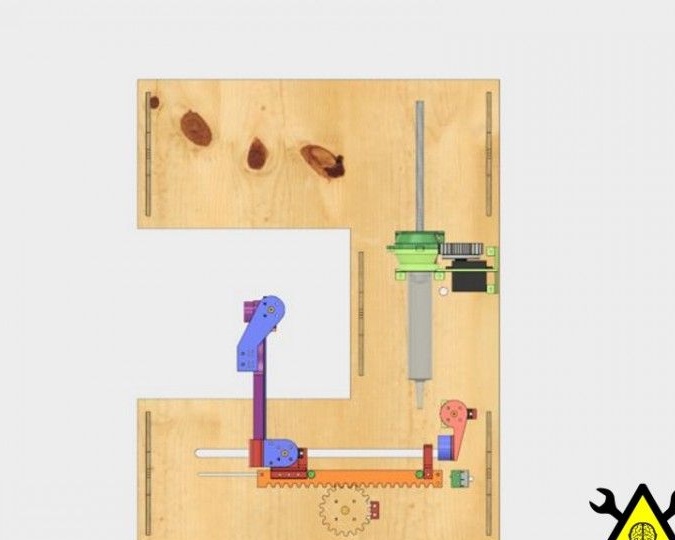
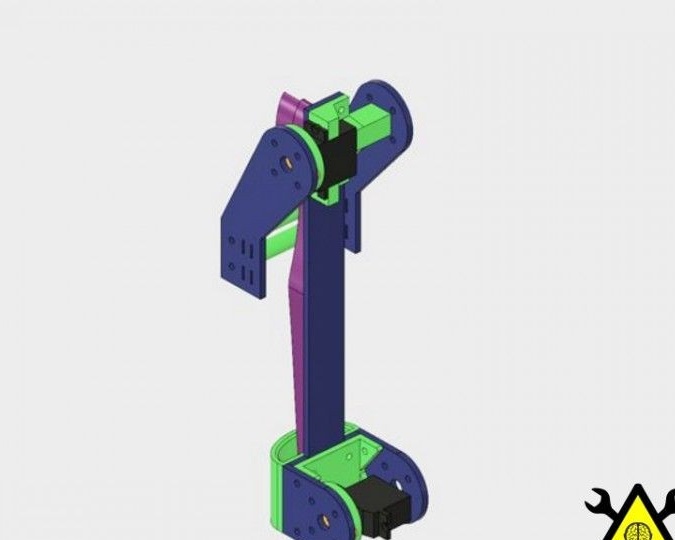
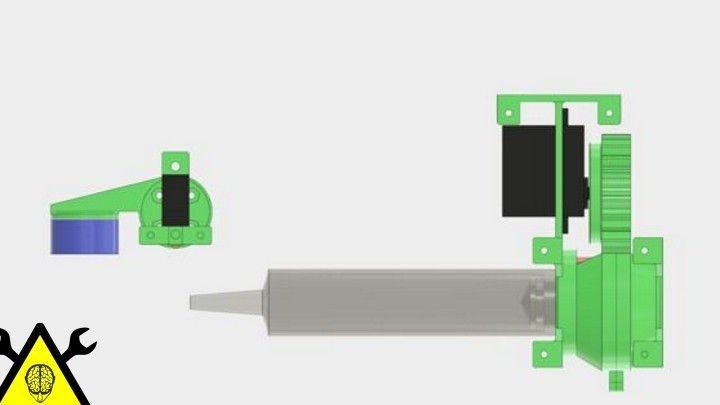
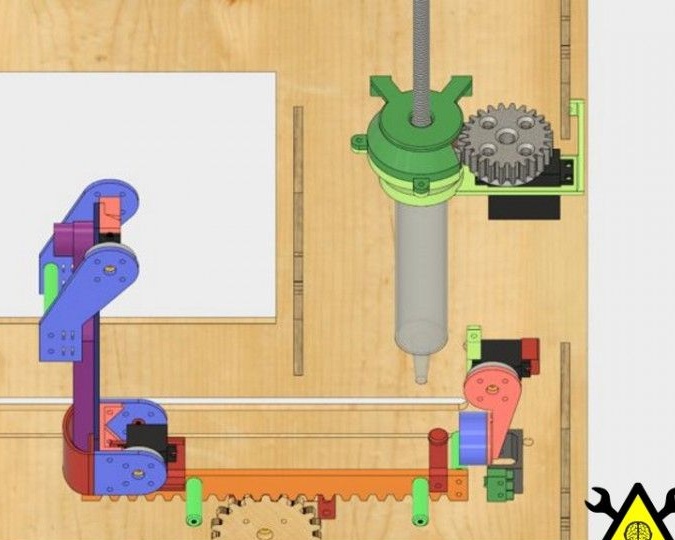
The device was first modeled using a combination of Fusion 360 and Illustrator. In the process, a whole technology was created, which includes 3D printing, as well as laser cutting of metal. In total, the system can be divided into four main nodes. This includes a carriage, a toothbrush holder, a main body and a dispenser.
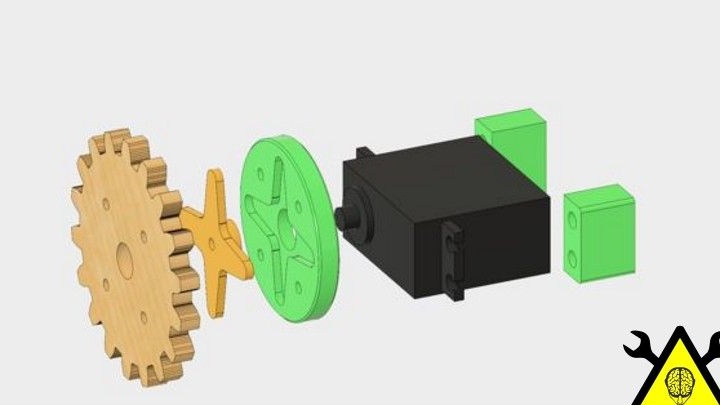
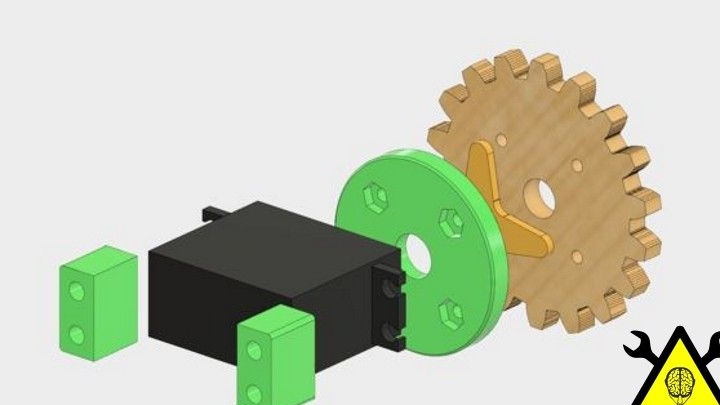
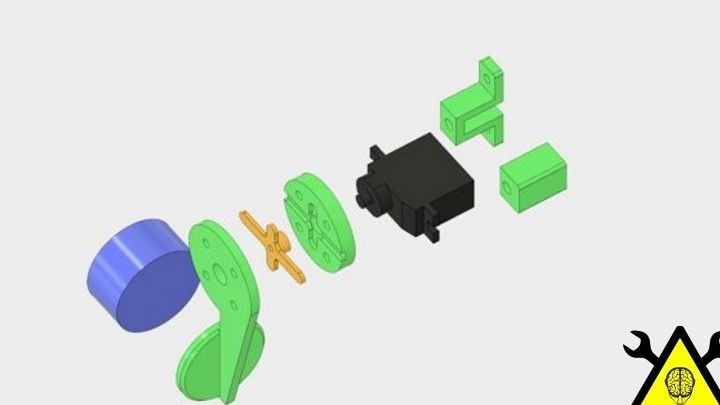
In order for home-made products to be used for wider needs, it was decided to model adapters for standard and micro-servos. These adapters have slots for attaching standard shafts, as well as space for four nuts on the back. Due to the fact that the adapters were designed for shafts, they must be attached either to the plates or to other objects.
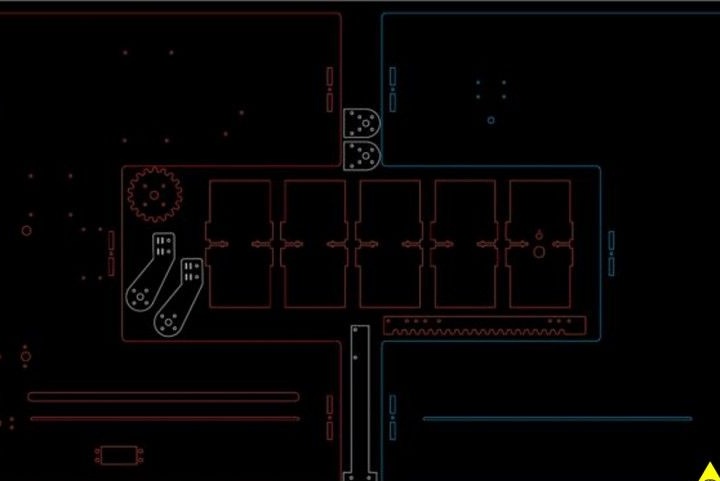
Step Two The electrical circuit of the device
A 5V and 3A source is used as power. This is enough to power one engine. As for the main board, it consumes about 500 mA, and the motor drives, the original LED and the real-time clock consume a small amount of current.
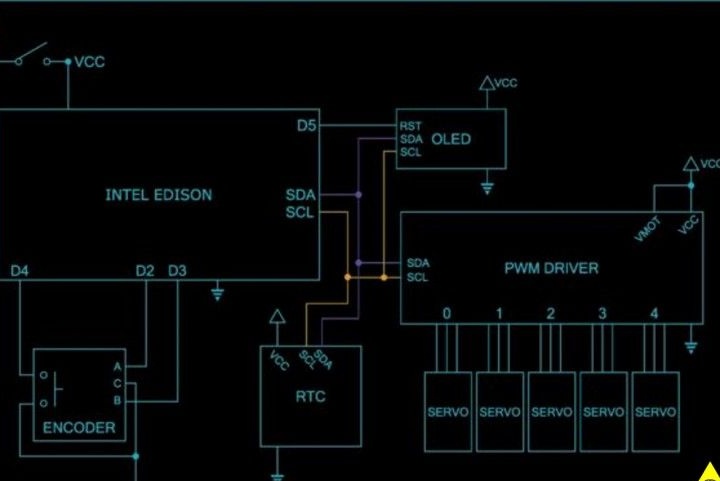
The Intel Edison processor is used as the main controller of the system. Due to the separation of the boards, the processor can easily communicate with other components of the electronics. The board connects to the engine, clock and screen.
To control the five servos, a PWM board is used. The power of the engines can be controlled using an external source, but the author decided to tie the Vmot to the VCC pin.Thanks to this, the whole system is powered by 5V.
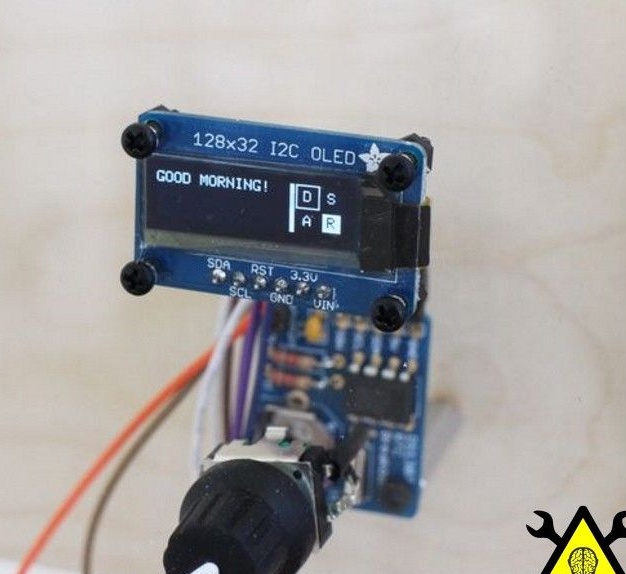
So that the device can be controlled, a small 128 x 32 size display is used. A rotary sensor acts as the main user input. The outputs of the sensor are connected to the digital contacts of the processor.
Step Three Body assembly
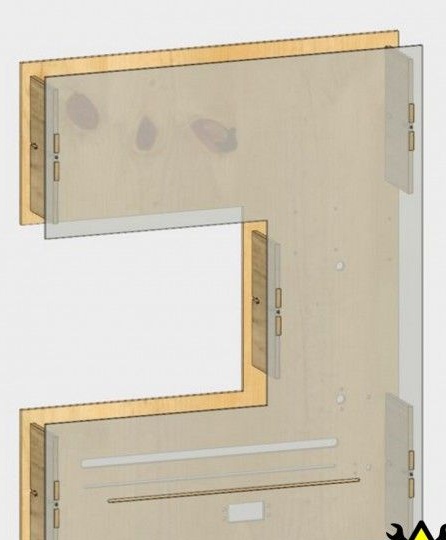
The back part acts as a support for the case; it is made of plywood with a thickness of 6 mm. Four screws are used to secure the PWM and processor. Edison is mounted on the front side, and PWM on the back.
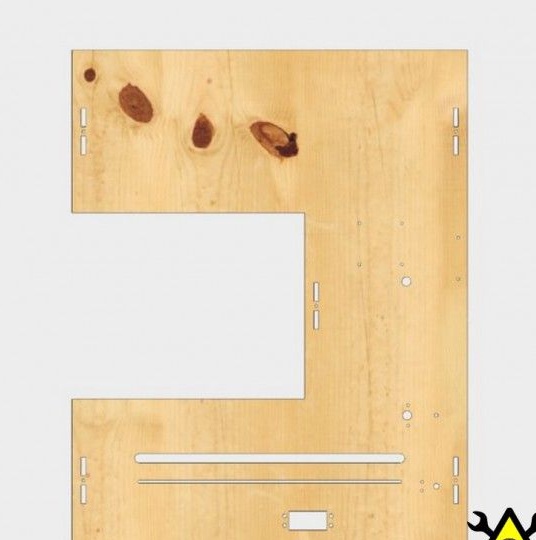
Five spacer plates are used to connect the front and rear panels. Spacers are attached to the plates with screws and appropriate nuts. The plates are almost symmetrical, but the protrusions on one edge are shorter, they do not extend forward. The switch, together with the power connector, is attached to the lower strut.
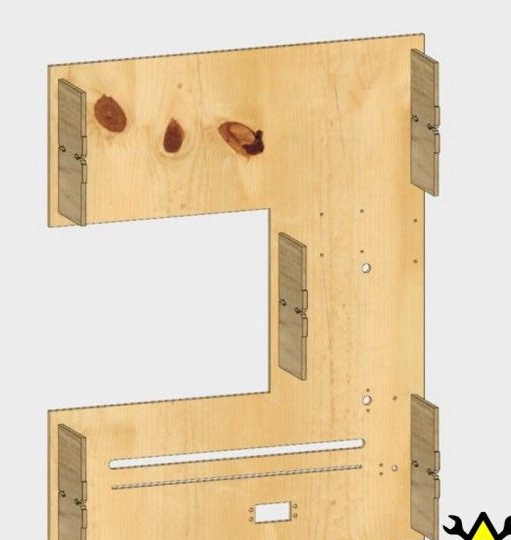
As for the front panel, it is needed mainly in order to protect the device during operation. Four screws are used to secure the screen; the rotary sensor is also attached with nuts.
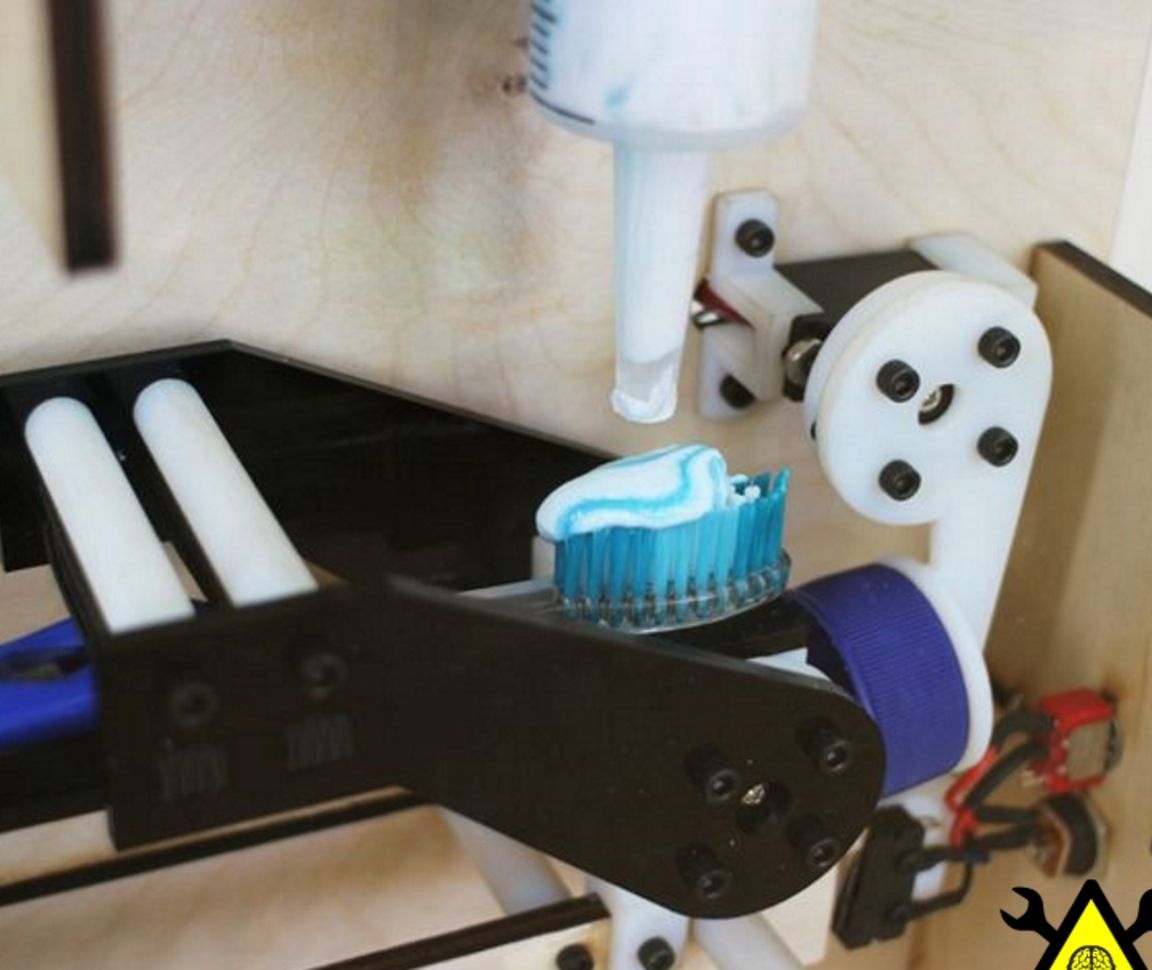
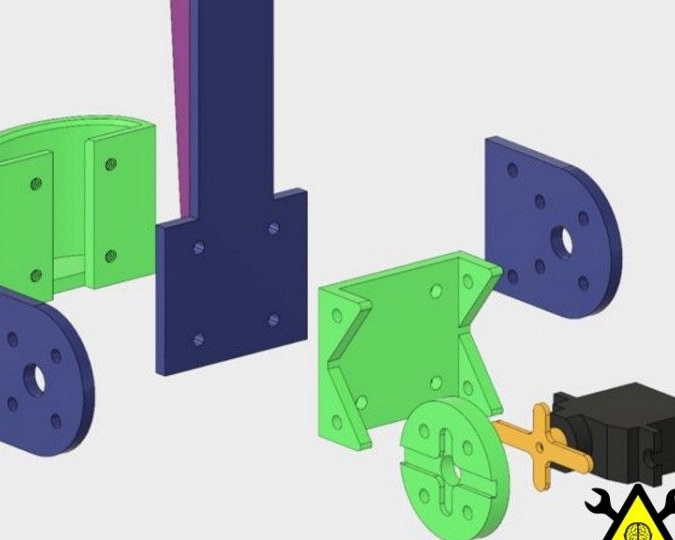
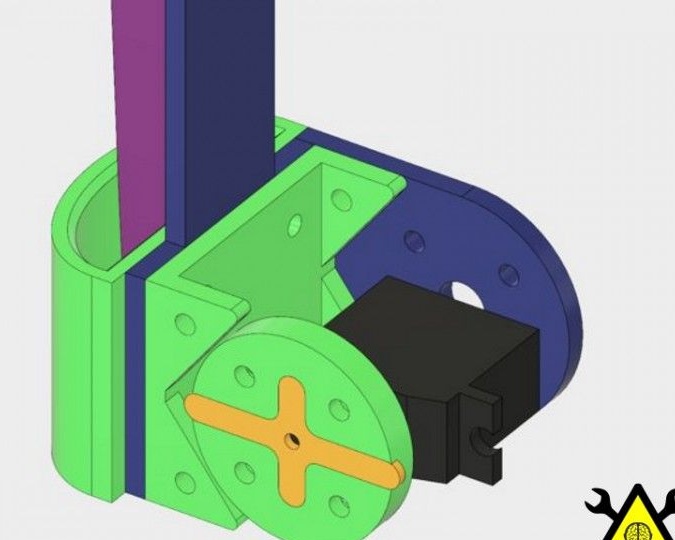
Step Four Toothbrush mount
There are two servos on the toothbrush holder, which are driven by the components - the base and the “head”. In the picture you can see the elements of blue and green. What was cut with a laser cutter is colored blue, and elements that are printed on a 3D printer are colored green.
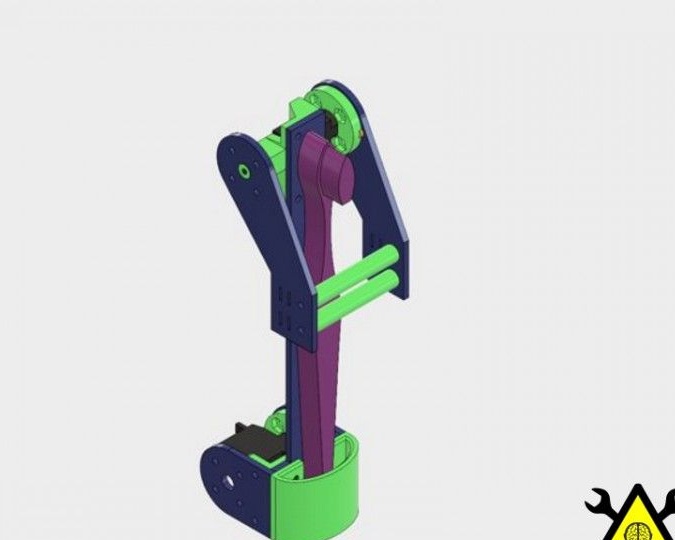
Thanks to the head, the toothbrush does not fall. The hands are driven by a single servo drive, they are fastened with two gaskets. A 3D adapter and two screws are used to attach the servomotor to the main plate. There are four slots in the plate, through them with the help of black rubber bands a toothbrush is attached.
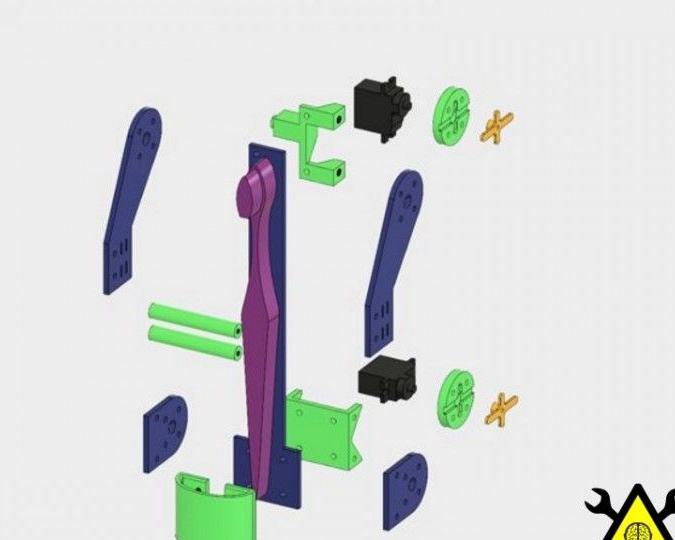
The base is a small 3D cup, it keeps the brush from falling. After the toothbrush is loaded into the assembly, the servo drive holds it and turns down. Eight screws are used to connect the plates.
Step Five Rail mounting
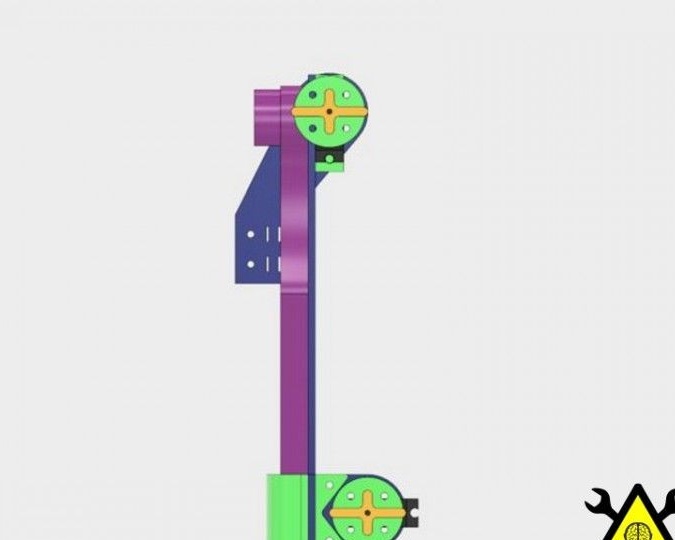
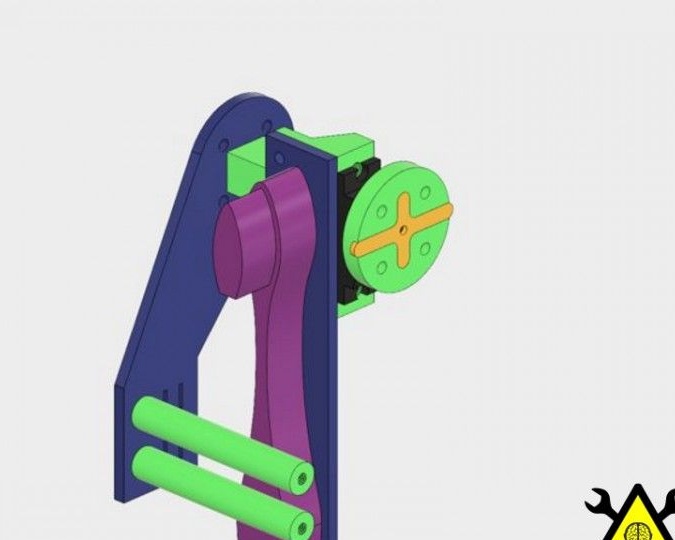
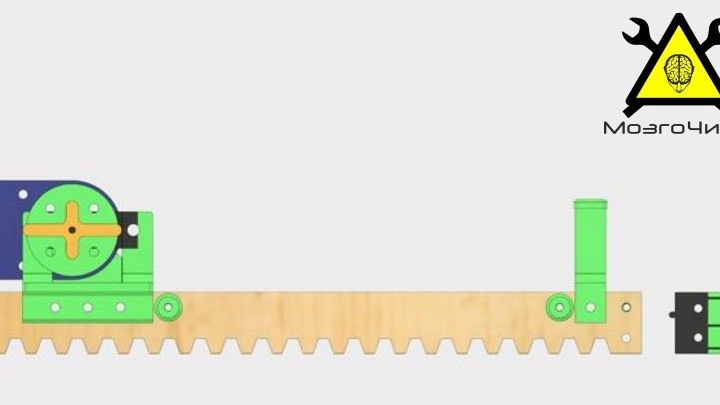
The frame consists of three unique parts, this is a headrest, carriage and struts. Using the carriage, the frame holder is attached. The carriage itself is attached with three screws. The headrest is needed in order to reduce the load on the main servo holder, it is mounted further on the carriage on the frame.
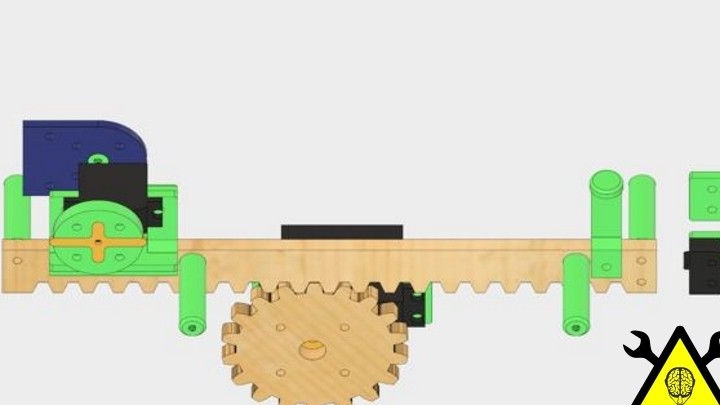
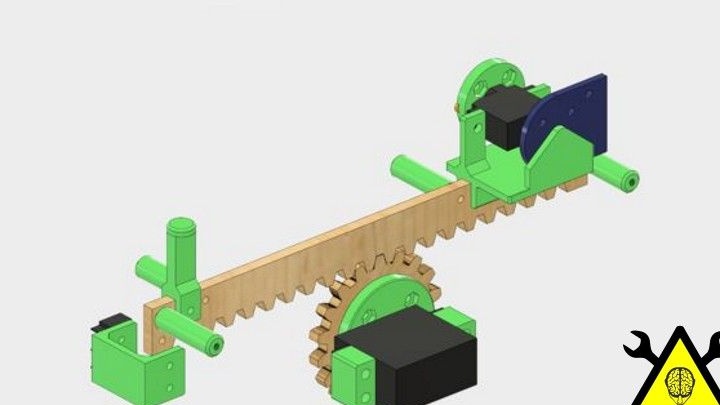
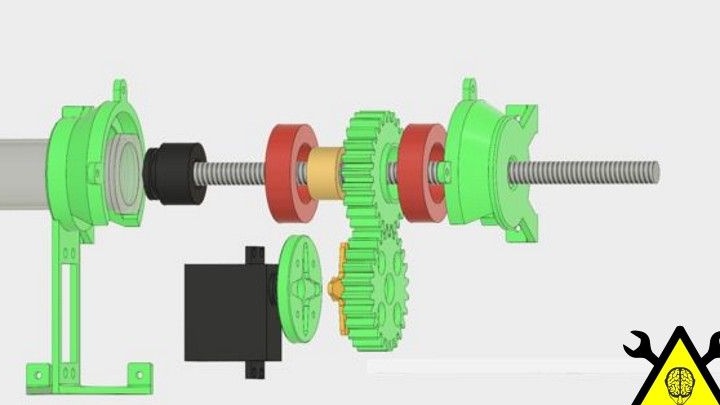
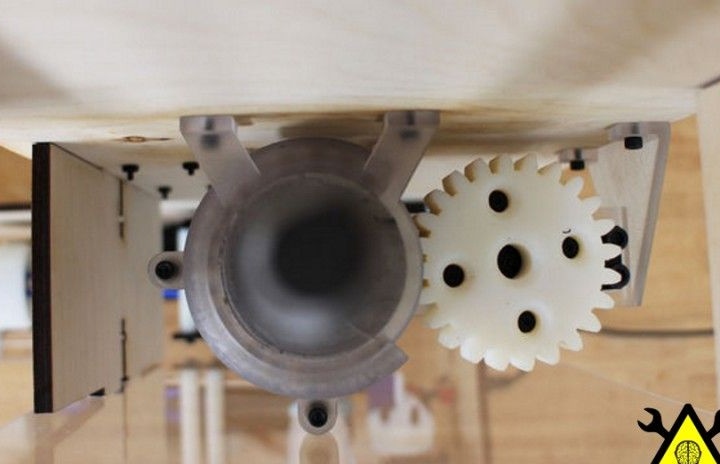
The gear is mounted below the frame. It is cut out of plywood 6 mm thick and attached to a standard servo shaft. The servo drive itself is placed slightly offset from the base plate, in connection with this there are identical rectangular struts on it. The servo itself is attached to the base with four screws.
Step Six Mounting the dispenser
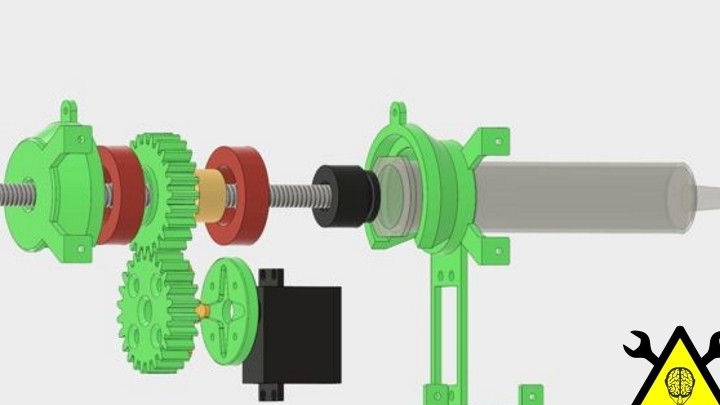
The most complex mechanism in the device is a linear drive. Thanks to him, the dosage of the paste occurs. The core of the device is a threaded rod and a nut, with the help of this, the tube is compressed. Six screws are used to secure the drive.
Seventh step. Software
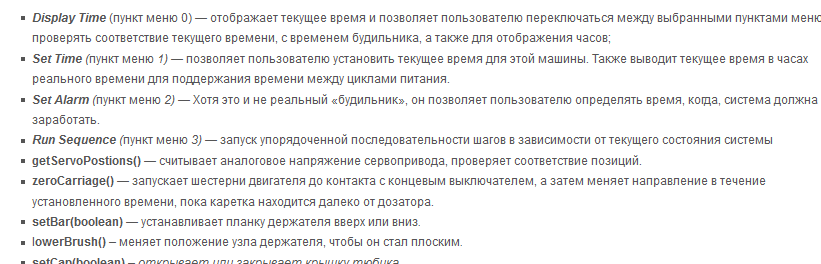
In total, the program has three functions: setting the time, setting the "alarm", and also the function of starting the device.

That's all, after flashing and configuring the device is ready for use.