

Today I decided to continue the topic of home-made mini-drills, mini-drills, mini-cutters, etc.
We are talking about a very simple tool to manufacture, which can easily perform all of the above operations - i.e. engraving, drilling, drilling, cutting plastic, non-ferrous metal sheets - aluminum, brass, bronze up to 1.5 mm thick, etc.
This is really a universal drill, which, with its small dimensions, is very convenient to use, lies well in the hand and is quite capable of performing serious work with plastic, wood, bone, metal and other materials.
For more than 3 years I have been using my mini-grinder in my work and, I confess, it helped me to earn a lot of money when repairing miniature products, such as glasses, various jewelry (polishing the product) and other works where fine processing of parts before soldering or for more durable connection with mini bolts.
So, here is a photo of my mini-drill:
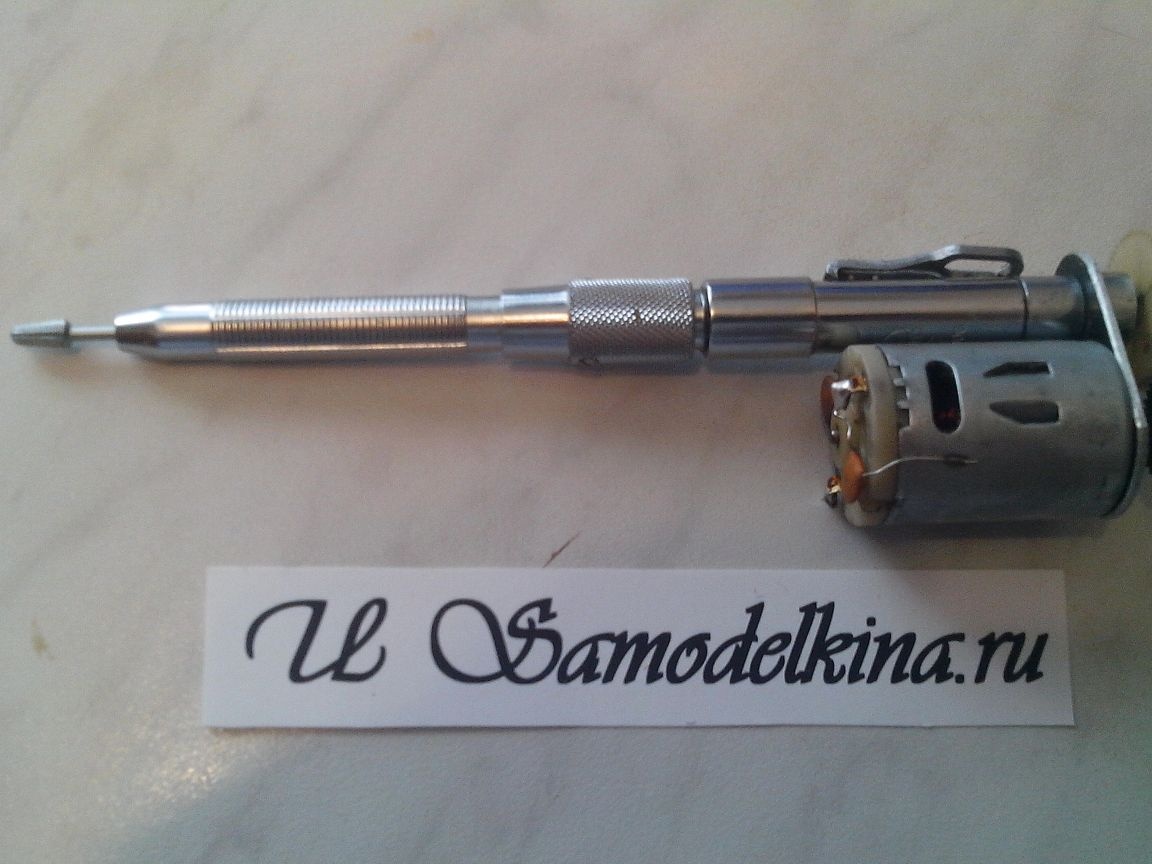
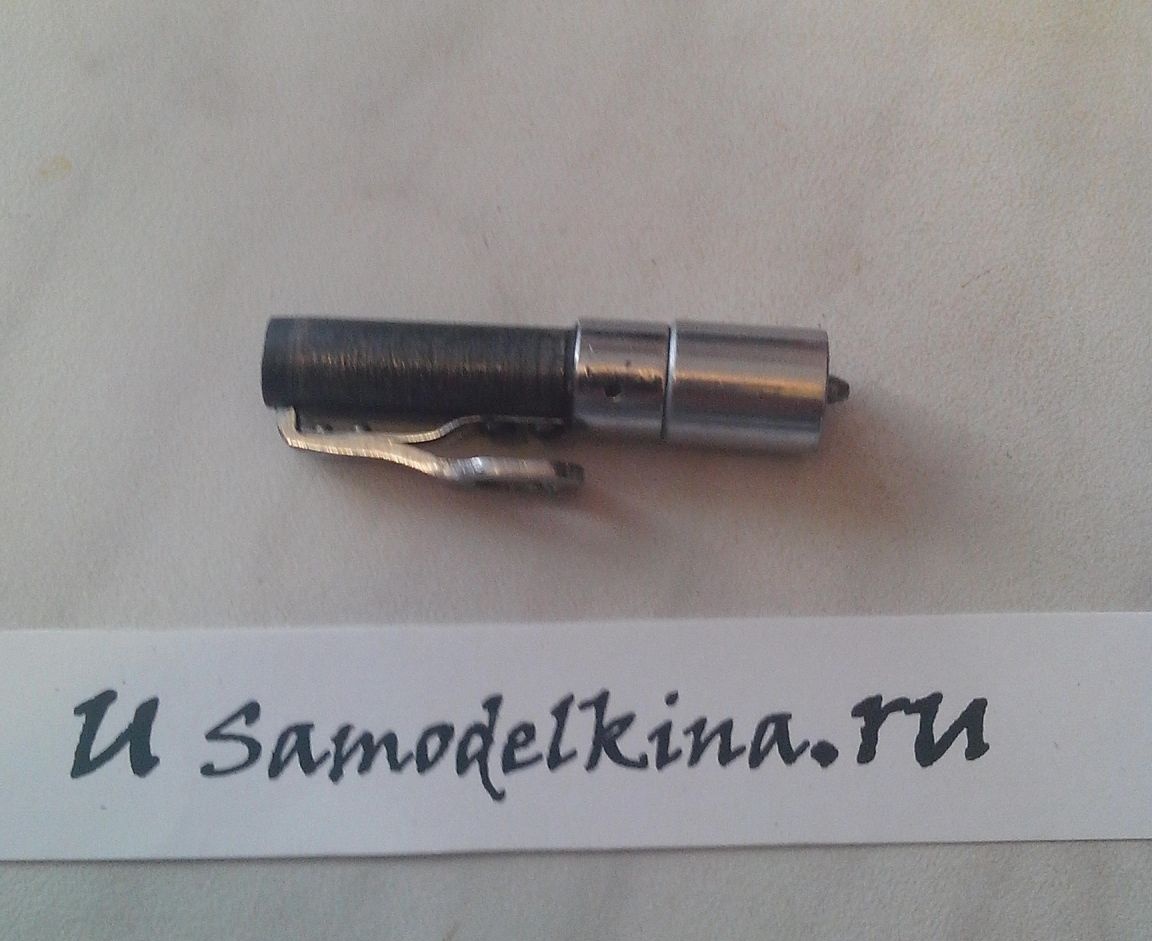
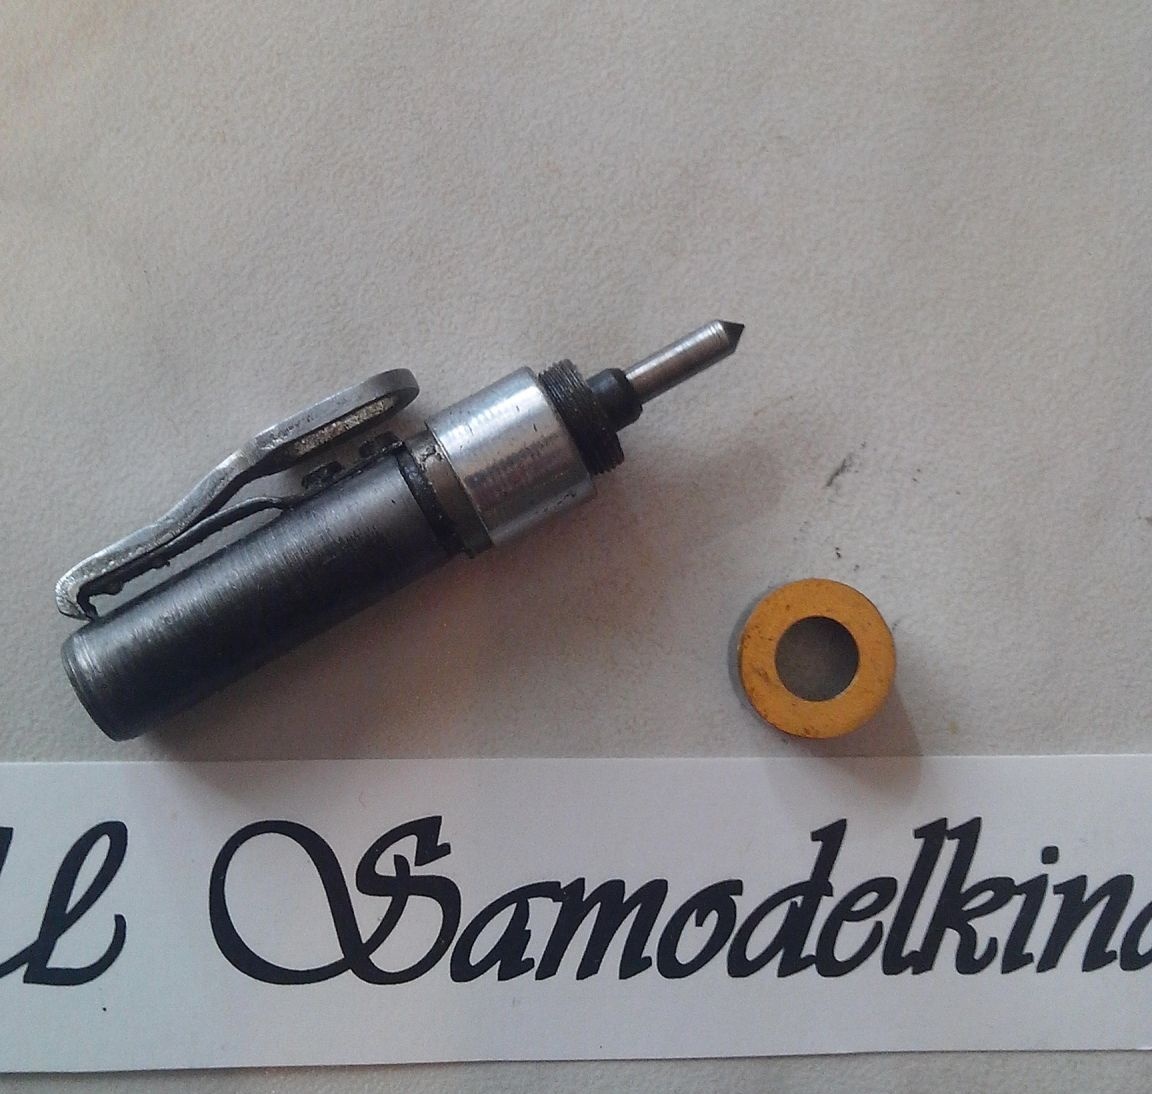
The main element of my mini-drill, as you probably already understood, is the end of the flexible shaft of an old drill (pictured)

Namely, of its final part (in the photo), for this it is necessary to unscrew the spring of the flexible shaft and get this element (in the photo below, which must be cut off to make a nut for fastening to the plate and the shaft for the gear nozzle is released:
and nozzles (a removable holder of dental burs), which are of such modifications:
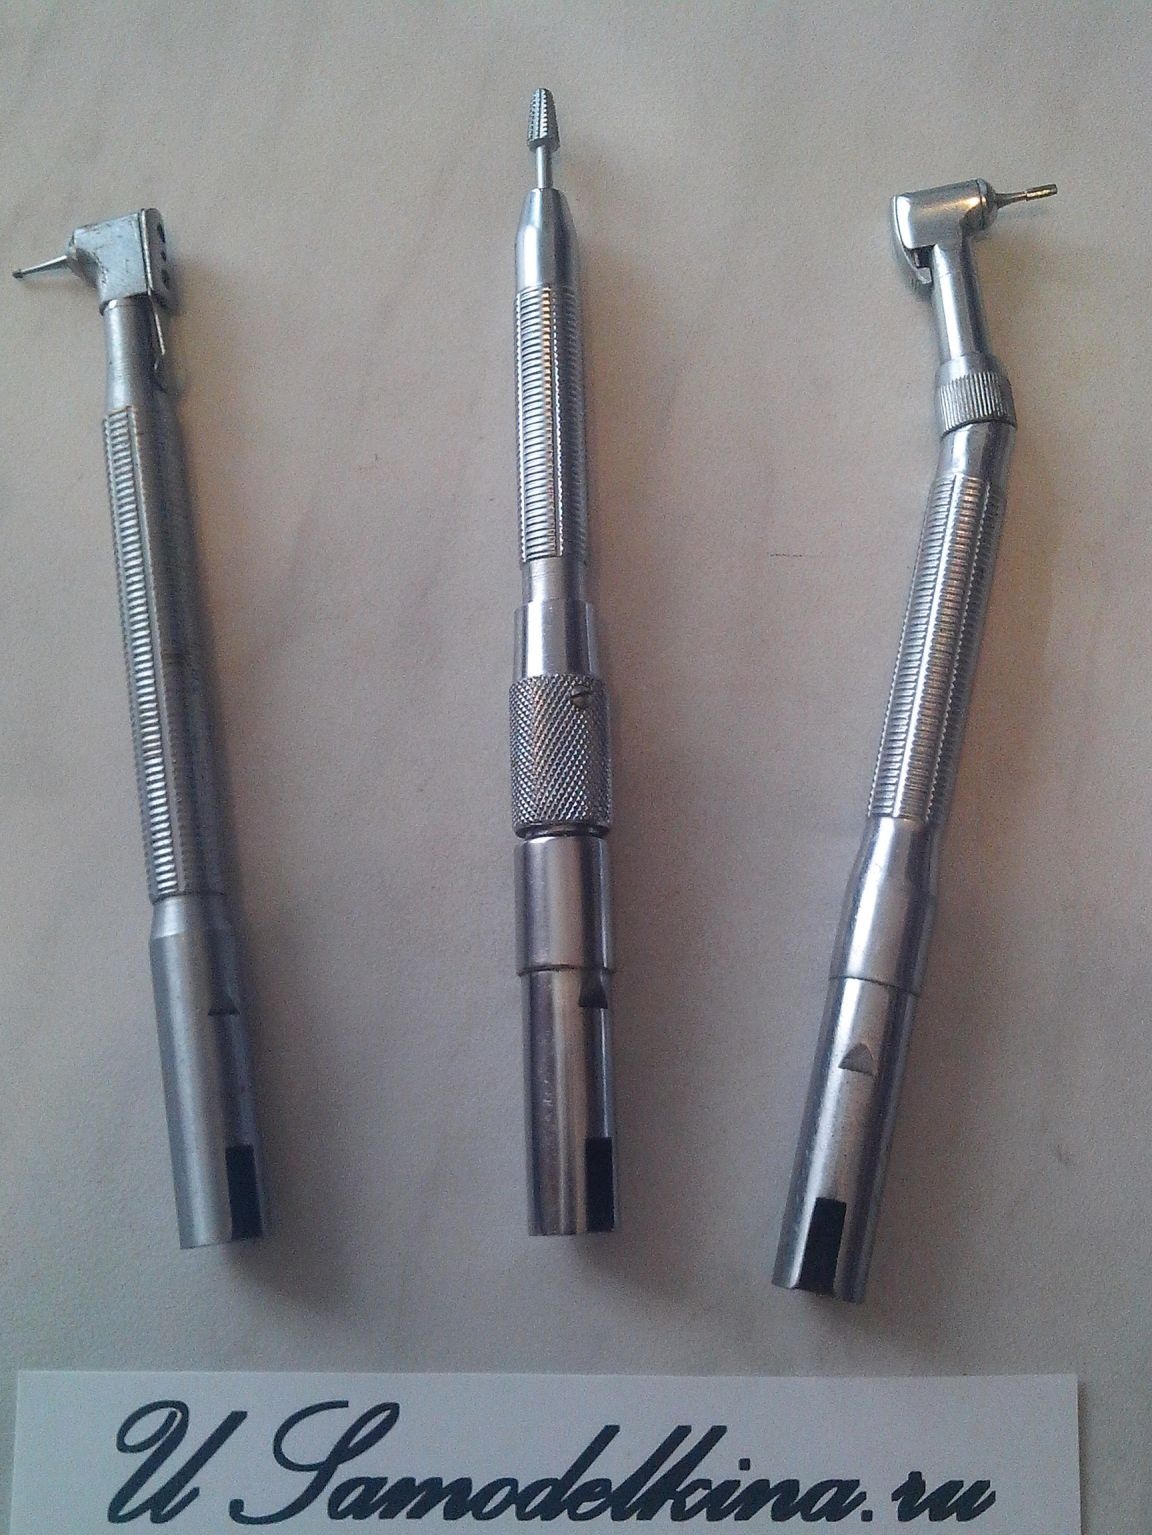
I personally use the direct nozzle most often, although there are problems when repairing small items, when you can get to the place of repair only with a holder with a rectangular bur clamp (fortunately, I have all three nozzle configurations), but I’ll say again that in 90 % of cases, a direct (average in the photo) nozzle is used.
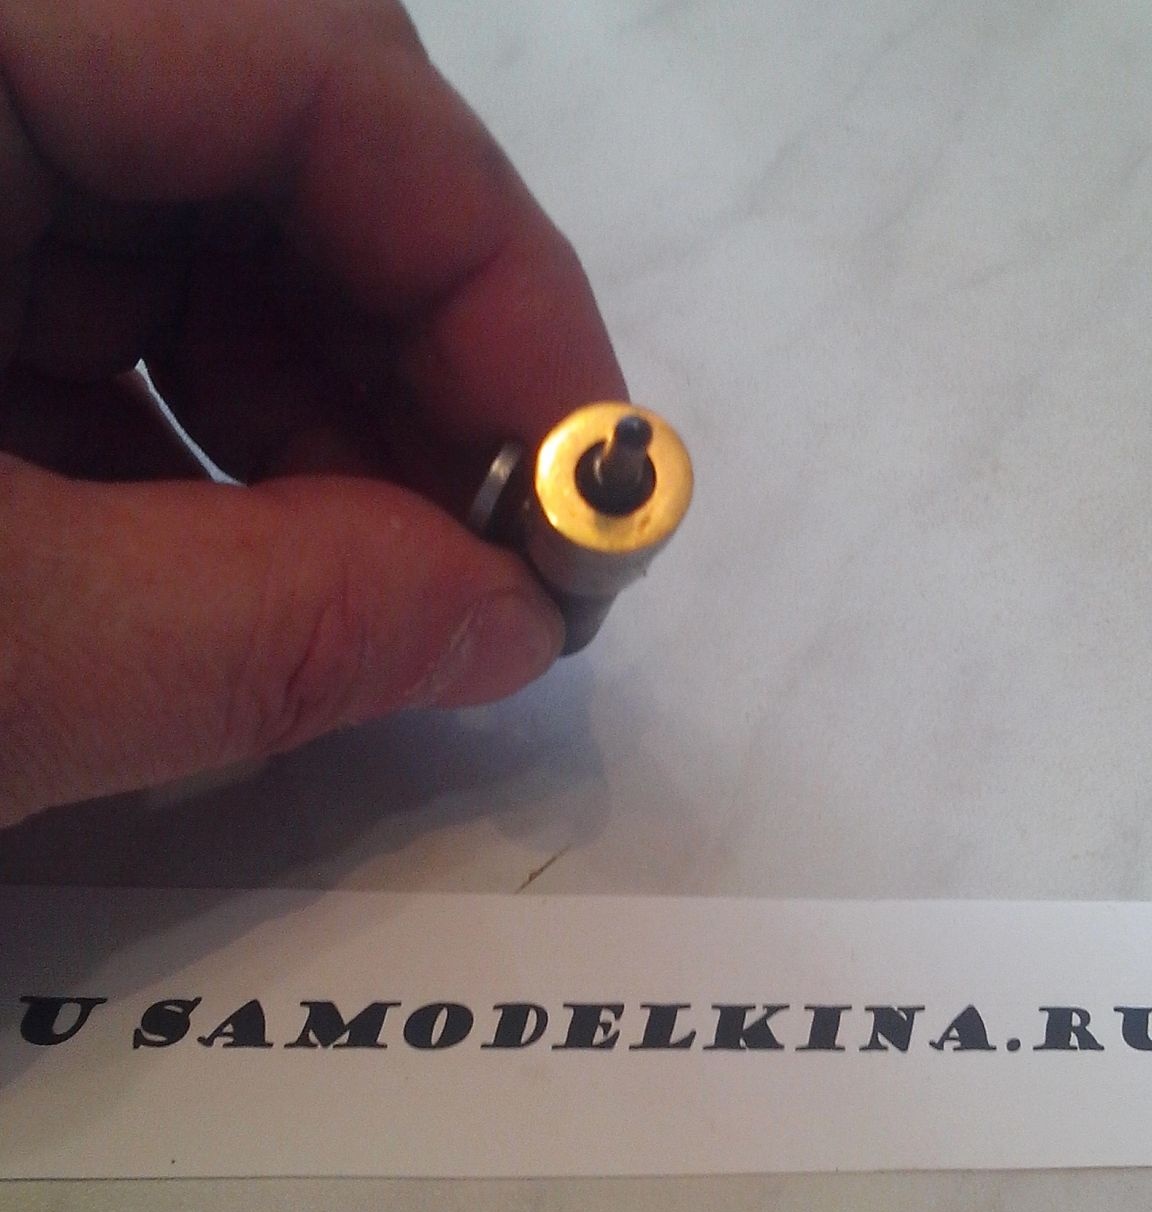
In these nozzles, or tips (as they are also called), burs with a diameter of 2.35 mm are still used. Here they are in the photo:
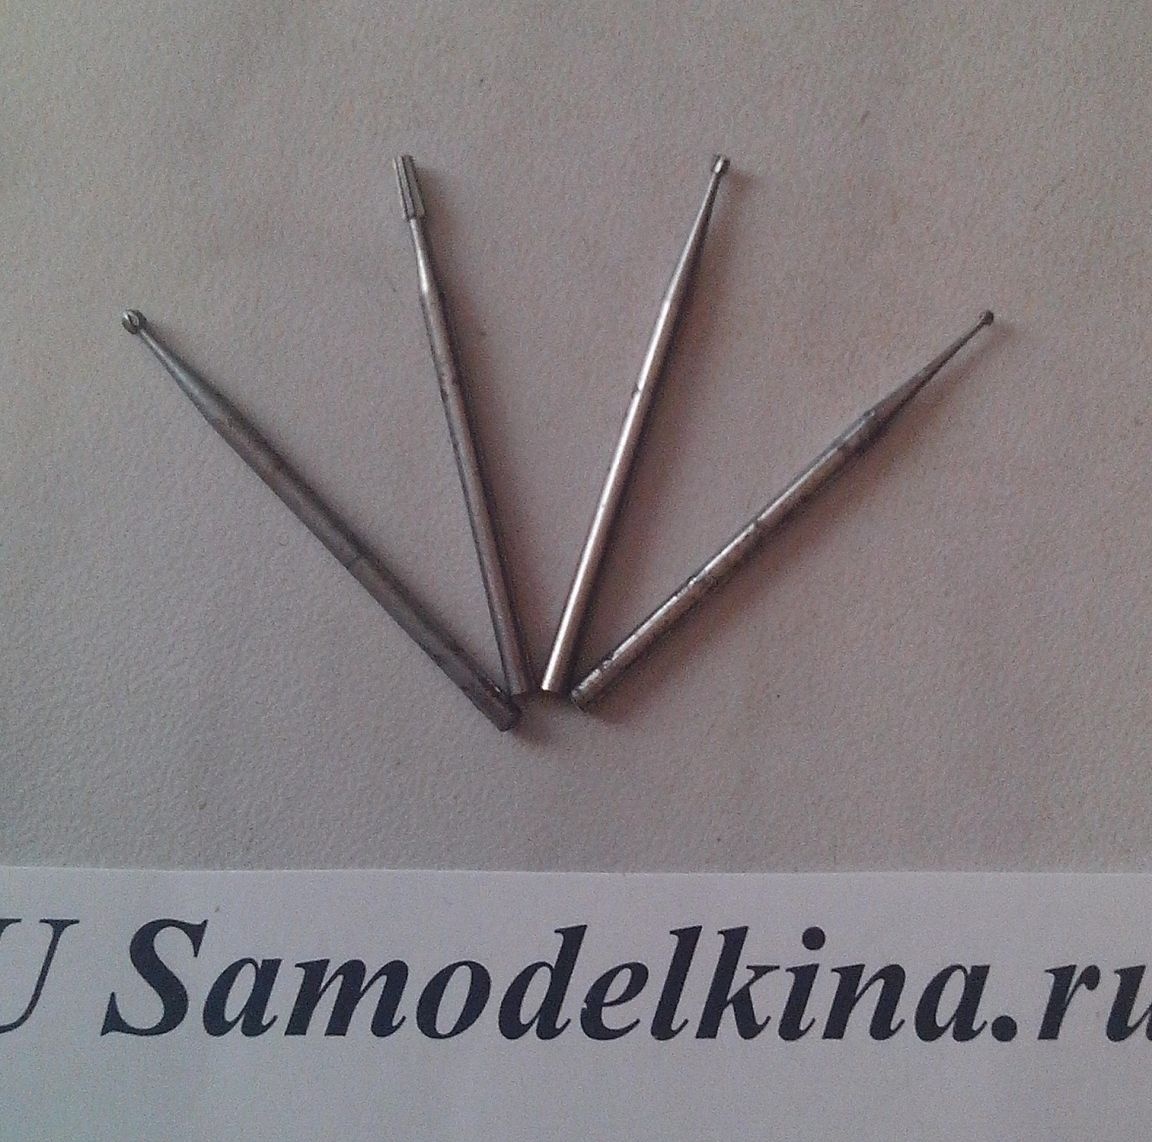
These are burs for a direct nozzle.
For angled tips (nozzles) - burs are shorter and with a slot (groove) at the end. (I did not show you short burs, as they are used very rarely, and functionally they are exactly the same as long ones).
Such a dental tool was used even with our grandfathers.Now these flexible shafts and tips are completely different, pneumatic, with air supply, etc., but there are a lot of people like mine in the homemade product, moreover, they are almost never used, and it is not difficult to get them (in stores medical equipment or from familiar dentists).
I admit honestly, I got them for free when I eliminated a dental office at our enterprise in 2004.
So, after 8 years of storing this "gadget", I decided to make it a tool that is very necessary for any master.
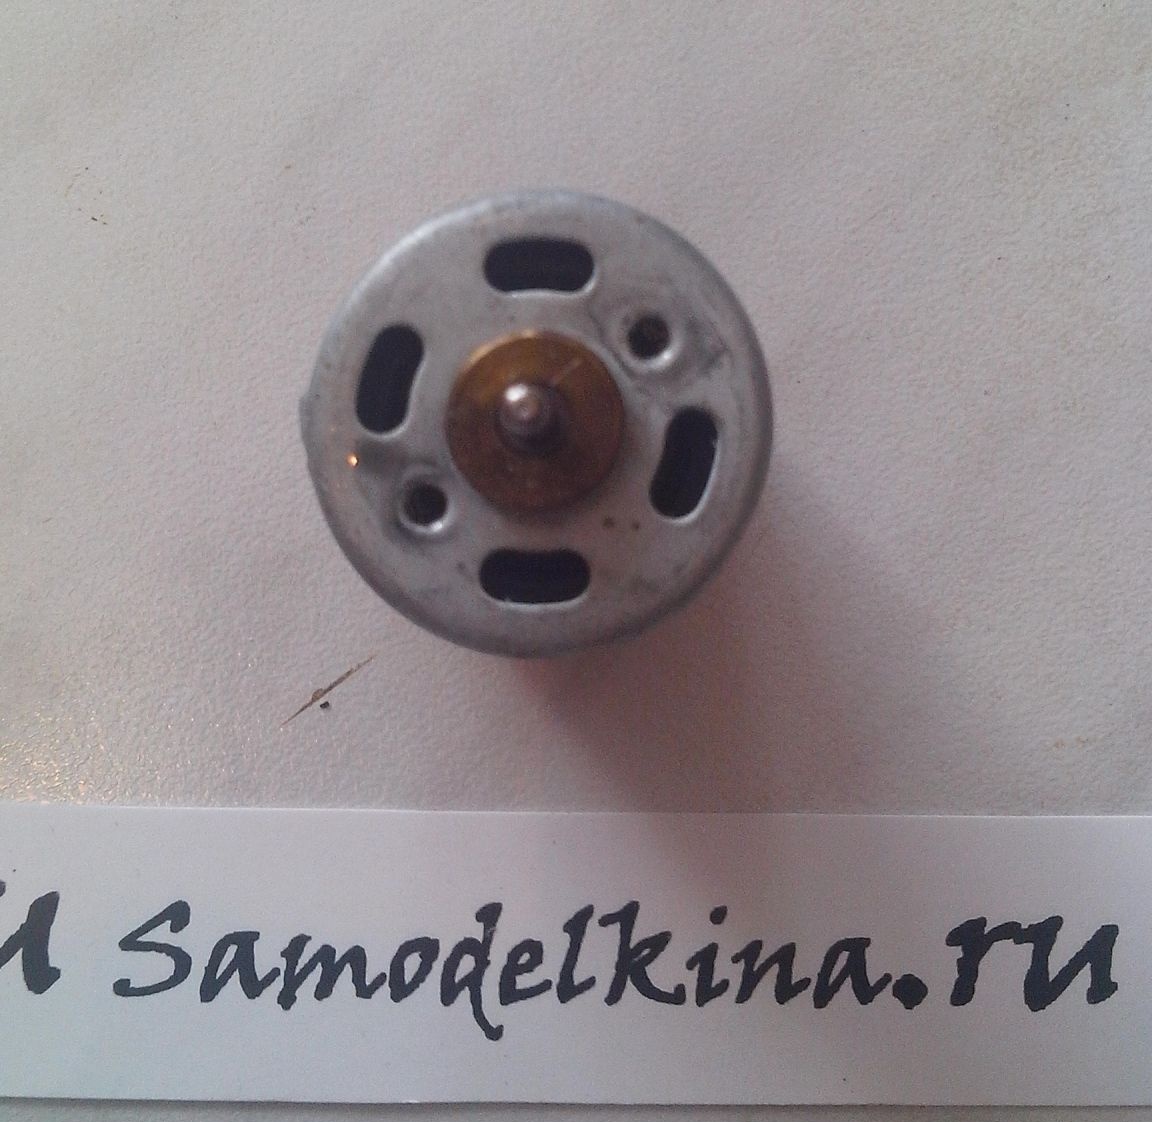
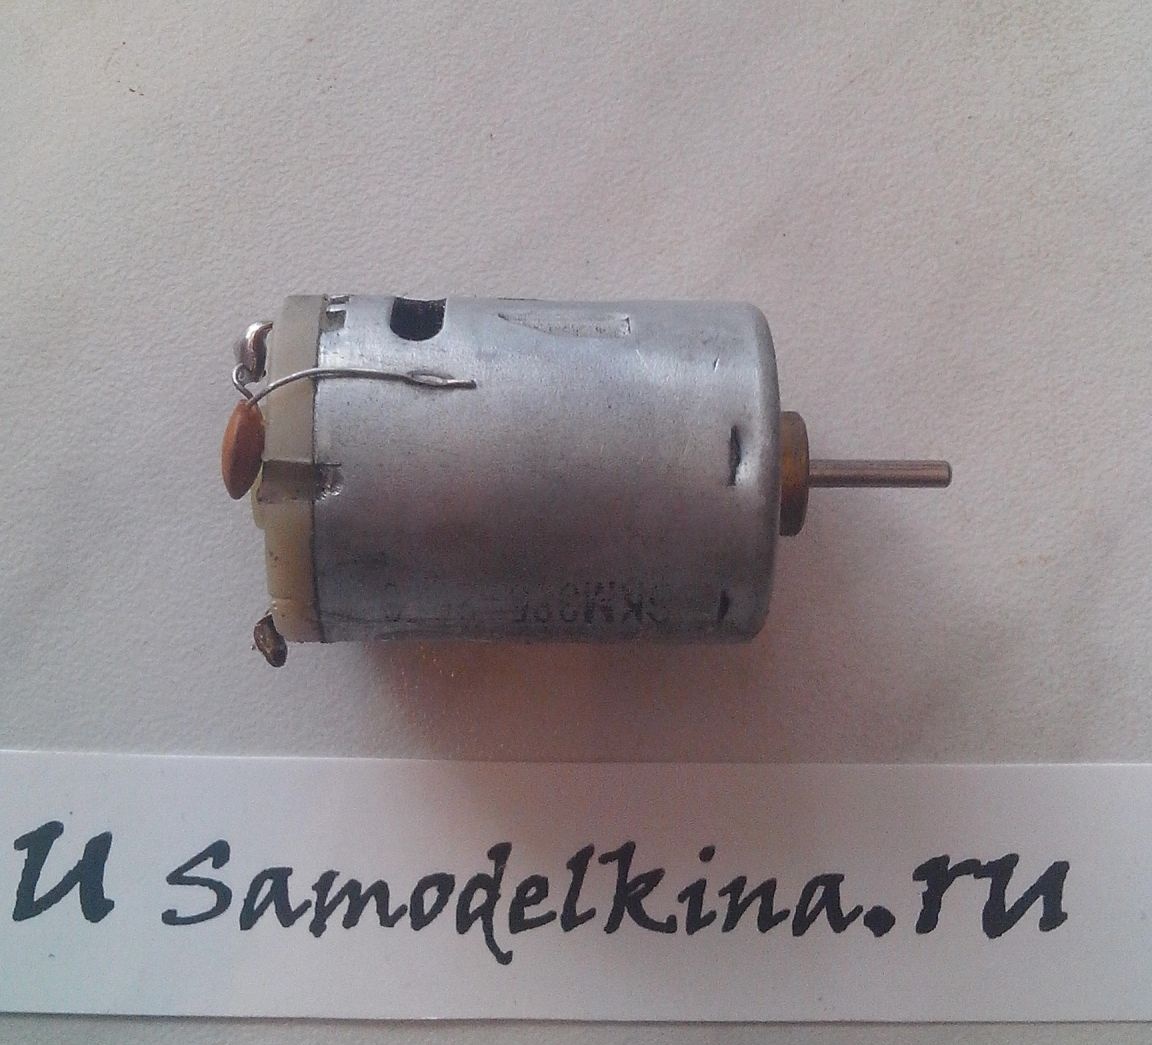
First of all, I decided to compactly attach to the existing end of the flexible shaft of the drill an electric motor of the required power, but small dimensions.
I found such a micromotor in an old, out of order video recorder. (Tip: - very good multi-turn and powerful motors are in hair dryers, which are used, basically, by all females).
Further, it was necessary to reliably, and most simply connect these two mechanisms.
I decided to use ordinary plastic gears, which are used in gearboxes of old clockwork toys, which, thank God, I have in abundance.
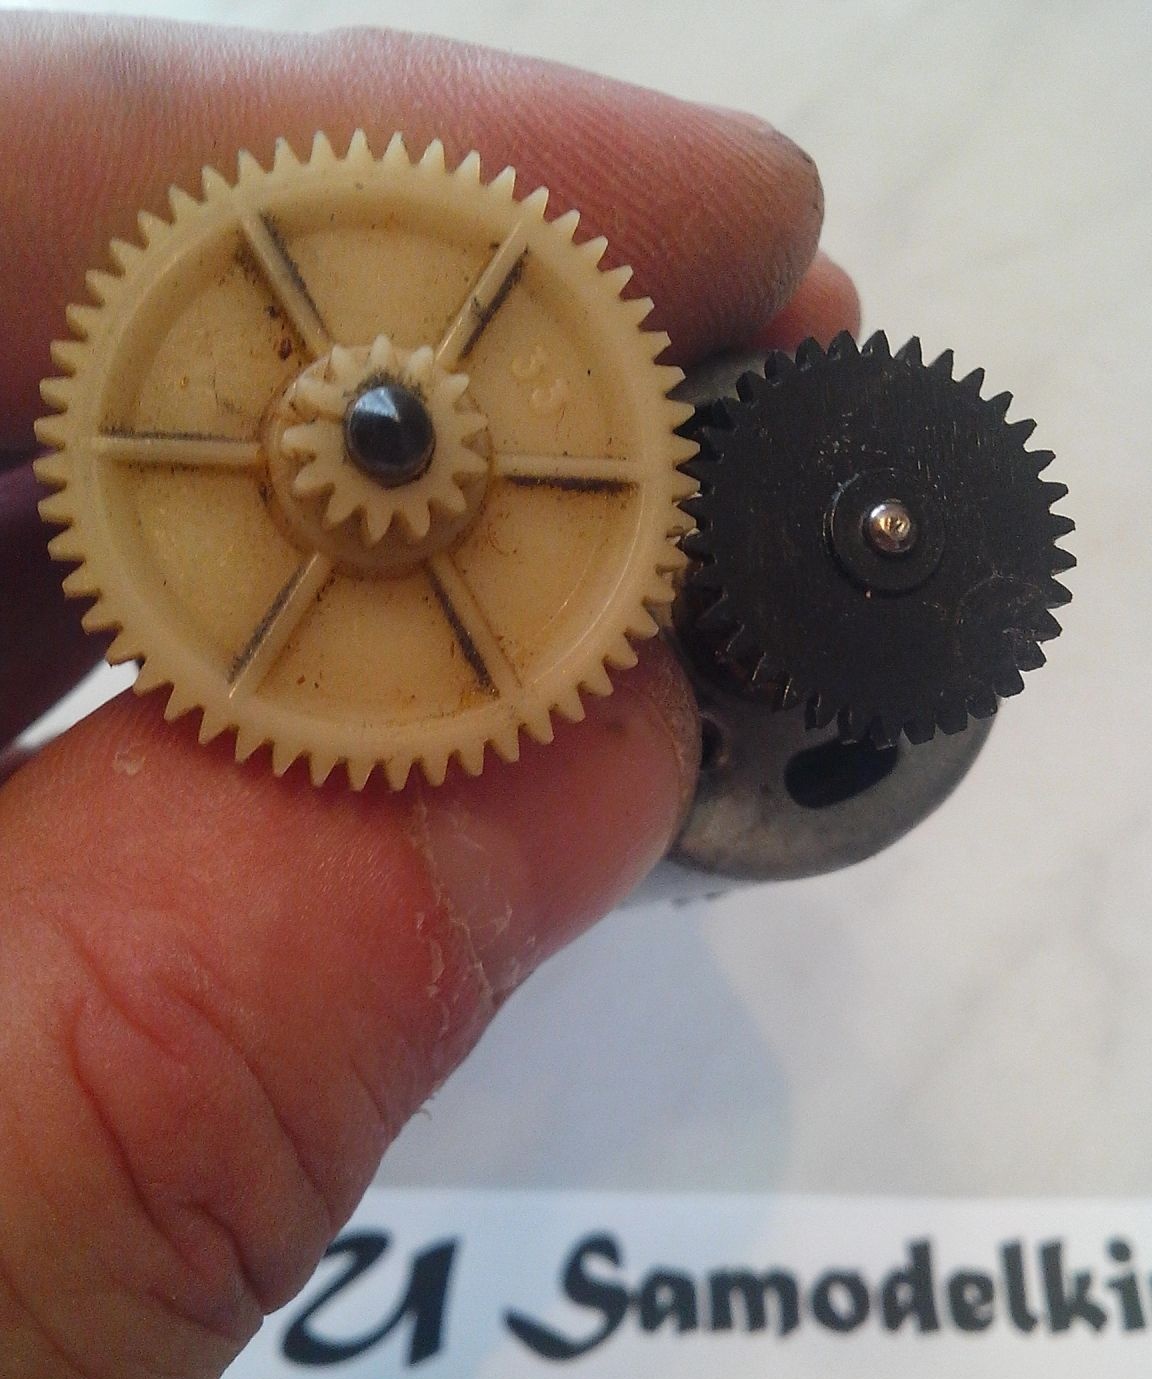
You can use any other gears matching the teeth and diameter, based on your capabilities, but I strongly advise you that the gear on the electric motor should be smaller in diameter than at the end of the flexible shaft of the drill, so you will increase the power of your mini-drill.
Of course, picking up the gears for the shaft diameters that I have (the end of the flexible shaft of the drill and the electric motor) is ideally impossible, but the issue was solved very simply. I drilled the landing holes of the gears for the required diameters (0.1-0.2 mm less than the diameter of the shafts) and I put them on the shaft of the drill and the electric motor.
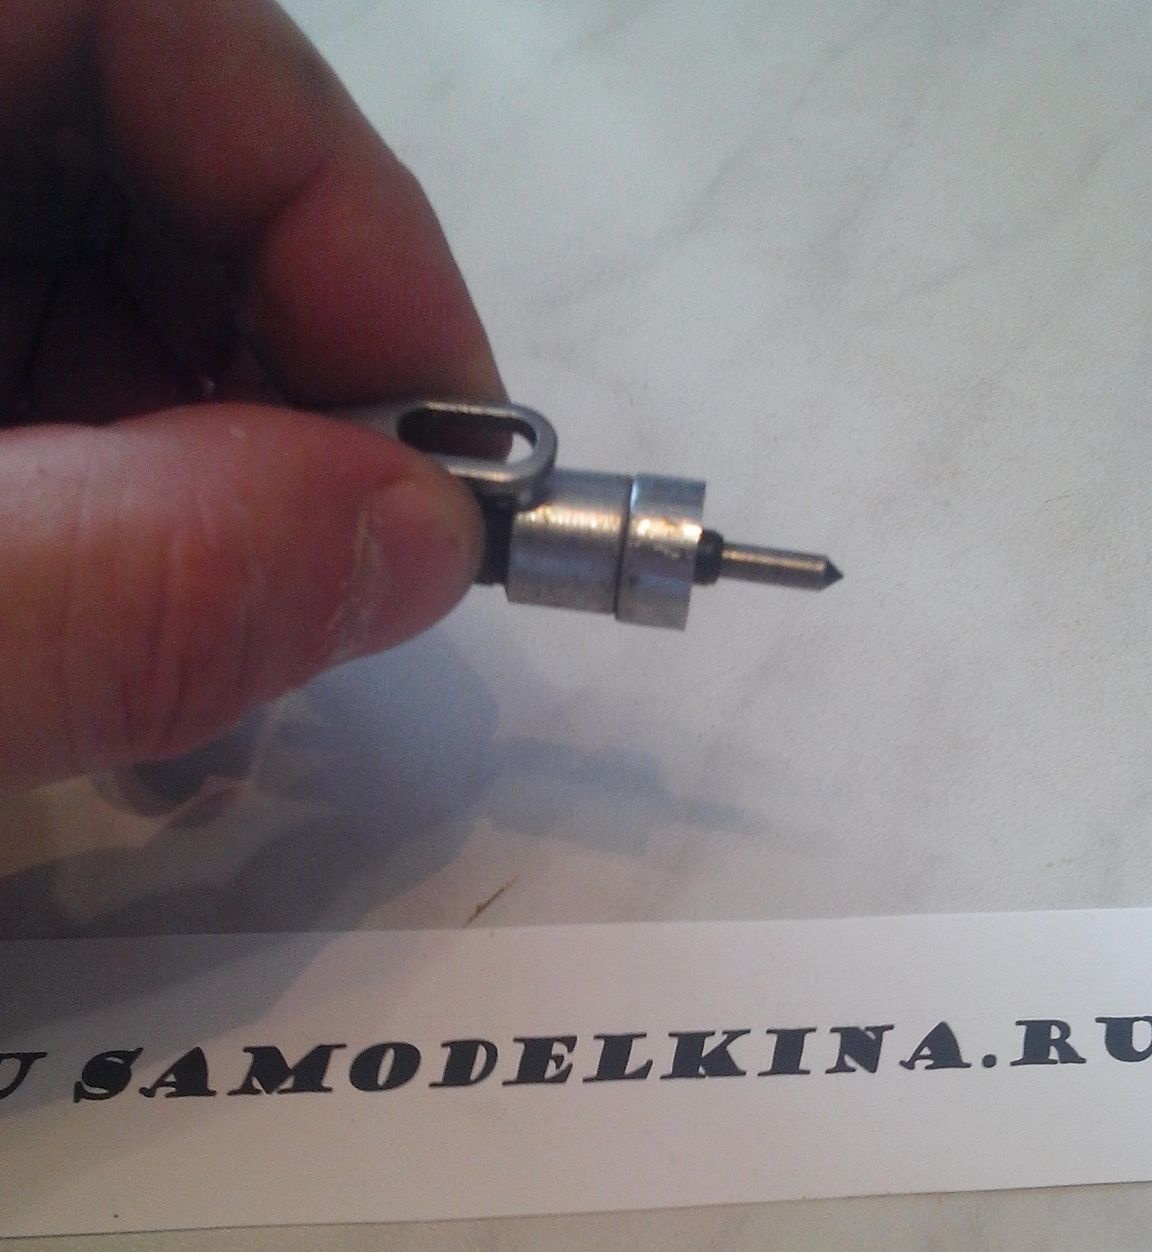
(in the photo I hold the nozzle and the electric motor in my hands, then they will be connected by a mounting plate).
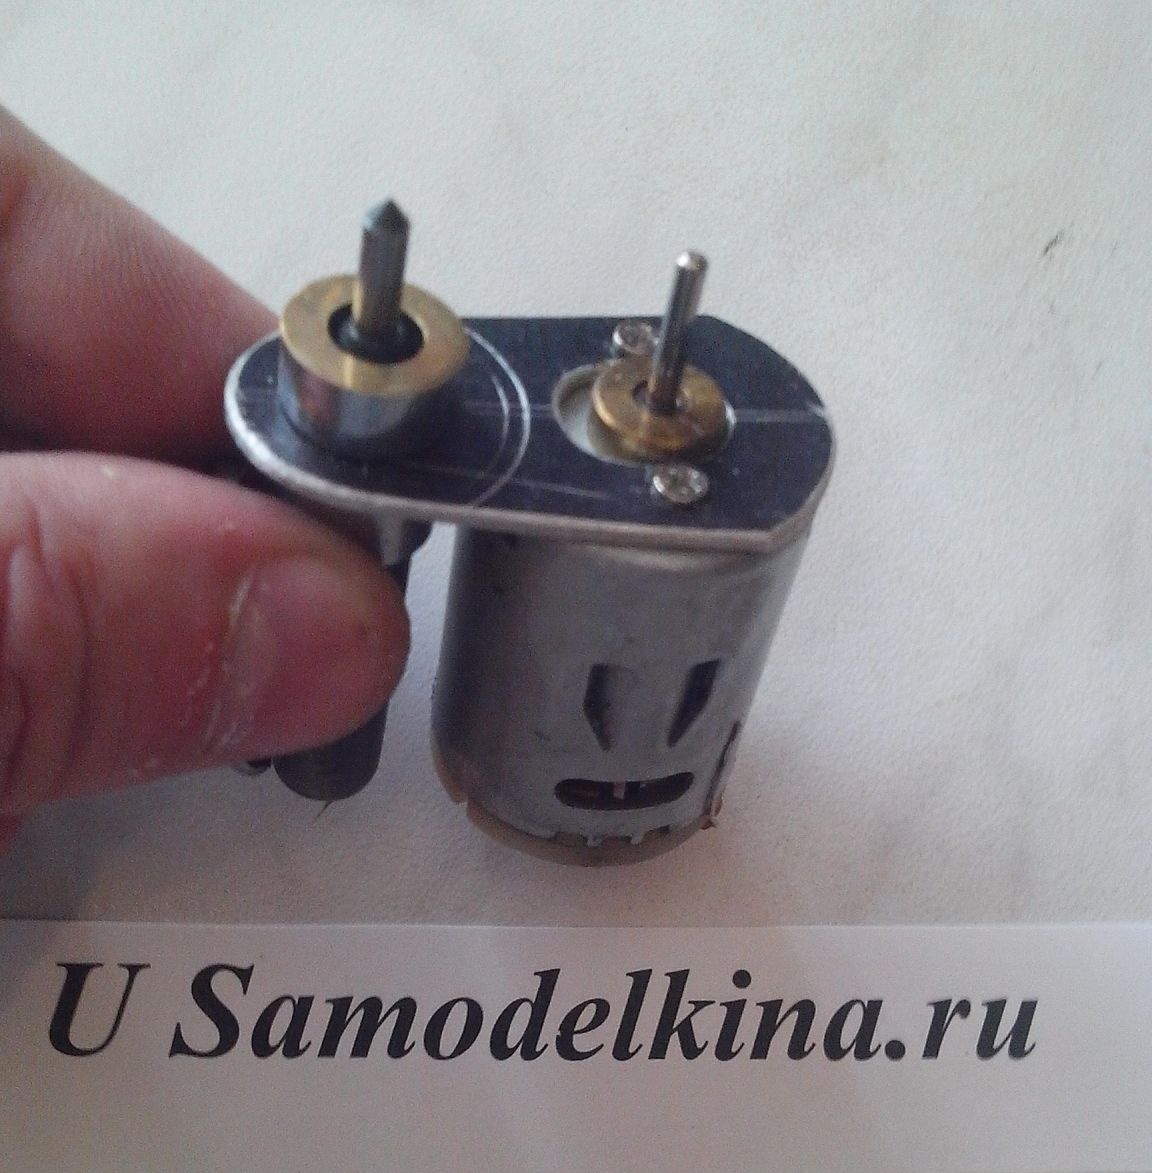
It remains to make a plate for attaching our electric motor to the end of the flexible shaft of the drill.
To make this mount, I used a 2mm thick aluminum plate.
It can be of such a configuration, although this is not necessary, it all depends on your imagination:
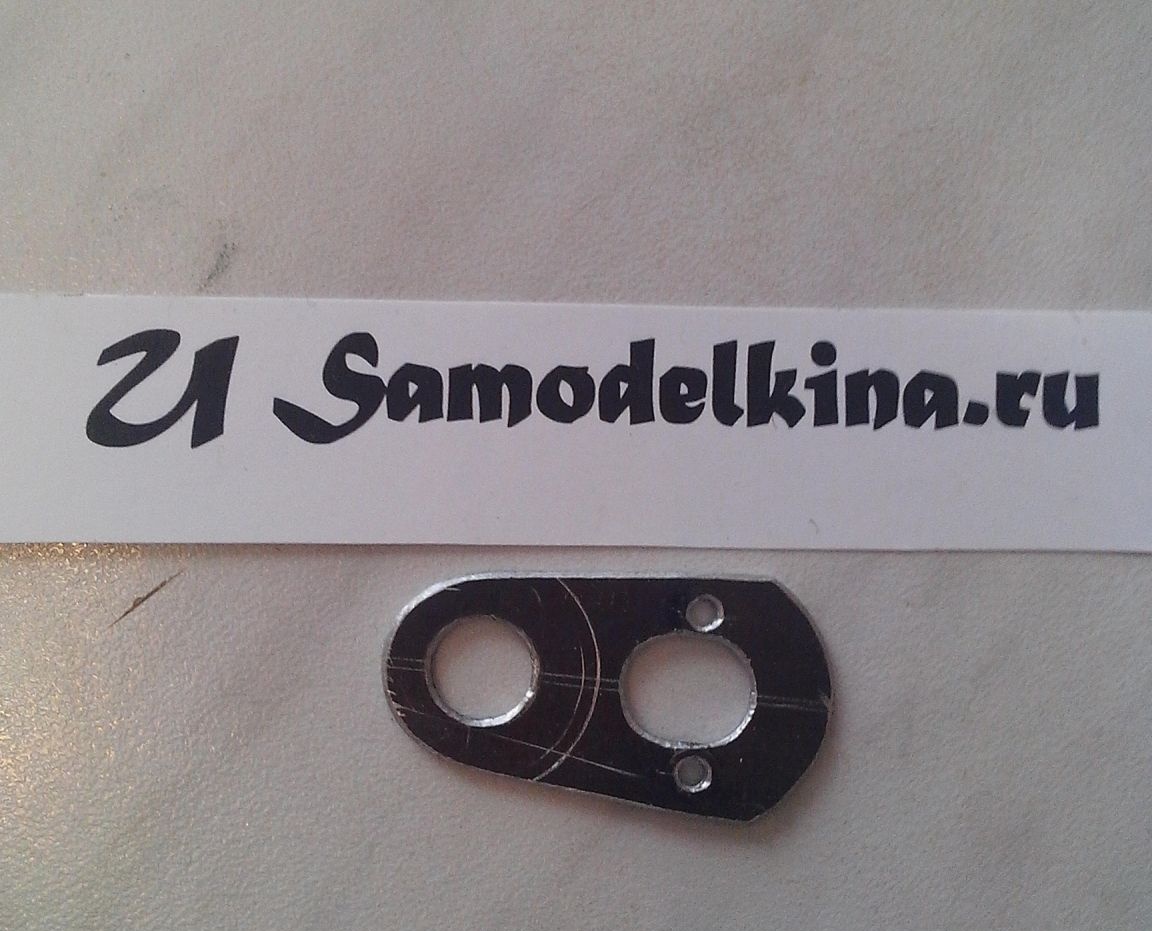
The main thing, and it is very important, is to precisely drill holes in this plate.
The distance between the centers of the holes in the plate should exactly match the distance between the centers of the two gears put on the shafts and combined with each other to rotate the gears (sorry, abstruse, but I can’t explain easier). Like this:
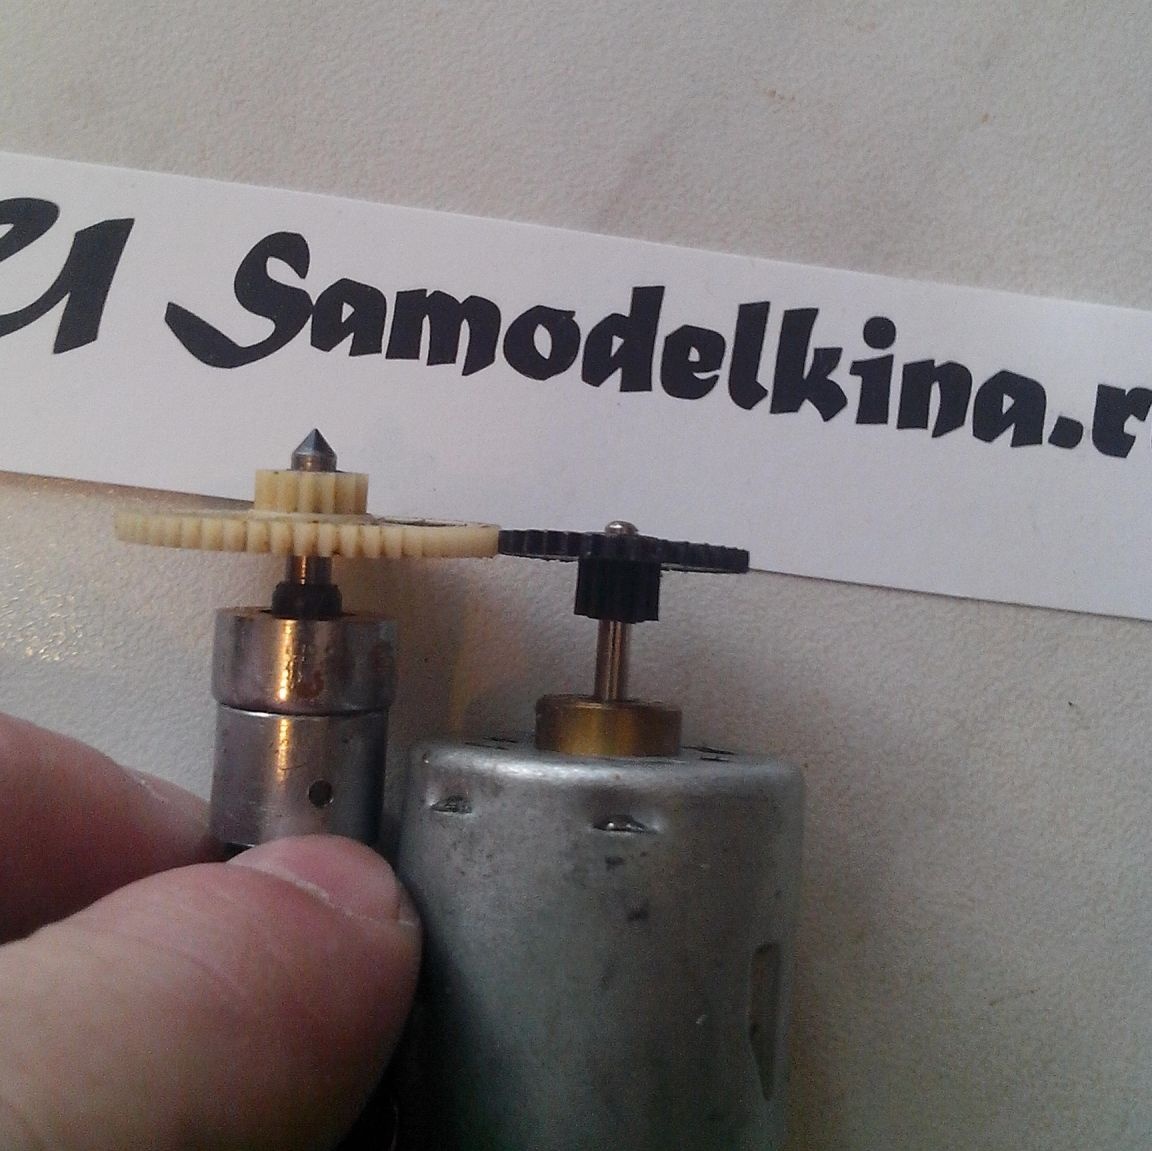
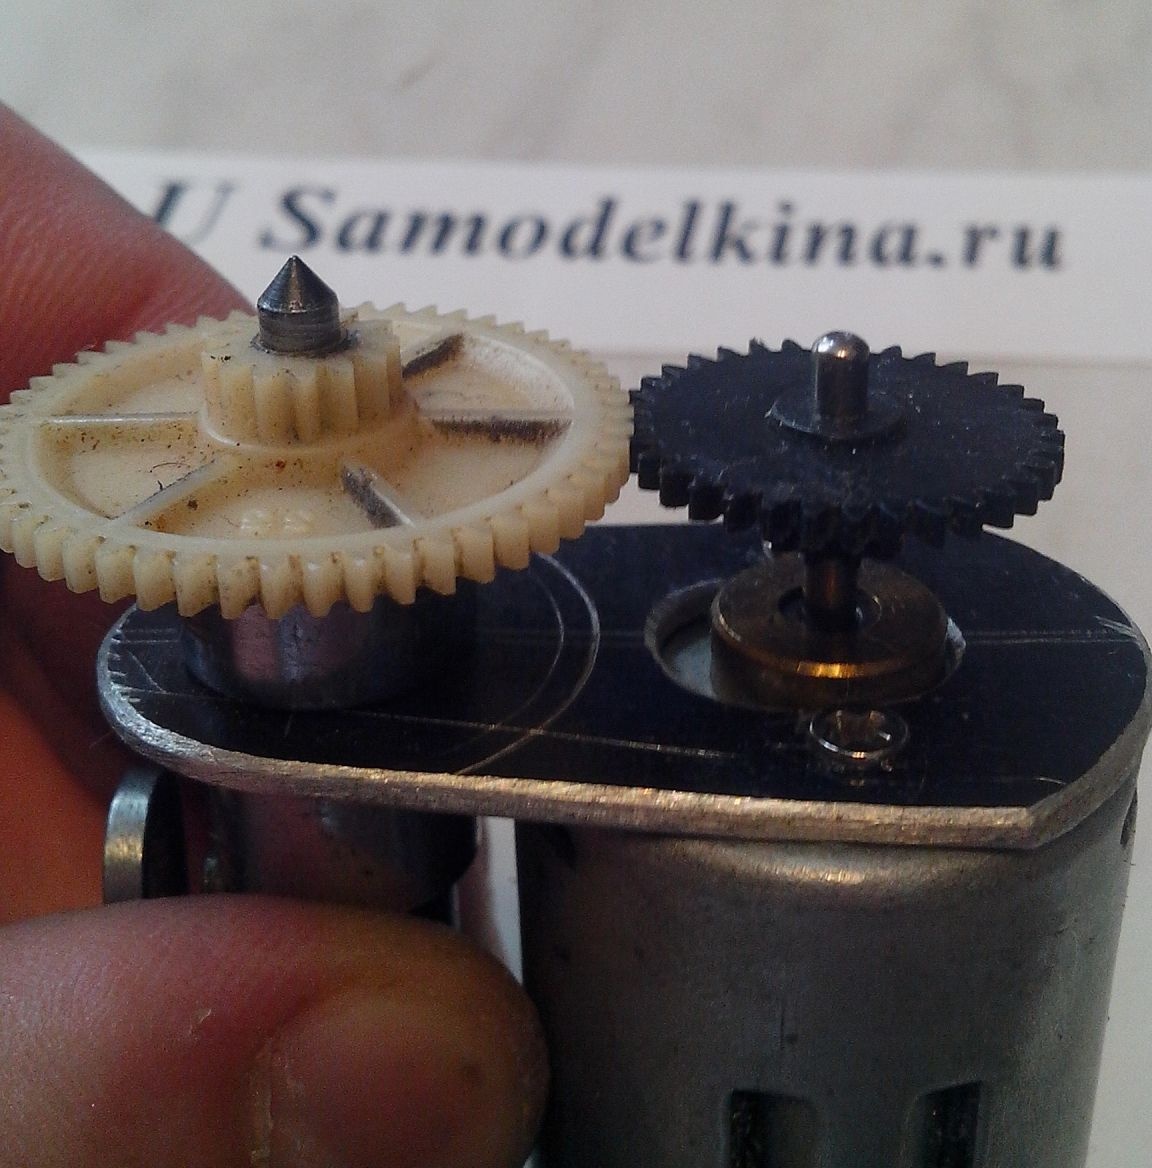
It is necessary that when the electric motor rotates, the gears easily rotate each other without jamming and without slipping through the teeth.
Although here you can make a mistake by 1-1.5 mm, which can be fixed by increasing the holes for mounting the electric motor in one direction or another (making it in the form of an ellipse).
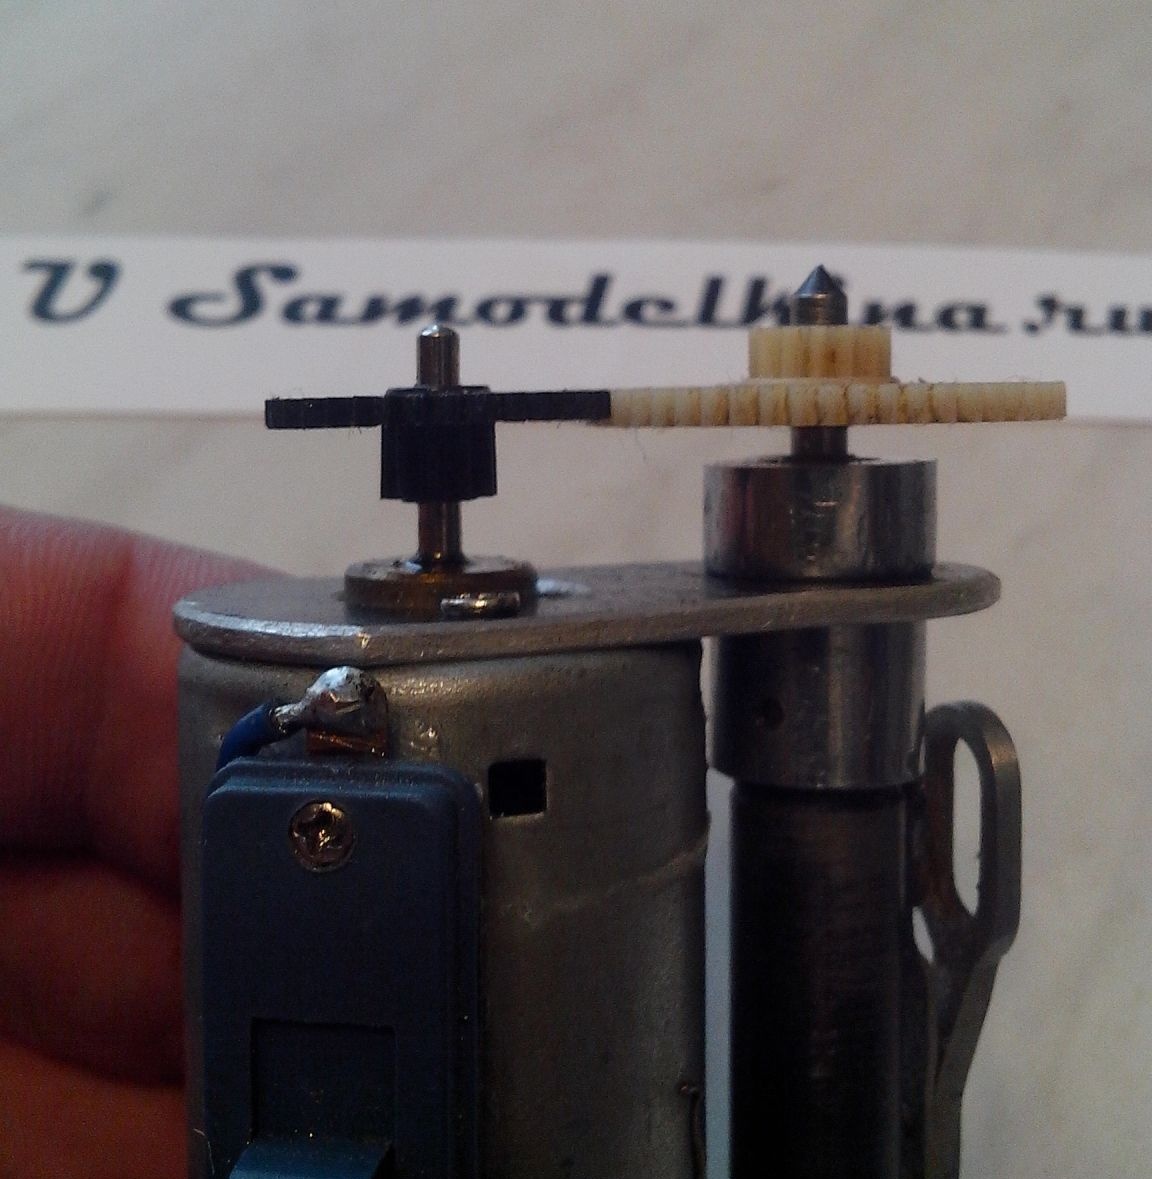
After the electric motor is fully fixed and the flexible shaft of the drill ends on our mounting plate, there should be a small gap (0.1-0.2 mm) between the teeth of the gears for easy rotation.
And it is also very important that the gears had no horizontal runout during rotation, i.e. the holes in them must be drilled strictly perpendicularly.
For inexperienced craftsmen - ideally at right angles to the surface of the gear itself.
Like this:
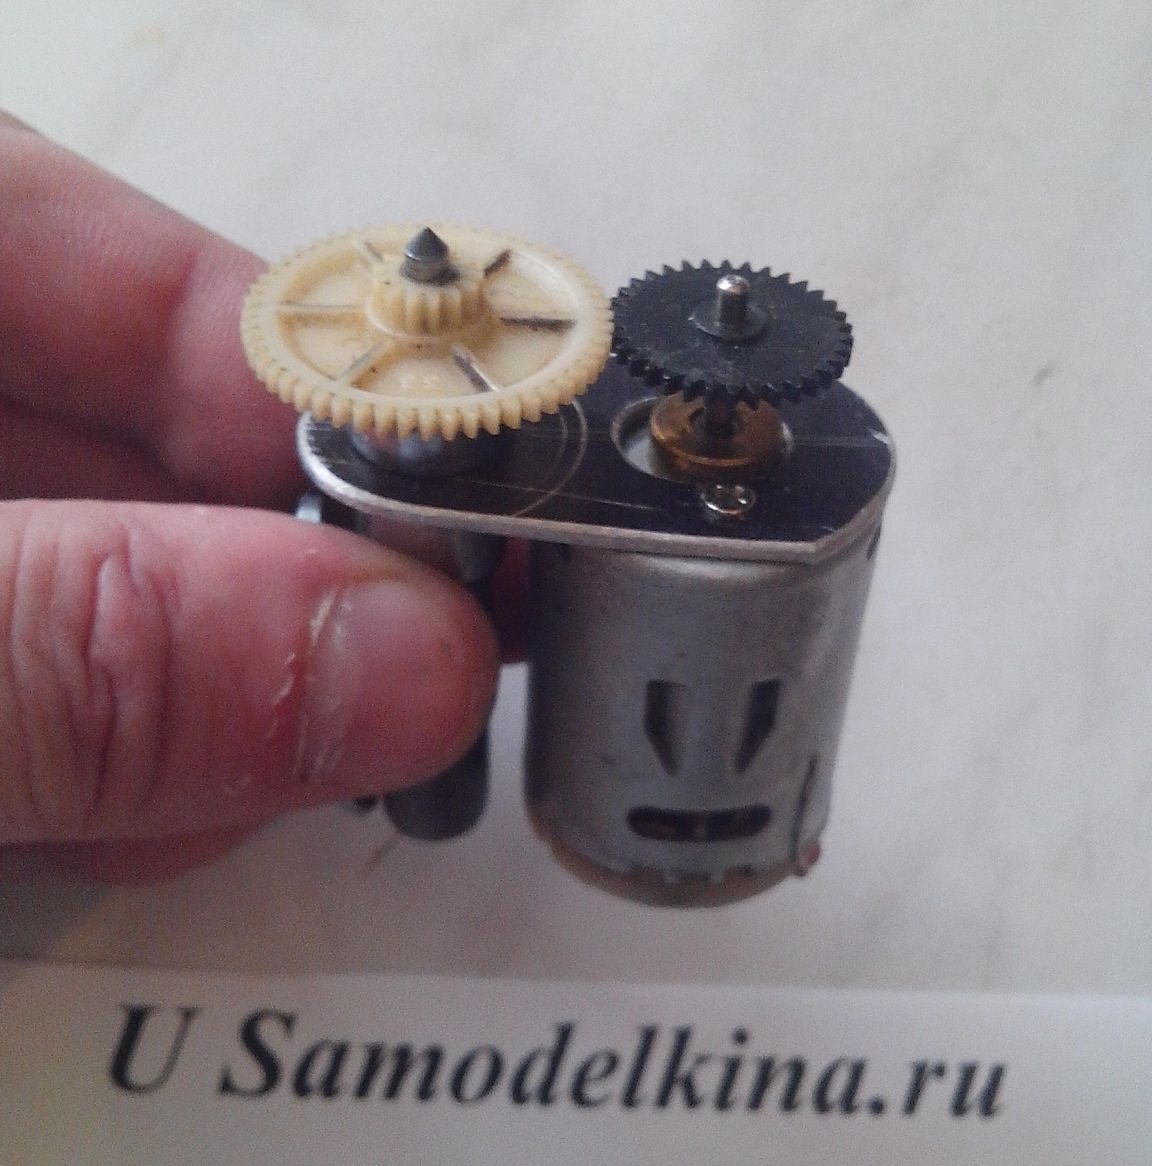
Then everything is simple:
We fasten our end of the flexible shaft of the drill to the mounting plate:

We fasten the electric motor with bolts to our mounting plate:
We put on, our gears, and we get a ready-made power unit for DIY with the name of a mini-drill.

We connect our nozzle for burs with a finished power unit and connect the power to the micromotor.

As you can see, I stuck on the motor, a microswitch from some hairdryer, and a power connector, which is very convenient.


We connect the power and work.
P.S.A significant drawback of my mini-drill, until a certain point, was that the nozzles can clamp only tooth burs or drills with a diameter of 2.35 mm, and if it was necessary to clamp, for example, a drill of a smaller or larger diameter, it was impossible to use.
But, we, friends, will always find a way out.
Here is what I did:
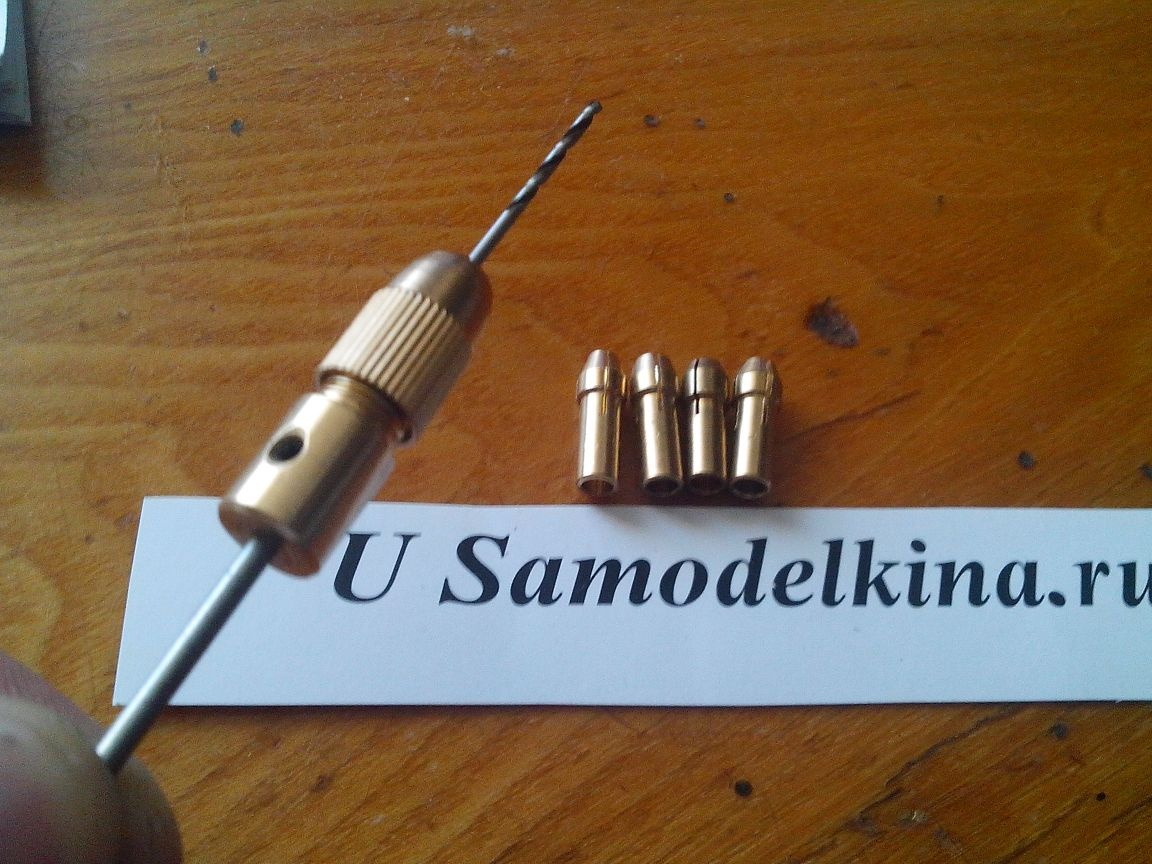
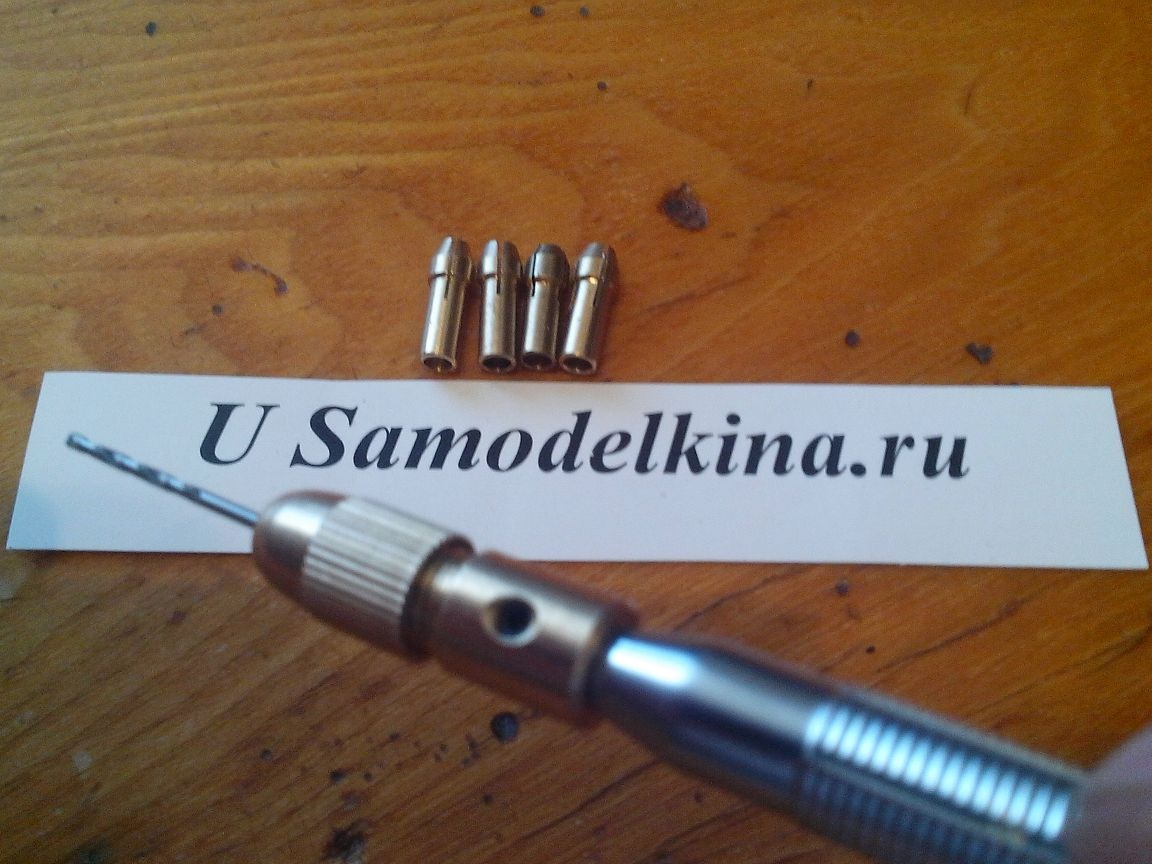
I bought on Ali Express this one with an internal diameter of landing on the axis (this is very important) 2.3 mm.
Next, I took a branded pine forest, broke off his head, and planted on it a minipatron purchased on Ali Express.
Here's what happened:
Demonstration of work:
It works perfectly, there is practically no beating.
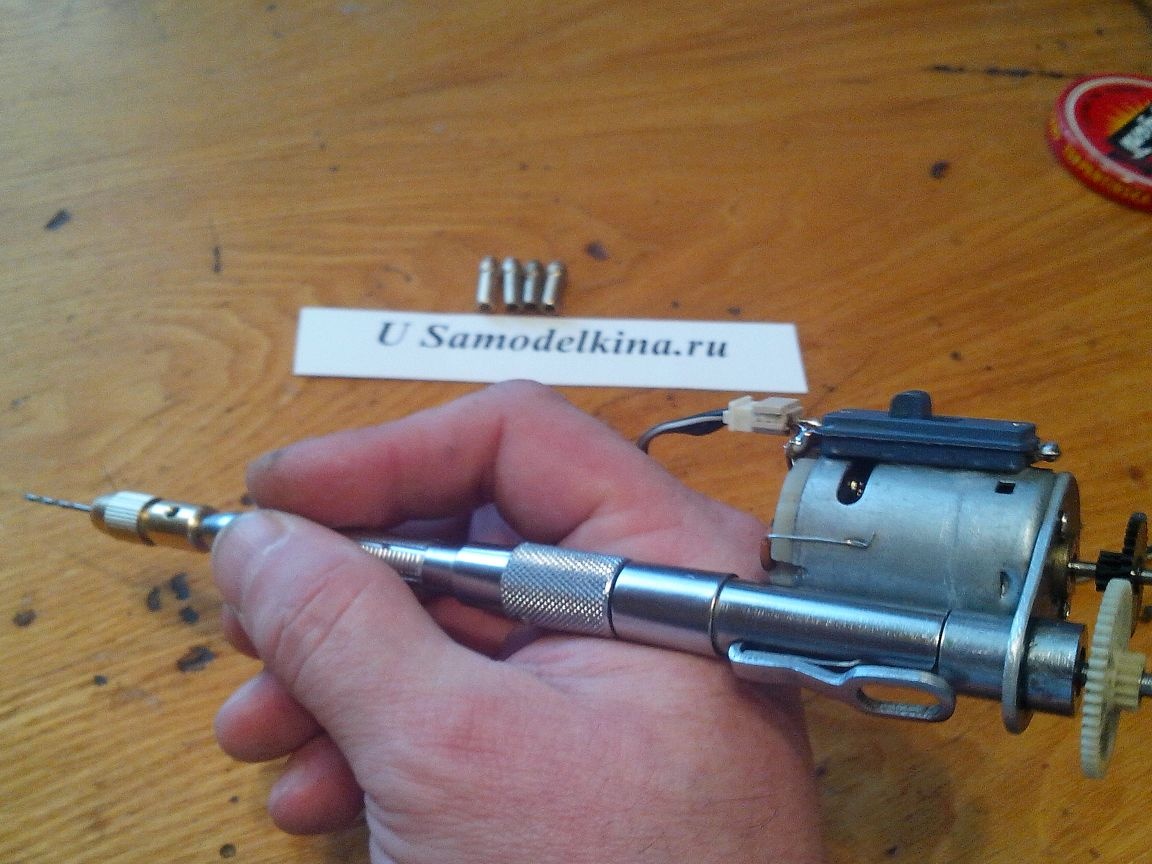
Now I can drill holes from 1.0 to 3.0 mm with my mini-drill and am very pleased with what I wish for you.
Respectfully,
Master, Michael - MNS1961.