
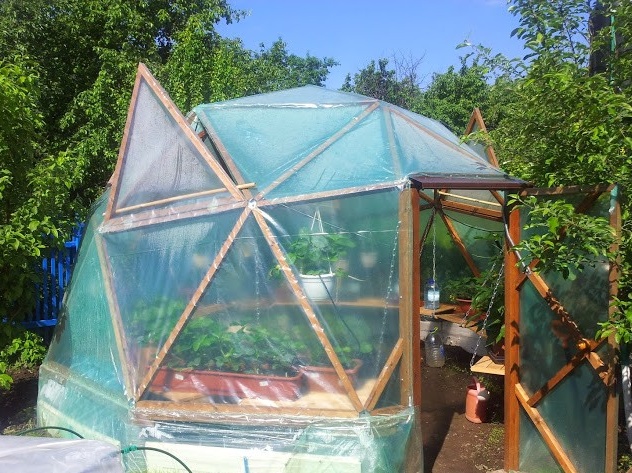
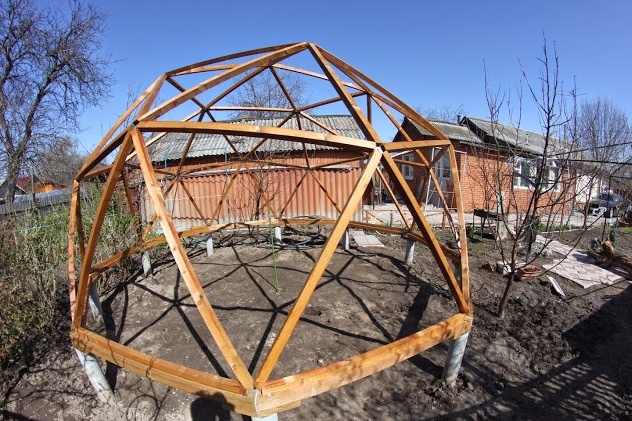
This greenhouse, despite the apparent complexity of the design, was assembled in a very short time, about one week. Dome geothermal has a diameter of 5 meters. Before its construction, the author made a model of the greenhouse from aluminum tubes, which helped him to understand the structure in more detail and accurately and make it as easy as possible for assembly.
Materials and tools that the author used to build this greenhouse:
1) asbestos-cement pipes
2) circular saw
3) timber 10 by 5 cm
4) plastic film
5) polycarbonate
6) metal plates
7) bolts 8 by 10 mm
8) timber 5 by 4 cm
9) screwdriver
Let's consider in more detail the main stages of the construction of this greenhouse.
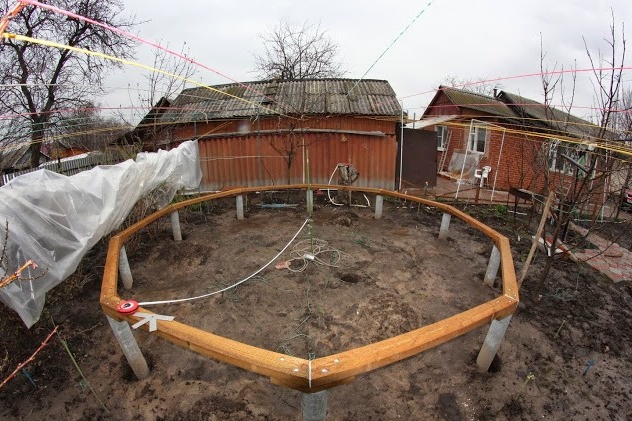
To begin with, a place was chosen where the future greenhouse will be located. Then the author proceeded to mark the axles for the supports of asbestos-cement pipes. The work was greatly hindered by a high level of meltwater, since construction greenhouses were started in early spring.
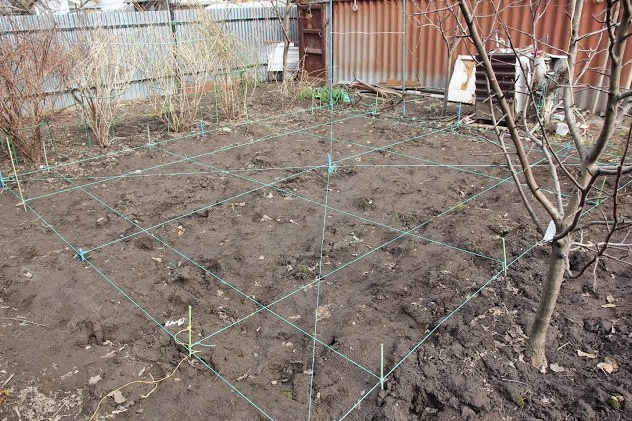
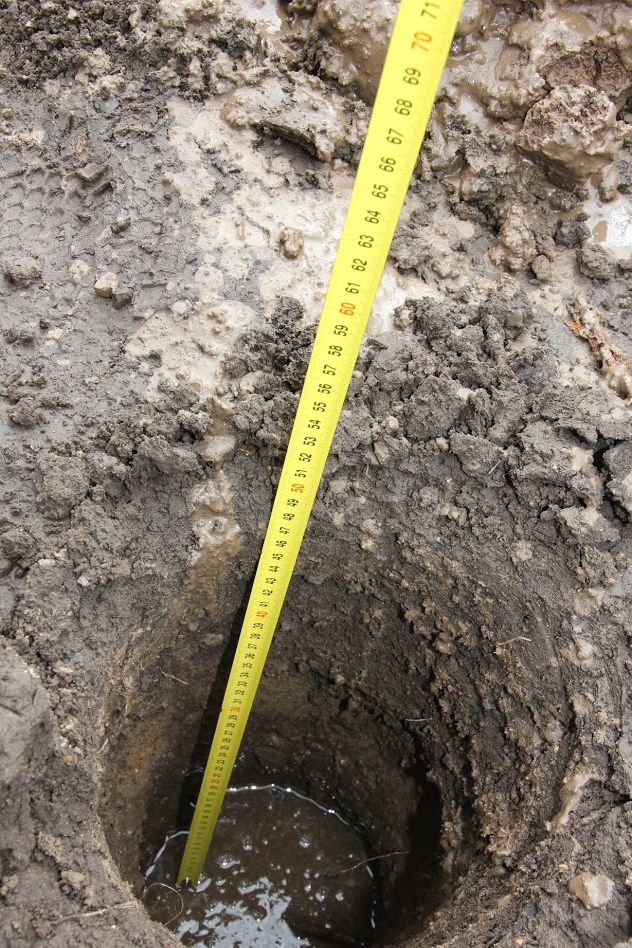
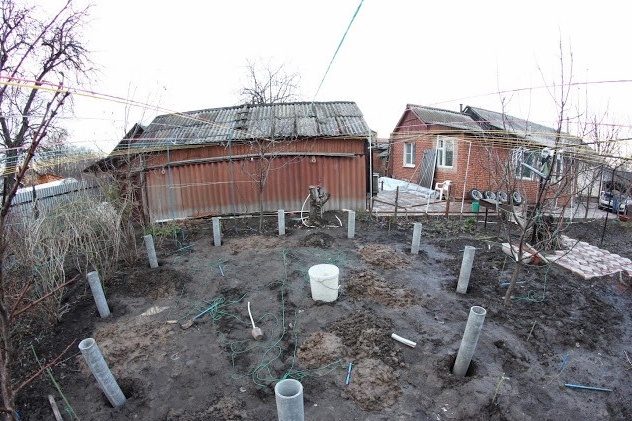
However, this did not stop the author and he proceeded to the next stage of construction. Of the asbestos-cement pipes, 10 supports, each 165 cm long, were cut. At first, the author tried to use the universal disc of the grinder for cutting supports, however, it was quite difficult and took about 20 minutes per support. Therefore, looking for information on the Internet, a thick disk was purchased with slots and a rough surface, with which the supports were cut in a minute. After cutting the supports, the author began to prepare pits for them. The pits were made in two approaches: first, with a drill of 14 cm, then 22 cm, thanks to this approach, the author spent less effort and time on this process. The depth of the pits in the end turned out to be 1-1.2 meters. In order to make the supports more stable, the author additionally drove them into the ground, after which he leveled the pipes with a liquid level.
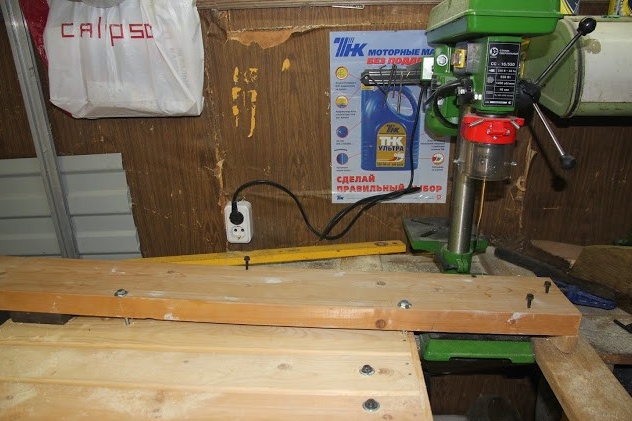
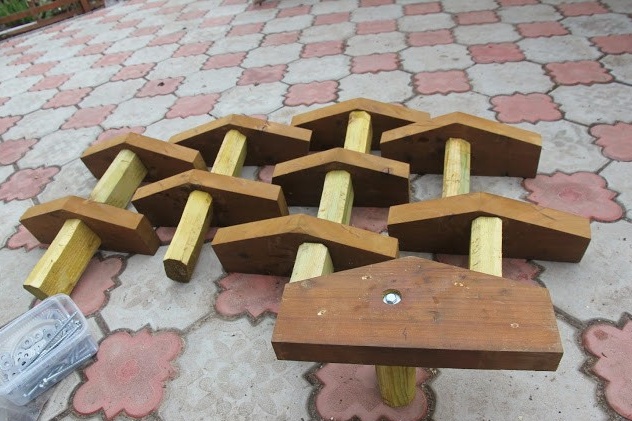
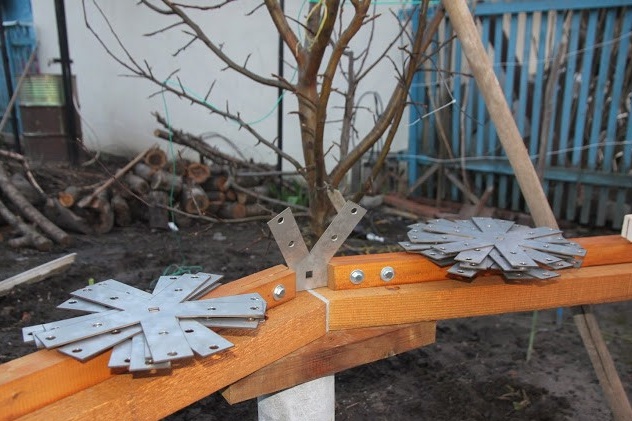
In the next stage of his work, the author decided to start preparing the elements for the base of the dome of this greenhouse. A beam measuring 10 by 5 cm was used as the main material, and for the edges of the dome, a beam of 4 by 4 cm, this thickness is quite enough to withstand the load even in winter under snow. In order to make it easier to cut a four-meter beam, the author made a small stand to support the opposite end and the middle part of the beam, and to make it easier to mix the workpiece, the author attached rollers to the rack, thereby facilitating the movement of 40 kg of timber.
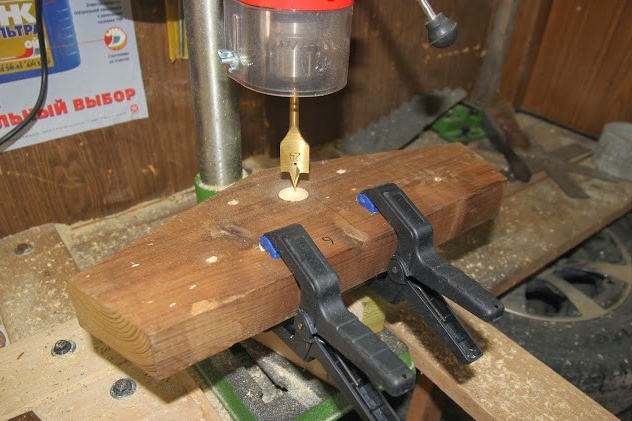
Then the author made a template for drilling mounting holes. The template consists of a board with four bolts that guide the beam. The first element of the base of the support was fitted and marked out in 15 minutes, the next elements took no more than a minute. In order to protect the wooden structural elements, the author processed them with an antiseptic.
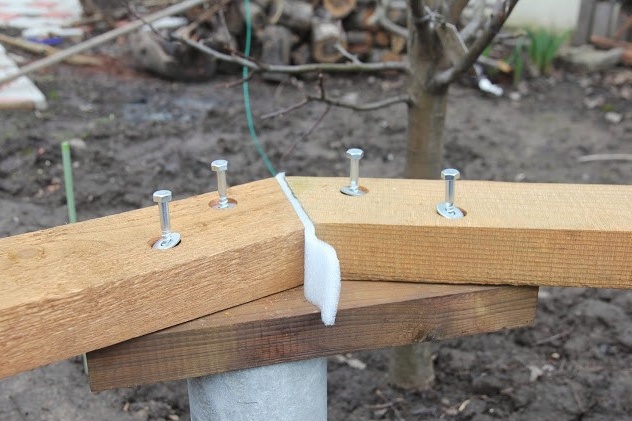
Then the author made the connection of the supports with the base of the greenhouse dome. The joints securely fix the decagonal structure and at the same time can be shifted horizontally and vertically if necessary. So that the bolts that secured the joints do not protrude to the surface, the author made indentations. After the structure was almost fastened, the author aligned it to one level and bolted it.
The design feature is that the base does not have a rigid attachment to the supports, it simply lies on top. This is necessary so that the structure has flexibility in the movement of the soil, and that the structure does not break, it is held by vertical bars attached to the main joints and simply inserted into the pipe.
After the base of the greenhouse was assembled, the author began to prepare materials for the upper part of the structure.
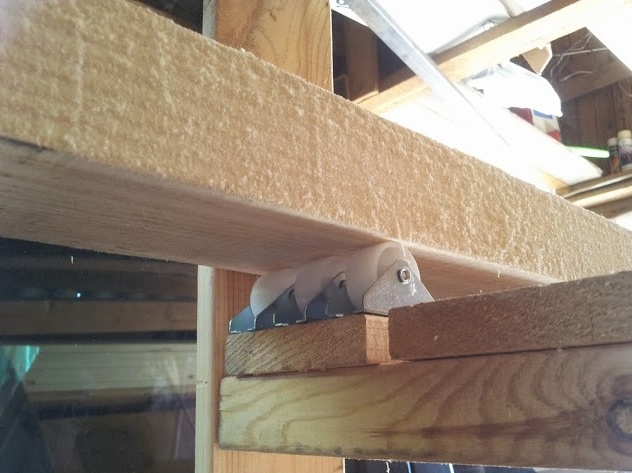
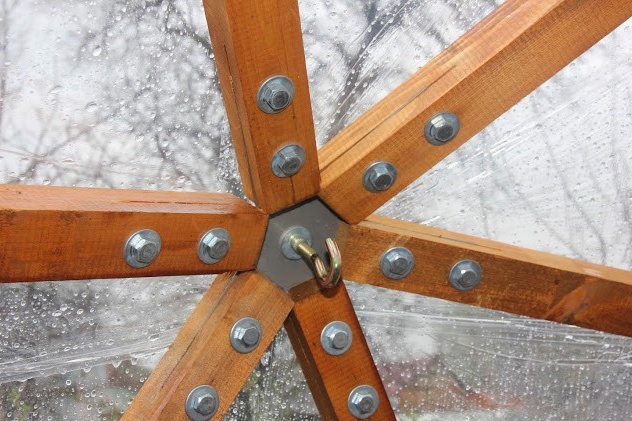
In each of the sawed ribs, the author made grooves for the connectors, thanks to which the structure will be interconnected. To facilitate the drilling process of non-through holes, the author used a template for fixing the workpiece in a certain position, as well as a limiter for the depth of drilling.
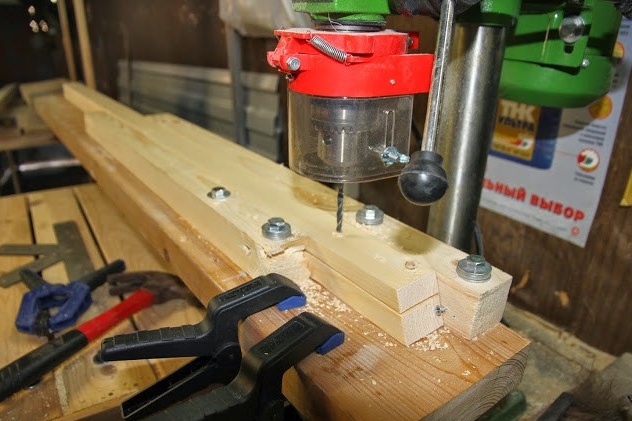

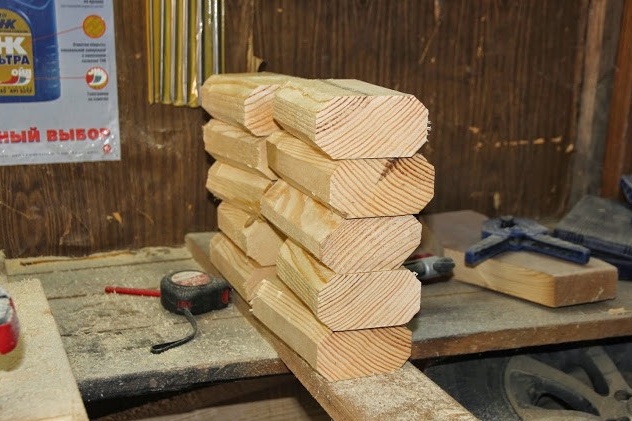
The cut out grooves made it possible to hide the connectors inside the ribs. The author made this decision for such reasons: the placement of metal connectors on the outer wall of the ribs would serve as a conductor of cold in the greenhouse, and when placed in the inner part of the greenhouse, its aesthetic appearance would suffer. As well as the wooden parts of the base of the greenhouse, all 65 ribs were treated with an antiseptic. Then, in the metal plates that will connect the ribs of the upper part of the greenhouse structure, the author made all the necessary holes. Including for installing anchor hooks.
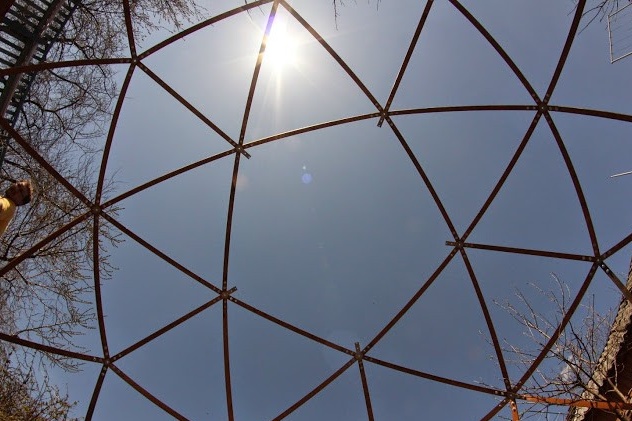
After which the author proceeded to assembling the upper part of the greenhouse structure. For fastening, the author used 260 bolts measuring 8 by 40 mm and a screwdriver. In order to speed up the assembly, the author first connected the ribs with a connector, and then fastened them to the general frame of the structure. When the dome was ready, the author secured it to the base, and wrapped it with wrapping film. This will protect the structure from rain.
Then the author made the door for the greenhouse from the same wooden bars from which the greenhouses were made. The author made the door without drawings, immediately adjusting it to the required dimensions, and then treated it with an antiseptic.
Initially, the author covered the dome of the greenhouse with plastic wrap, but then replaced it with polycarbonate.
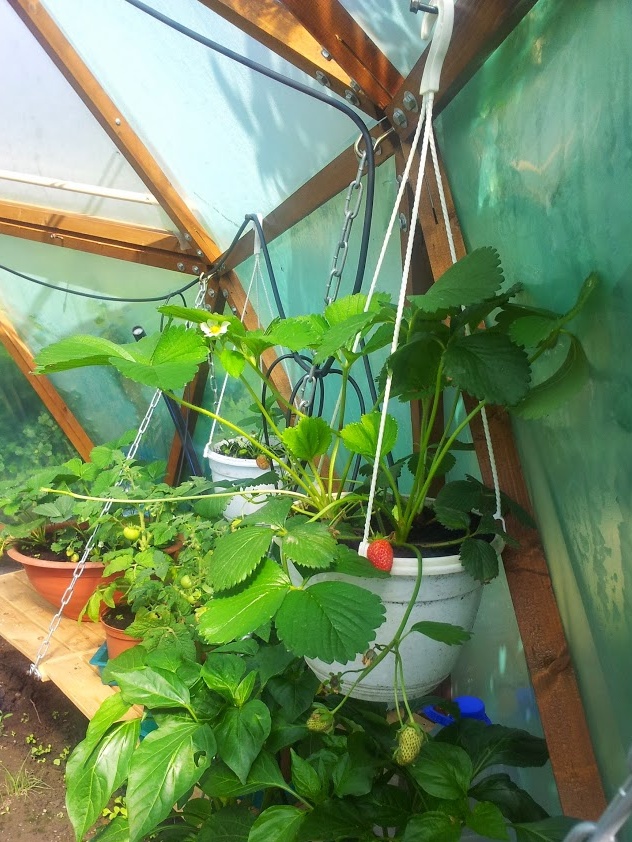
Also, air vents were installed on the second tier of the greenhouse, which are mounted on ordinary door hinges.