Hello, dear guests of the site and the inhabitants of our site. Almost all people living in villages and villages have their own households. Therefore, I present to your attention a folding cage for rabbits. Although, in this product you can keep and walk not only rabbits, but also any small animals, like hens, ducks, quails, chickens ... The author of this design provides the drawings according to which he collected it.
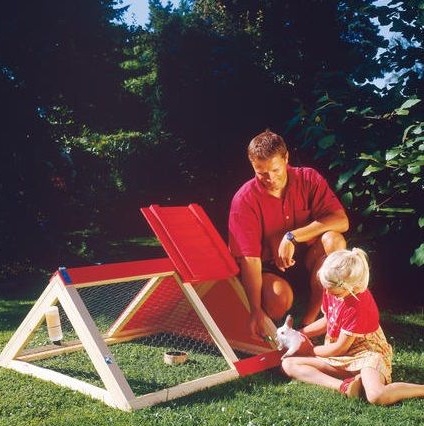
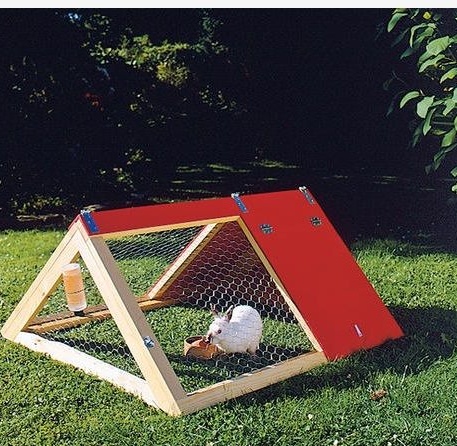
As can be seen from the drawings, part of the cage has an enclosed space - protection from the sun and rain of animals in it.
To work, you need the following tools:
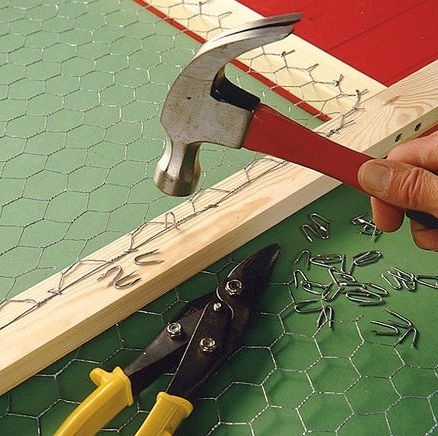
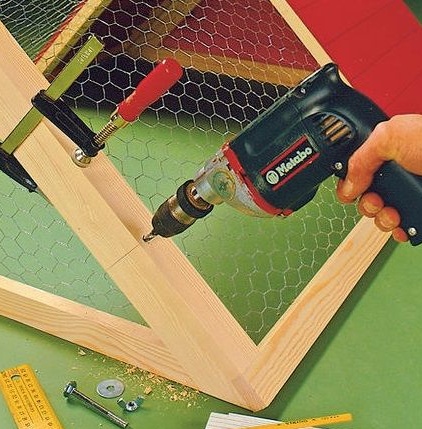
saw, hammer, wood screws, bolts, washers, wing nut, drill, screwdriver, emery cloth or grinder, corner, clamps and a form for cutting corners.
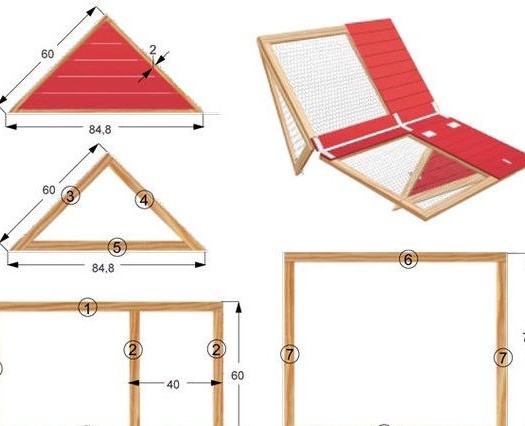
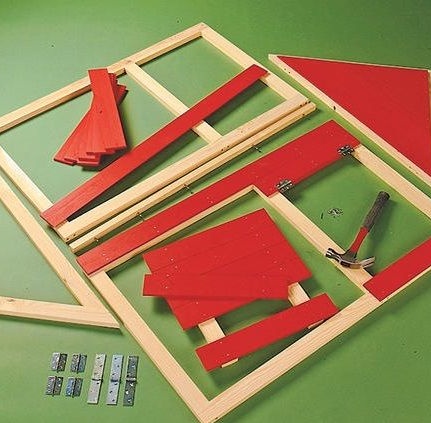
Stage 1. First we make the blanks. We will need wooden slats, approximately 20x60 mm and plywood. The length of the rails is arbitrary. Choose yourself what size you will need. After all the blanks are ready, you can start assembling the product. To begin with, the author assembled the base of the cell - a rectangle on which the remaining parts of the product will be placed. The exact same rectangle will be the floor. He attaches to it a grid with a large cell, so that the pet in the cage can freely eat grass.

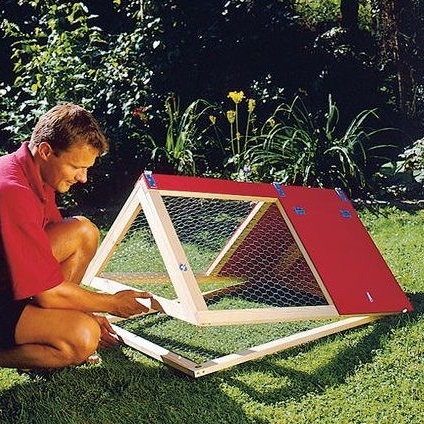
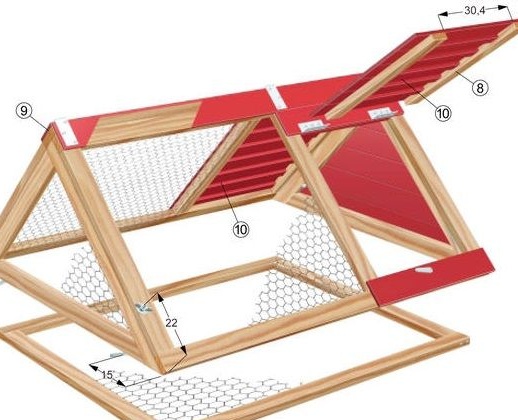
Stage 2. The next step is to assemble the parts of a triangular shape, the lower part of which is slightly longer than the width of the base. These will be the side walls of the cell. Using a form for cutting, we saw off such an angle as it seems to you more optimal. We fasten together the resulting parts with wood screws.

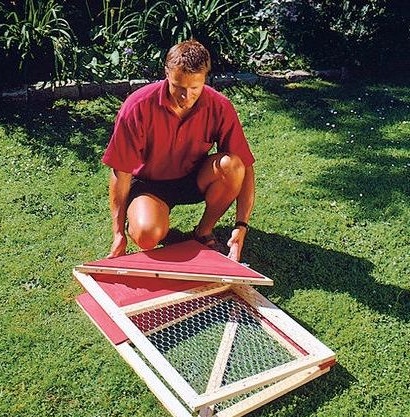
Stage 3. Now the author collects two rectangles, which will be the front and back walls. Divides both into two unequal parts, the smaller of which will be the door and weather protection. He encircles large parts with a net, and smaller parts with planks. Makes the door to enter the cage. The photograph clearly shows what should happen in the end.
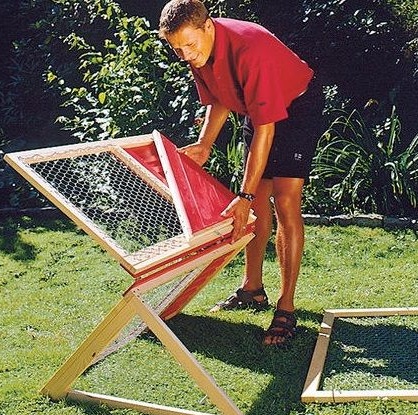
Stage 4. Now you need to assemble the entire structure together with the help of hinges. It turns out like this:

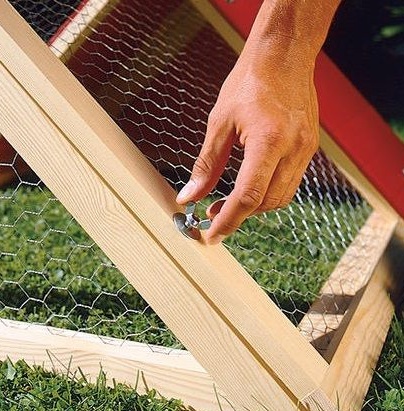
Stage 5.In one of the walls and the side wall, a hole is drilled into which a bolt is inserted. It serves to ensure that the wall is firmly held and does not "go away". We tighten the wing nut.
In the end, he got such a wonderful folding cage, which is suitable not only for the countryside, but also in the city. She does not take up much space, and can easily fit in a closet or under a sofa.
It remains only to install the cage on the base-floor and run the pets.