An interesting feature of this robot is that due to the pulsed movement, it consumes energy rather economically.
Materials and tools for assembly:
- a sheet of PCB with a thickness of 1-1.5 mm (foil on one side);
- soldering iron with solder;
- wires;
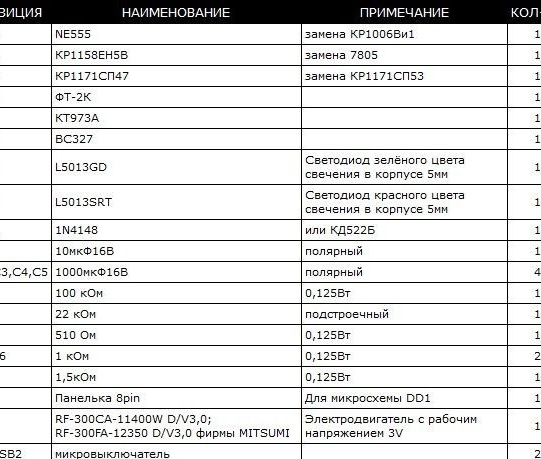
All radio elements can be seen in the table.
How the robot works and what it can do
Immediately after turning on the power, the robot starts to work, along with this, an LED flashes on it, which indicates that the pulse generator is working correctly. The robot responds to light, this is due to the fact that a photocell is installed on it. If you shine a flashlight on a robot, it will run very fast.
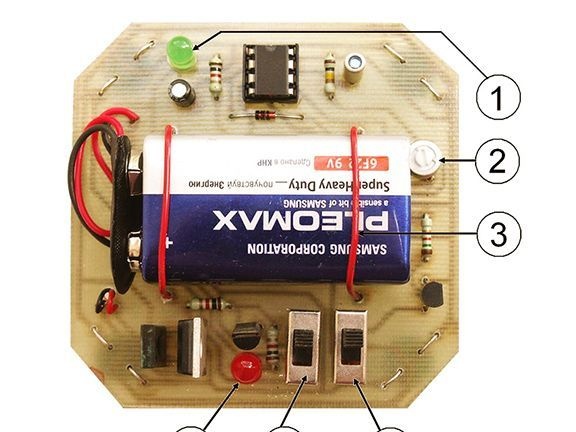
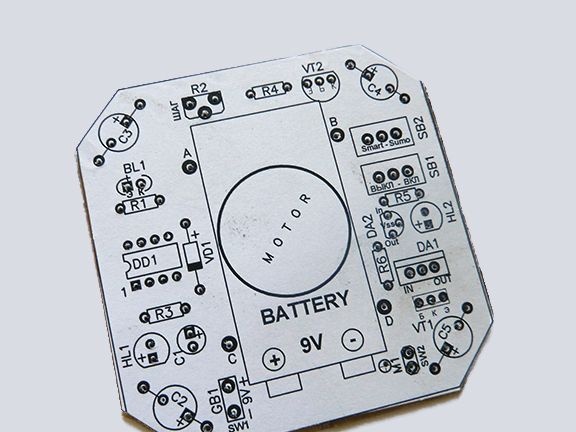
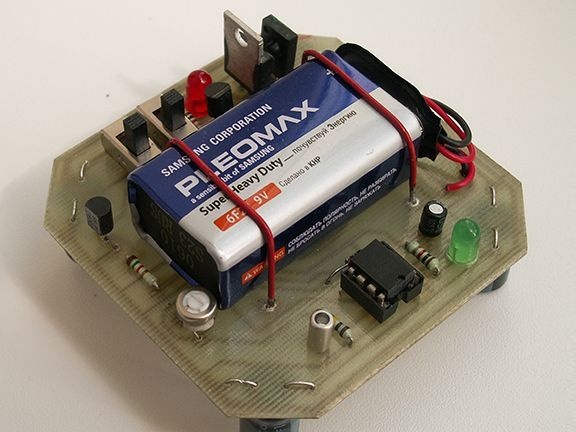
In the picture, the numbers indicate the elements of the robot and their functions are described:
1. LED HL1. It signals the operation of the pulse generator.
2. Trimmer resistor R2, they can adjust the pulse width.
3. Battery mount element.
4. Smart-Sumo robot mode switch.
5. Switch to turn off the robot.
6. The HL2 LED turns on when the battery is low.
Now a few words about the robot modes.
SMART mode activates the photoresistor of the robot, that is, it begins to respond to light. The brighter the lighting, the more actively the robot moves. In the dark, the robot travels very slowly or completely shuts down.
As for the SUMO mode, when it is activated, the robot begins to grab various small objects and move them, as an example it can be matchboxes. This feature can be enabled in competitions between similar robots. To enable the function, use the SB2 switch.
The robot can move in two options, either ride or walk. You can create any combination of movement that will alternate.When driving, the motor rotates evenly, and the robot drives very smoothly. When walking, impulses are communicated to the engine, and it moves jerkily.
Another interesting fact is that the robot is equipped with a backup power supply system. For example, when the battery starts to discharge, the robot activates a power circuit in which the voltage goes directly to the motor. This allows you to increase the overall performance of the robot by about two times.
Robot assembly process:
Step one. The principle of the robot
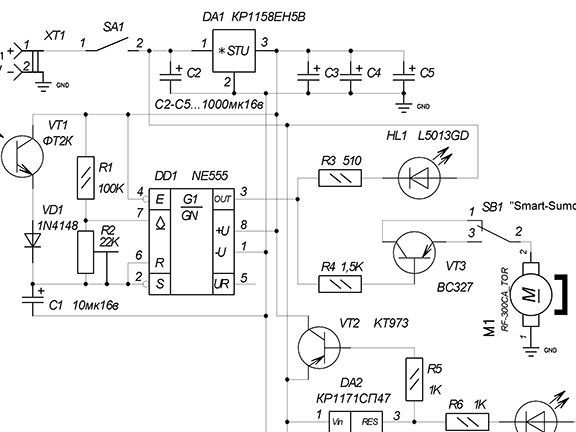
The pulse generator is created on a NE555 timer chip. When light enters the phototransistor VT1, its resistance and frequency decreases, and in this connection, the pulse duration on the DD1 chip also changes. As for the output signal DD1, rectangular current pulses are emitted from it, they are fed to the M1 motor and the HL1 LED in antiphase. Thus, the LED lights up when pauses between pulses are formed, and the engine M1 is turned on with a negative pulse. More details on how the robot works can be seen in the diagram.
Step Two We mount radio components
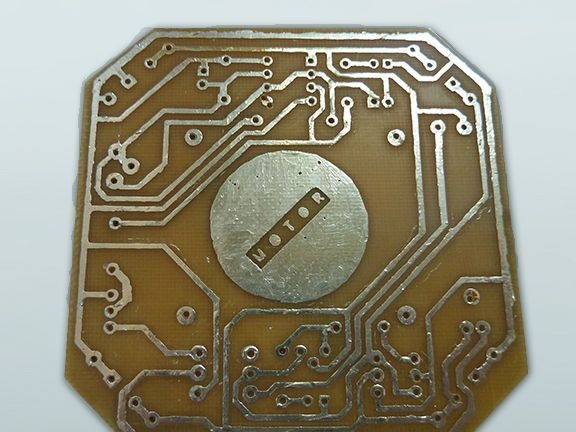
To create a board, you need to print the drawing on an A4 sheet. For loot translation, you need to print a thermal sheet, for this a laser printer is used. After creating the board, you need to check the tracks for a short circuit. Then, a circuit printed on paper is taken and glued to the board so that all the holes coincide. Well, then you can proceed with the installation of radio elements. After mounting the socket, you can install the DD1 chip in it. Photoresistor VT1 must be installed in the full length of the legs. After the photodiode is installed, it must be bent so that its front side looks up.
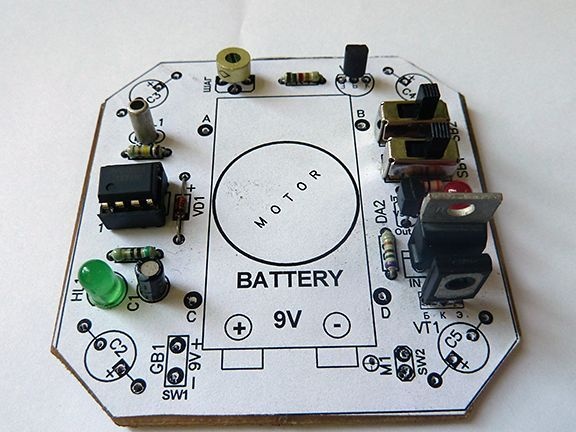
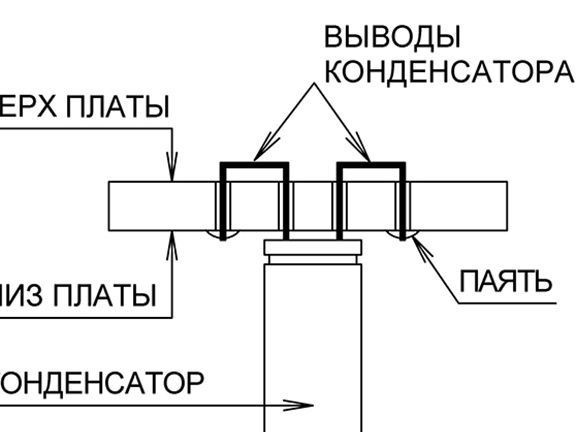
Step Three Install reference capacitors and motor
Capacitors called C2, C3, C4, C5 are installed on the side of live tracks. The legs of the capacitors are inserted into the holes, then on the other side they are bent and soldered.
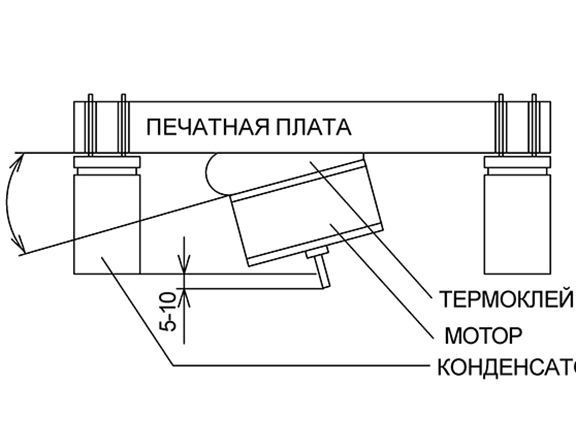
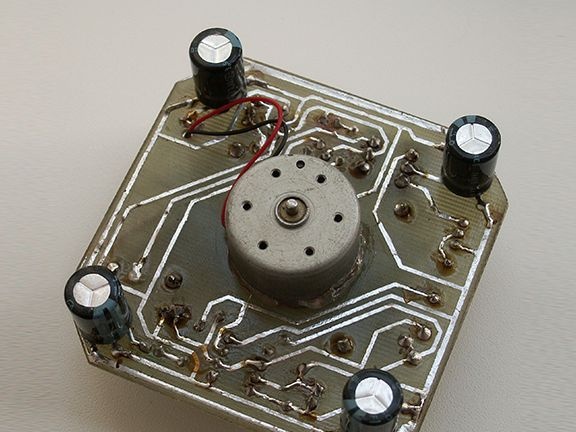
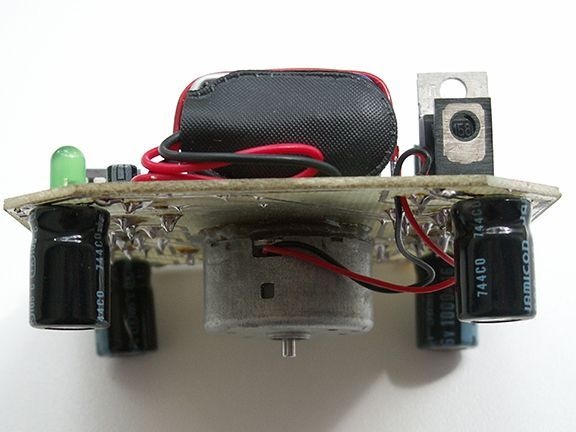
The author installs the motor using hot glue. It is applied from the side of current-carrying tracks, the place of installation of the motor is indicated by a circle. You can heat the glue with a soldering iron. Well, after the engine is glued, you can solder its outputs to the board.
Step Four Robot wheel
So that the robot can better interact with the surface when moving, it is recommended to put on a piece of cambric on its shaft. With such refinement, the robot will move on the surface much faster, as grip improves.
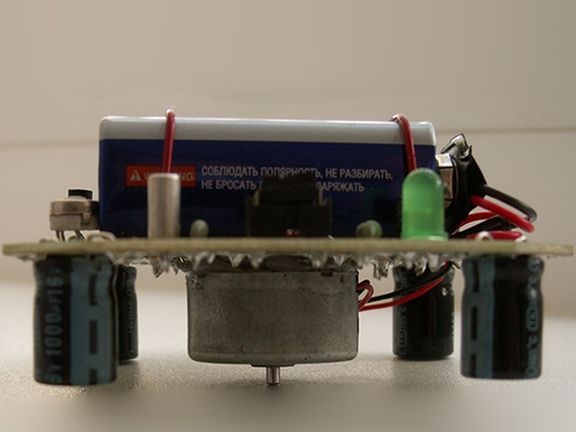
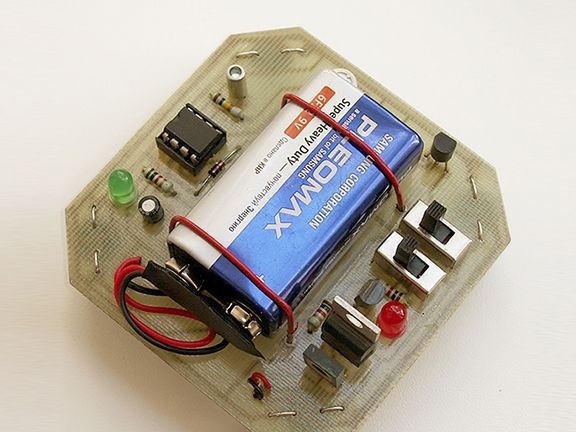
Step Five Battery Installation
In order for the battery not to slide on the robot during its operation, it must be well fixed. For these purposes, use long paper clips in isolation. U-shaped clamps that fit in size to the battery should be bent out of the clips, and then soldered to the board.
Step Six Turning on and checking the robot
The robot is switched on by the SB1 switch, while it should start moving, and the HL1 LED will also flash on it. Subsequently, you need to check the robot modes, including the corresponding switches.
If the robot does not work as it should, then the problem is sometimes very simple to find. Especially for these purposes, the author encloses a special plate for troubleshooting.