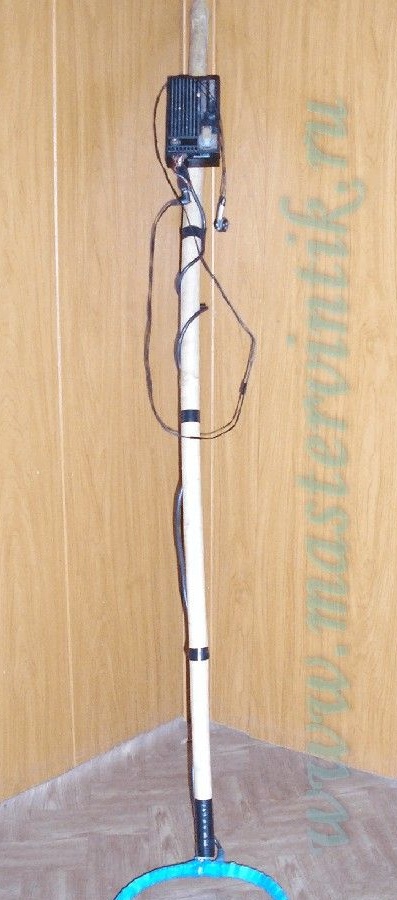
For many, the search for treasures, ancient relics and other interesting things is quite a popular type of hobby, along with fishing or hunting. This type of recreation can also be considered active, and for some metal detector - quite a good tool for making money, because in the land you can find quite a lot of ferrous metals that are valued today. After all, there is a proverb that "we walk for money."
In the store, even for a not too powerful metal detector, they sometimes ask for decent money. This article will discuss how to assemble a metal detector do it yourself. This requires minimal skills in the field of working with electronics and small (compared to buying a new metal detector scanty) investments.
According to the author, the device is capable of detecting a metal lid from a can at a depth of 20 cm. Smaller objects, such as a 5-ruble coin, are detected at a depth of 10 cm.
Materials and tools for assembly:
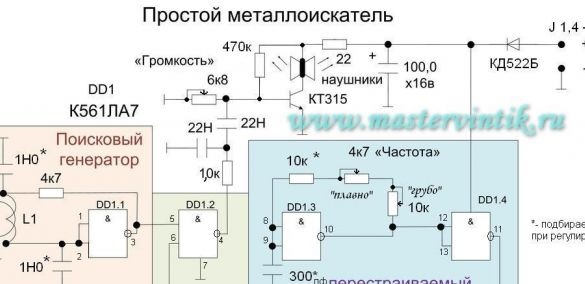
- chip K561LA7 or its analogue;
- low-power low-frequency transistor (suitable KT315, KT312, KT3102, analogues: BC546, BC945, 2SC639, 2SC1815 and so on)
- any low-power diode (for example, cd522B, cd105, cd106 ...);
- three variable resistors (4.7 kOm, 6.8 kOm, 10 kOm with switch);
- five permanent resistors (22 Om, 4.7 kOm, 1.0 kOm, 10 kOm, 470 kOm);]
- five ceramic or mica capacitors (1000 pF - 2 pcs., 22 nF -2 pcs., 300 pf);
- one electrolytic capacitor (100.0 microfarads x 16V);
- wire type PEV or PEL with a diameter of 0.6-0.8 mm;
- headphones from the player (or any low impedance);
- 9V battery.
The process of manufacturing a metal detector:
Step one. Case and appearance of the device
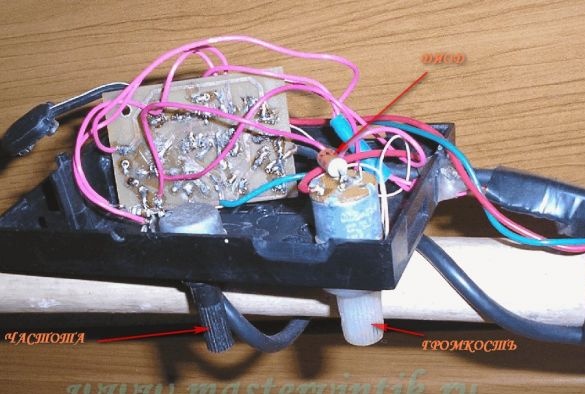
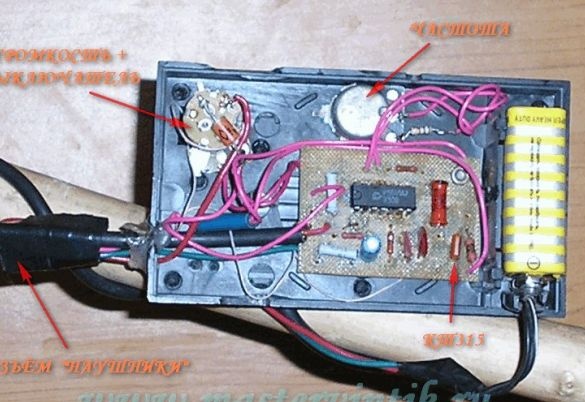
Due to the fact that searches often take place among branches, grass or in wet weather, the device must be reliably protected from all these factors. As a case for electronics, you can use a soap box or shoe polish cream. The main thing that electronic the part was well protected.
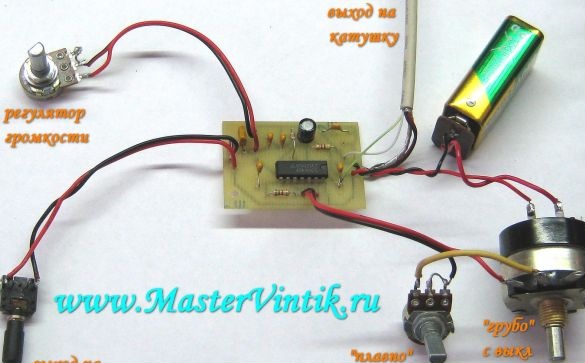
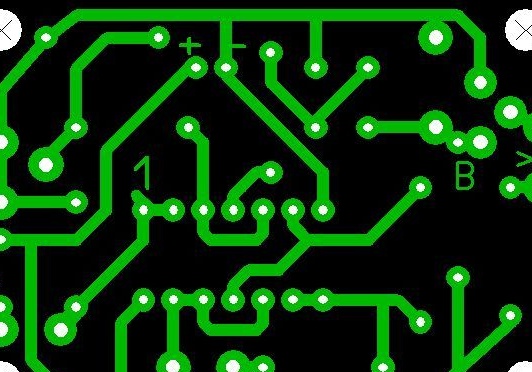
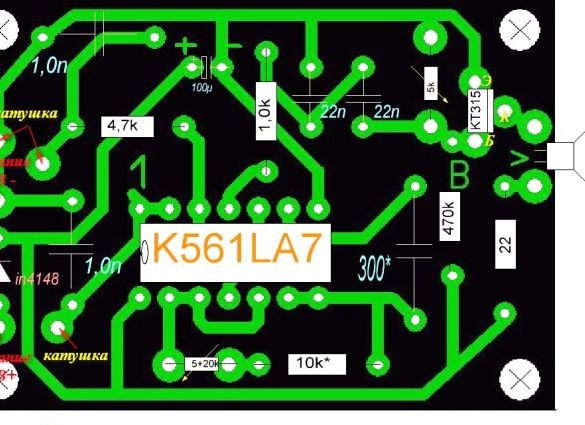
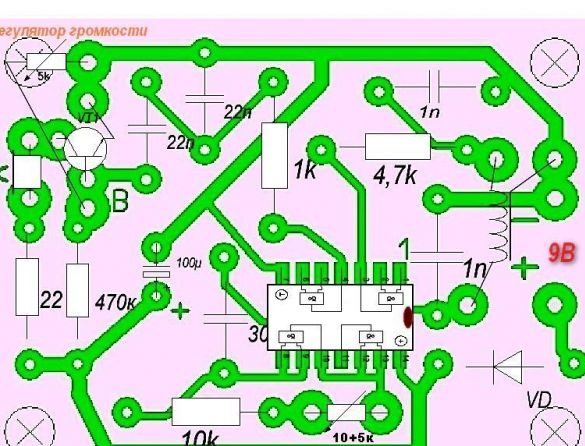
It is important to know that if you do not connect the variable resistors (their cases) with the minus of the board, the device will form interference. If everything is done correctly and a high-quality coil is made, there are no problems with the operation of the device. When the metal detector is turned on, a characteristic squeak should immediately appear in the headphones, it should respond to the frequency control knob.If this is not observed, then it is necessary to choose a 10 kOhm resistor, which is in series with the regulator, or choose a 300 pF capacitor in this generator. As a result, you need to align the frequencies of the search and reference generator.
To determine what frequencies the generator emits, you need an oscilloscope. In total, the operating frequency can be in the range of 80-200 kHz. Measurements are made at pins 5 and 6 of the K561LA7 microcontroller.
There is also a protective diode in the system. It is needed in order to protect the electronics from improperly turning on the battery.
Step Two Making a search coil
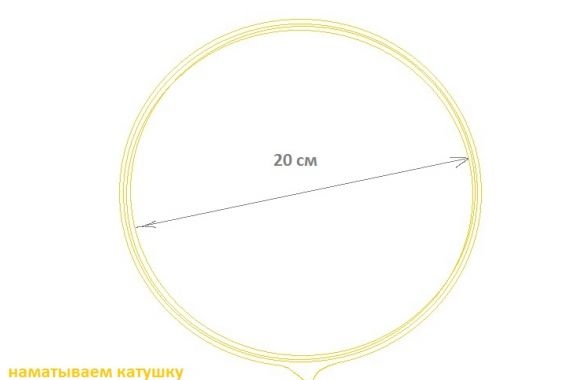
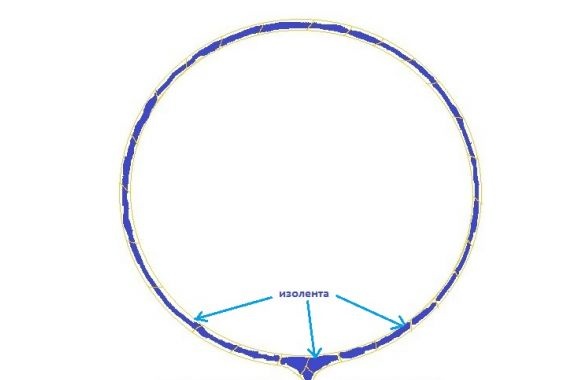
Coils are wound on mandrels with a diameter of about 15-25 cm. A bucket or shuttle made of wire or plywood can be used as a form. The smaller the coil, the less sensitivity it will have, it all depends on what purpose the metal detector will be used for.
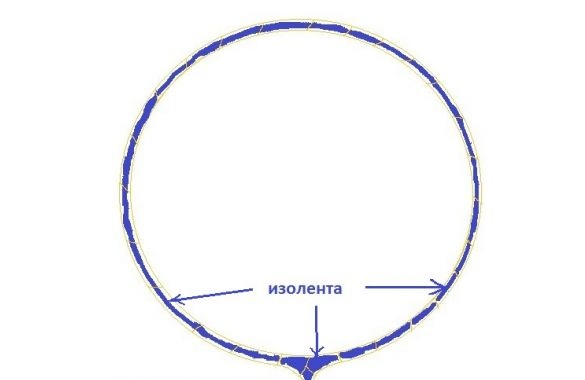
As for the wire, it can be a wire in varnish insulation type PEV or PEL with a diameter of 0.5 to 0.7 mm. Such a wire can be found in old televisions with a kinescope. In total, the coil contains 100 turns, you can wrap from 80 to 120. From above, this whole thing is tightly wrapped with electrical tape.
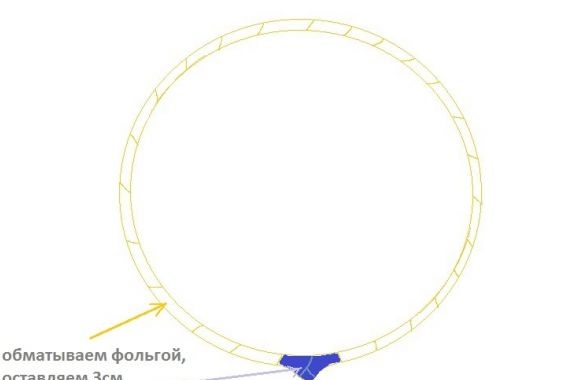
When the coil is wound, winding is made from a strip of foil over it, while you need to leave a section of 2-3 centimeters not wrapped. Foil can be found in some types of cables, it can also be obtained from chocolates, cut into pieces.
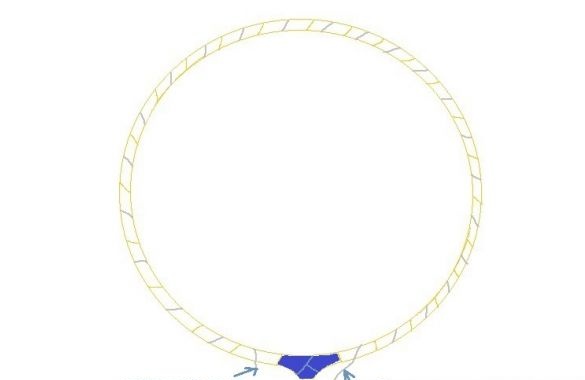
Not insulated wire is wound over the foil, but tinned is best. The beginning of the wire remains in the end on the coil, and the other end is soldered to the body. From above all this again is well wrapped with electrical tape.
Subsequently, the coil is mounted on a dielectric, as an option non-folded textolite is suitable. Well, now the coil can be attached to the holder.
To connect the coil with the circuit, you need to use a shielded wire, the screen is connected to the body. Similar wires can be used to dub music from a tape recorder. You can also use the bass cable to connect various devices to the TV.
Step Three Metal detector check
When the device is turned on, it will be possible to hear a characteristic noise in the headphones, the frequency must be adjusted with the regulator. When you bring the coil to the metal, the noise in the headphones will change.
You can also redo the circuit so that during operation the metal detector is silent, and the signal will appear only when metal appears under the coil. In this case, the noise frequency will talk about how big the object is and at what depth it is. But, according to the author, with this approach, the sensitivity of the metal detector is greatly reduced, and he catches only very large objects.
To get zero beats, you need to combine two frequencies.
In this way, you can assemble a simple metal detector with your own hands. Of course, you can hardly find a real treasure with him, but to collect coins and lost earrings on the beach is quite possible. Two coils can be made to the device, one for searching for large objects, and the second for searching for small ones.

