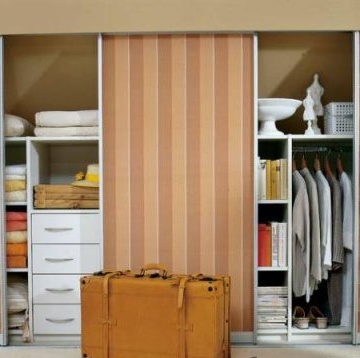
Whatever the area of your apartment or house, no one will refuse to carve out an extra free meter. To do this, you can make a built-in wardrobe do it yourselfto hide interfering things.
To implement this idea, the right wall of the room of your choice will help you. You can also fill a niche or corner. Whatever you choose, the main point in your work should be the installation of cabinet doors that can be hung on a track mounted in the ceiling or pivoted on hinges.
If you stay on swing doors, then give yourself unlimited access, but there should be free space in front of such a cabinet. If the area of the room is small, then it is better to make a retractable structure and not be too lazy to push the door right or left once again to get the thing in the corner.
First you need to determine the depth of the closet to fit any clothes in it. After that, count how many hangers, drawers and shelves you would like to see in your wardrobe. Below it is convenient to place shelves for shoes or children's toys, and above - for rarely used things.
Then think about the design of the wardrobe doors. You can show imagination and make a huge panel, or you can simply paste over the cabinet walls with the same wallpaper as the room walls.
Having determined the depth of the cabinet, screw the load-bearing beam to the ceiling beams. Align this bar horizontally with shims. Next, take the track for the sliding doors and screw it to the supporting beam, after checking the horizontal position of the first of them.
Be sure to leave a small clearance for the rack against the wall.
The role of the side pillar of the door frame will be performed by another bar, which should be attached to the wall. Mark the skirting profile on the rail. Then cut off the excess tree from the timber with an electric hacksaw or a jigsaw. Check how tight the bar is against the wall.
After checking the horizontal level of the rack level, mark it and drill holes for fasteners.
Align the marking and side stand by screwing them to the wall.Perform the operations described above on the second side of the opening.
After that, determine the height of the door and cut it, not forgetting about the overlap or gaps that should be indicated in the instructions.
Screw the suspensions to the door. Insert the suspension wheels into the groove of the track and suspend the door, then giving it a vertical position. Go to the bottom guides.
Take a decorative platband and nail it to the supporting beam to close the suspensions and the track. Sometimes tracks can be sold immediately with a platband. To the front edges of the side racks beat nail platbands.

