
Robot work video
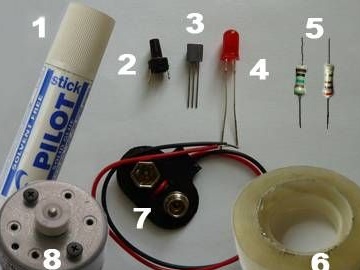
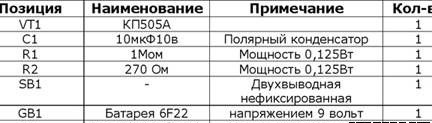
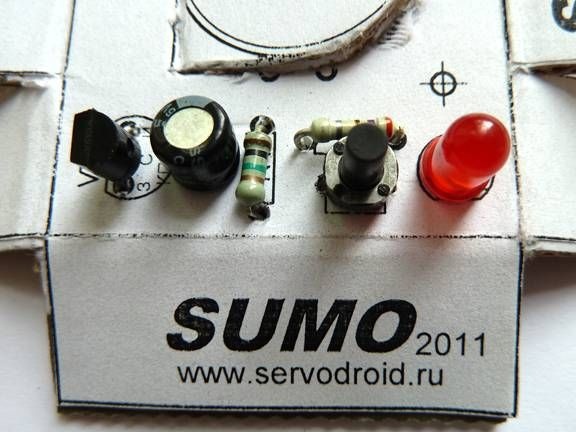
Materials and tools for creating a robot:
- dry glue stick;
- transparent tape;
- two-pin not fixed button;
- one flashing LED type ARL-513URC-B;
- transistor type KP505A;
- two resistors with a nominal value of 1M and 270 Ohms;
- clip-connector for connecting to a battery of the type "Crown";
- motor model RF-300CA-D / C 3V or similar.
Functionality and characteristics of the robot:
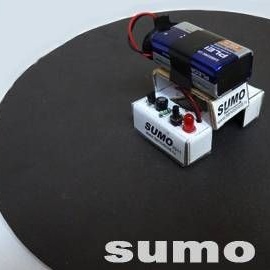
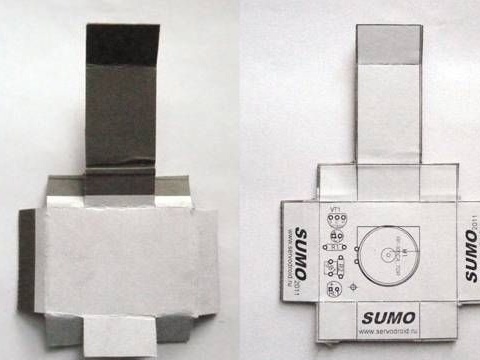
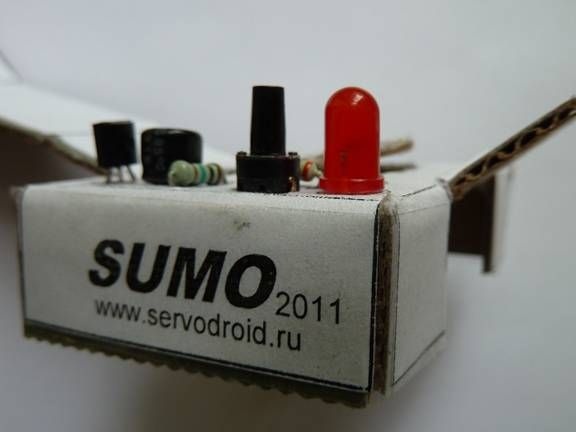
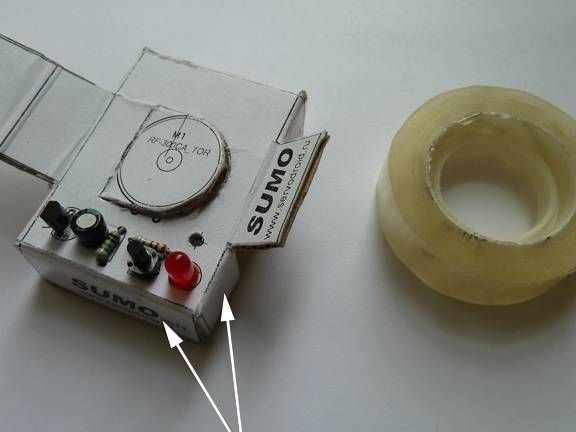
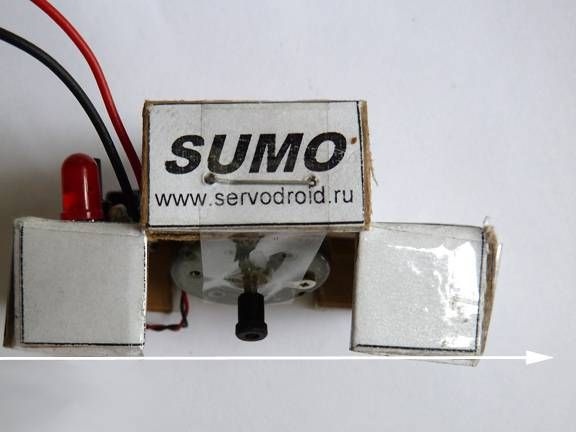
In the photo you can see already assembled robot. To move the device, only one motor is used, it is installed vertically, but at a certain angle. When moving in a short segment, the robot moves in a straight line, and makes an arc on a longer section.
One button is used to turn on the robot; when it is pressed, the robot turns on for 20 seconds. After that, an automatic shutdown occurs, and the robot is in standby mode until the next activation.
Another feature of the robot is that it automatically stops at the edge of the ring. The fulfillment of this condition is possible if the opponent’s weight is not less than the robot’s weight, and the ring thickness is not less than 3 mm.
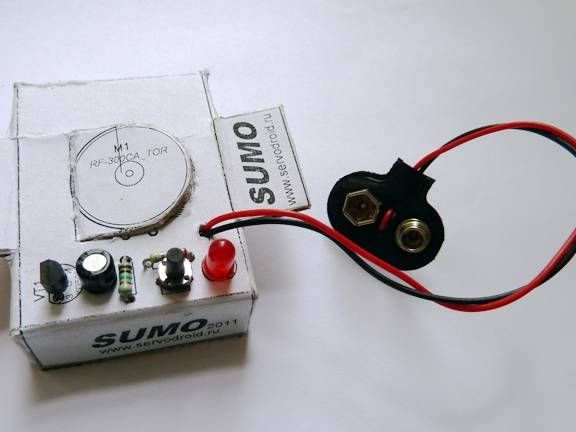
Here, a 9 Volt battery is used as a power source, it is mounted on top of the robot. Thanks to the additional weight, the robot accumulates the necessary kinetic energy for the necessary actions.
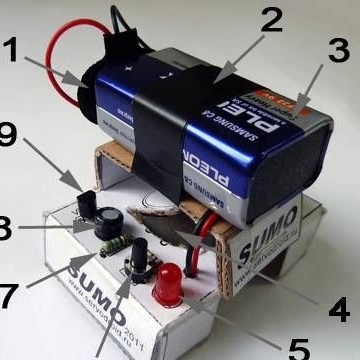
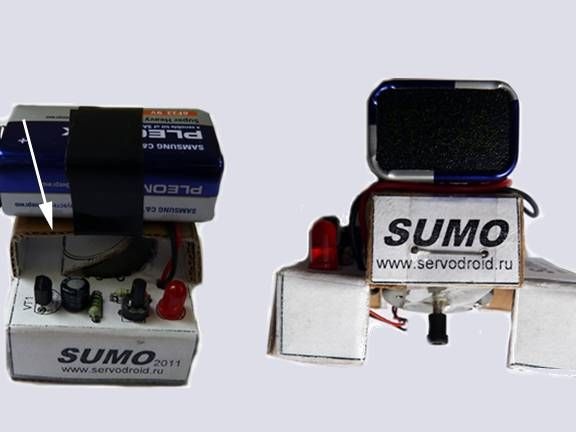
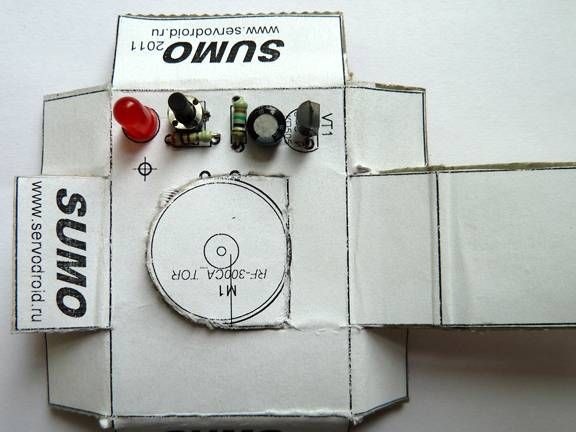
In the picture, the robot components are marked with numbers:
1. Clip for connecting the battery.
2. Battery latch.
3. Power supply (9 V battery).
4. The engine.
5. Flashing LED (indicates that the power is connected).
6. Button to turn on the robot.
7. Resistor, thanks to it you can set the time of the robot.
8. Capacitor, he is also responsible for the time of the robot.
9. Transistor type KP505A, it is a motor driver.
Robot assembly process:
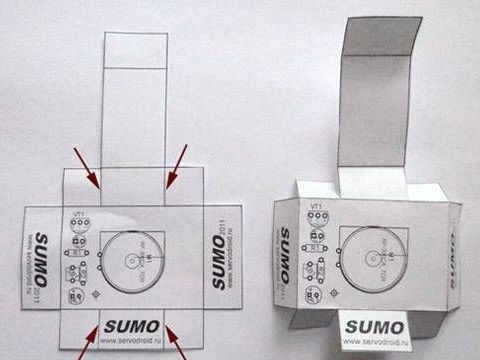
Step one. We make the case
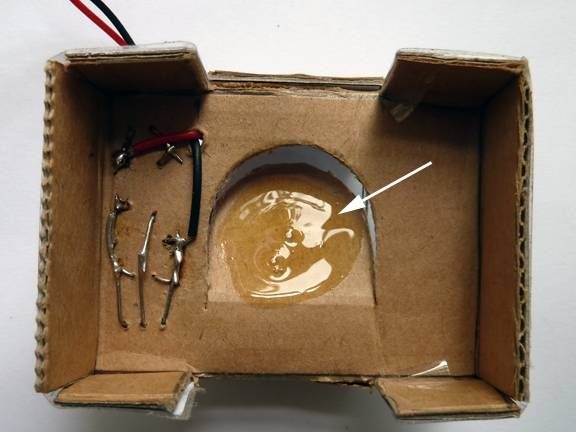
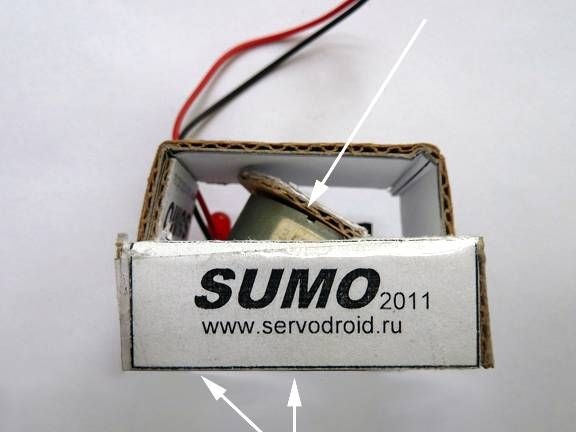
To make the case, the author uses corrugated cardboard, you need to apply a contour to it according to the template. The template can be printed on a printer, it is attached to the article. Further, after making the necessary folds, the pattern can be cut along thick lines. To install the engine, you need to cut a semicircle in the cardboard, and then bend it a little, as indicated in the photo.
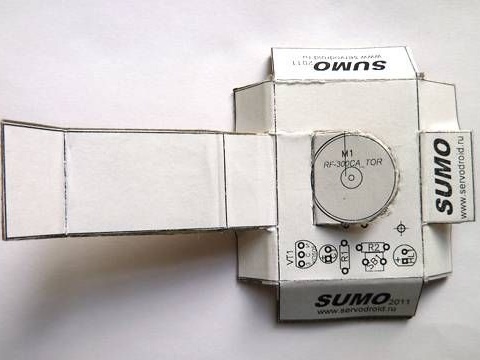
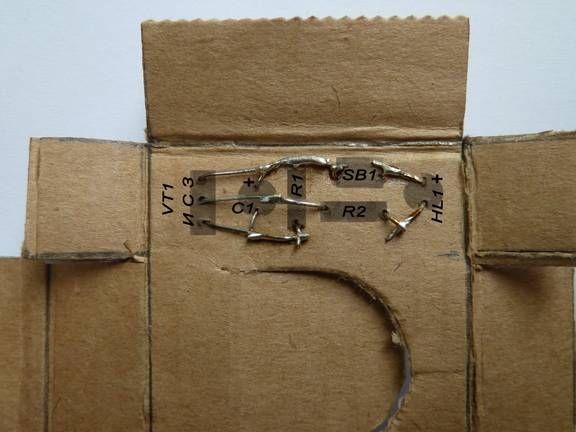
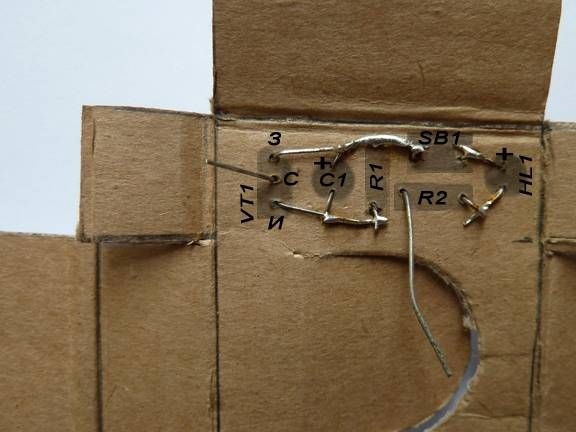
Step Two Installation of radio elements
At the next stage, you need to install all the necessary radio elements. To do this, you need to take an awl and make holes in the cardboard, they need to be done in round marks. To fix the components, after installation, their conclusions need to be slightly bent. You can also see the mark in the form of a sight on the cardboard, here you need to make a large hole, a power wire will pass through it.
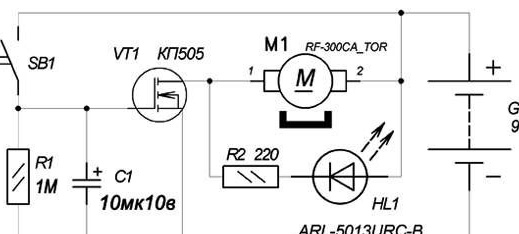
After that, you can take a soldering iron and start connecting the contacts of the radio elements in accordance with the scheme.

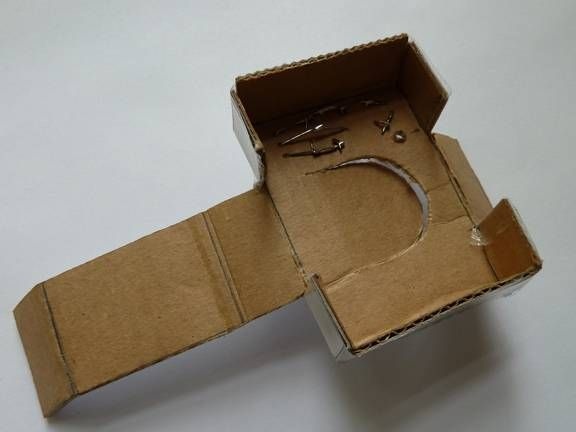
Step Three We fix the lower side surfaces
At this stage, the lower side surfaces can be joined. To do this, you need to bend the lower planes and then fix them with transparent tape. Also in the picture you can see the elements of the case tilted up, they are needed to fix the battery.
Step Four Connect peripherals
To connect power to the battery, you need to use a clip connector. The wire needs to be passed through the hole, red is soldered to the positive contact of the LED, and black to the minus of the capacitor C1.
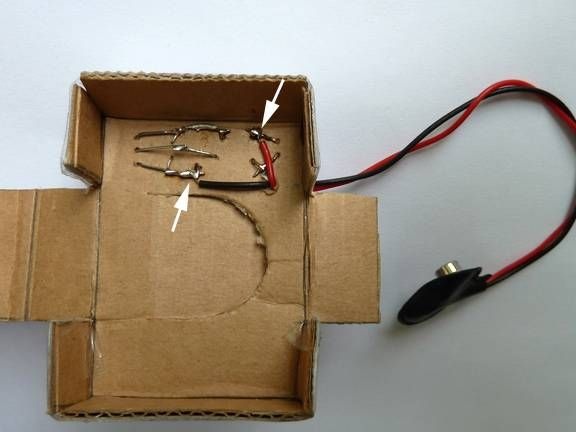
Then you need to connect the left and right side surfaces, as a result, the letter "P" should be obtained. For reliable fixation of the elements, a bracket from the stapler is used. Where to install the brackets is indicated by a white arrow. Clamps can be clamped with pliers.
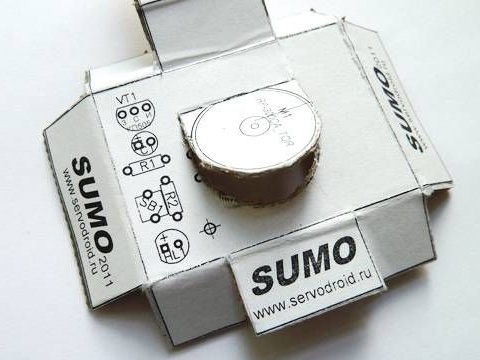
Step Five Install and connect the engine
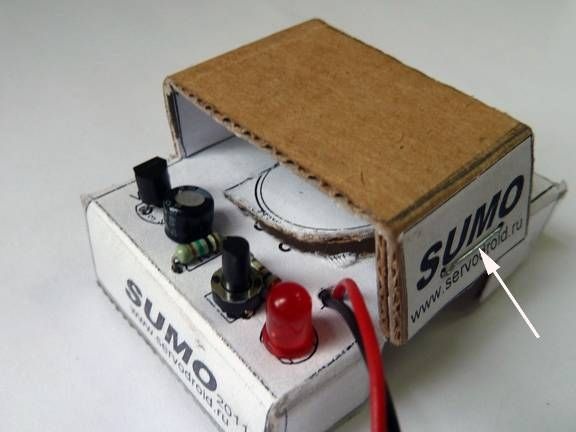
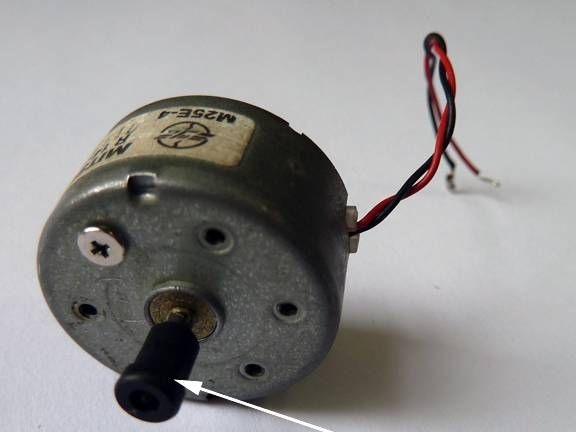
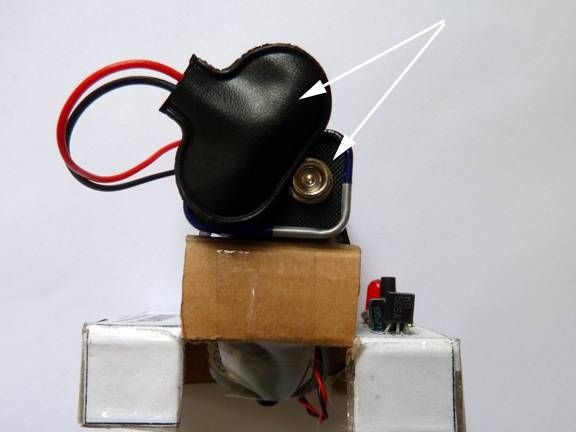
For the robot to move straight, its shaft must be at a certain angle to the surface. In other words, the robot will stand on the side parts, and its shaft will only be in contact with the surface. In order for the robot shaft to have a good grip, you need to put on an elastic band on it, it can be a cambric or a rubber retainer from a helium pen.
The motor is mounted on glue, the place of lubrication is marked with a white arrow. After applying the glue, you need to wait a bit for it to become viscous, otherwise liquid glue can get into the engine and ruin it.
For additional fixation, the motor is wrapped with tape.
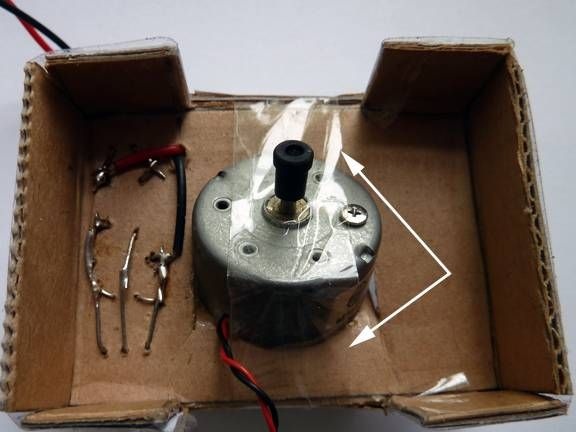
As for the angle of the robot, then all this is clearly visible in the pictures. After installation, the motor needs to be connected. One pin is connected to the minus, and the other to the drain of the transistor VT1.

Step Six The final stage of assembly
The battery is mounted on a U-shaped frame, the battery is fixed using electrical tape. The frame is thought out in such a way that, in addition to the support, it is also a shock absorber for the battery. If the robot needs to be completely disconnected from the power supply, you can disconnect one wire from the battery.
Well, in conclusion, for the competition you will need a ring, it is made two-layer, with a thickness of at least 3 mm. If this condition is not met, the robot will not be able to stop at the edge of the ring. The diameter of the ring should be 250 mm. The lower layer consists of a thin corrugated cardboard, and the upper one of black thin cardboard. Both layers need to be glued together. The assembly is over, you can start the competition. The winner is the robot that remains in the ring.