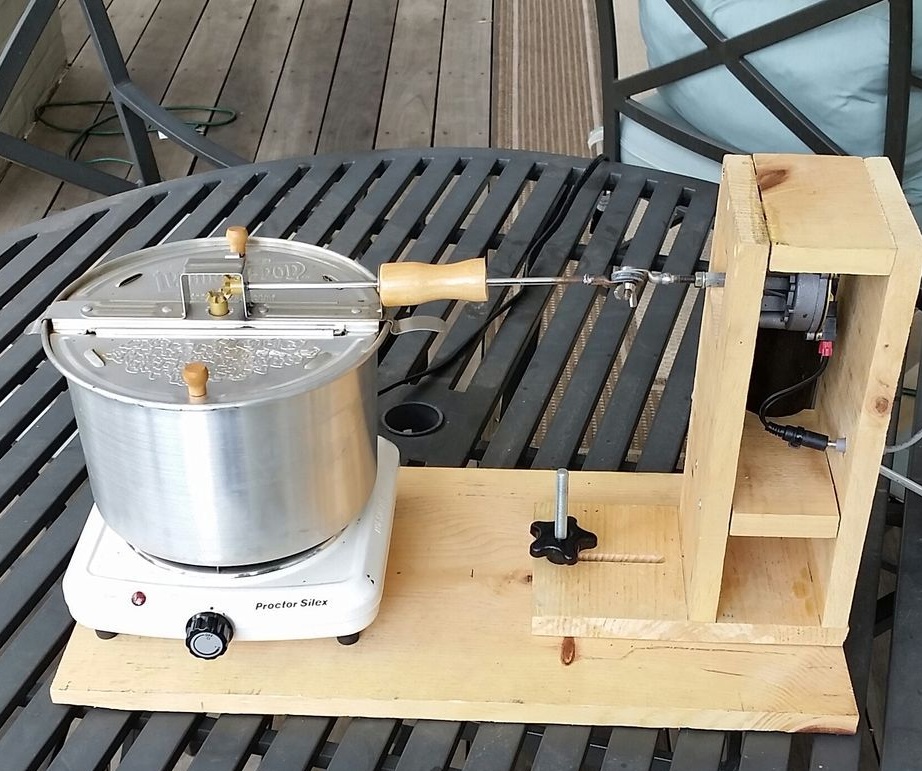
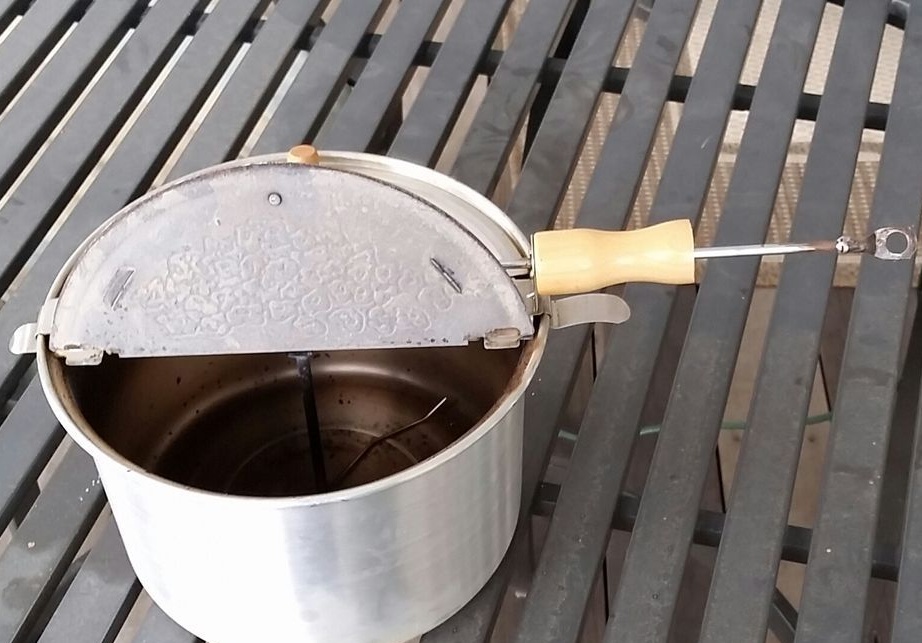
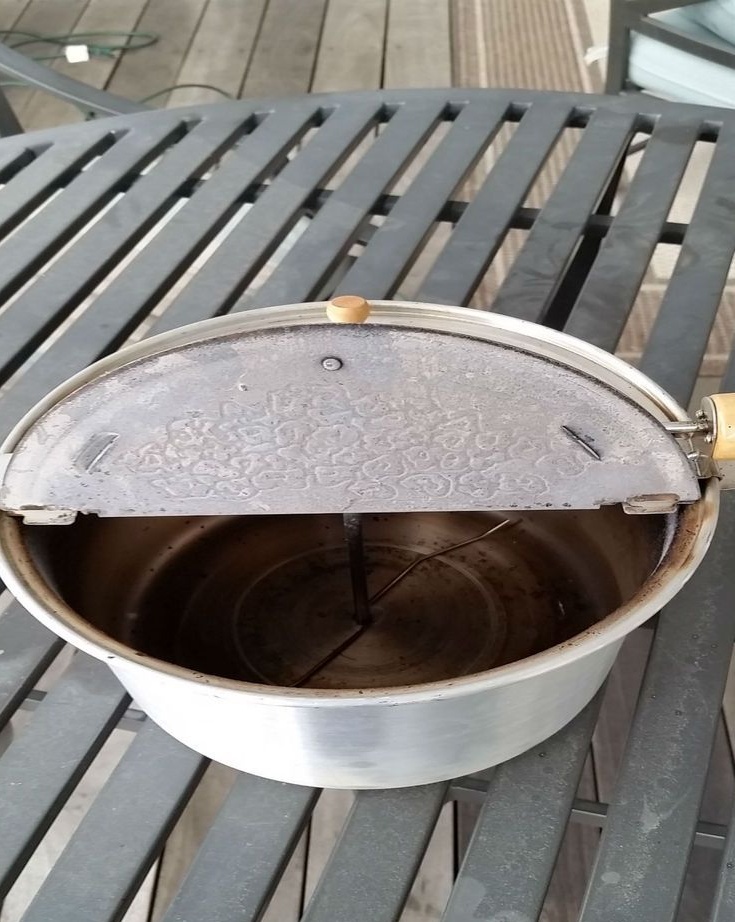
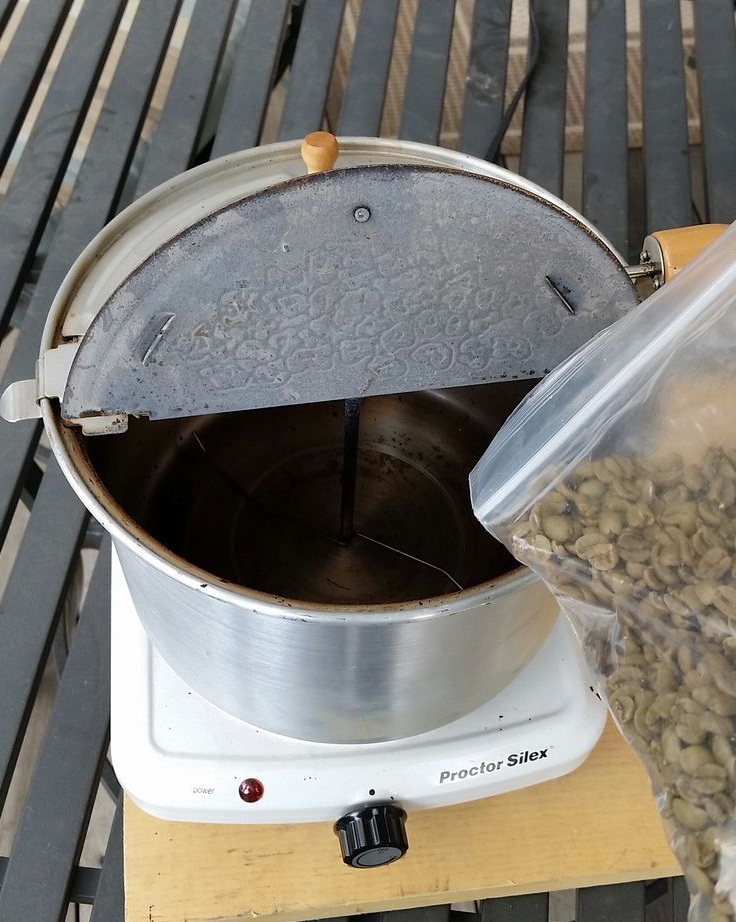
This homemade It will be useful for coffee lovers who dream to roast coffee beans on their own and make natural, aromatic and healthy coffee from them. The main task when roasting beans is to ensure their uniform heating, otherwise the coffee will be tasteless. For these purposes, the grain must be constantly mixed. Of course, this can be done with your hands, but sometimes it can be quite tiring. The author decided to automate the process of mixing the grains by collecting such an interesting device. All materials are readily available and are relatively inexpensive. As a basis, a pan was used to create popcorn, which has a handle for manual stirring in the lid.
As for the heating element, an electric stove is used here, this allows you to arrange the roasting process in an open place, since a lot of smoke is released. Well, a motor from automobile wipers is used as an engine; it is powerful and durable.
Materials and tools for manufacturing:
- A motor with a 12V reducer (from car wipers);
- power supply (car battery or step-down transformer with a rectifier);
- pan for the production of popcorn (with a handle in the lid);
- electric stove;
- a board for creating a device frame;
- self-tapping screws;
- a hacksaw;
- screwdrivers;
- soldering iron;
- wires and other little things.
The manufacturing process of the device:
Step one. Principle of operation
As a basis, the author used a saucepan for making popcorn. There is a handle in the lid of this pan that is connected to the screw. When the handle is rotated, a screw rotates in the pan, which mixes the grains. If such a pot could not be found, then, in principle, such a lid can be made independently, with some effort. All you need to do is connect the engine to the pan, and install it on an electric stove.
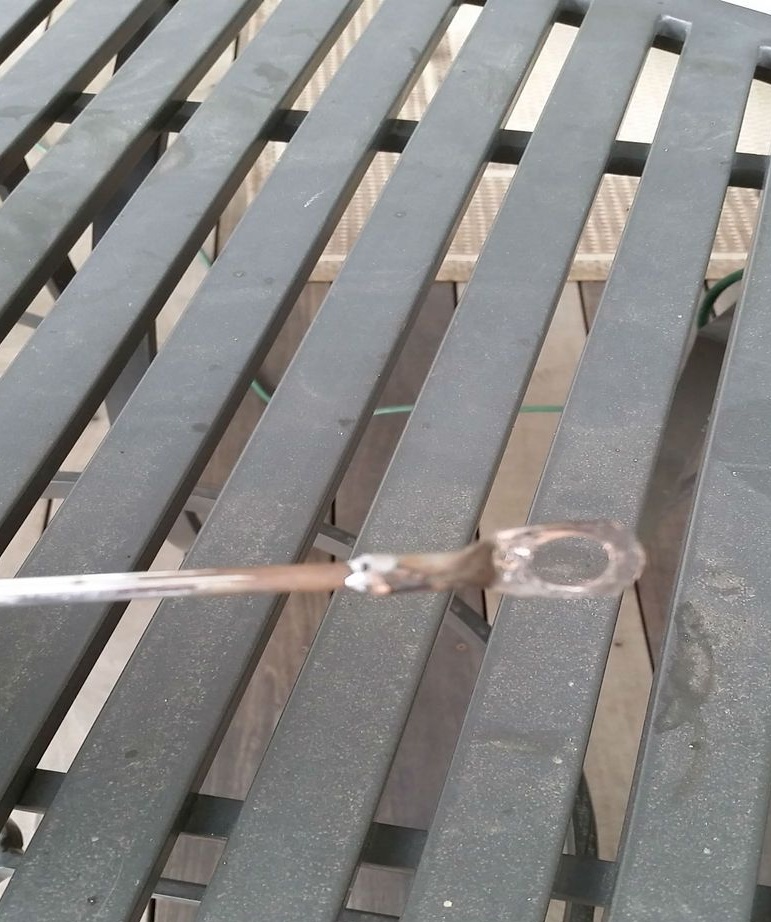
Step Two We make a shaft for connecting a motor
In total, the shaft consists of two parts, this allows you to quickly disconnect the motor from the pan, if it needs to be removed.
For the manufacture of the motor shaft, the author used a threaded rod, on one side of which he soldered a loop from the electrical terminal. The other part is screwed onto the motor shaft with the help of nuts. As for the shaft, which is mounted on the pan, it also has a loop at the end, two shafts are connected to each other using washers and a bolt with a nut.
Step Three Engine installation
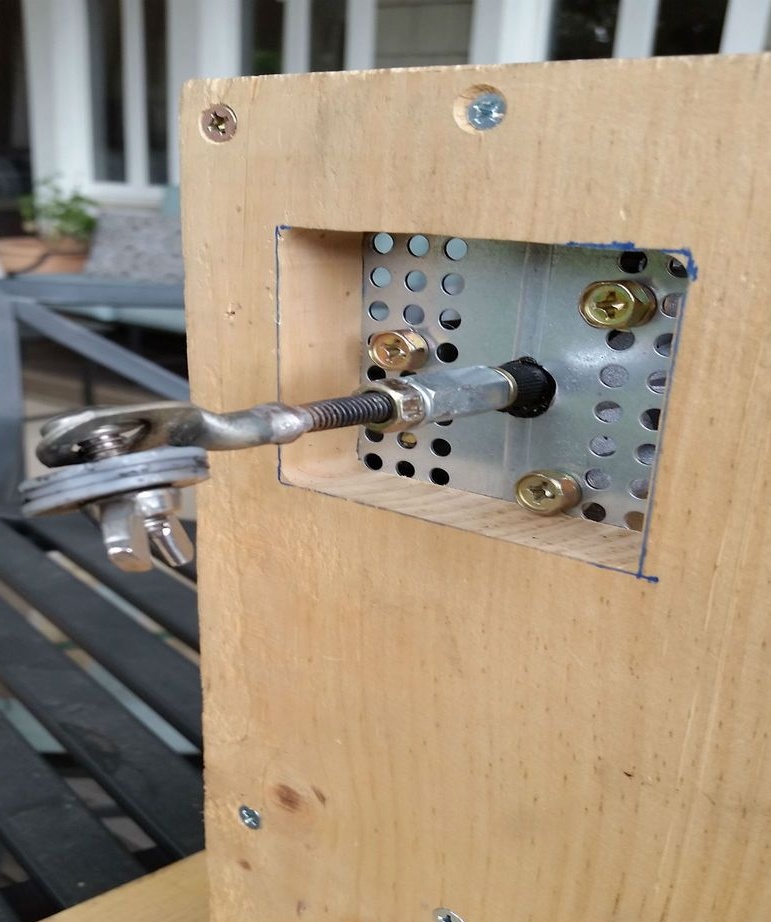
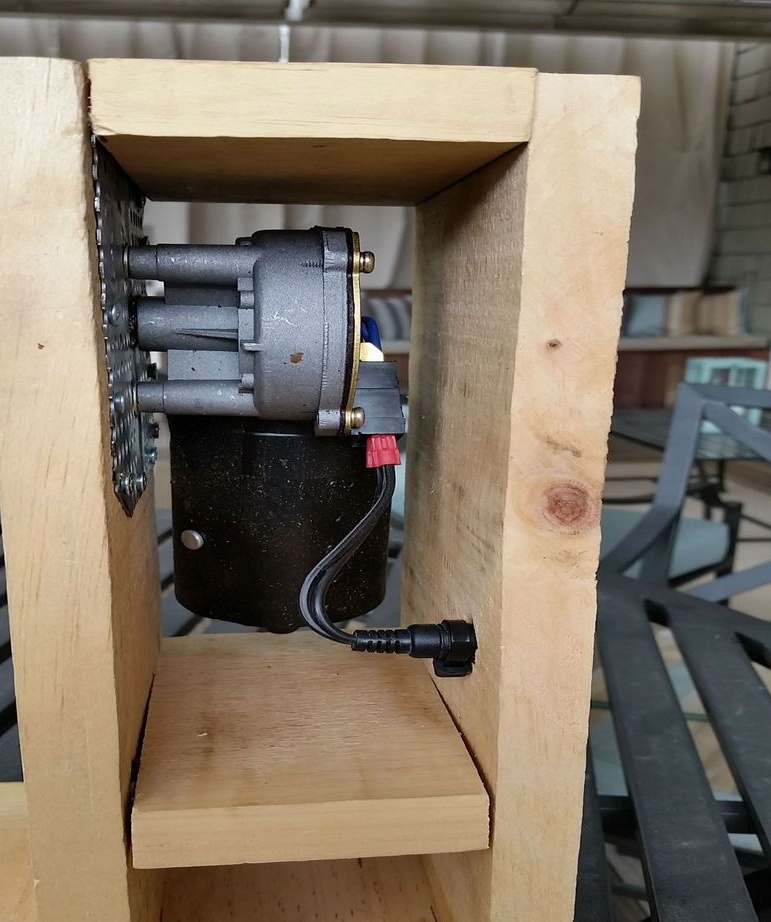
For the operation of the device, an engine from automobile wipers is used, it is quite powerful and has an optimal rotation speed thanks to the gearbox to cope with this task. To install the engine from the boards, a frame is created, it is done quite quickly, and is assembled using self-tapping screws. Such engines are often mounted on three screws to create fasteners, the author took the case from an old computer power supply.
However, for these spruces you can use any piece of tin, having drilled holes in it. The metal plate is screwed to the frame with self-tapping screws, but the engine is attached to the plate with screws. At this stage, you also need to connect the wire to the engine and bring it through the hole in the frame, securing it there.
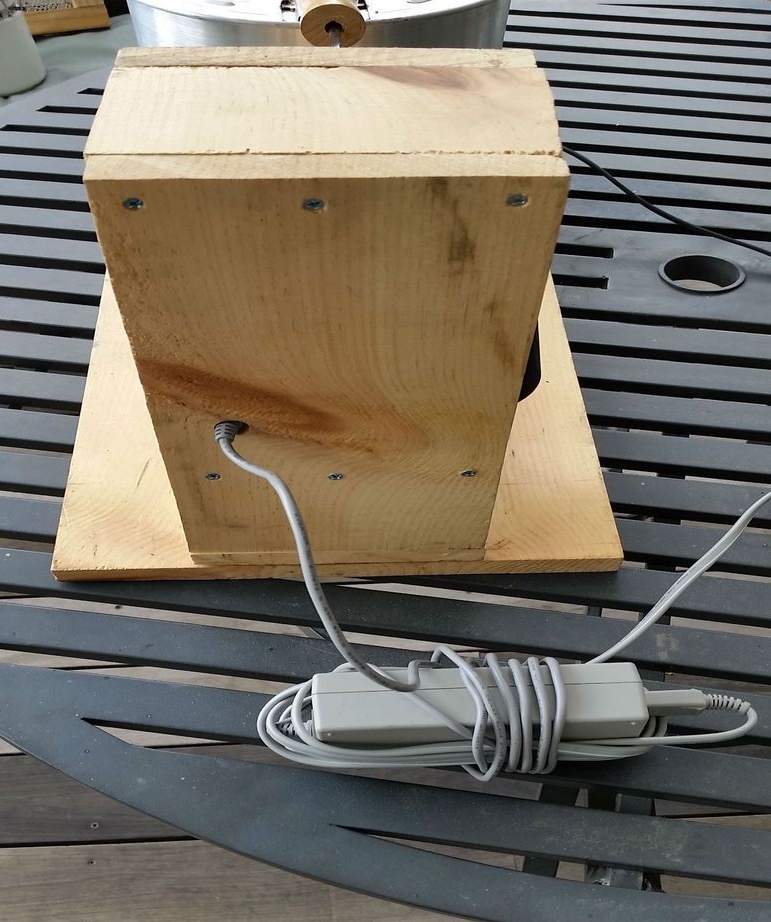
Step Four Putting the foundation together
The most important thing in this process is to calculate everything so that the motor shaft is at the right height in relation to the pan shaft. To do this, put the stove, install a pot on it and take measurements. The assembly is going again from the boards. The author decided to make the frame with the engine removable and adjustable, for this a cut was made on the board.
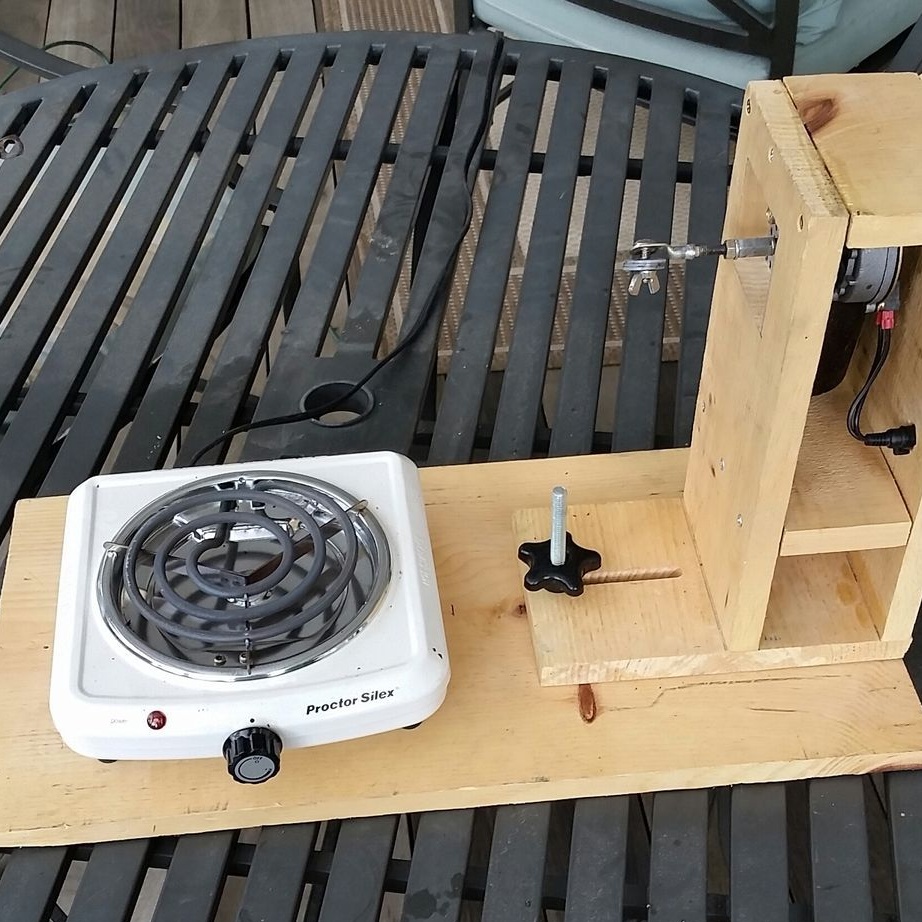
Step Five We assemble the device and proceed to frying
Now the structure can be assembled by connecting two shafts, installing an electric stove and a pan. Pour into the pan so many grains that the engine can mix them without load. As for the frying time, it already depends on many factors, this is the power of the stove, and the ambient temperature. According to the author, this takes about 10-12 minutes. But it is best to look at the color of the beans from time to time during frying and feel their aroma. Also, the characteristic crash will indicate the readiness of coffee.
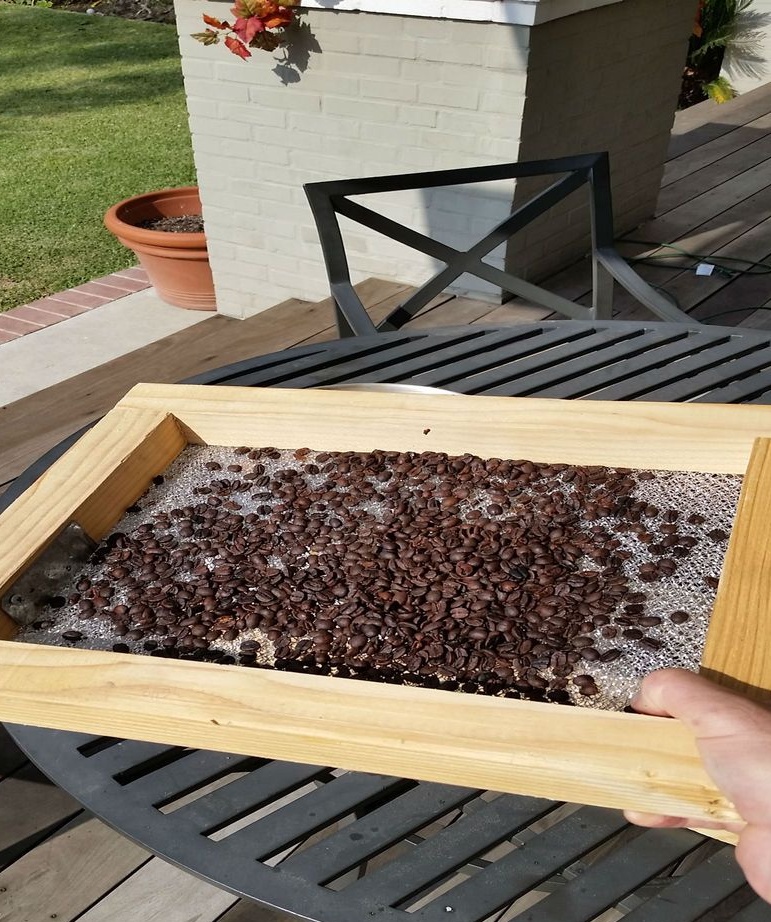
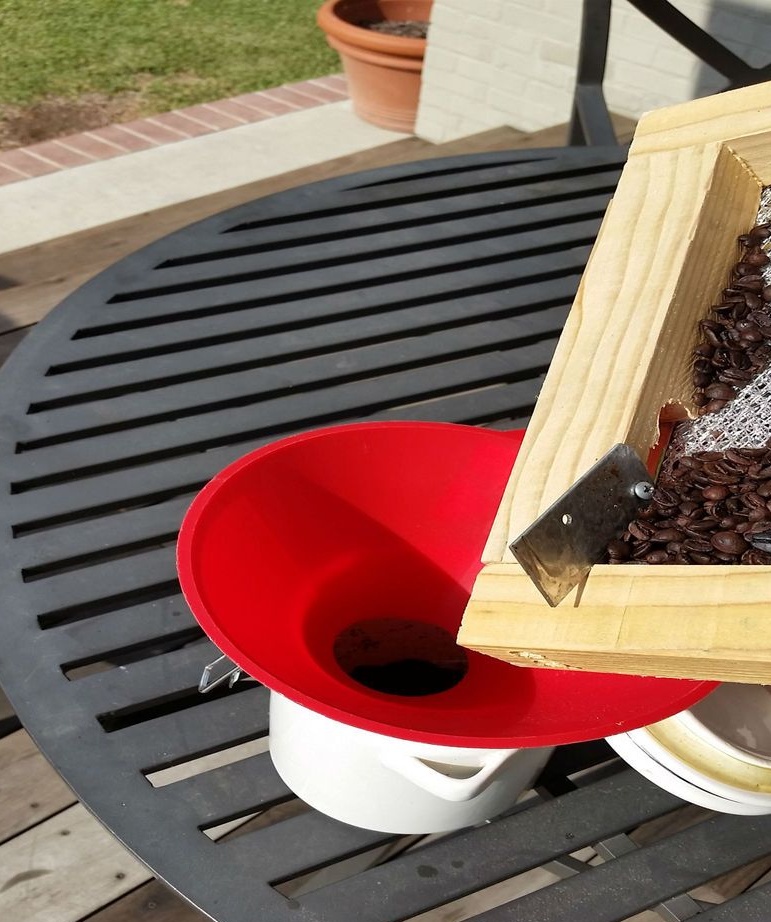
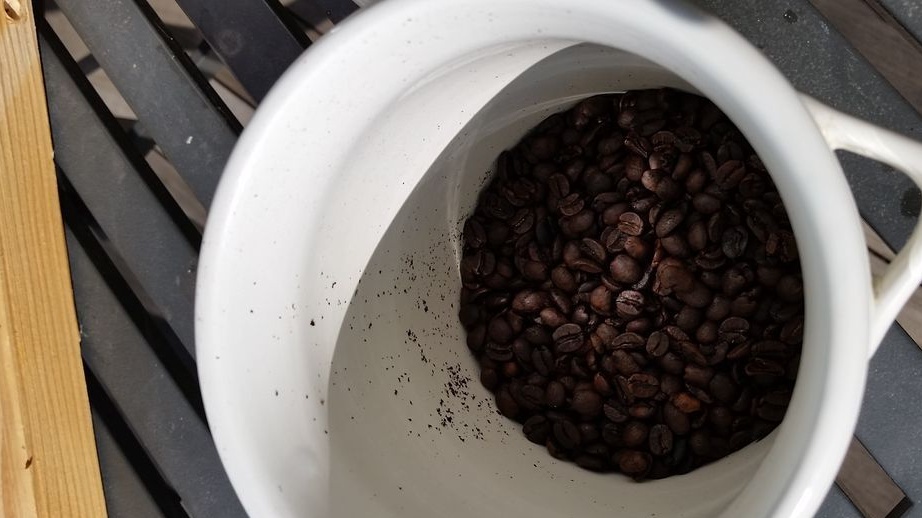
Step Six The final stage
After frying, the beans need to be cooled by pouring into a colander, you can also make a special frame for these purposes. After cooling, the beans can be sent to storage utensils. On the first day, you do not need to close them tightly, carbon dioxide should come out of them. Well, then the container can be well closed with a lid so that the aroma does not come out. Subsequently, it remains only to grind the beans and enjoy aromatic coffee. Without losing their qualities, in this condition, beans can be stored for a month, so you do not need to immediately roast coffee in large batches.