
Similar toys were very fashionable in the 80s and 70s.
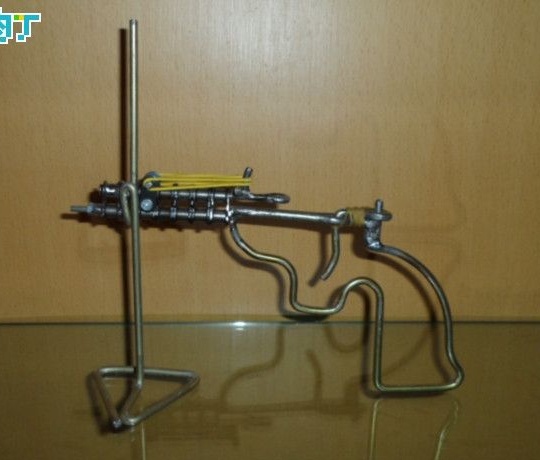
The indisputable advantage of such a toy is that it is almost impossible to break, because here everything is made of metal. The only thing required for the pistol to work is matches. The gun is safe to use with care and very easy to create.
Materials and tools for assembling the gun:
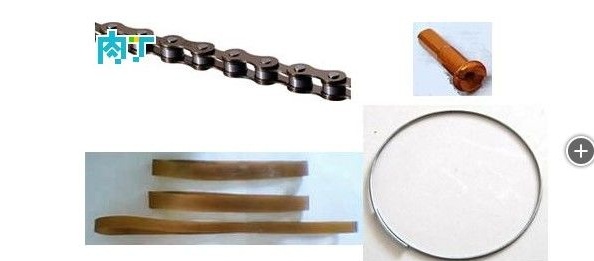
- old bicycle chain;
- strong steel wire;
- soldering iron (or welding);
- a pair of rubber bands;
- nuts from bicycle spokes;
- bicycle spoke;
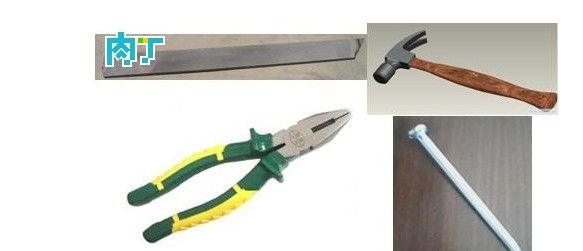
- hammer;
- screws with nuts and washers;
- pliers.
The principle of operation of the gun:
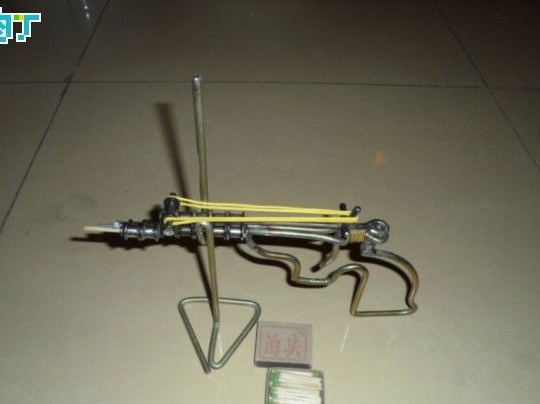
There is an elastic band on the gun, it drives the striker. Sulfur from ordinary matches is used as a charge. When fired from the barrel of a pistol, flames and smoke break out, and a very loud sound of the shot is heard. Do not shoot animals and people with a pistol if they are at a distance of less than 8 meters, as you can easily cause injury in the form of a burn or stun.
Gun manufacturing process:
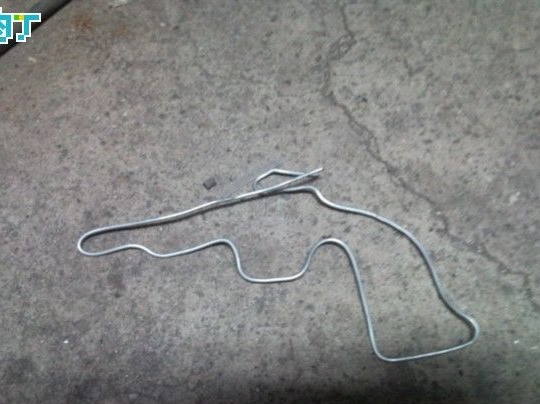
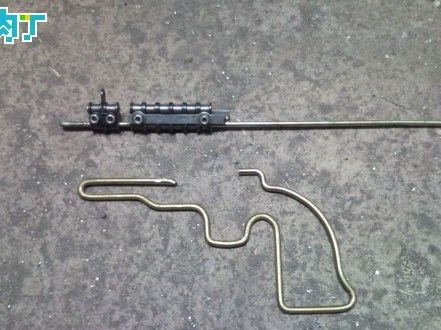
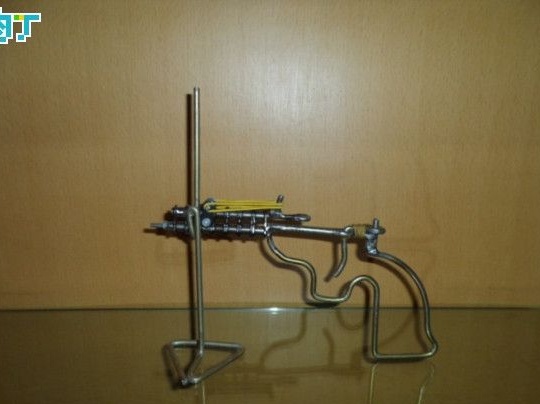
Step one. Create a pistol body
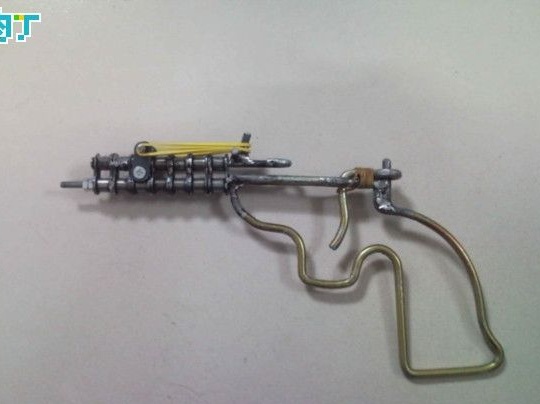
The main part of the gun is made of durable steel wire, some authors also practice the manufacture of such guns from thick aluminum wire. As you can see in the photo, here the author used welding in some places, and a soldering iron can also be used to connect. What needs to be connected is the axis that holds the “barrel” and the body of the gun itself.
You can use pliers and a vise to work with wire.
First, it is desirable to bend the frame of the pistol with your hands from a soft wire, and then make the gun on it.
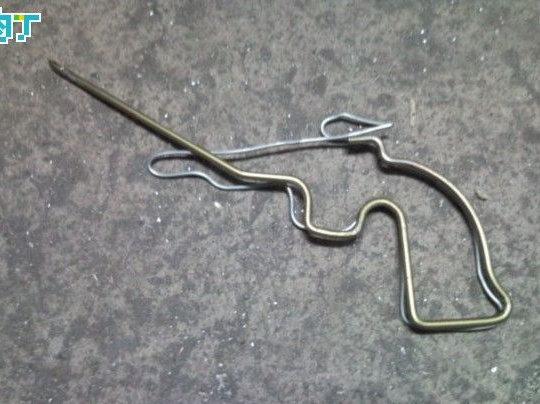
Step Two Making the barrel for the gun
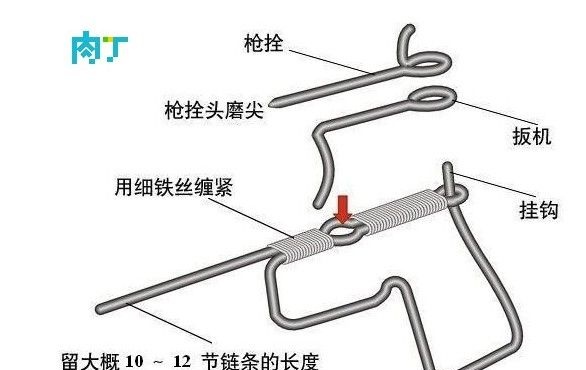
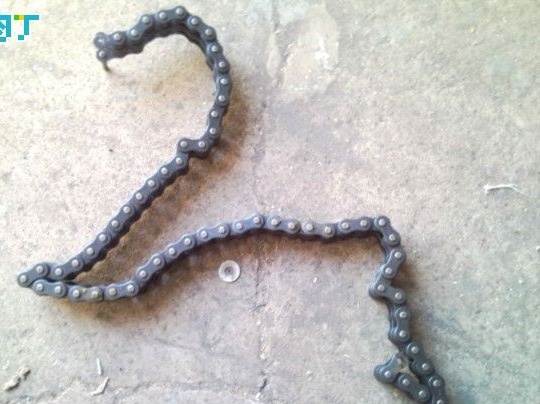
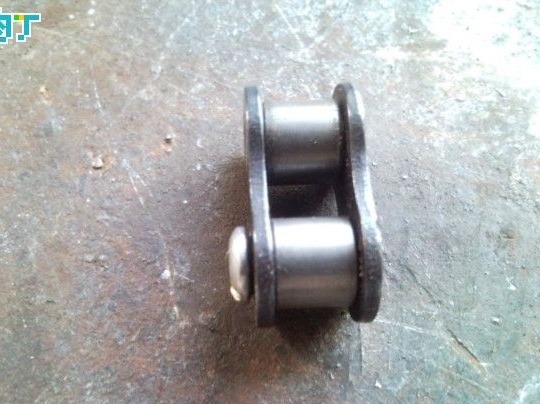
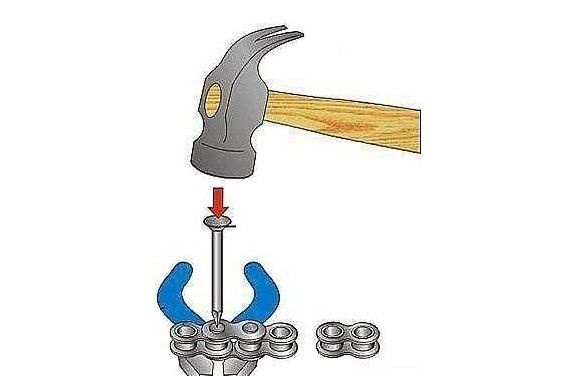
The barrel, interestingly, is made of several links of the bicycle chain and consists of two parts.The nose can deviate to the right or left on the axis, this is necessary in order to charge the gun with gray from a match. First, you need to disassemble the chain and get eight links from it (you can also have another number). To do this, grind the hats on one side of the chain, and then knock out the axes from them.
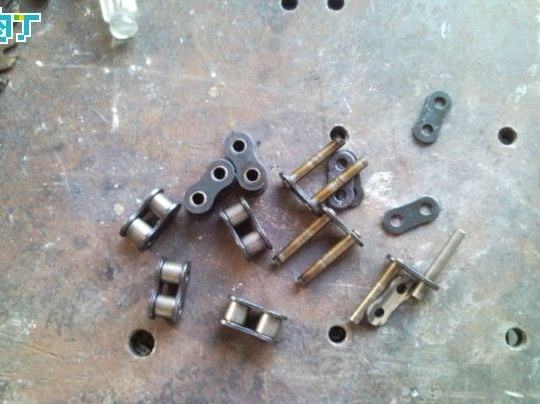
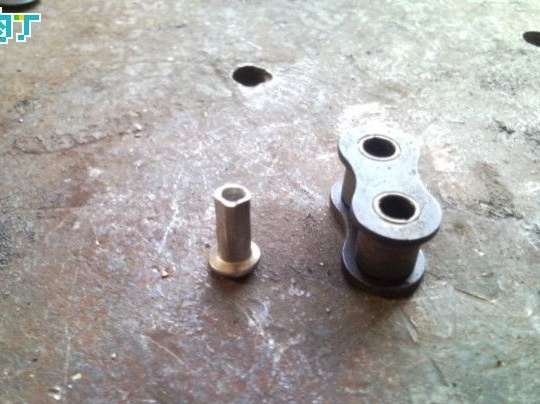
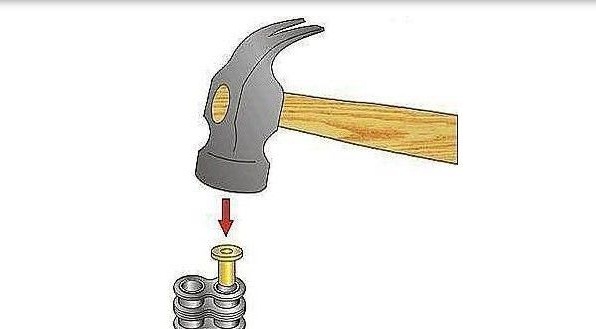
After this, you need to create two blocks from the chain links, the water block should have six links, and two in the other. The nose will be the most important, it consists of two links, sulfur will be charged into it. To provide support for the striker, a nut from a bicycle spoke is driven into the front. As a result, the hole in the chain link will narrow, and sulfur will detonate upon impact. In an explosion, fire and smoke will also come out of the gun barrel.
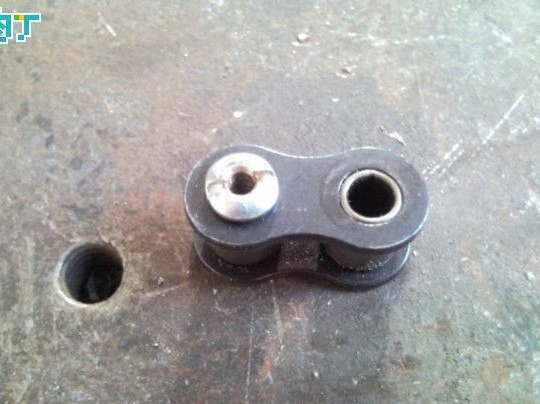
The front two links are interconnected by bolts with nuts, as well as two parts from the same bicycle links. For the long part, you will need two pieces of metal with holes, they are also connected with bolts and nuts.
Also in the front part you need to fasten the loop for which the elastic will cling. This loop is also made from part of a chain link.
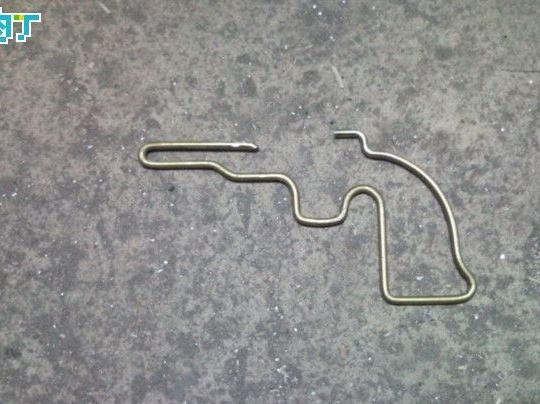
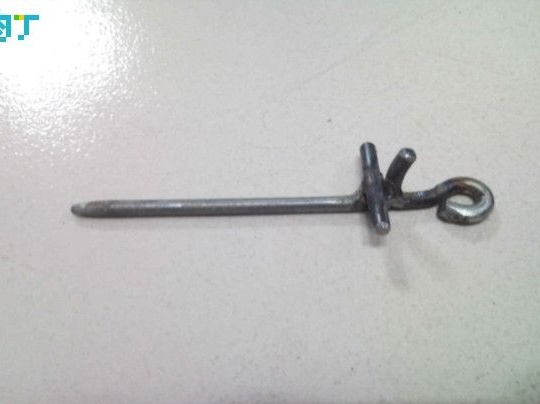
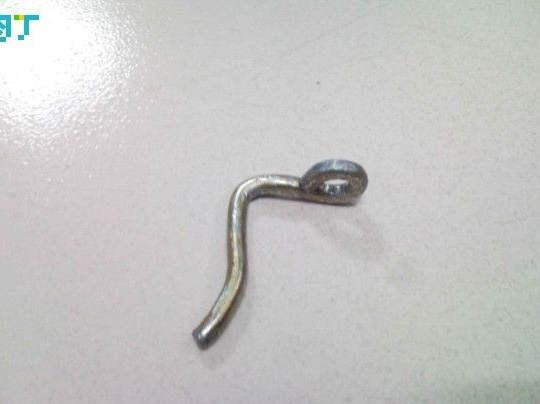
Step Three Creating a hammer at the drummer
The trigger is also made of wire, it is a hook with a loop at the end. When you pull the trigger, the drummer’s loop is removed from the axis and a shot is fired. As for the drummer, here you will need either welding or a soldering iron. What the drummer looks like can be seen in the photo. It is an axis with a loop at the end, with this loop the drummer is put on the axis when loading the gun. Also on the drummer there is a special hook for which the elastic clings. Well, in the very front part a special handle is welded, which makes it easy to deflect the drummer and thereby load the gun.
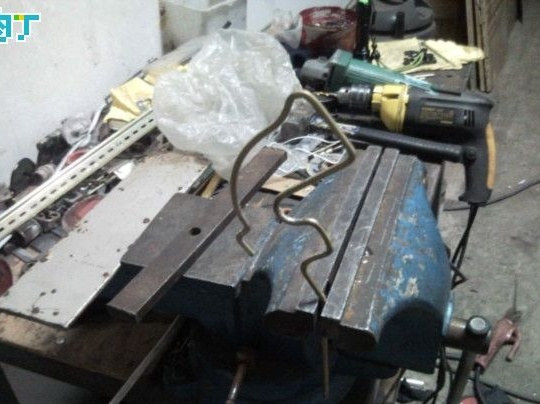
Step Four Gun assembly
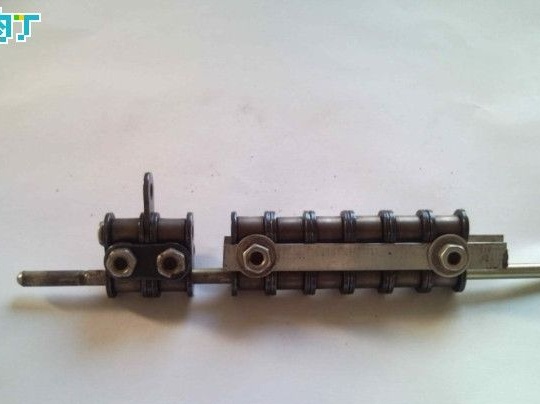
Assembling a gun is very simple. The fabricated blocks of links must be installed on the axis and attached to the gun. The long block can be welded to the axis or soldered. As for the front, it must be movable to load the gun. To do this, a thread will be needed at the end of the axis, but the block will be fixed with nuts and washers.
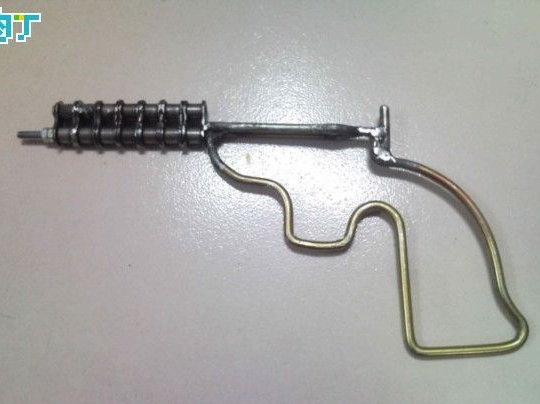
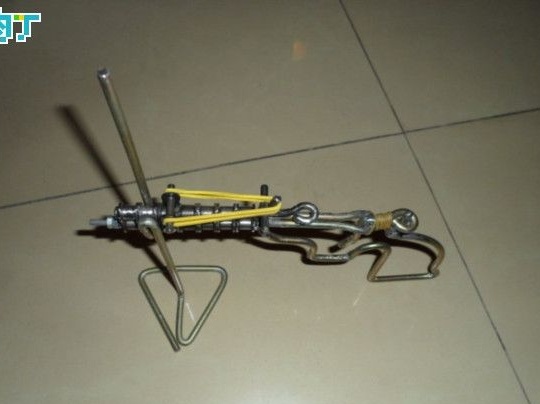
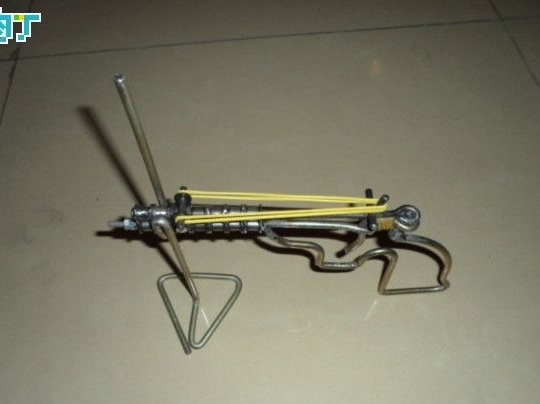
Now you can set the trigger and drummer. The trigger can be wound to the axis of the gun with rubber, this is the easiest way to mount. Well, the striker is inserted into the block of links, and its loop is worn over the loop of the trigger. And finally, it remains to pull the elastic, one end it is attached to the nose of the gun, and the other to the striker. The elastic must be powerful enough for detonation to occur.
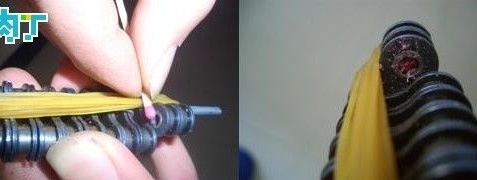
That's all, now it remains only to charge the gun. To do this, you need to deflect the nose to the side and lay sulfur in the hole from the matches. After that, you can try to make the first shot.