
Huge rooms, most often former industrial buildings, a huge amount of glass, brick and concrete ... Such a building can hardly be called a cozy house in which you can forget about everyday problems, business and troubles. In many cases, such housing is an indicator that the owner is a successful person, having, if not everything, but much, keeping up to date and with modern fashion trends. This housing - showing the status of a person. This is a certain style that comes from the English word "loft", which means attic or gallery. This style is characterized by huge open spaces, colors of dark, cold tones and so on. Interior decoration - different from other styles.
Therefore, based on all of the above, I present to your attention a sample of the lighting design of such a room in the loft style. An example will show how to make a chandelier in this style from a minimum of materials, costs and skills.
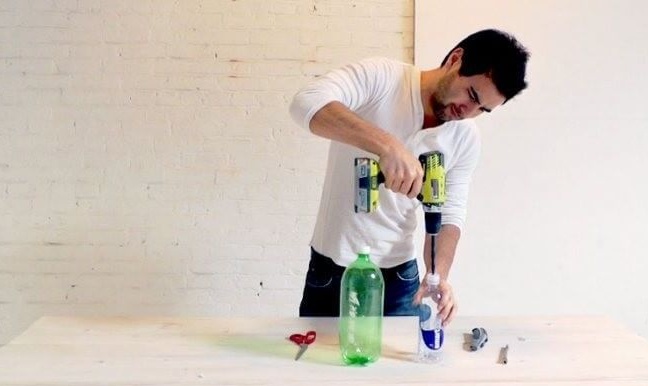
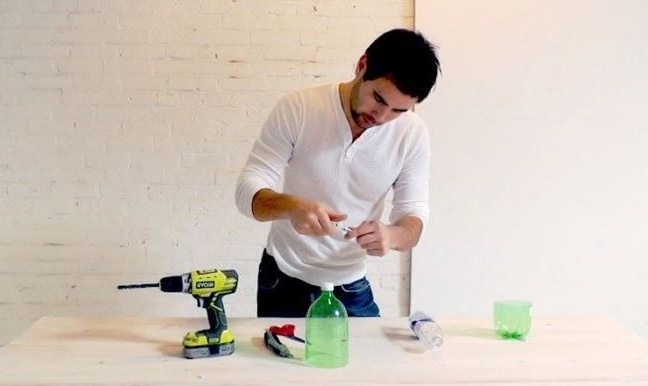
For work, the author used such components and tools, as:
wire cutters, stationery knife, wire, bulb holder, self-tapping screws, wire cutters, a drill or a screwdriver, cement, sand, several plastic bottles of different sizes, containers for mixing cement and a film.

To begin, cover the work surface with a film, so that when mixing the cement mixture does not stain.
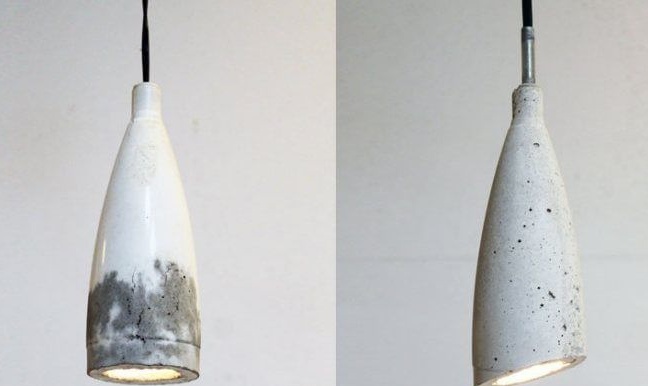
Now plastic bottles are taken. The size of the bottles depends on your desire to make a large or small lamp. For the outer side, openwork PET containers are also suitable. The pattern captured on the bottle will be reflected on the surface of the product. The inner bottle is taken with a smaller diameter. It should be smooth, without any patterns. Cut the bottom of a large bottle.

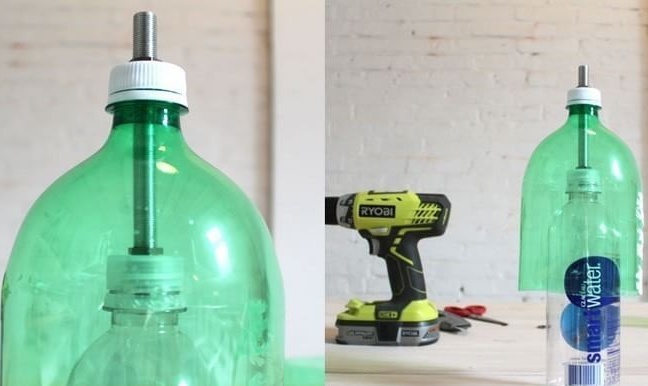
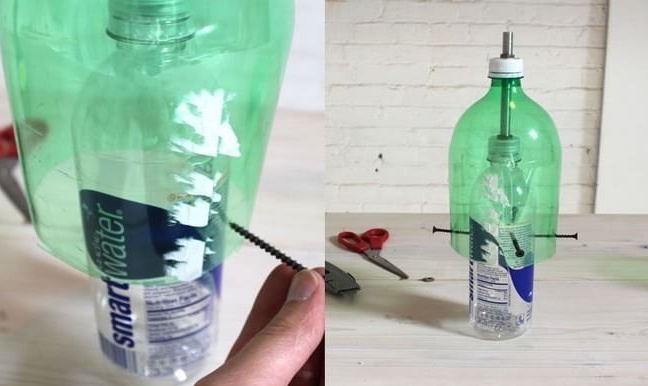
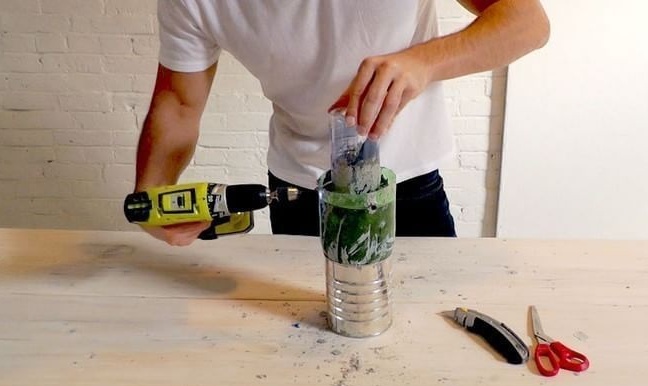
In the caps on both bottles, drill holes for the tube through which the electric cable will subsequently be passed. The holes should be drilled strictly in the middle, so that when filling the tank with cement mortar, the wall thickness was the same. We fix the tube on the bottle caps. This is what you should get.
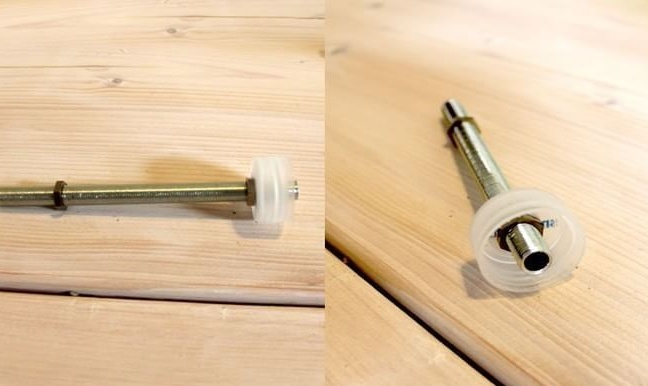
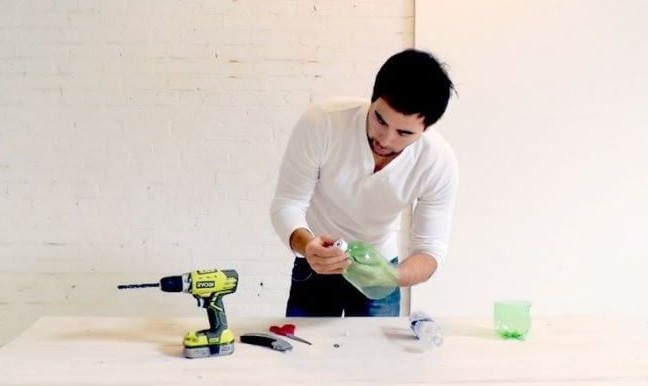
In order to avoid displacement of the center near the inner bottle, the author fixes it with self-tapping screws.
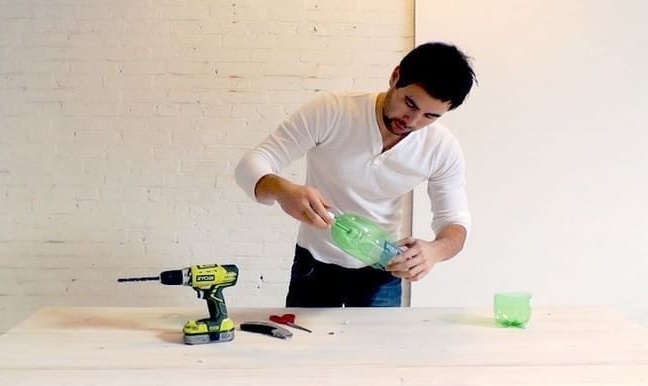
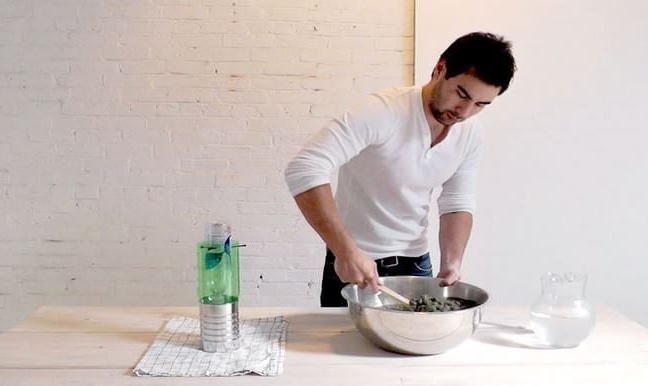
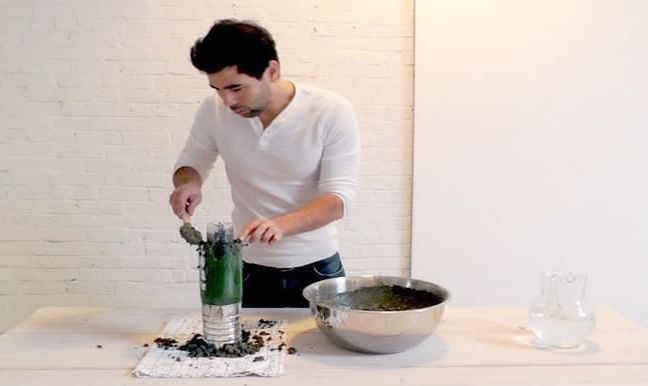
After the preparation of the shape of the future lamp is completed, the cement mixture is prepared. If you want the walls to be smooth and even, use a thick mixture, and vice versa, if various effects are needed, make the mixture liquid. Also, for the convenience of filling you will need some tin can in order to put a form in it. When filling with a mixture, flog bottles to avoid voids and snug fit. Also, for beauty, a certain amount of multi-colored additives can be added to the cement mixture.
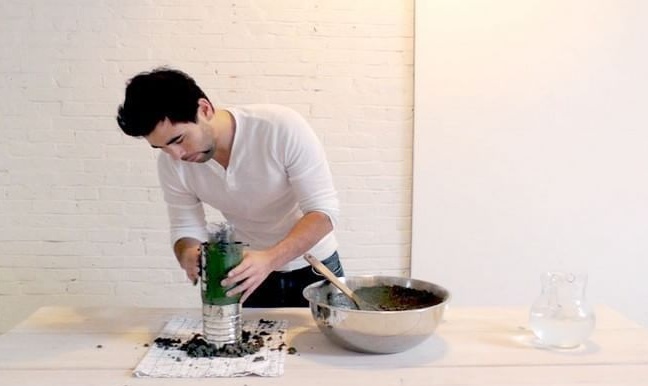
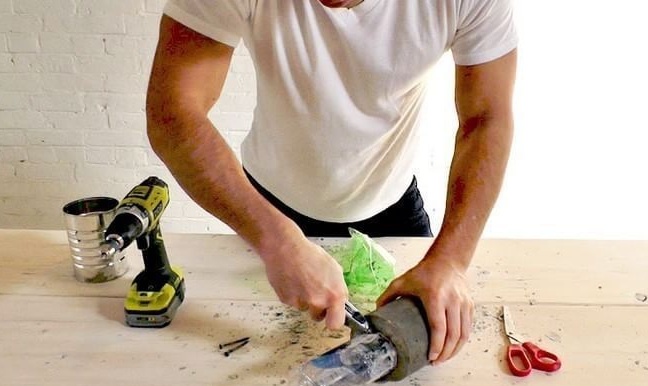
When the solution sets a little, unscrew the screws and allow to dry completely.
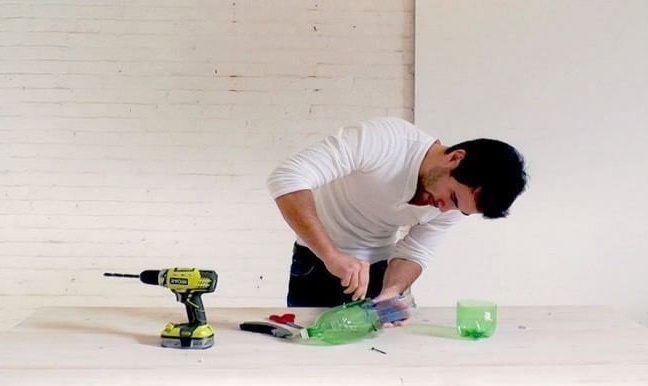
Next - remove the bottles. Be careful not to overdo it with efforts, so as not to spoil the almost finished work.
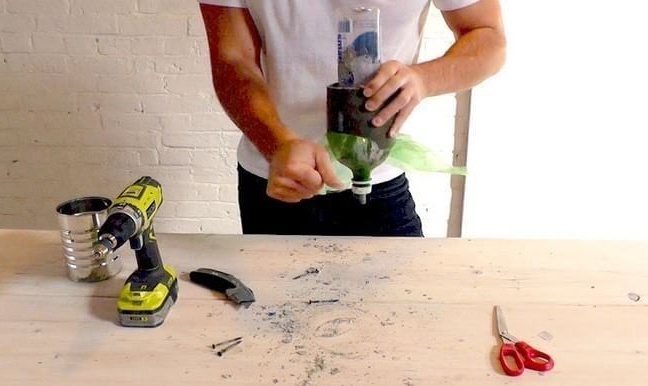
Level the surface with an emery cloth. Getting to the electrification. Connect the cartridge to the cable and pass it through the tube that is installed in the lampshade. Pay special attention to the cable, since it will be the main load on it. At least for the person who originally made this lamp, the entire load lies precisely on the cable. To reduce it, you can use the chain. Connect, check and fasten to the place where it should be, you can enjoy the result. The lamp in the style of the loft, or minimalism is ready.