
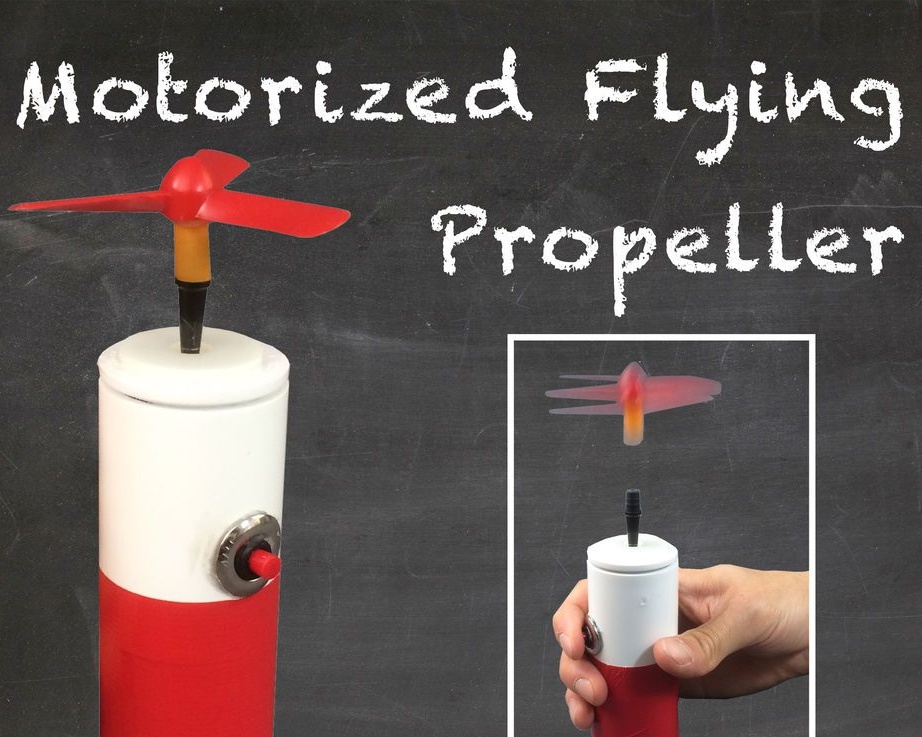
Surely many people know such a toy as a flying propeller. It is a screw that is mounted on an axis. To start such a screw, its axis was clamped in the palms, and then with a parallel movement of the palms the screw untwisted and took off. More advanced screws had a special trigger, in which you need to pull the rope to unscrew the screw. This article will examine an example of a starting device that uses an electric motor. Such homemade not only will be interesting to the child, but also will open for him the wonders of the homemade world.
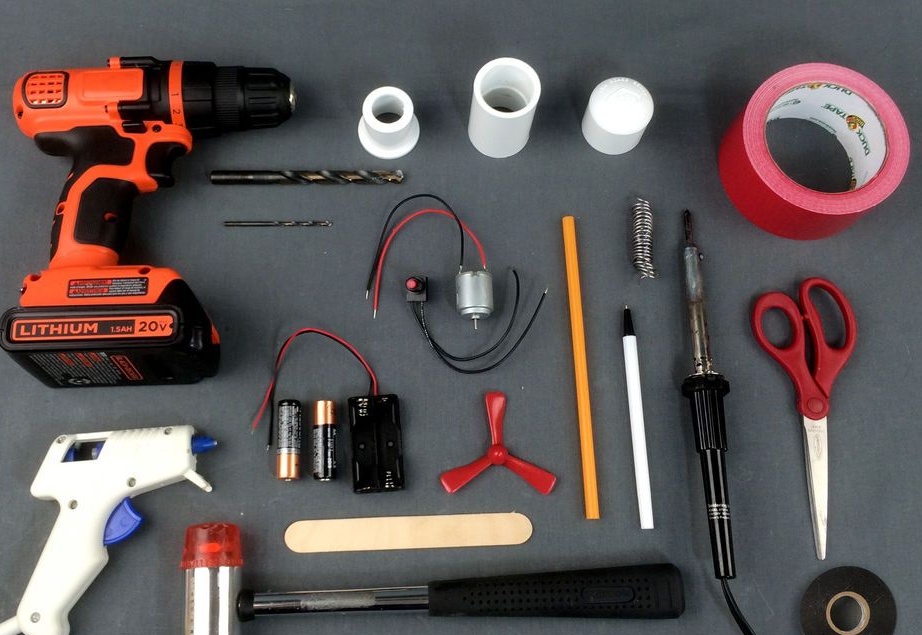
Materials and tools for manufacturing:
- 3V motor (can be found in toys electric shavers, etc.);
- button;
- wires;
- power supply (two finger batteries);
- holder for batteries;
- a screw and an axis for it (if you assemble the propeller manually);
- drill;
- soldering iron with solder;
- scissors;
- PVC coupling;
- PVC reducer;
- ball pen;
- electrical tape;
- hot glue and more.
Homemade manufacturing process:
Step one. Engine installation
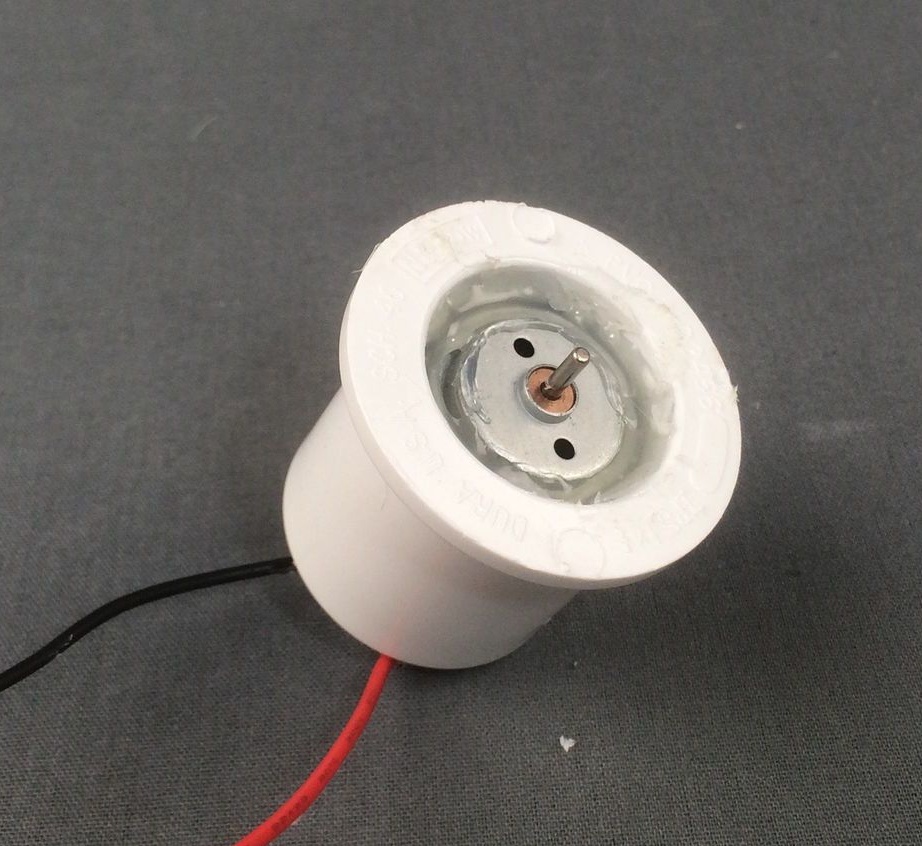
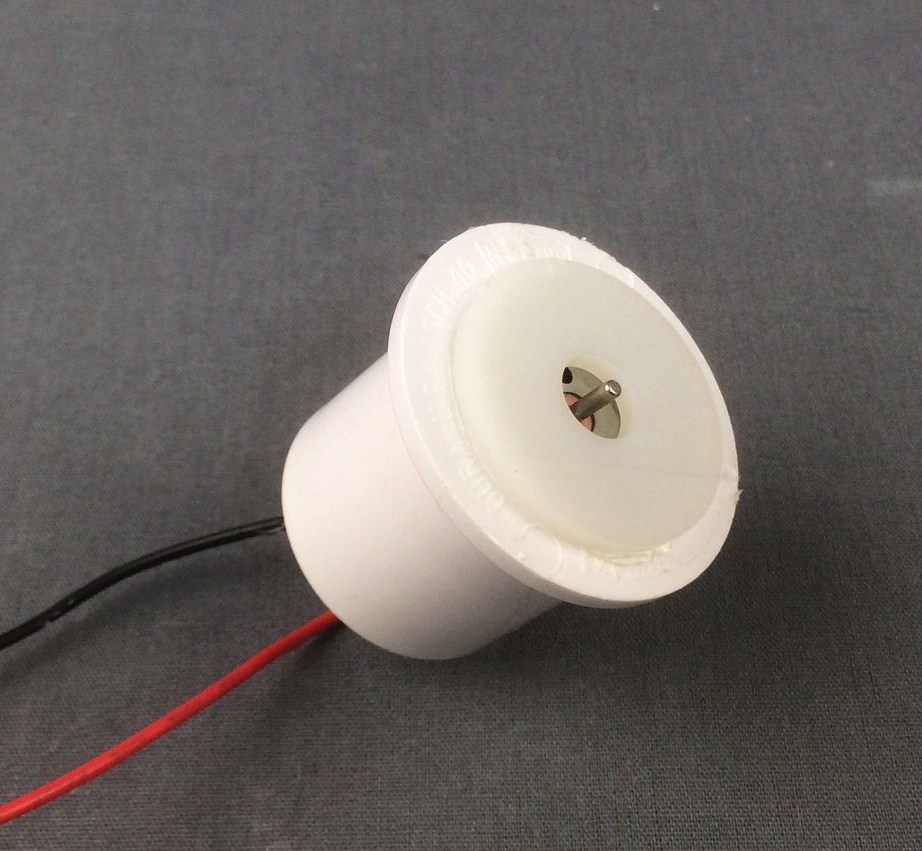
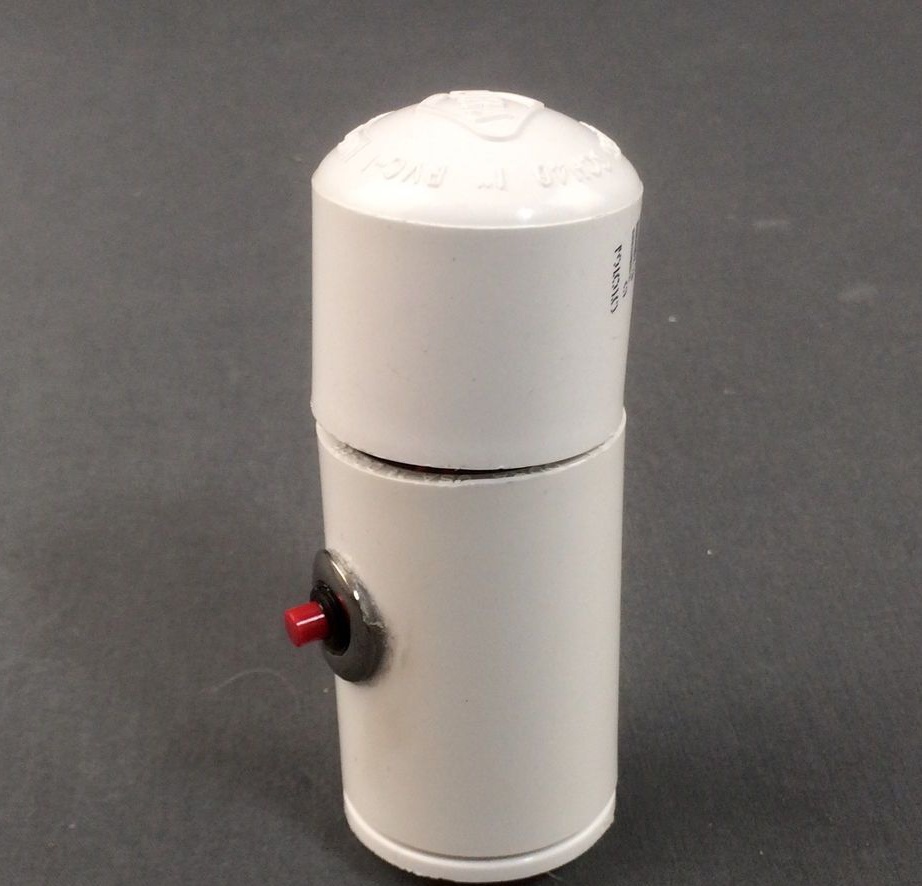
Self-assembly begins with the installation of the engine. It must be placed in the PVC gearbox and fixed there with hot glue. In this case, you must be careful not to let the glue get on the shaft or inside the engine. Glue is applied around the perimeter, as you can see not a photo. After installing the engine on the upper part, the washer is glued, it does not affect the design properties of the device, but simply gives it a more pleasant appearance. The motor wires must exit from the back of the pipe and be of sufficient length to connect them.
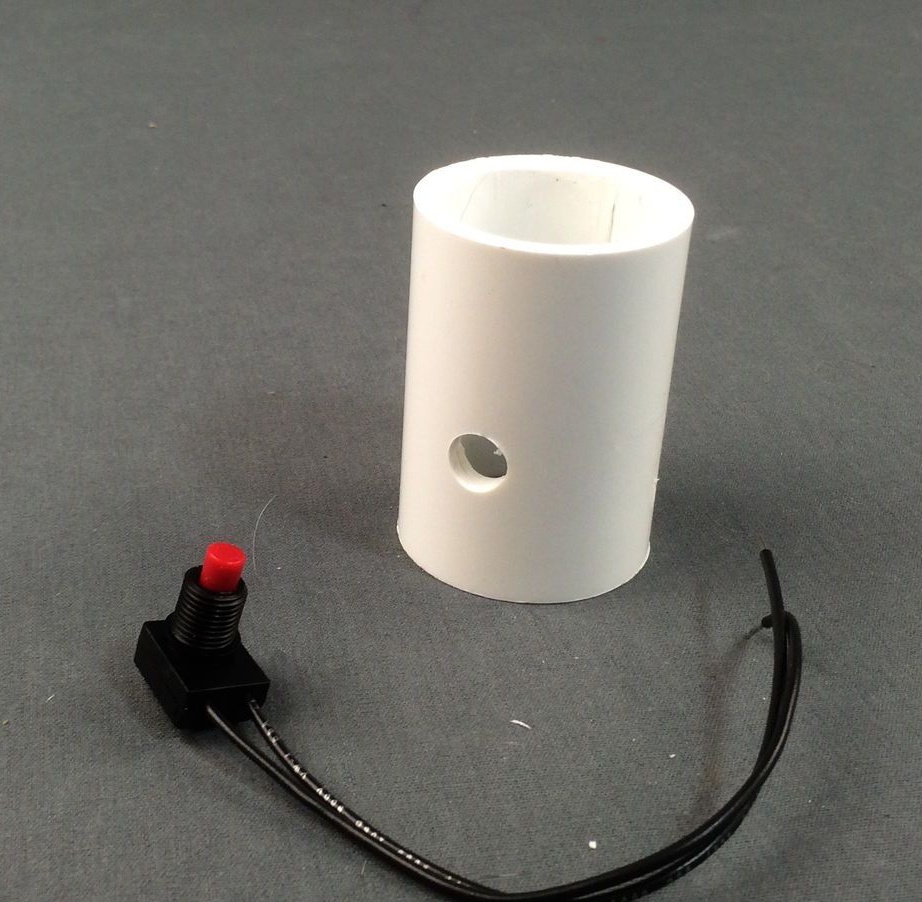
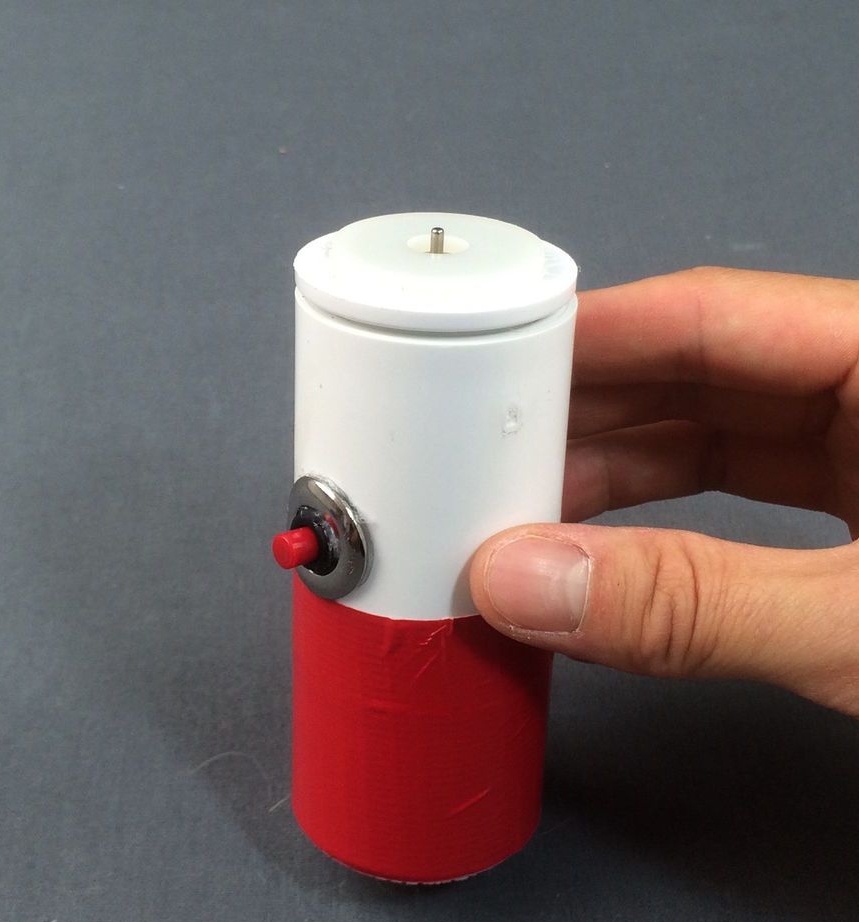
Step Two Set the button
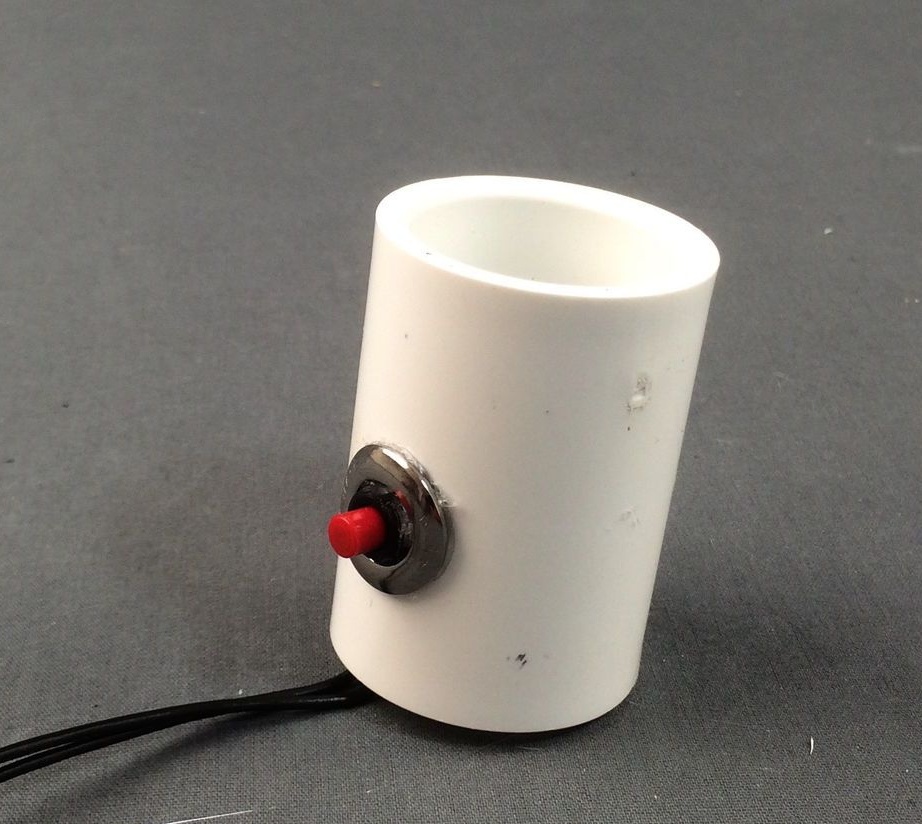
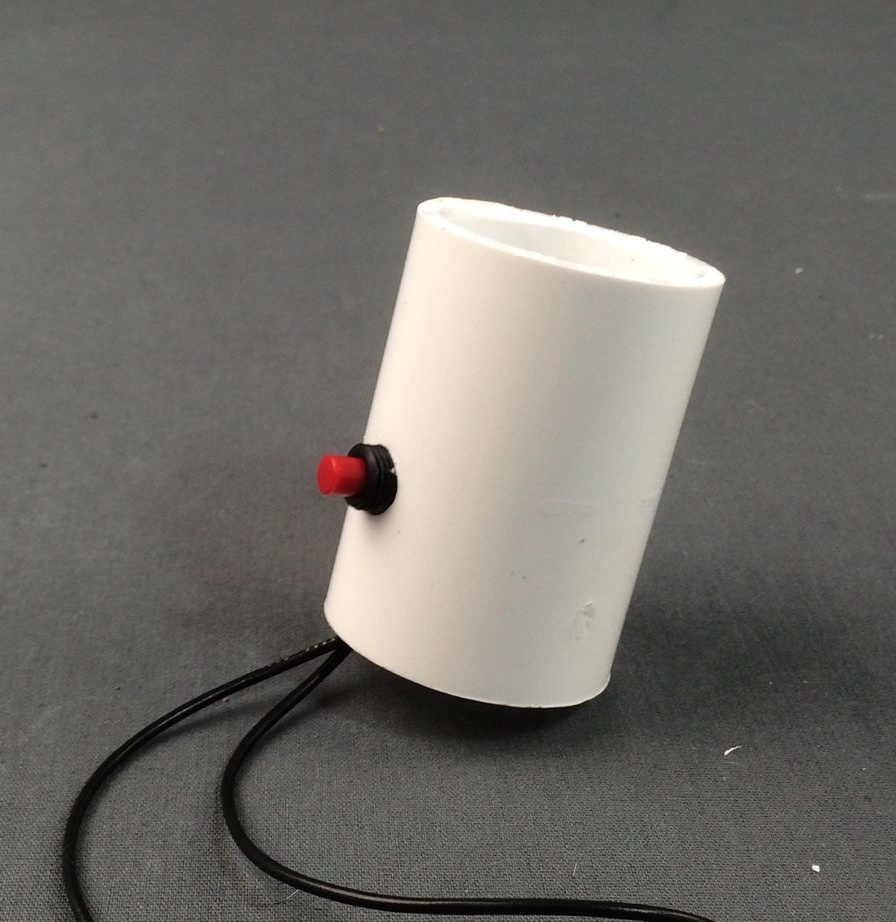
In the PVC coupling, you need to drill a hole for the button. It should be slightly larger than the diameter of the button. The button must be placed so that it does not interfere with the installation of the gearbox in the pipe. The button is attached using the nut that is present on it. If there is no nut, the button can be glued with hot glue.
After that, you can install the gearbox in the coupling. It is possible the gearbox will go into the clutch tightly and you will need to make a few light hammer blows. It is important not to get on the motor shaft.

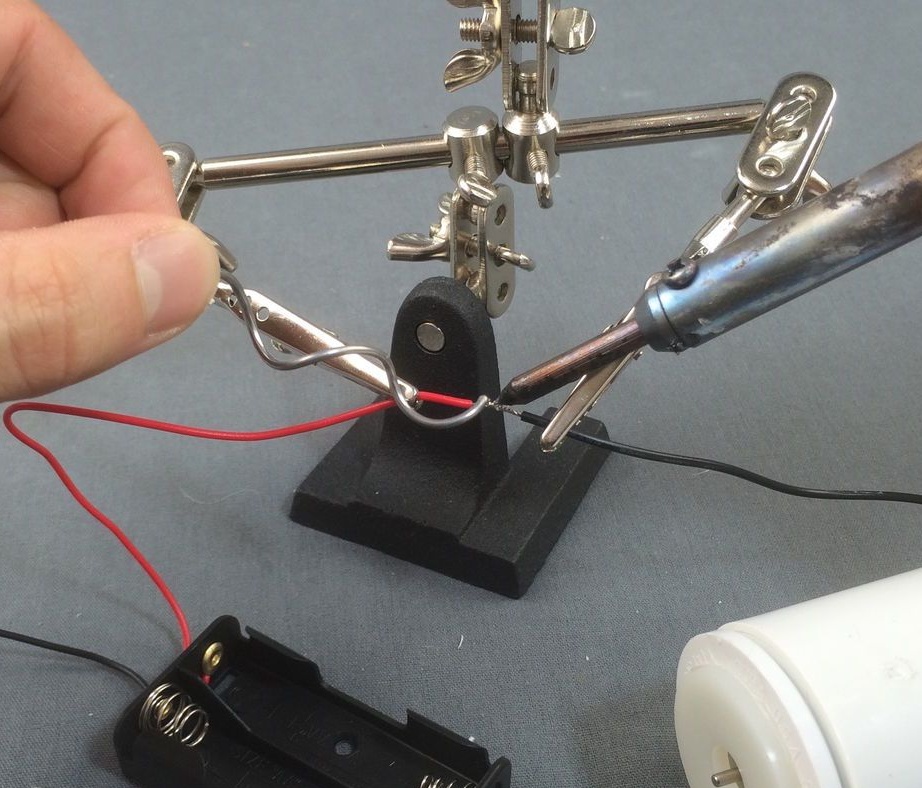
Step Three We solder a chain
Now you need a soldering iron. It is necessary to connect the wire from the motor or switch to the battery. It is important not to reverse the polarity, otherwise the motor will spin the screw in the opposite direction, it simply will not take off.The button is set to the gap between the battery and the motor contact. However, you can do without a soldering iron, it is enough to twist the wires. Subsequently, the wires at the connection points must be well insulated.

Step Four Assembling the device
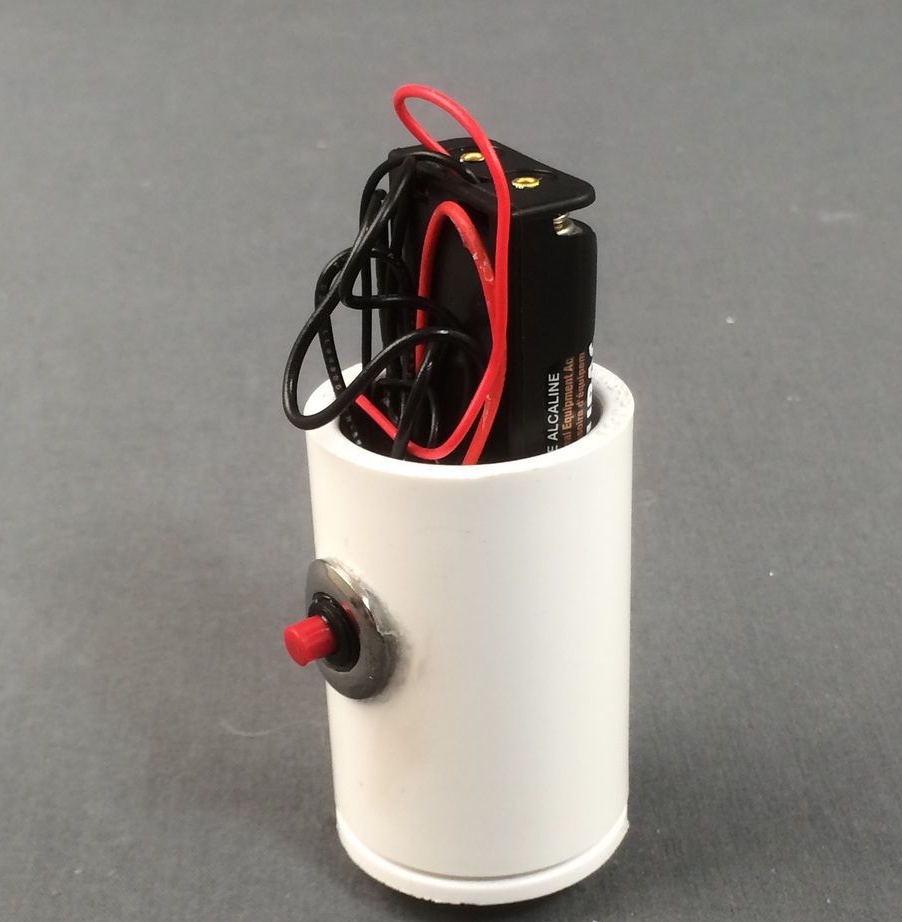
An adapter is used to install the battery pack; it can also be made from a piece of PVC pipe or other part. The battery holder is installed in the pipe, and then this pipe is attached to the coupling using a wide tape. In the future, replacing the batteries will be easy enough to rewind the tape.
Step Five We make a shaft for transmitting torque to the screw
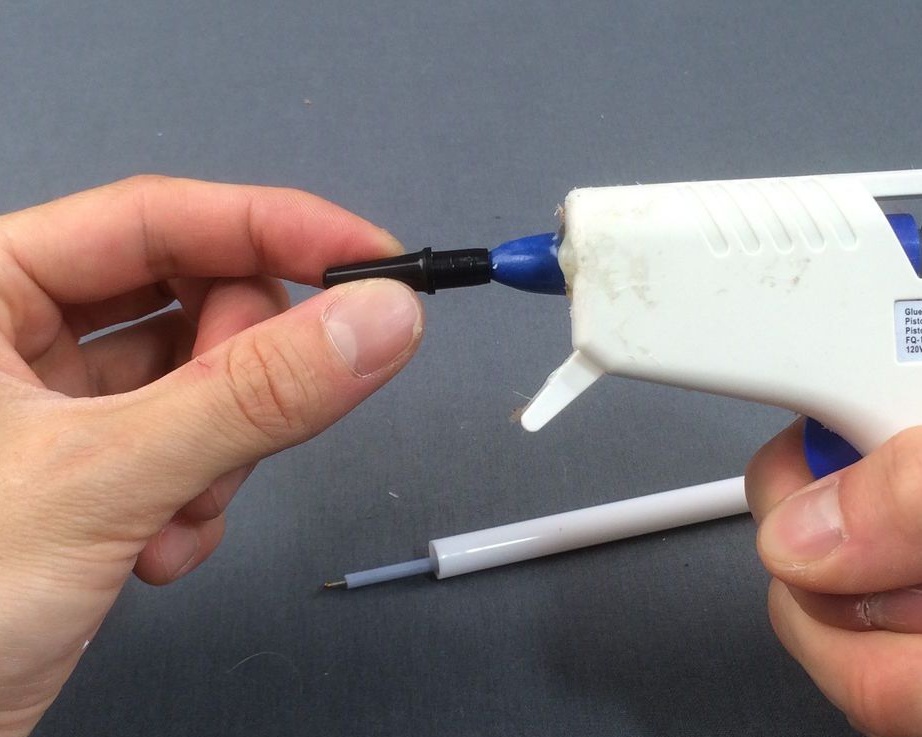
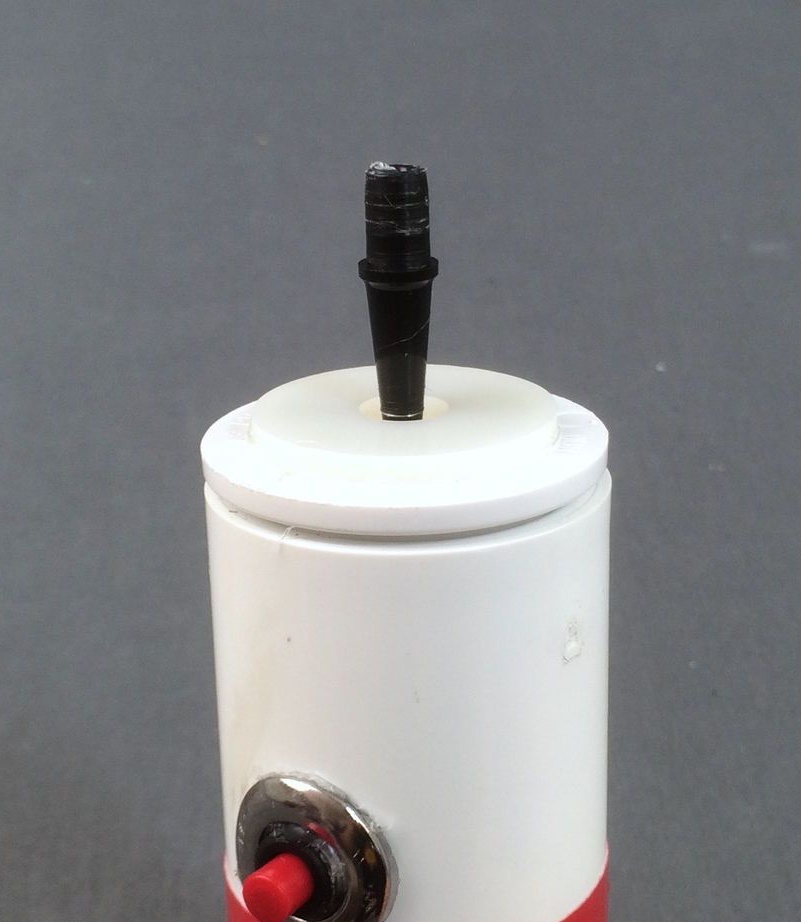
In order to connect the propeller to the device, you will need to make a special adapter. The author makes it from the tip of a ballpoint pen. It is put on with a sharp end on the motor shaft and then hot glue is poured into it. The most important thing is that the tip is located exactly in the center of the motor shaft. Otherwise, vibrations will form, and this will interfere with unscrewing the screw to the desired speed, and will lead to a rapid discharge of the battery.
Step Six Making the axis of the screw
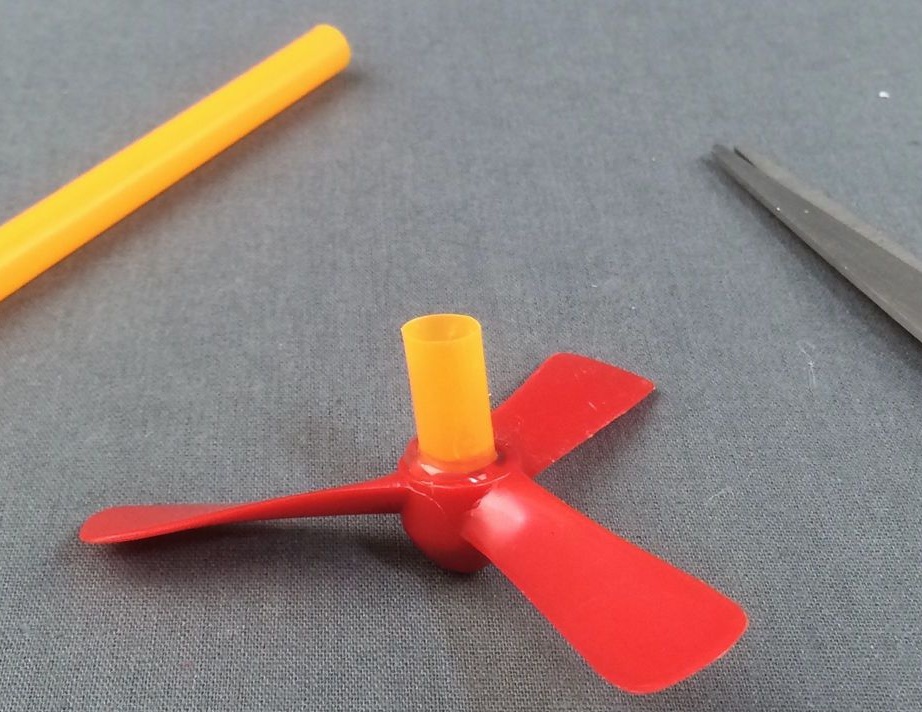
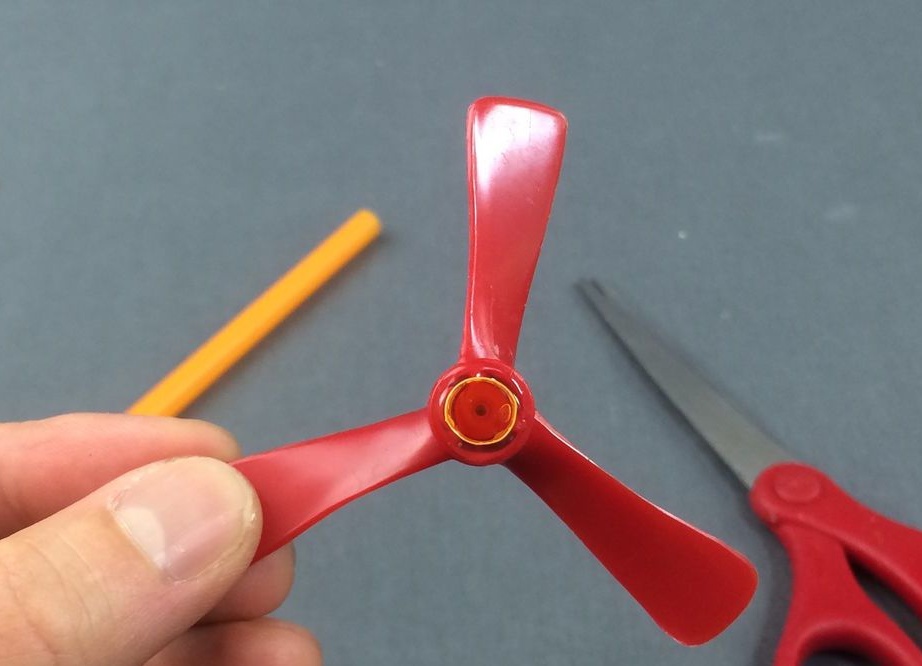
The screw axis is made from a piece of plastic straw. You just need to cut a piece of the desired length and then attach it to the propeller with hot glue. It is also very important that the straw is in the center of the screw.
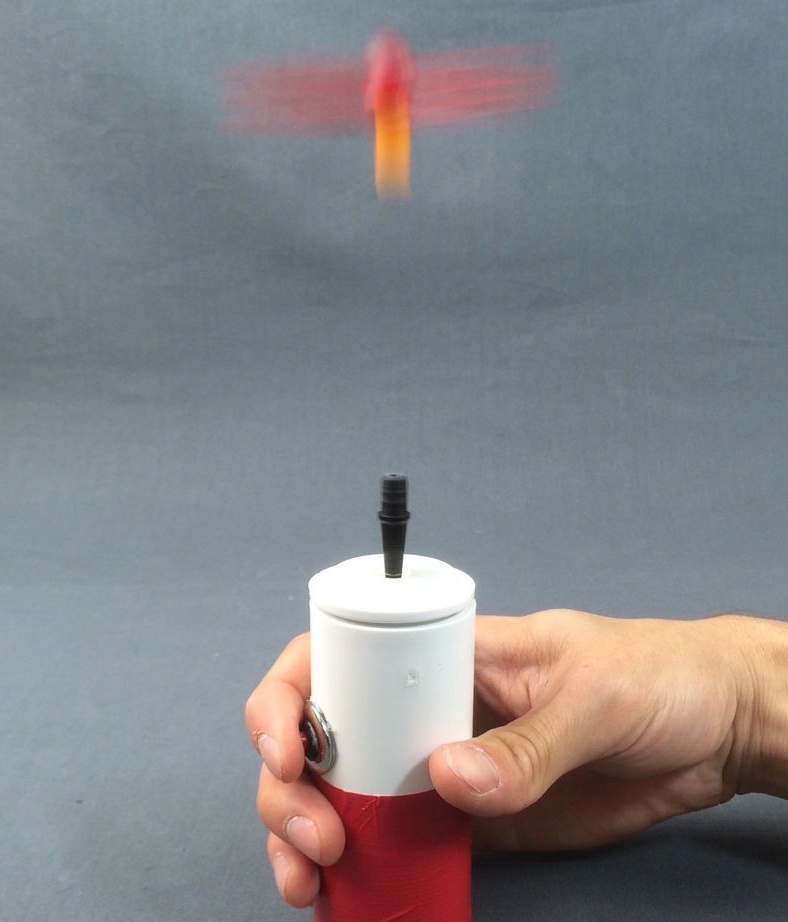
Seventh step. Homemade tests
To start the propeller, you need to perform several actions. First, the propeller must be installed on the motor shaft, in our case it is a cap from the handle. Then you need to take a ruler or other similar object and slightly tighten the screw to the device. After that, you can press the button and wait for the moment until the screw is untwisted to maximum speed. Then, as soon as the ruler is laid aside, the screw will immediately fly up. Thus, you can start the screw not only up, but also sideways. You can also run it upside down on a table so that it spins like a spinning top.


That, in fact, is all. If everything is done correctly, a rather interesting and informative toy will turn out. If the screw vibrates too much, it needs to be centered. Also, the tube may turn out to be too large in diameter, and you will need to select the axis of the optimal diameter or come up with a different design.