
If you need to make a quality incubator do it yourself, then for this purpose the old refrigerator is the best fit. Firstly, this is a ready-made building that is well insulated, which means that the incubator will not lose heat, and energy will be consumed much more economically. In addition, there are shelves in the refrigerator, they can be used as a ready-made incubator tray. All that is needed to turn the refrigerator into an incubator is to install heating elements, a temperature regulator, and of course to organize a favorable microclimate for the development of embryos in eggs.
Let's look at an example of how to make a simple incubator out of the refrigerator. It does not have a system for automatically turning eggs, however, this is not a problem if you show enthusiasm, such homemade it is quite possible to make an automatic incubator.
Materials and tools for manufacturing:
- An old refrigerator (you can not work and without a compressor);
- bulbs with cartridges for 220V;
- a temperature regulator (you can purchase or do it yourself);
- wires;
- coolers from the computer (preferably);
- a cutting tool (for example, a grinder);
- drill;
- screwdrivers, screws and other little things.
Incubator manufacturing process:
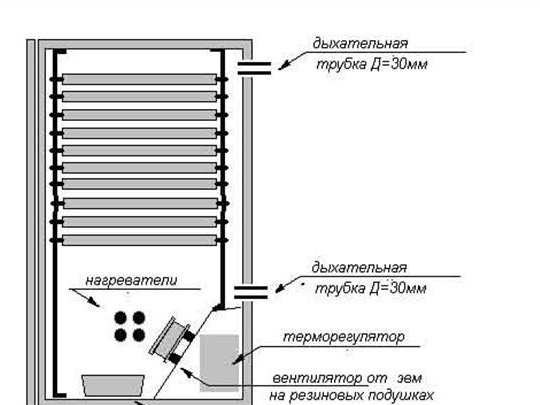
Step one. Installation of heating elements
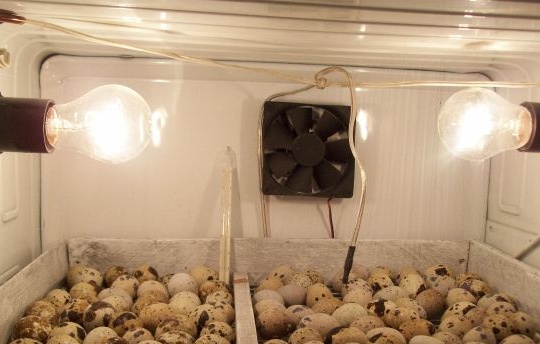
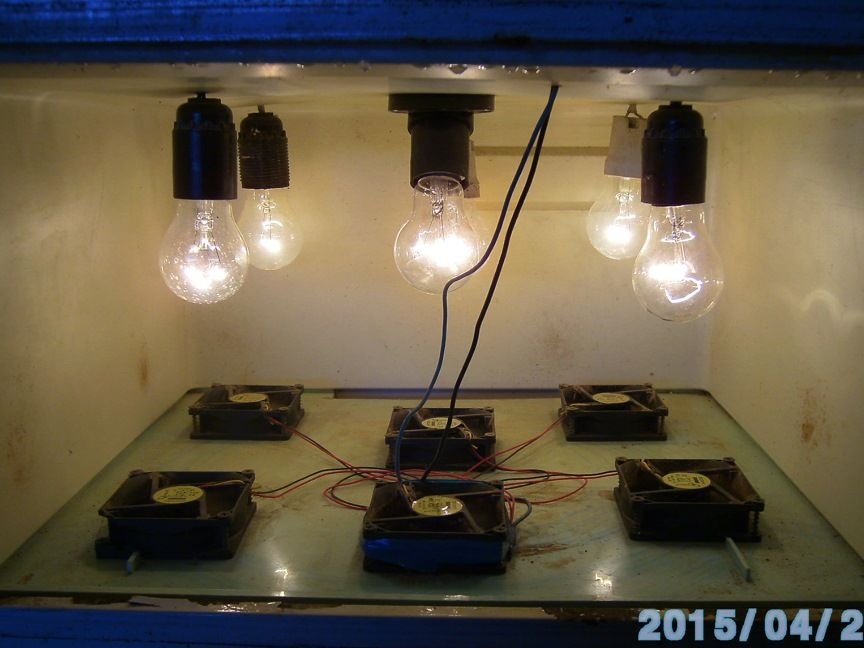
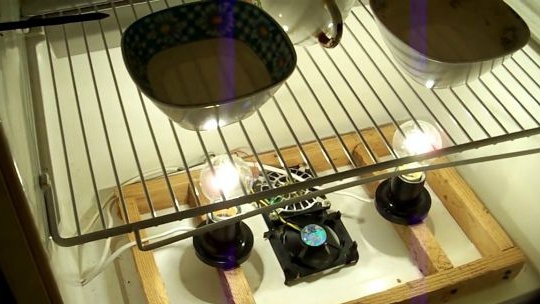
As heating elements, 220V bulbs are usually used. As for their power, everything here depends on the volume of the incubator. It is best to use many low-power bulbs than one powerful one. This will allow the incubator to warm more evenly. If the refrigerator is large enough, you will need four light bulbs per 100 watts.
Still as some heating elements some use TENy.
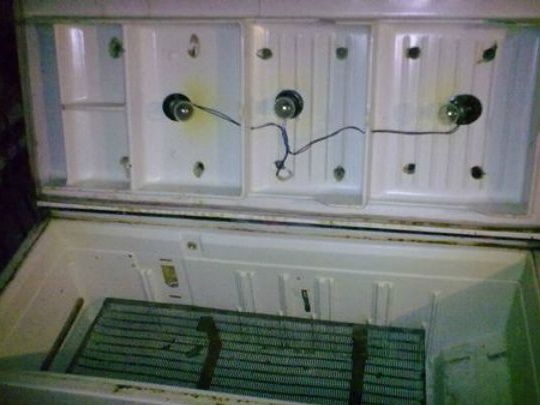
Bulbs are installed in the refrigerator door, for this you need to drill a hole in it to output a wire through which power will pass to the bulbs. From the inside of the door, you need to install cartridges for bulbs and connect them to each other with a wire. Next, the wires are combined into one and output through one hole in the door to the outside.
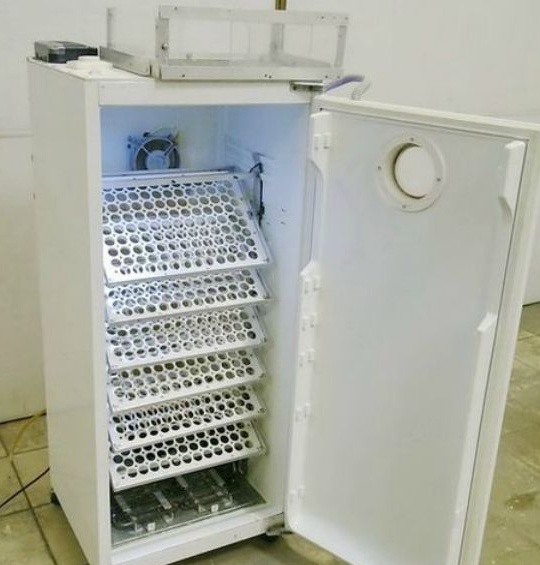
As for the method of placing the incubator, it is easiest to put the refrigerator upside down.
Another incubator can be placed vertically, that is, as the refrigerator originally stood. But in this case, the bulbs are usually installed not in the door, but directly in the refrigerator itself. For uniform heating, two bulbs can be installed at the bottom, and two at the top, or placed evenly in each chamber, it all depends on the type of refrigerator.
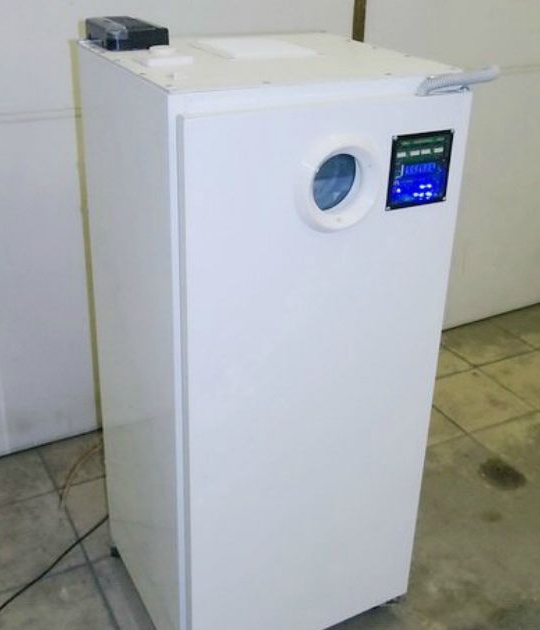
Step Two Temperature controller
The temperature regulator is needed in order to maintain the temperature in the incubator at the same level. Such a regulator can be assembled either by yourself, the Internet is full of circuits, or you can buy one already ready. The regulator itself is installed outside the refrigerator, and only the sensor is installed in the refrigerator itself. When, after turning on the incubator, the bulbs begin to glow and warm the air to a certain value, the controller turns them off. When the temperature drops, it turns on again. As a result, you can see that the lights blink when the regulator is working. There are also such regulators that smoothly supply voltage to the light bulbs, either increasing or decreasing their brightness. This method is good in that the bulbs last a very long time, since they never burn completely.
If the incubator is assembled correctly, then it does not consume more than 40 watts. It all depends on thermal insulation.

Step Three Fan installation
In order for the incubator to work better, it is recommended to install one or several fans in it. In this case, the air will circulate, and as a result will warm up evenly. In addition, due to the circulation, humidity will be evenly distributed. As such fans, you can use computer coolers. You can install several of them. Such fans consume very little power.
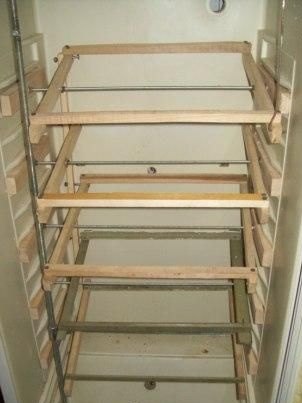
Step Four Egg shelves
To create shelves for eggs, you can use existing shelves in the refrigerator. On them you can install cardboard packaging for eggs. If the shelves are too small, then you can always install additional ones.

Step Five Egg placement and incubator start
Before laying eggs on shelves, the incubator must be set up. To do this, first install a thermometer inside the refrigerator and set the temperature correctly. To monitor the thermometer, you can make a window in the refrigerator door. The temperature in the incubator should be 38 degrees.
When the temperature is set, moisture sources must be installed in the incubator. It can be bowls with water. Some also pour water into the trays of the refrigerator. When heated, the water will evaporate, thereby forming the desired microclimate in the incubator.
And finally, when everything is ready, eggs can be loaded into the incubator. All that remains then is to monitor the temperature, and also turn the eggs on time. It is also important not to forget that there is always a source of evaporation water inside the refrigerator.
[media = https: //youtu.be/Dnb9j3fLKd8]