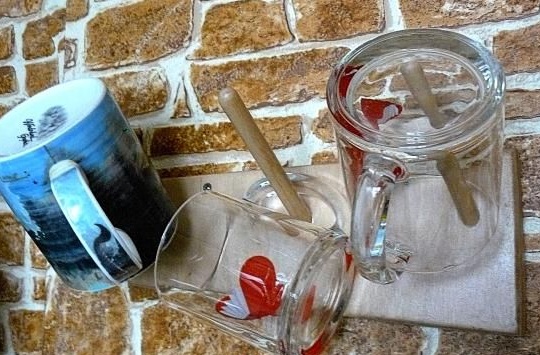
Mugs for tea are certainly necessary utensils in the kitchen of every home. Often they are stored on the dryer for the rest of the dishes or in a cabinet. The author suggested making a separate place for them, which will be mounted on the wall. Three cups are placed on such a holder, usually this amount is enough for the most commonly used cups.
Materials and tools:
- Twigs wooden (were taken from an old crib)
- A piece of plywood 16 - 18 mm
- Ruler
- protractor
- pencil
- Jigsaw (you can use the usual)
- drill
- Grinder (you can use a piece of sandpaper)
- PVA glue
- Brush and varnish
If desired, this scheme can be expanded to any number of mugs, it all depends on your needs.
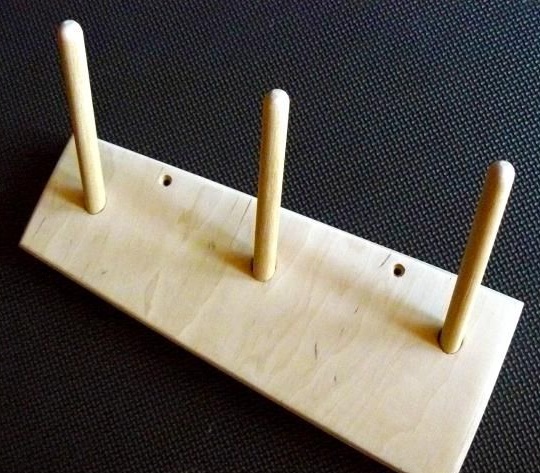
First of all, the author sawed out the basis for the future holder from plywood.
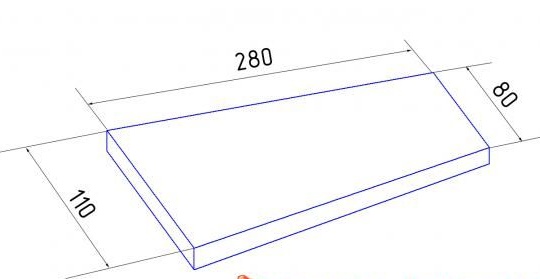
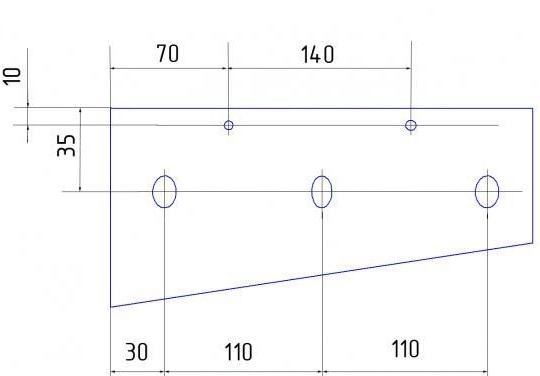
Since the base in the form of a rectangle looks massive, and it will not be very convenient to use, the author made one of the corners beveled. Further, he marked out and drilled holes for fastening under the screws he had available.
A guide was made of a wooden block.
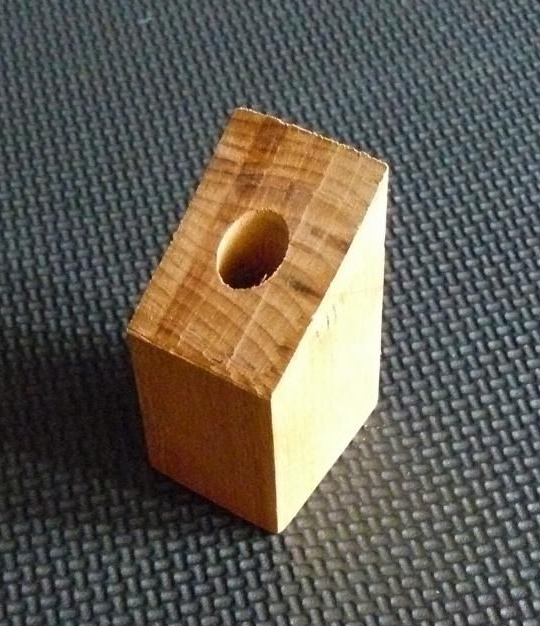
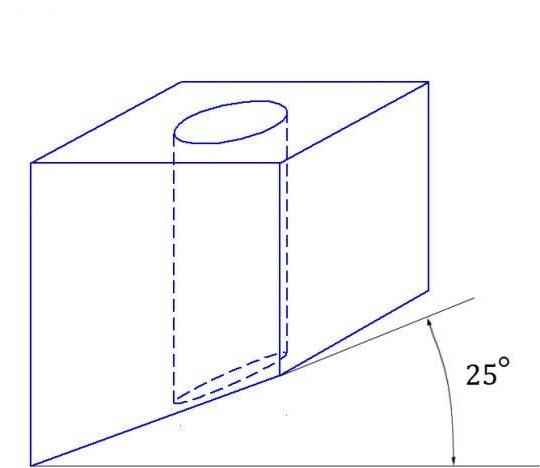
The size of this bar also does not play a particularly important role, the author just took a leg segment from the bed; the size turned out to be 35x30x60. At first, the twisted wood rods have a diameter of 12 mm; therefore, a drill of the same diameter was used. A through hole was made at the end of the bar.

Taking his hands on a piece of cardboard, the author began to mark up, with a protractor, an angle of 25 degrees was noted. It is from this angle that the twigs will become. After transferring the angle from the cardboard to the bar, he cut off the excess part from it.
For convenience during drilling, emphasis was made on unnecessary and suitable boards.
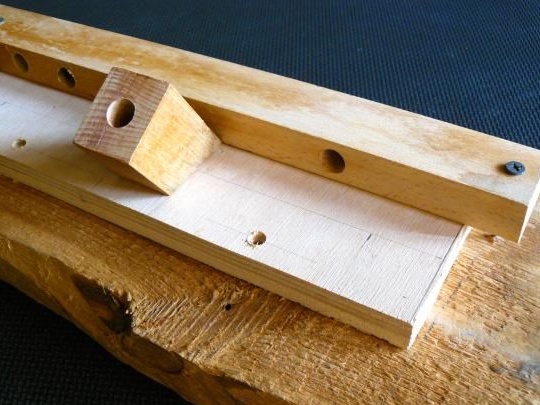
In places where twigs on plywood will be fixed, the author installed a guide and made through holes with it. Further, the base was polished, and the ends were slightly rounded. After that, he cleaned the twigs of varnish, and cut them into pieces of 14 cm.
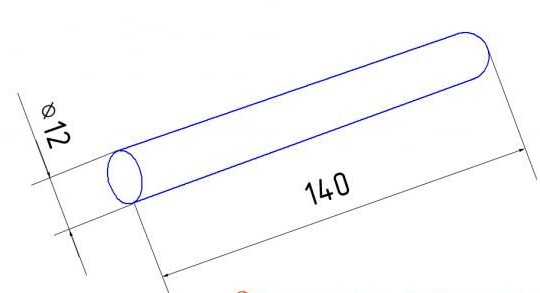
One end of the twist is rounded off, then lubricated with glue and inserted into the pre-prepared through hole with a blunt end so that the twig protrudes from the back.
After the glue has dried, the protruding part can be sanded. Such homemade can be puttied and sanded, then varnished, then simply fixed on the wall.