
Essence homemade lies in the fact that the lamp can be turned off without touching anything. You just need to blow it on a special sensor and after a moment the lamp itself will go out. Probably, the idea was borrowed from the way a person puts out a candle with his breath. Homemade is quite simple and useful, the system can be connected to a table lamp, a chandelier or any other source of lighting.
As a basis for homemade use a humidity sensor. The fact is that when you exhale, a certain amount of moisture comes out of a person, which the sensor picks up. To prevent the device from triggering any increase in humidity, it is set to a certain threshold value at which it triggers electronics.
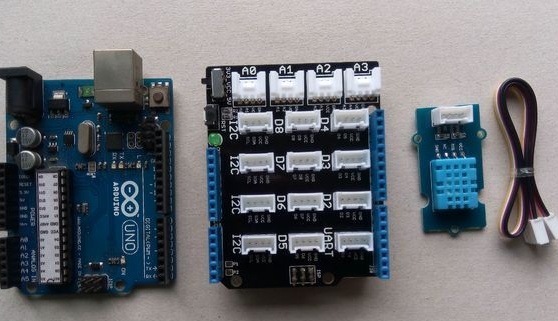
Materials and tools for homemade:
- humidity and temperature sensor;
- relay;
- button;
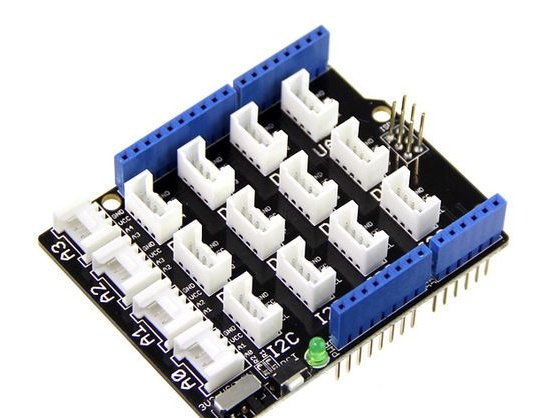
- base shield;
- microcontroller Arduino Uno.
Homemade assembly process:
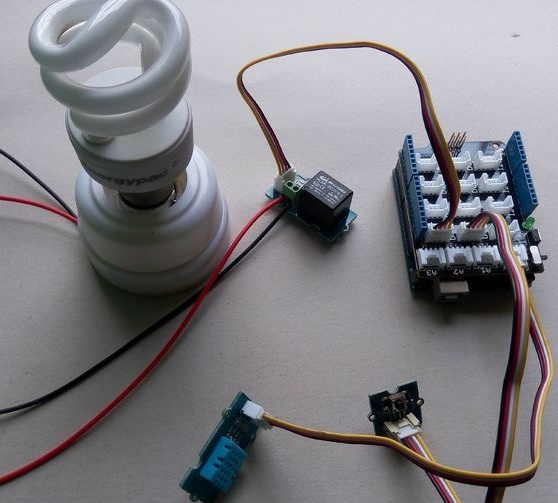
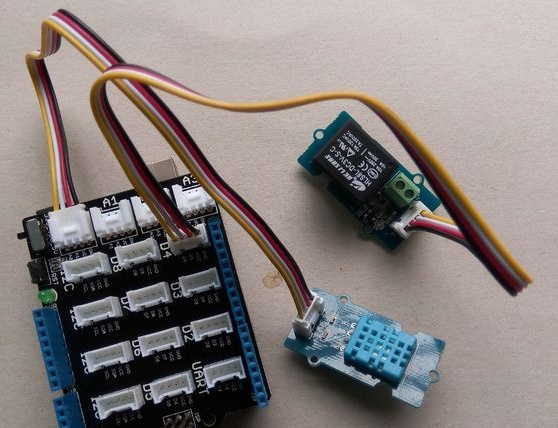
Step one. We connect the humidity sensor
The humidity sensor is connected to the analog pin of the Arduino Uno microcontroller. You need to connect through the Grove Base Shield, it has many connectors, this allows you to conveniently work with this kind of homemade products. The DHT11 A0 sensor is connected to the base shield.
Step Two We are looking for a threshold value for the sensor
Only by setting the threshold value correctly, you can successfully control the system without false alarms. Here you need to move on to the programming process. For these purposes, you will need to download the library. In addition, you need to download the attached code for Arduino.
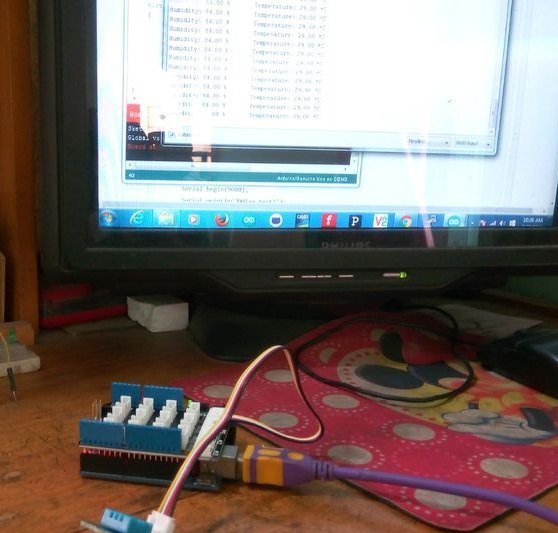
To properly configure the sensor, you need to open the input monitor and observe for one minute, to what extent the percentage of humidity changes. It will be necessary to record the maximum value that will be during this time on the monitor. This value will be the threshold. According to the author, in his house the maximum humidity was 84%.
Step Three We connect the relay and the button
At this stage, you need to connect the relay and button. The relay is needed because the 220V lamp will work. The relay is selected depending on the load. The relay is connected to the D4 connector, and as for the button, it is connected to the D8 connector.However, you can use other connectors, but you must remember to change the values in the controller code.
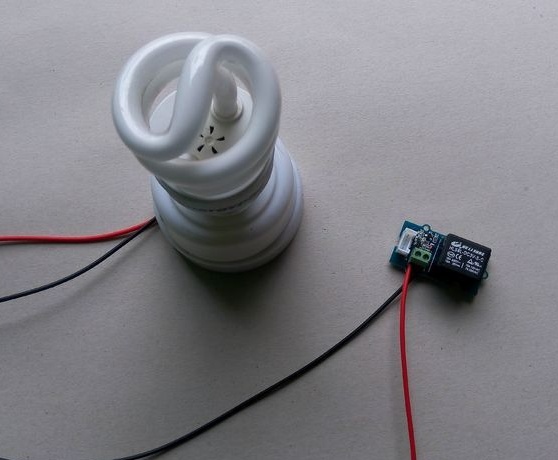
Step Four We connect a lamp
To demonstrate the operation of the system, the author used a CFL lamp. One wire is connected to the relay, and the other to the power source. At the same time, one must be careful, because this is where high-voltage operation takes place.
That's all, the homemade product is ready, you can start the tests. For clarity, the electronics can be equipped with a small LED. You will also need to conduct a couple of experiments and choose the optimal threshold for the device to trigger when breathing.