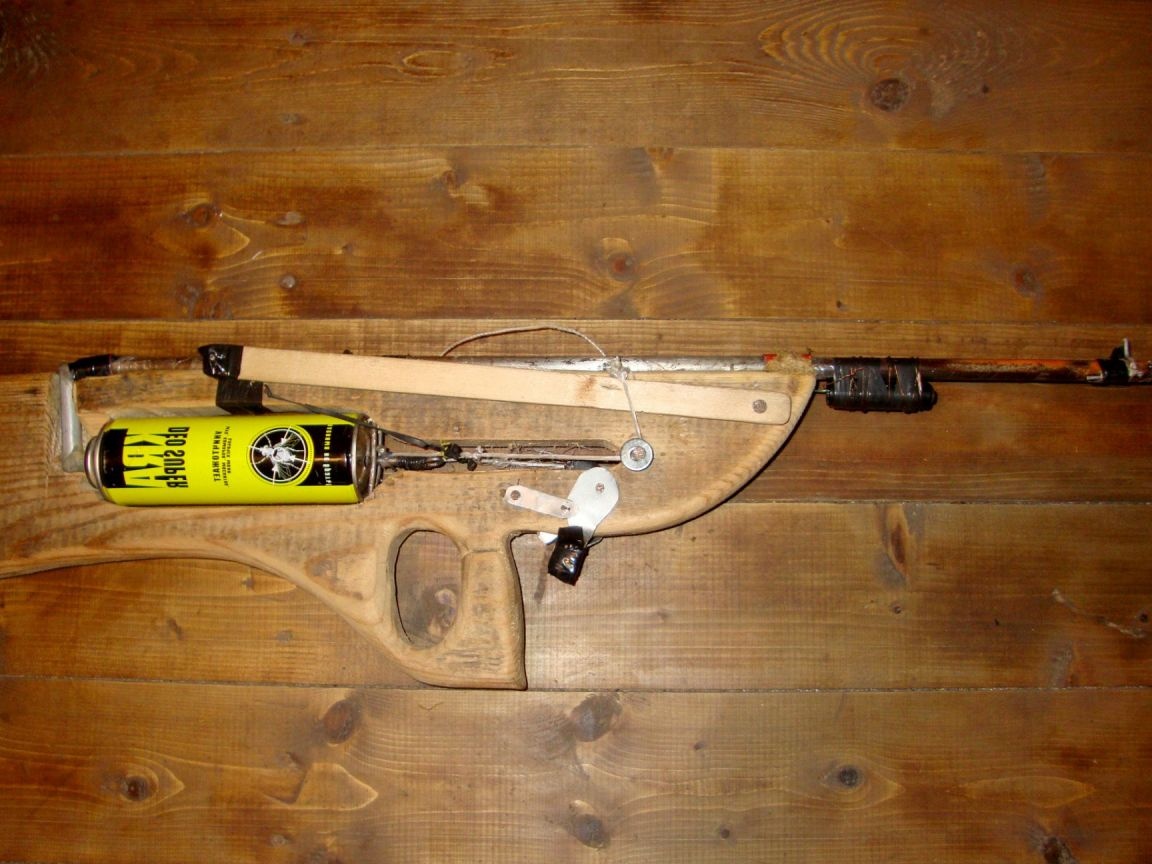
The article will consider an example of creating a simple spring-piston rifle that shoots darts. According to the author, from such a rifle it is quite easy to get into a beer can from a distance of 20 meters. Made homemade from improvised materials, and the assembly process itself is quite simple.
Materials and tools for homemade:
- spray can;
- rubber from a bicycle camera;
- cylinder made of wood;
- plastic or sheet metal;
- a piece of a thick board;
- electrical tape;
- spring;
- a nail 15 cm long;
- tube (metal or plastic);
- planks of wood;
- nails;
- a tube for the manufacture of the barrel (plastic or metal);
- steel washer;
- the rope.
Of the tools you will need: a file (or emery), cold welding, a lathe (can be replaced with a drill), pliers, a jigsaw, a drill, scissors and glue for rubber.
We make a dartometr:
Step one. Cylinder manufacturing
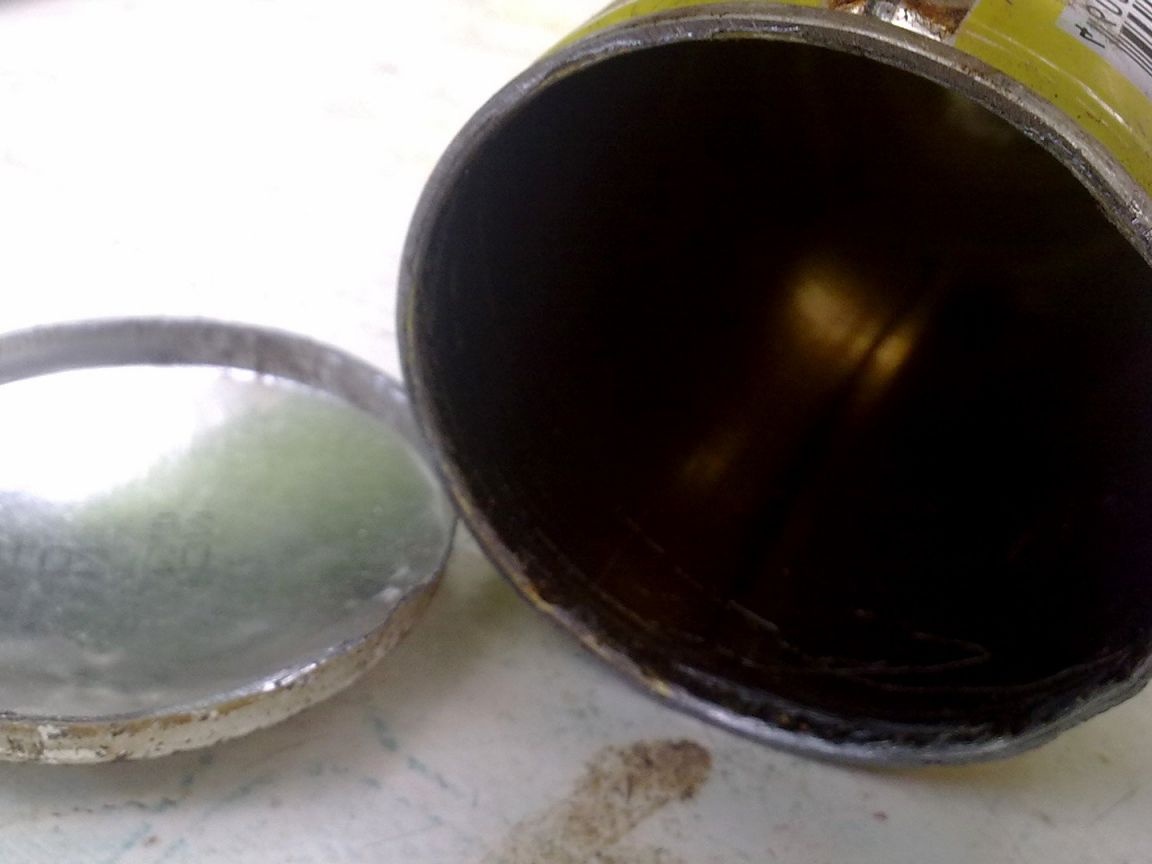
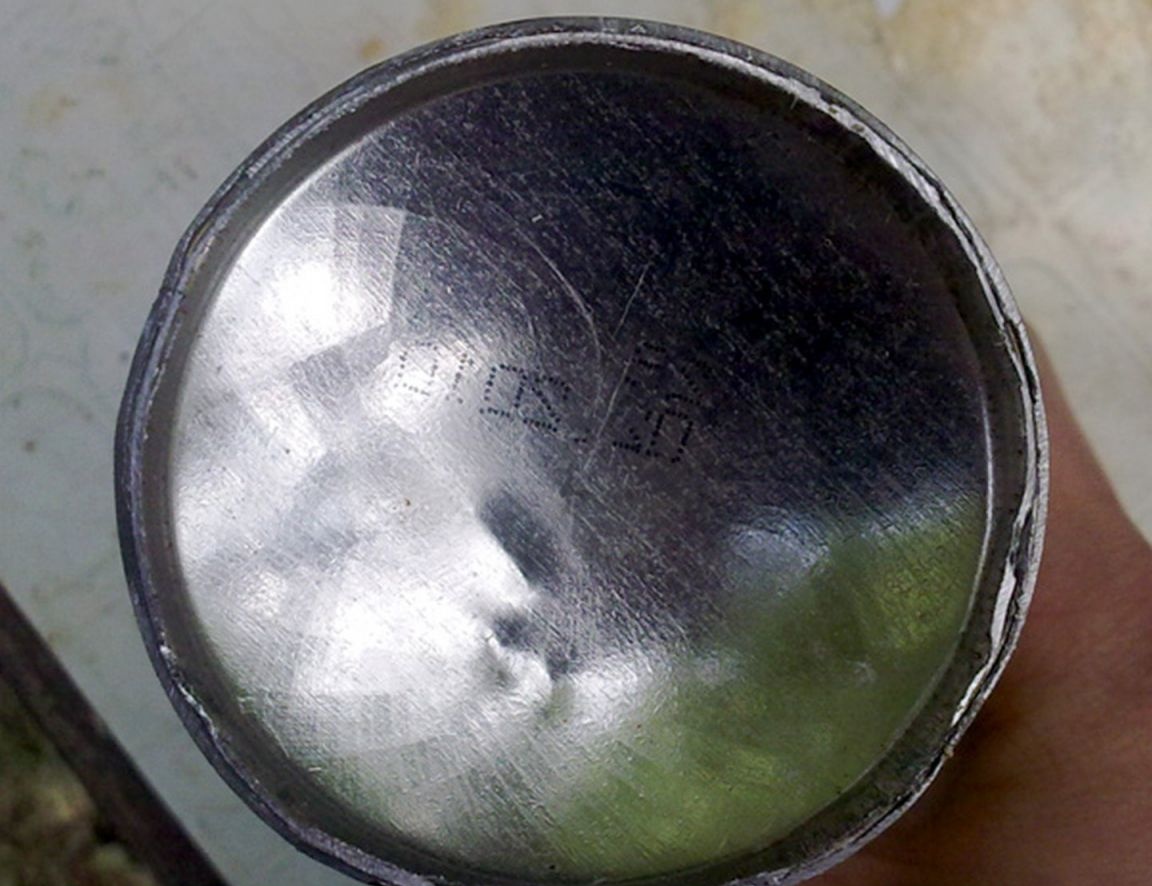
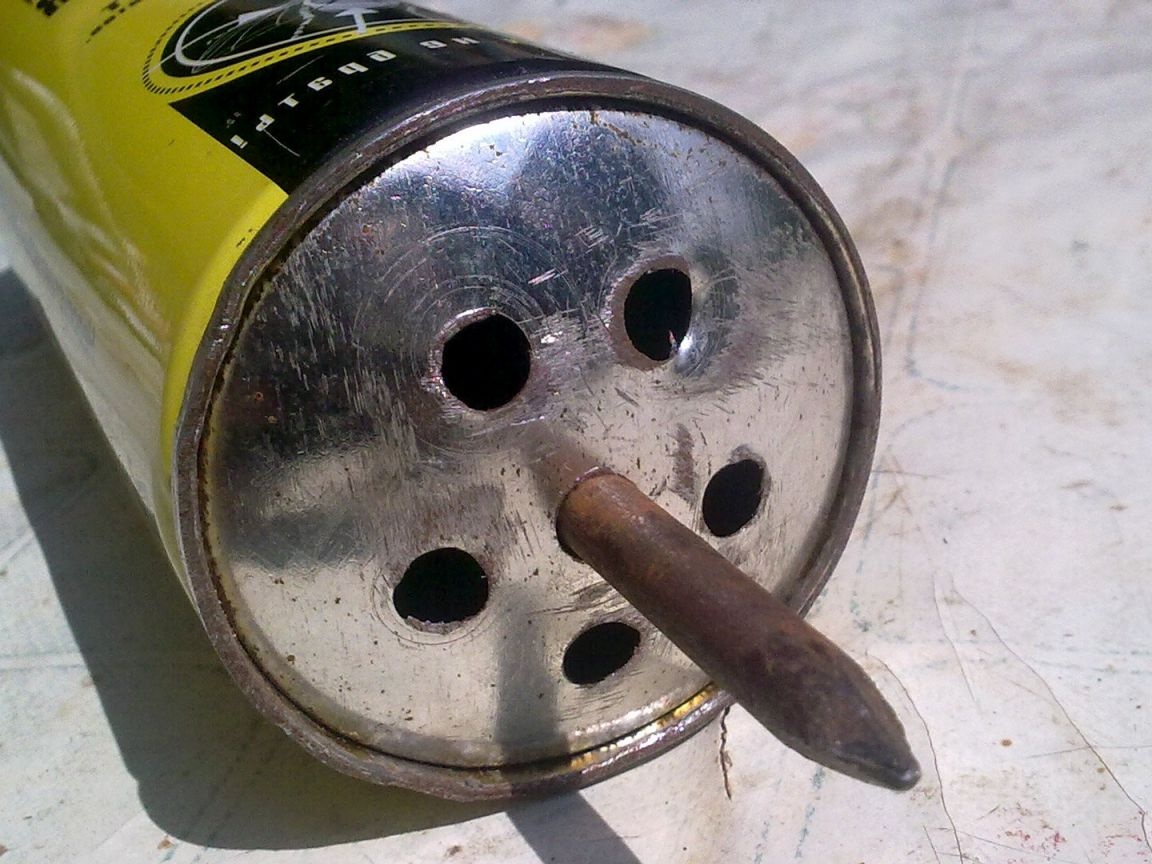
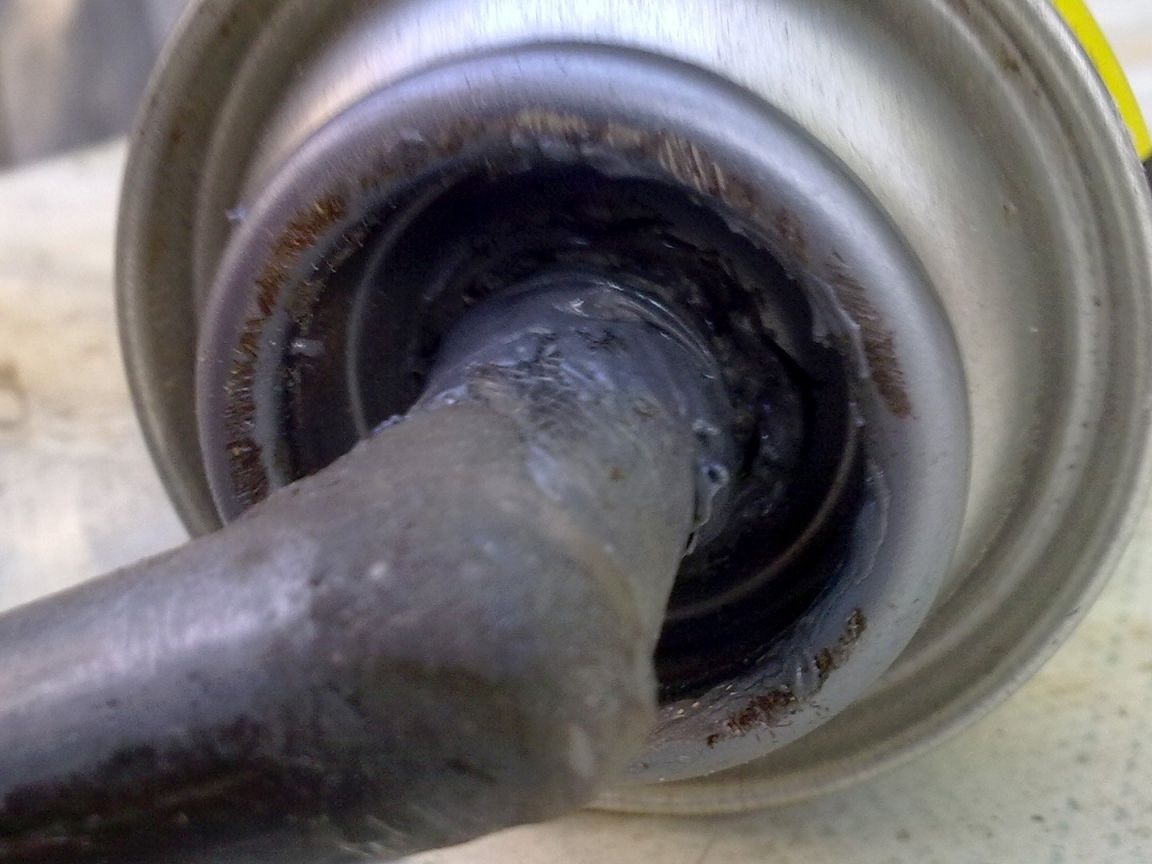
For the manufacture of the cylinder, the author used an empty aerosol can. To make a cylinder out of it, you need to remove the back wall from the spray can. For this purpose, it is necessary to grind the back part with a file or emery so that it falls out by itself. Next, sharp edges must be processed with sandpaper or a file so that they become smooth. At the final stage, the inside of the container must be washed with water.
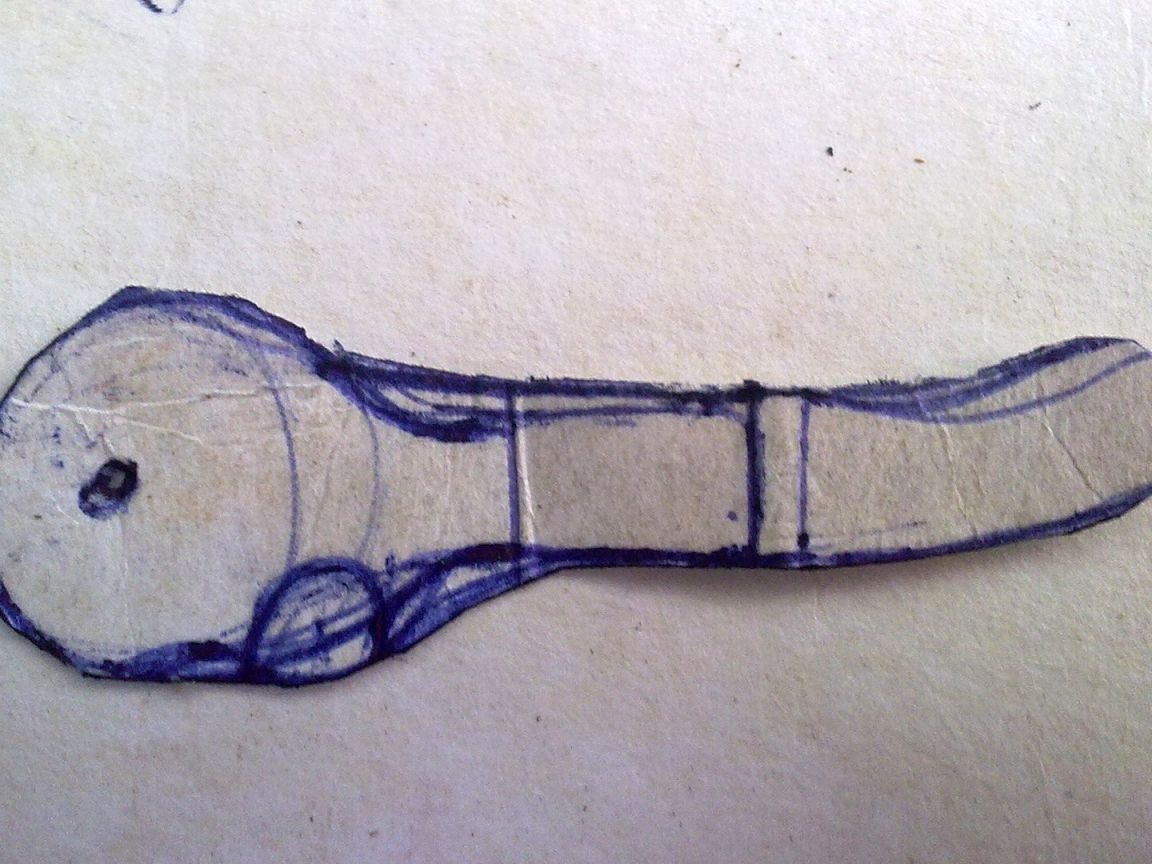
Step Two Make a piston
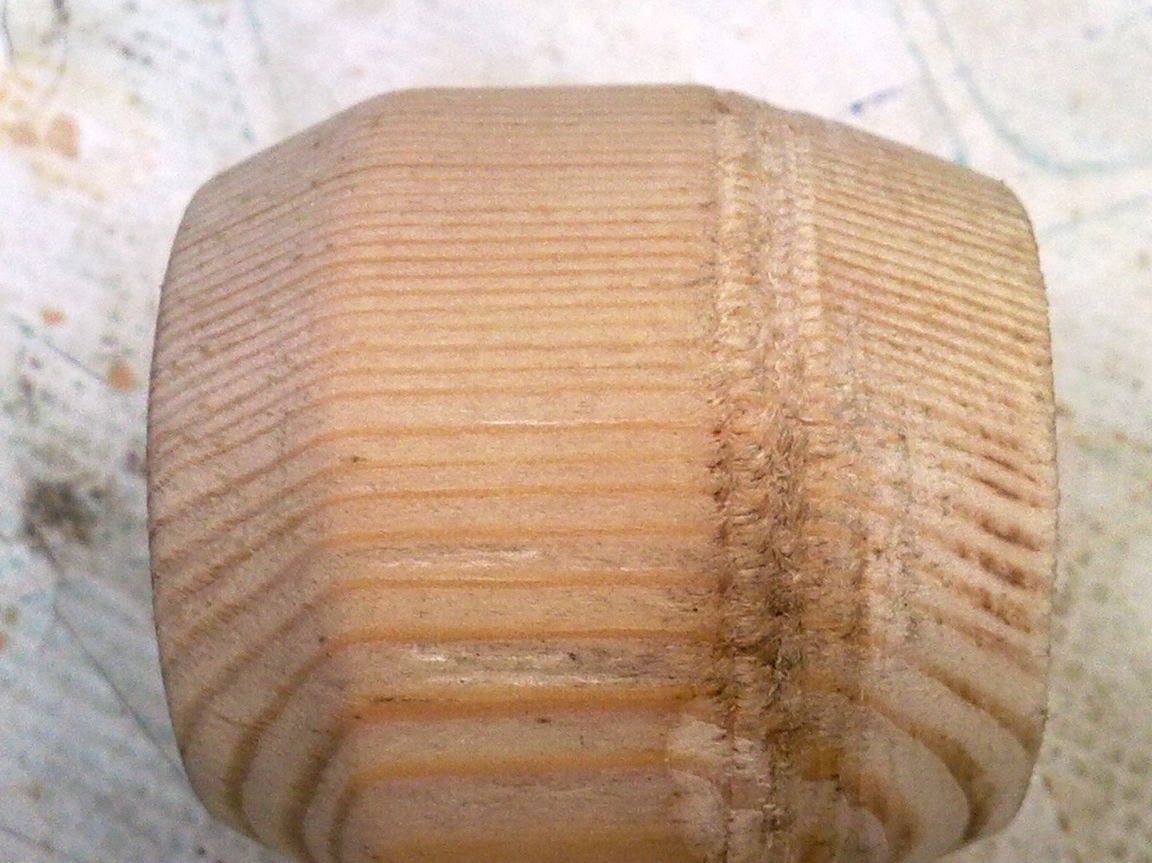
The piston is turned out of wood, a lathe is needed for these purposes, but as an option a drill and a chisel as a tool for processing are also suitable. The result should be such a detail, as seen in the photo. The facet is selected experimentally, it will be a rubber piston skirt.
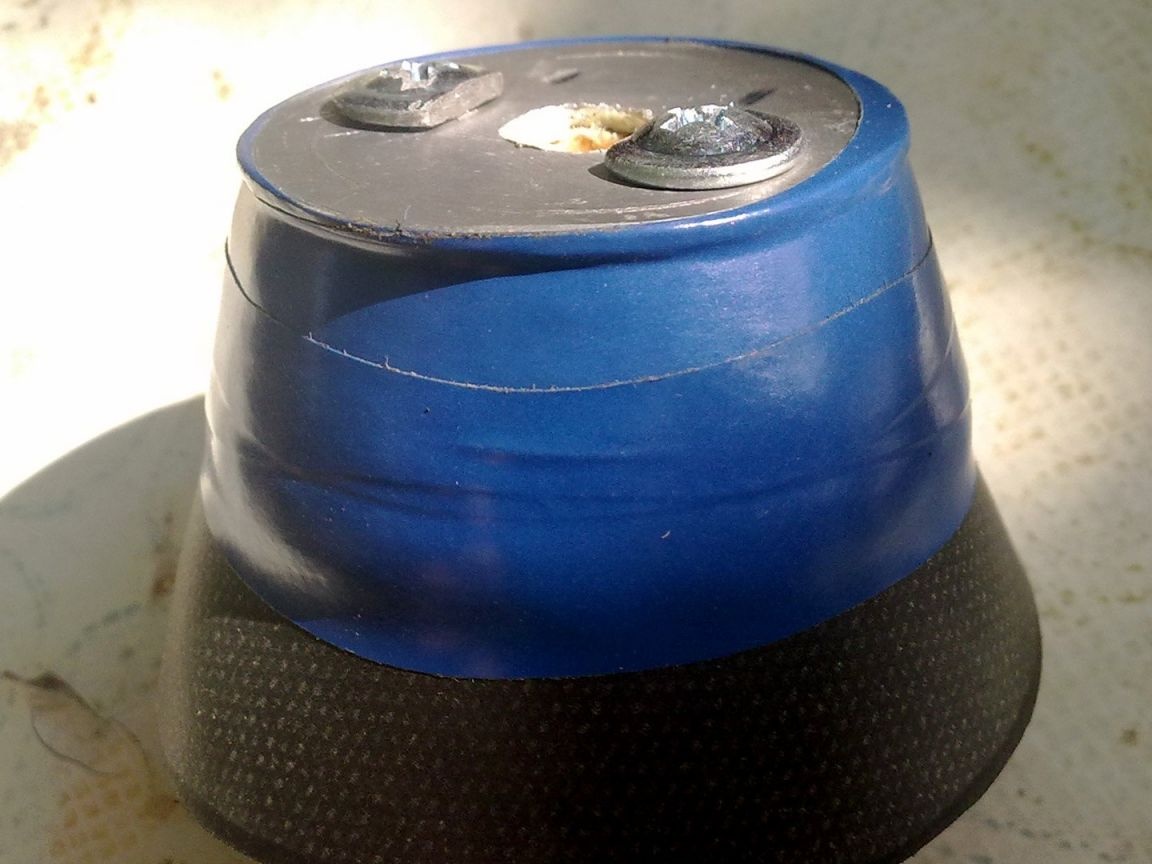

In order for the piston to create pressure when moving in the cylinder, it will be necessary to make a skirt for it, it is made of a bicycle chamber. It can also be made from a plastic bottle, but here it will be more difficult to achieve the correct operation, but with this approach there will be less friction. To make a rubber skirt, you need to cut a strip in the form of an arc. It needs to be glued to the piston, as seen in the photo, and a metal plate is glued on top, according to the author this is duralumin. The disk is additionally fixed with screws, and the piston skirt is finally wrapped with electrical tape.
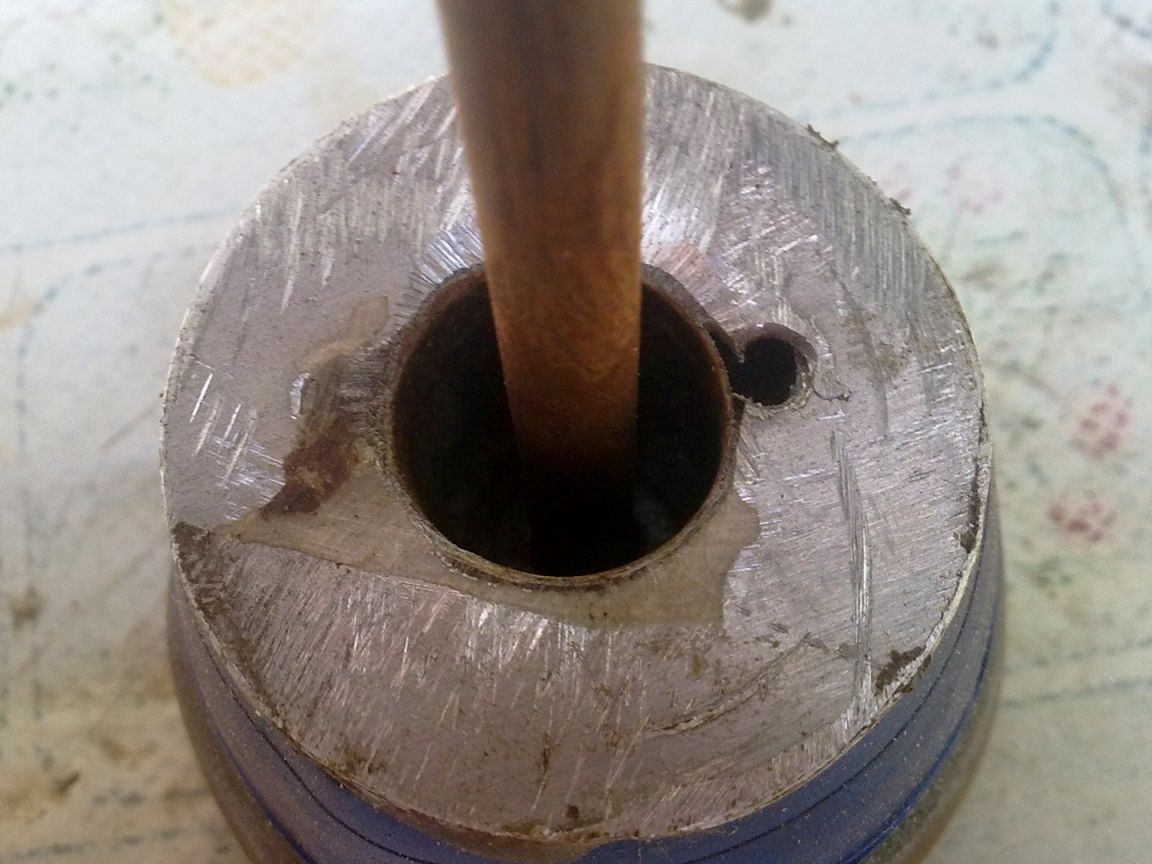
Step Three Piston rod manufacturing
To make the stem you will need a large nail.You also need to make a support for the spring, for this you need to fix another disk on the piston. The result should be such a design, as in the photo.

Step Four Installing the piston in the cylinder
To install the piston in the cylinder, it is necessary to drill a hole in the center of the bottom, the piston rod will go into this hole. As for the spring, it will abut one side of the piston, and the other on the bottom of the cylinder. Also in the bottom you need to drill a couple of holes so that air can freely enter under the piston.
As a result, if you pull the piston towards the rear wall and then release it sharply, an air stream forms in the front. As a lubricant, you can use graphite lubricant, others may have a high viscosity and will slow down the movement of the piston. The author used finely ground flour as a lubricant.
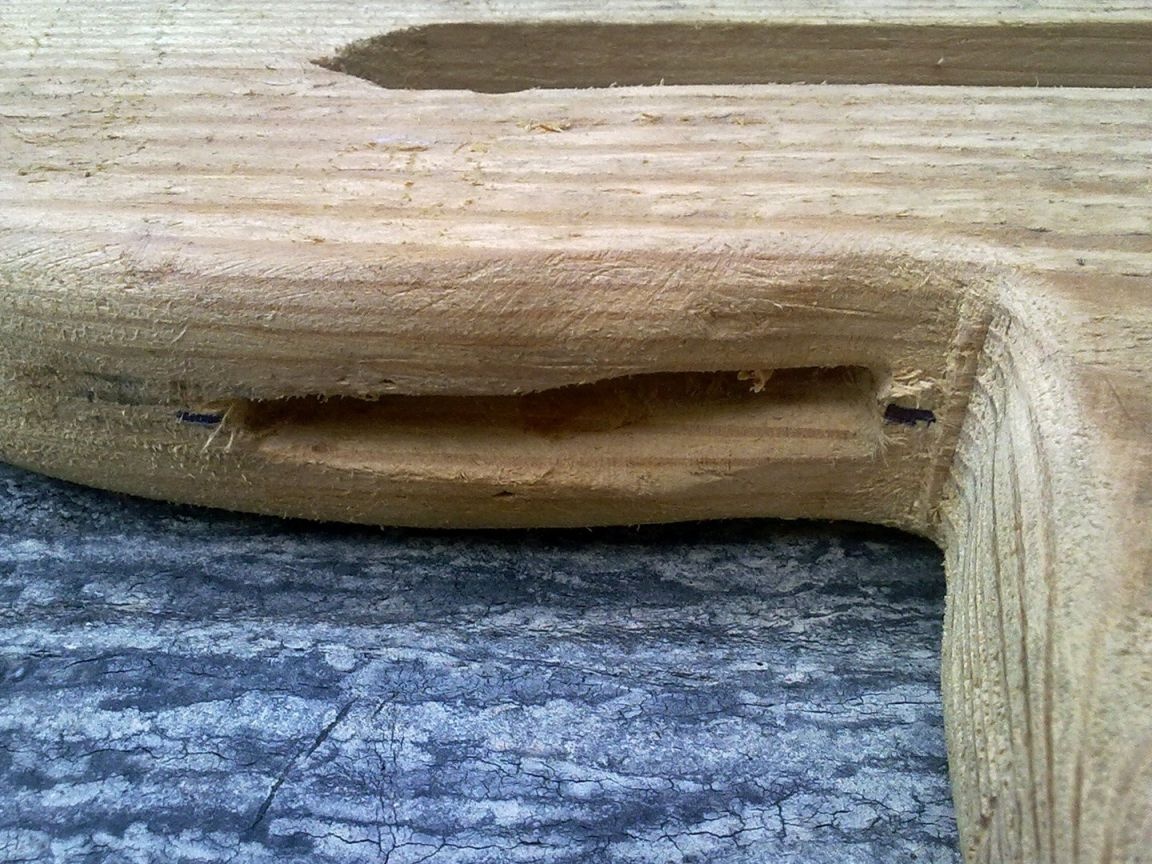
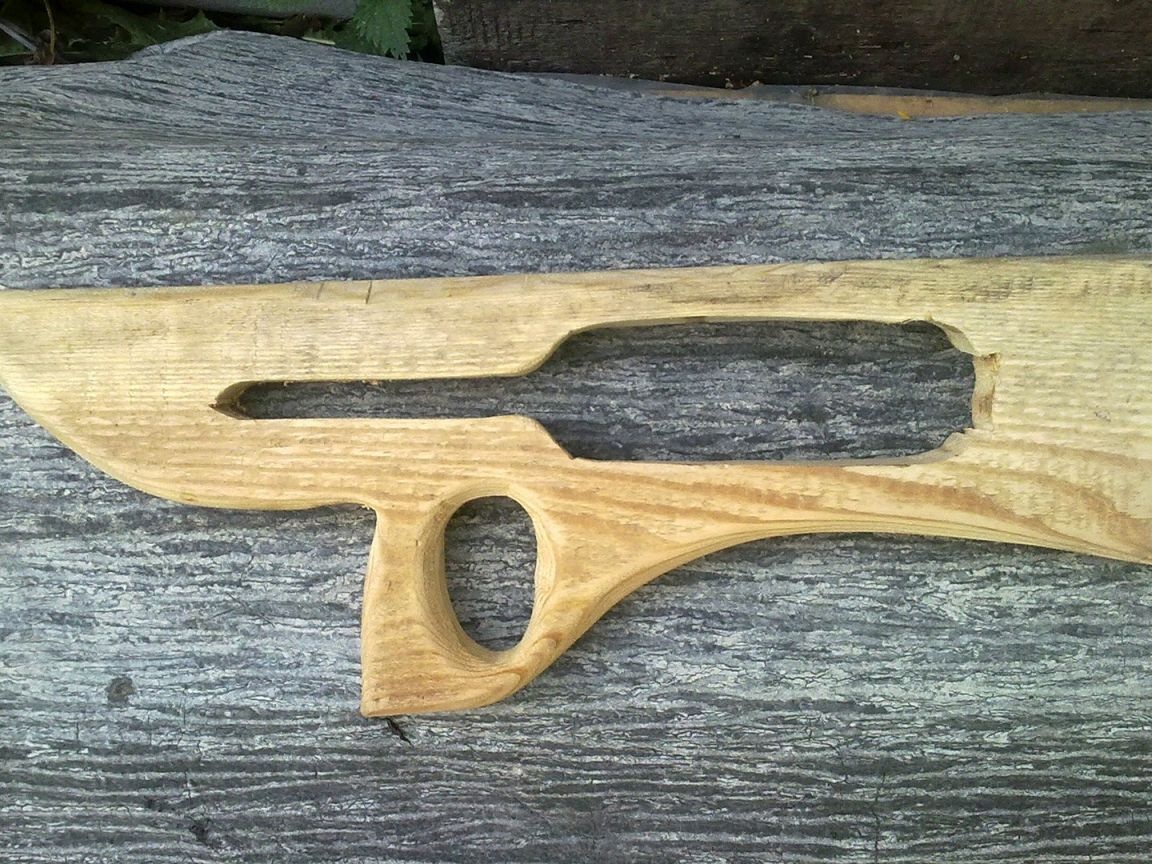
Step Five Make the bed
The box first needs to be drawn on a newspaper, here everything depends on the size of the container. Then it is cut with a jigsaw from a thick board. As for the trigger, it will be like a crossbow, for it is necessary to drill a hole in the box.
Step Six Installation of the cylinder in the bed
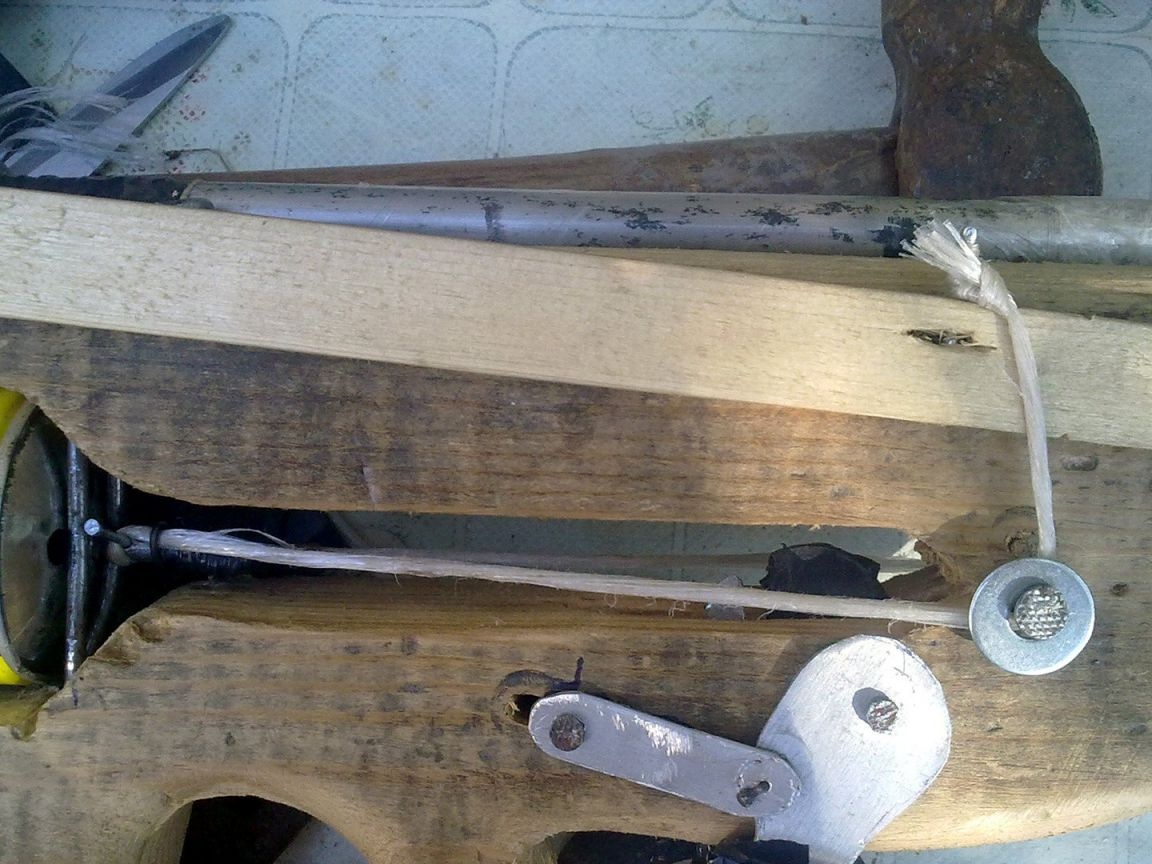
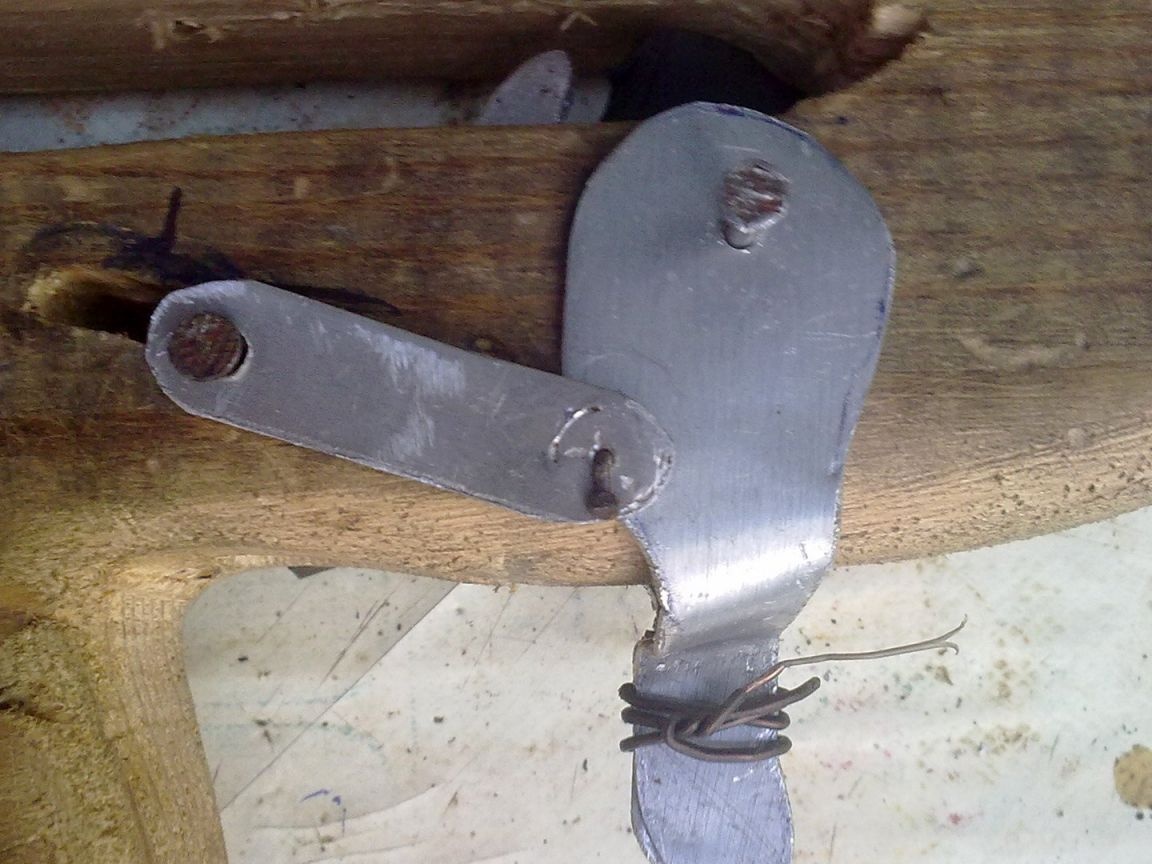
A hole must be drilled in the cylinder rod, then a loop of a nail is inserted into it. Also in the stock will need to make another hole for the cocking system.
The cylinder must be fixed in the bed, for the bottom of the cylinder, you will need to make additional supports from the nails.

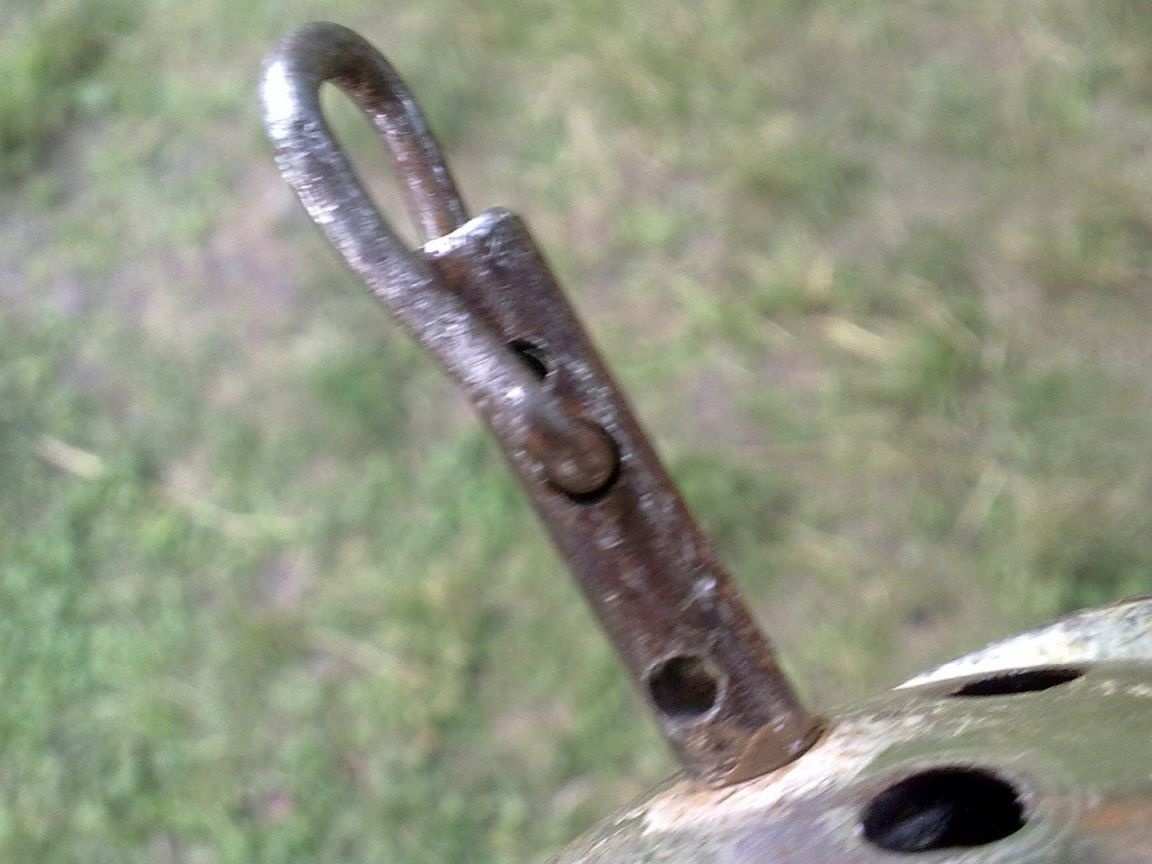
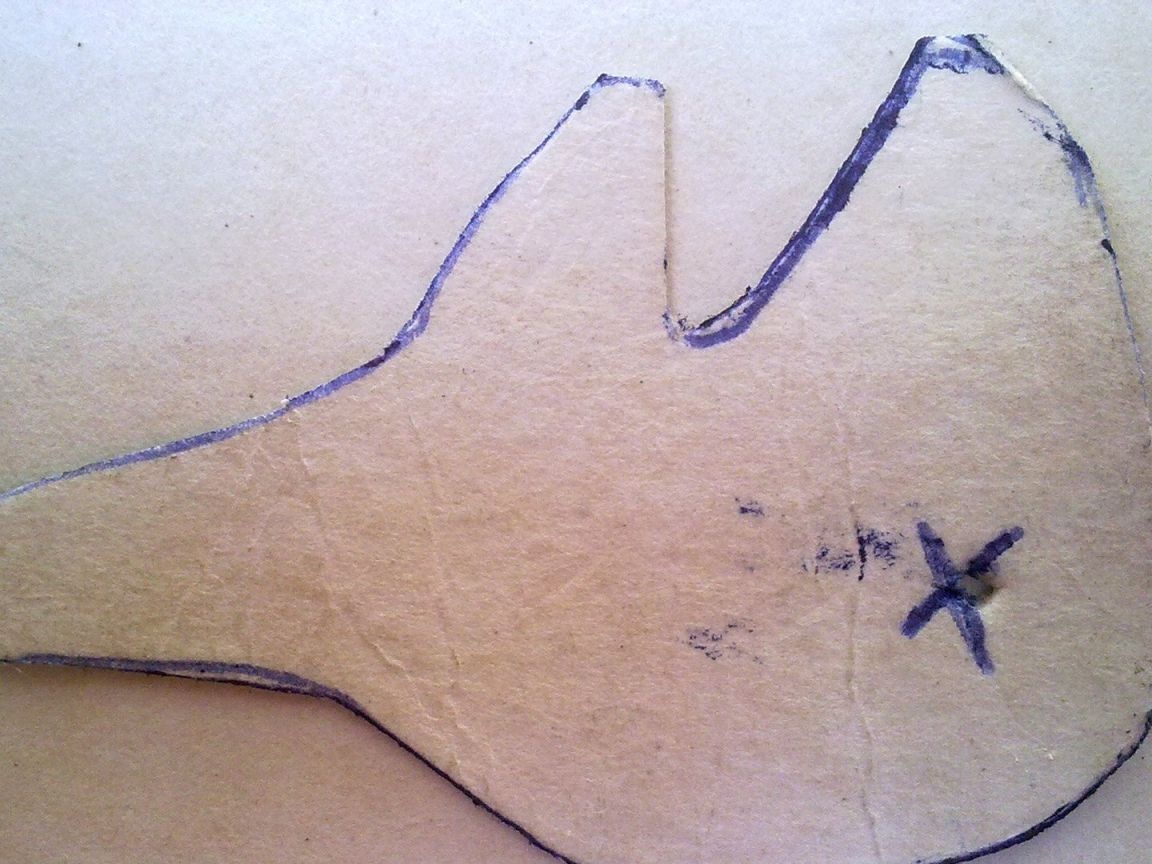
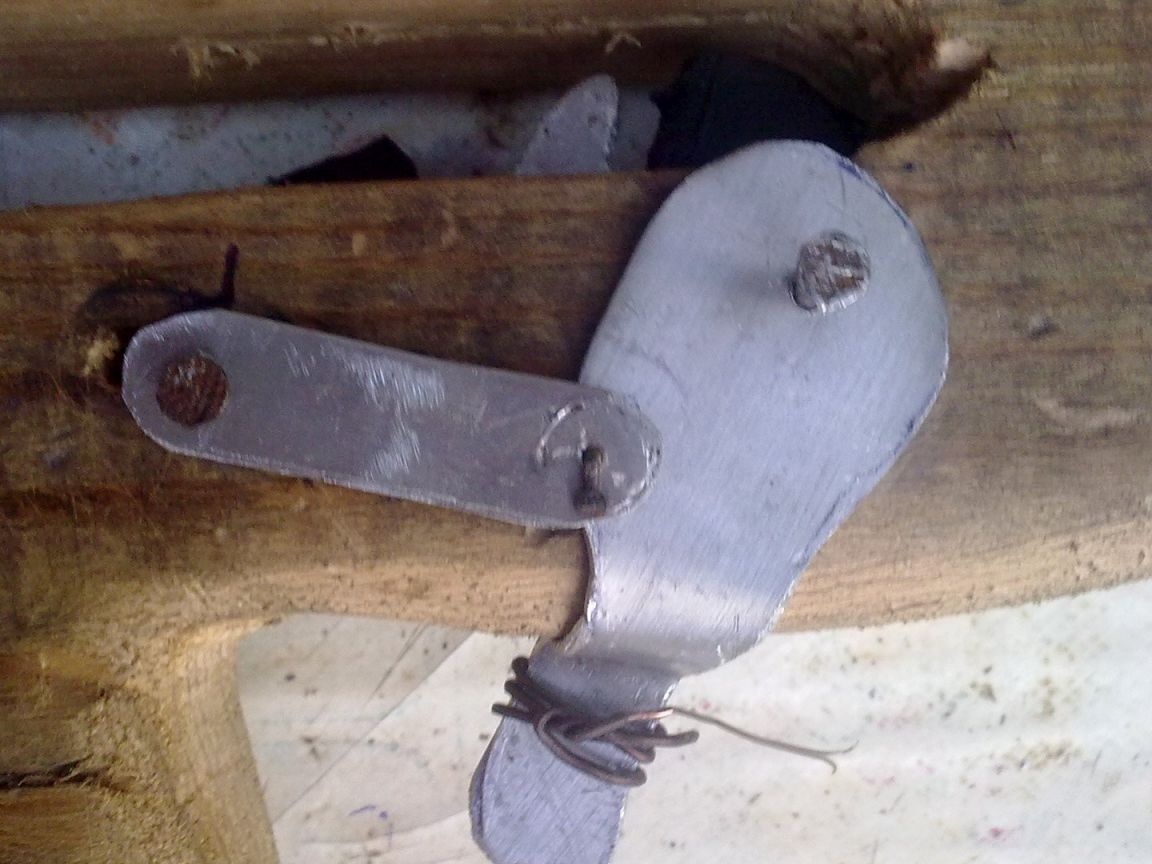
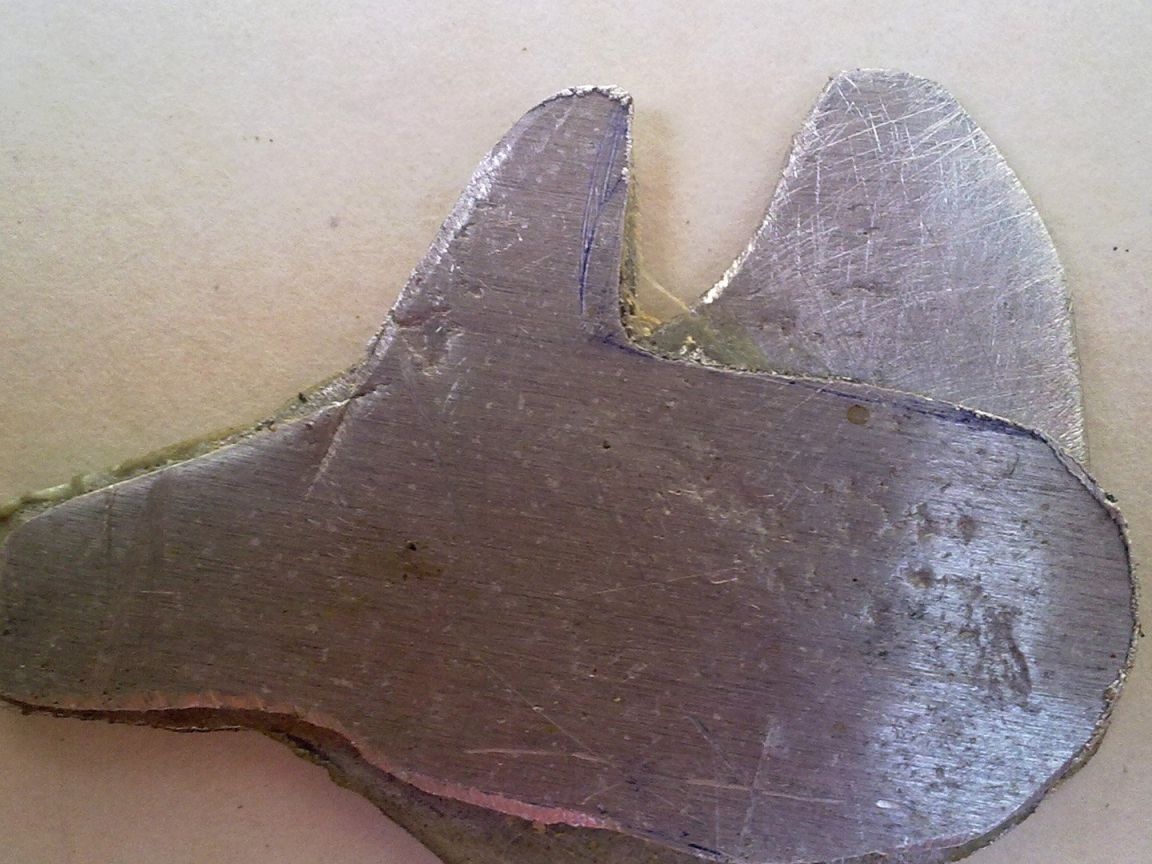
As for the rod loop, it will be fixed in the trigger, a principle that is borrowed from a crossbow. As a result, you will need to make the part, as in the photo. For the author, it is made of three pieces of metal that are glued together. The cross indicates the axis of rotation. How the trigger will work can be seen in the video.
Seventh step. Rifle barrel
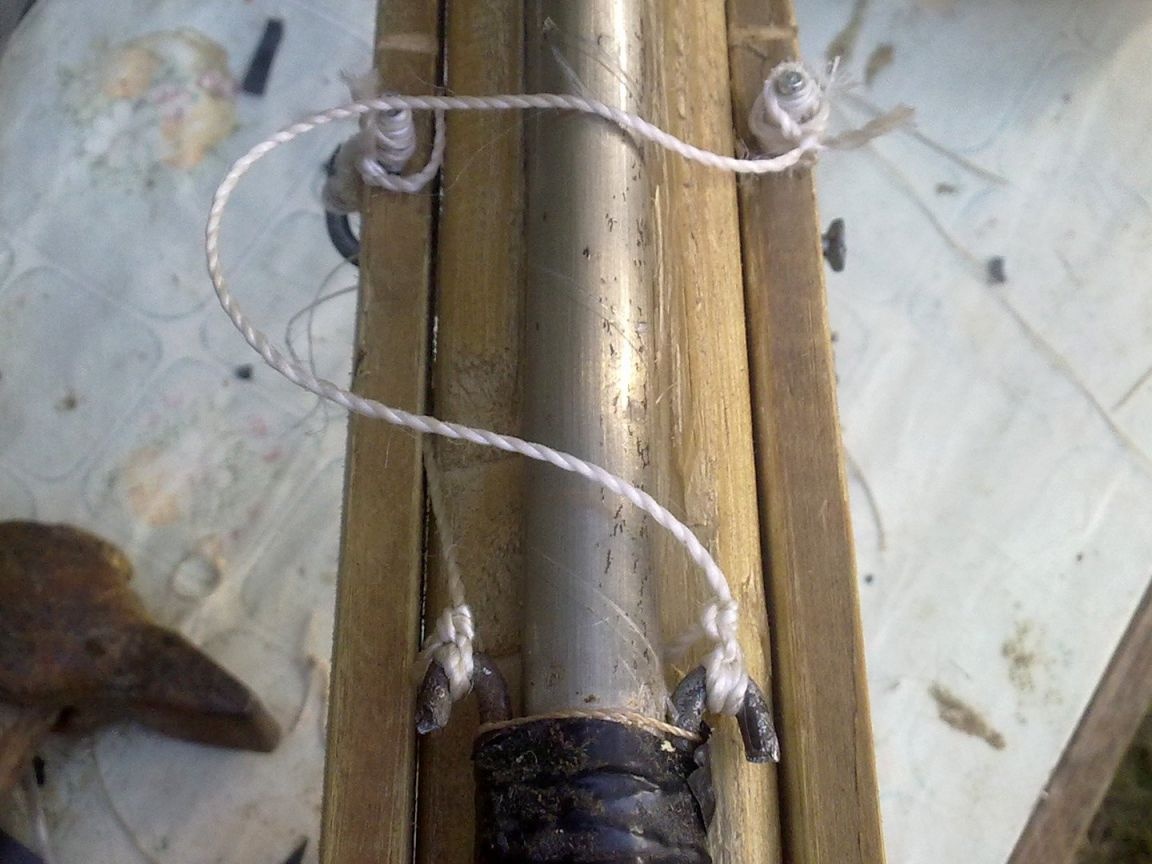
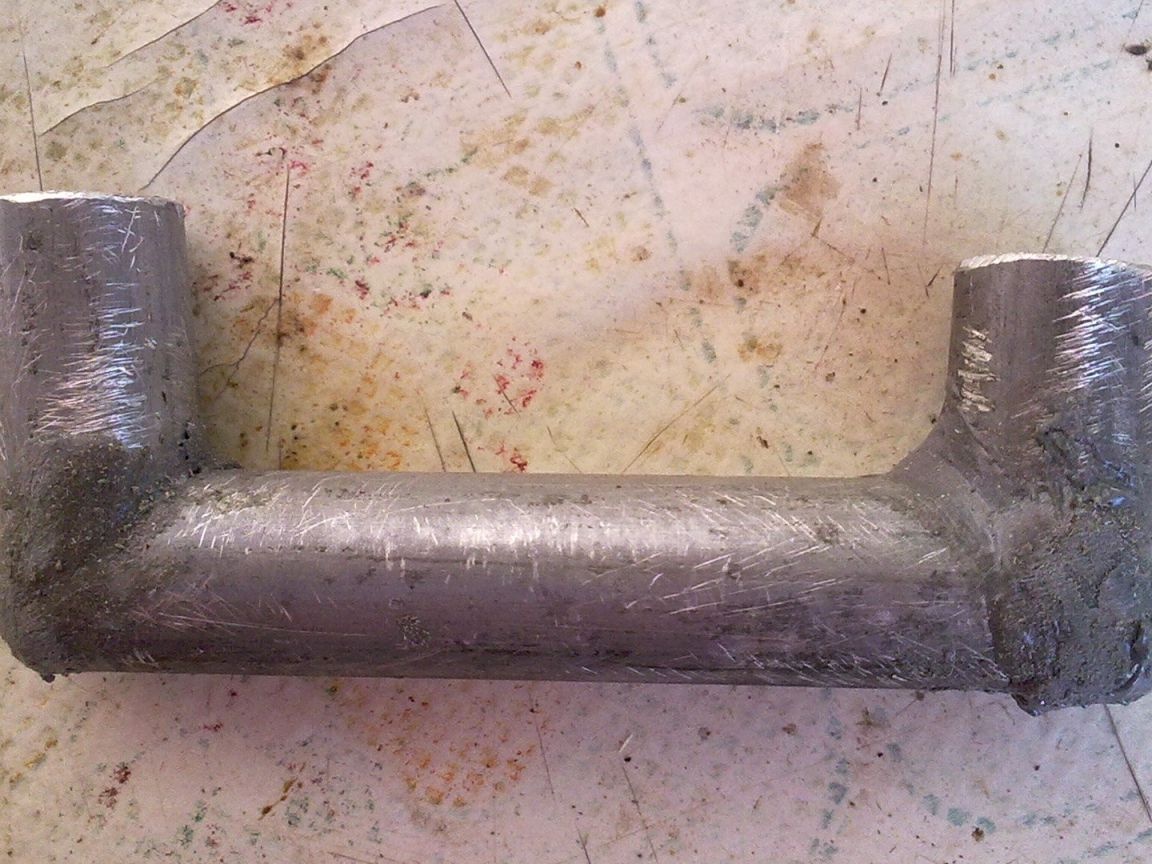
To connect the barrel to the canister you will need to make a "P" - shaped design of tubes. For these purposes, the author used a tube from an old antenna, which he cut into 3 pieces, and then connected using cold welding. Everything should be airtight.

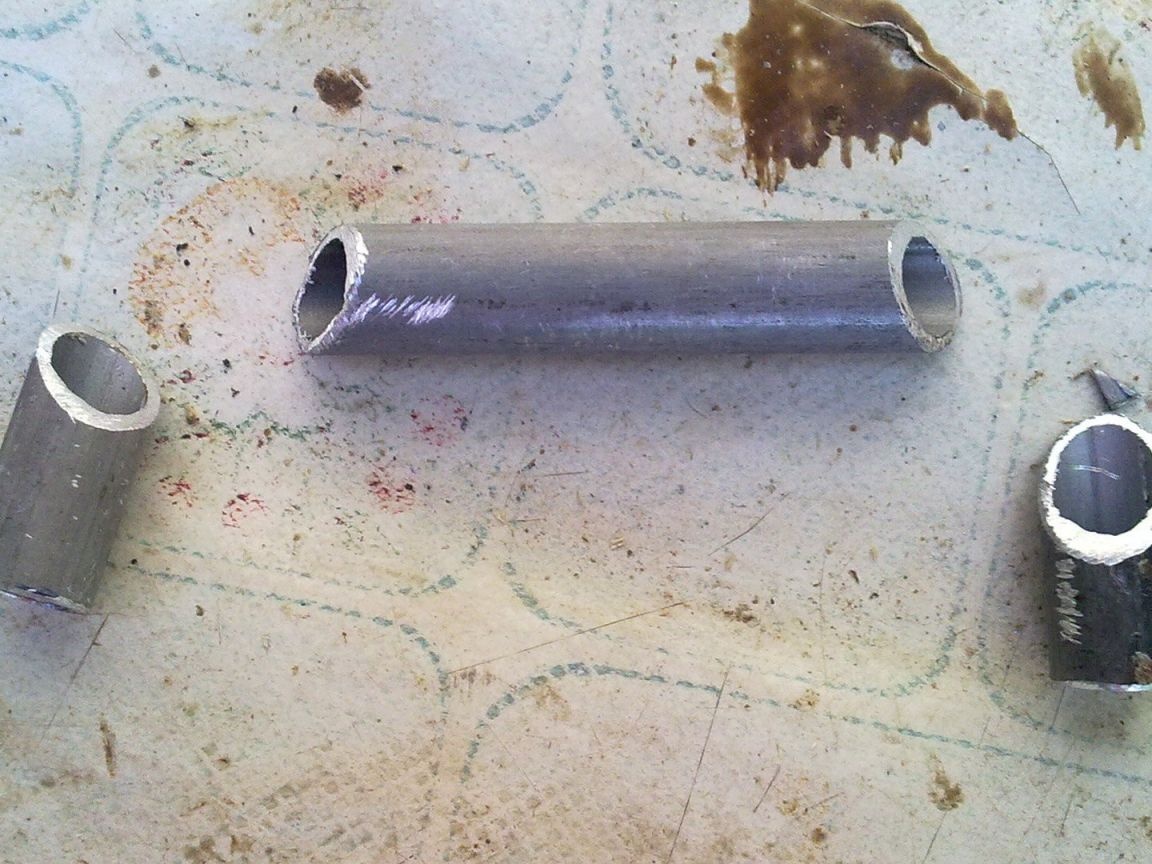
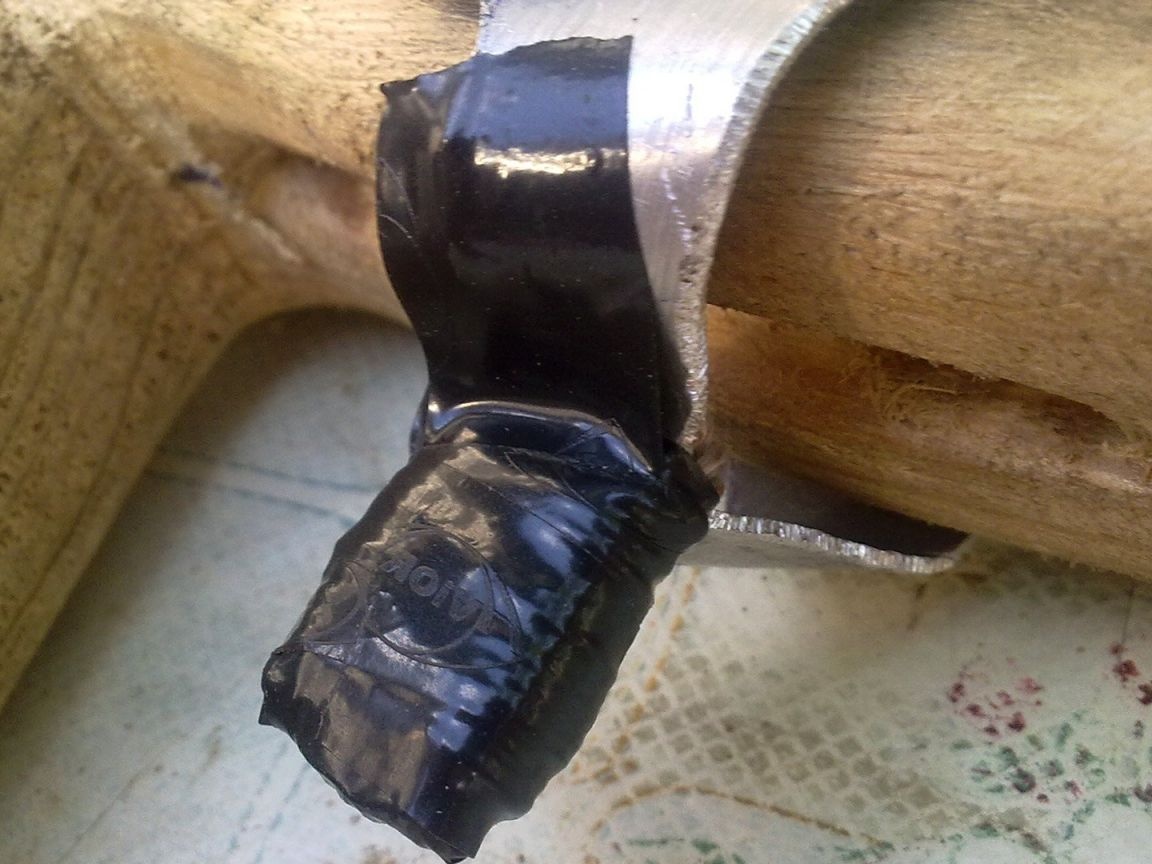
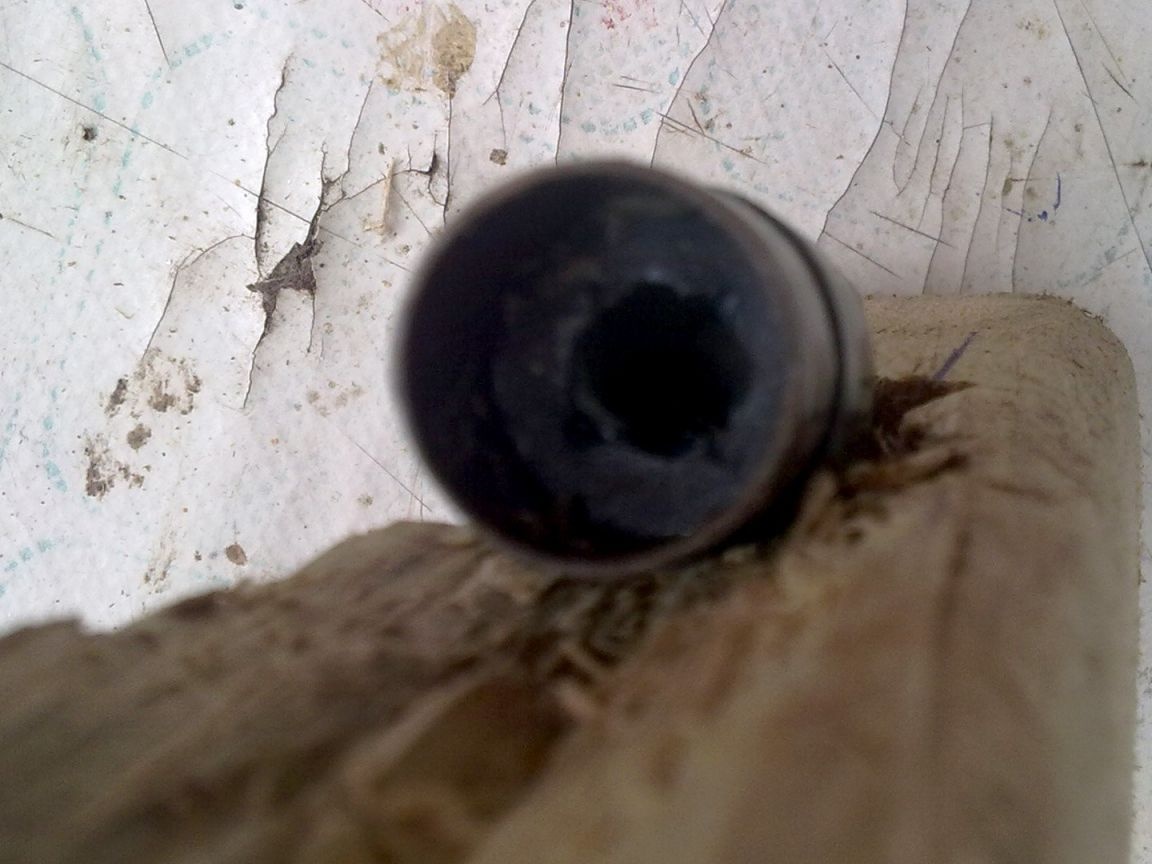
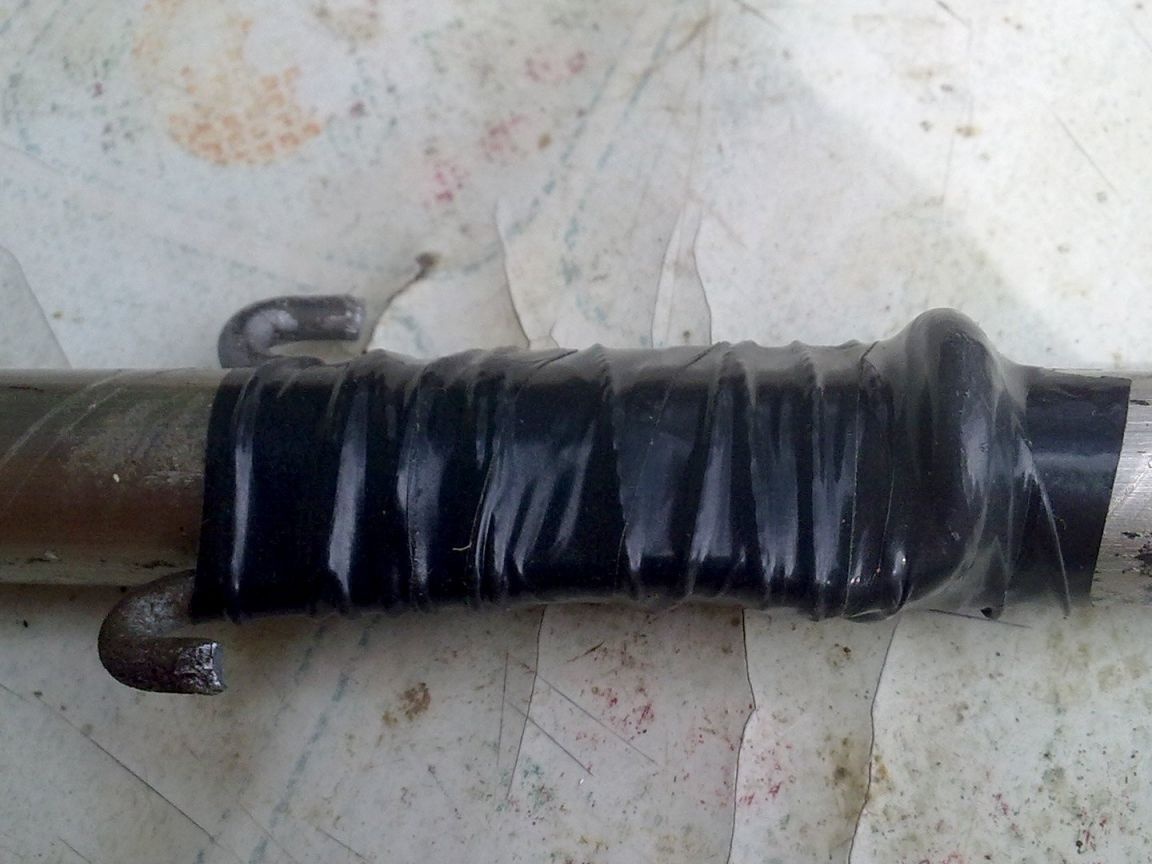
As for the trunk, one more pipe will be needed to make it, here we use a steel pipe from the bed with a diameter of about 9 mm. Since the tube has a seam, it had to be wrapped with tape. There must be a hook on the barrel for the cocking mechanism.
The trunk has one degree of freedom, that is, it can move forward and backward.

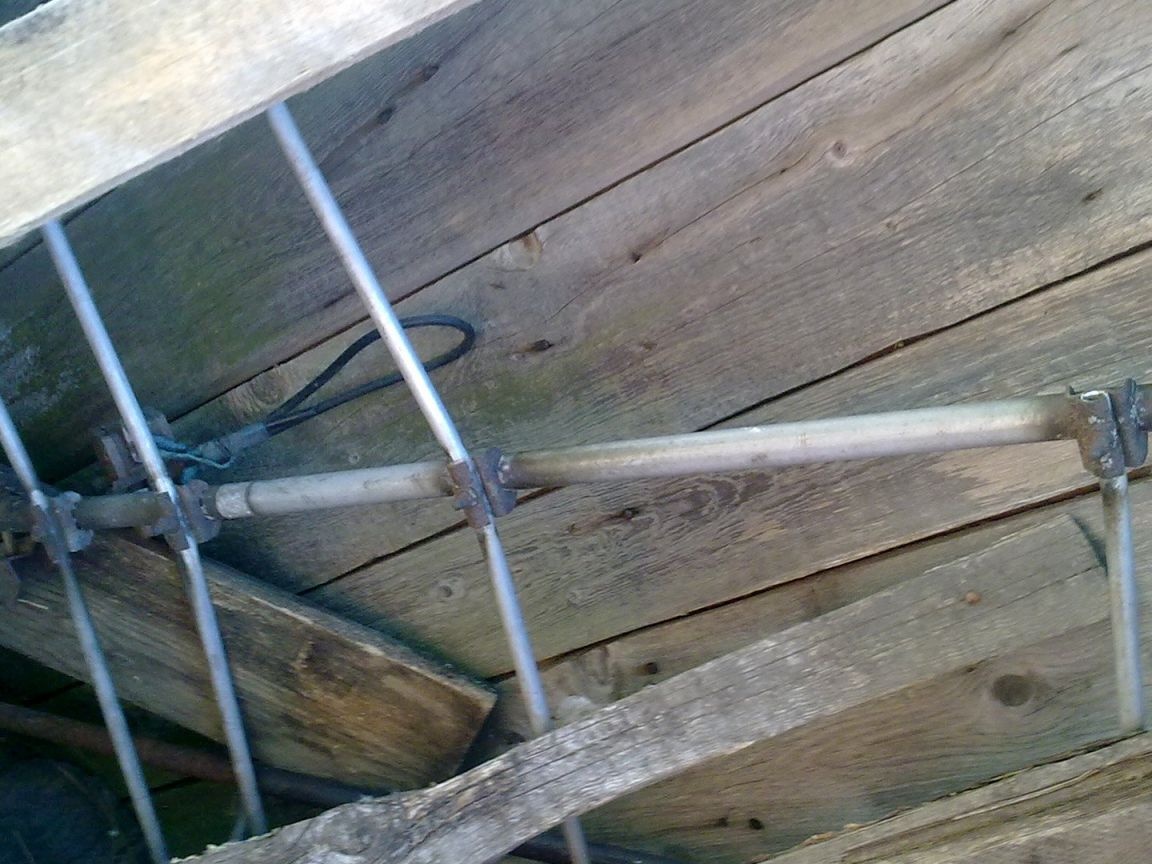

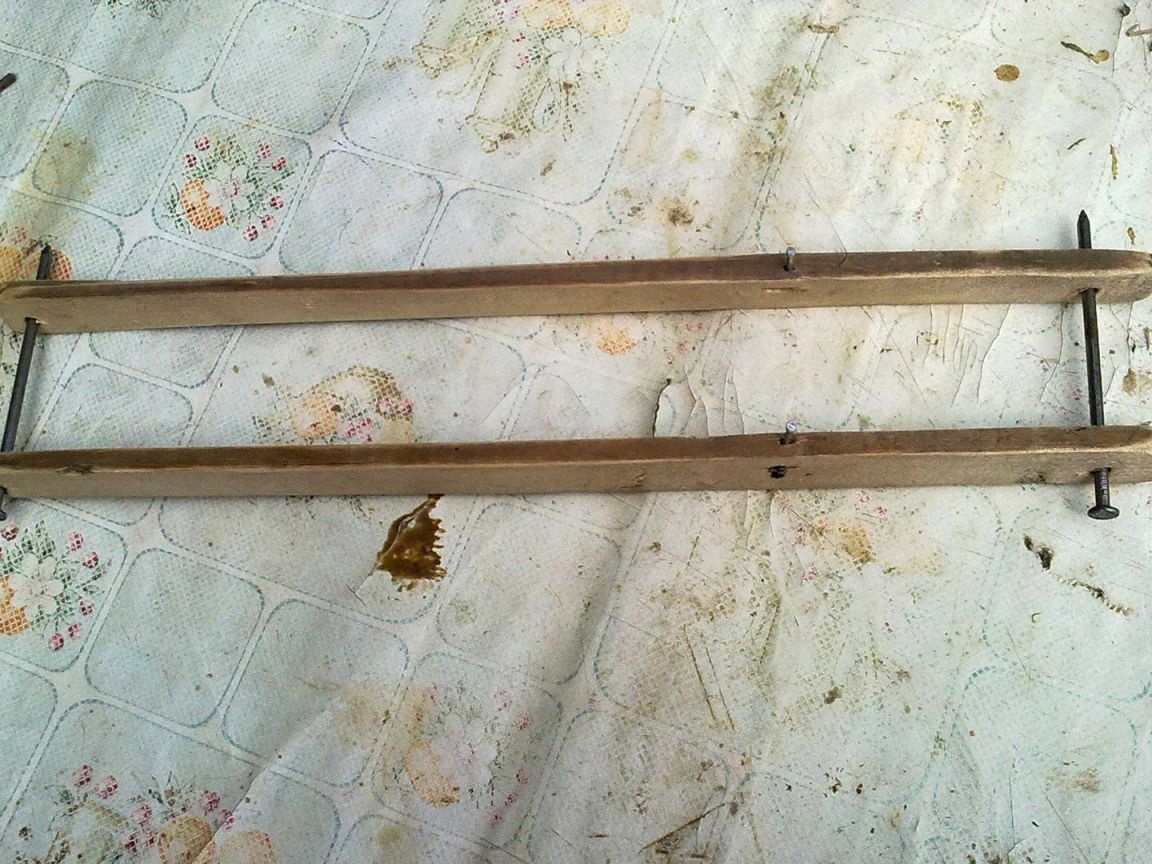
As for the frame, it is made of two frames and nails.
Step Eight. Final build phase
At the final stage, everything comes together. How the platoon system works can be seen in detail in the video. As for the darts, they are made of a sharpened nail, which is wrapped with tape and then fixed with threads. That's it, the rifle is ready for testing.