
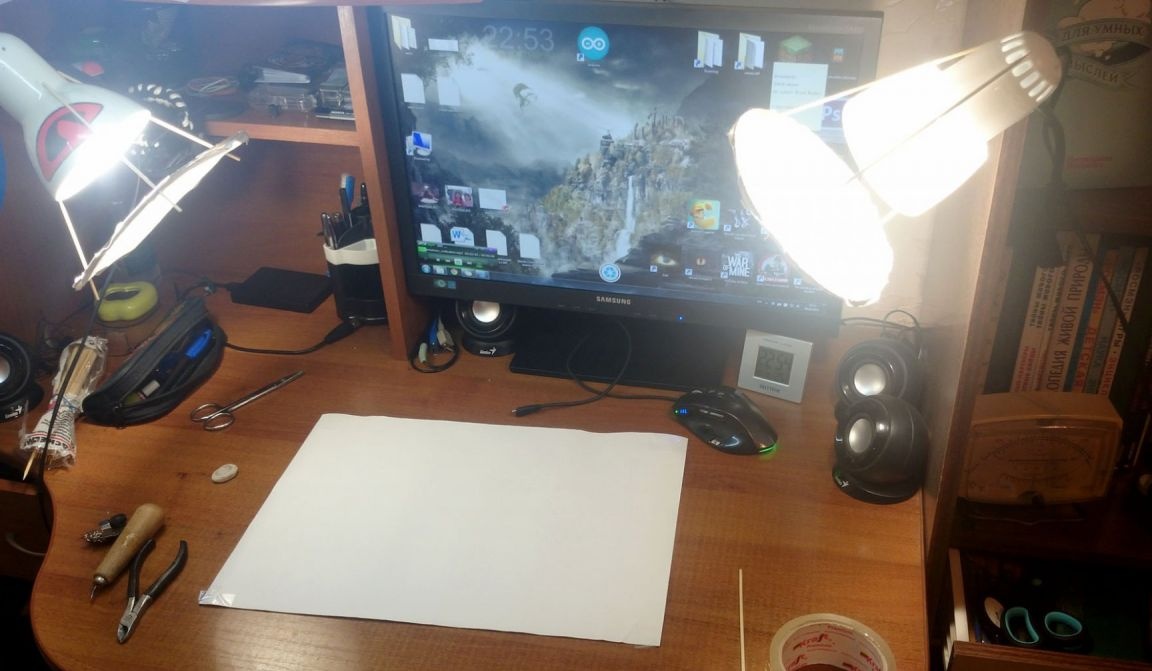
Such homemade will be useful to those who like to take photos. In this case, the shadows that cast objects become an eternal problem. The author, for example, constantly formed black shadows when he took pictures of his home-made products, so it was decided to collect better lighting by analogy with the studio. With this kind of lighting, the light scatters the room. Of course, for the highest quality you will need at least two light sources. The whole feature of this light is that it is diffused.
Materials and tools for homemade:
- a piece of thick cardboard;
- thin tissue (a handkerchief is suitable);
- adhesive tape;
- skewers for food (bamboo);
- table lamp.

Of the tools you need: an awl, a pair of compasses, a knife and scissors.
Homemade manufacturing process:
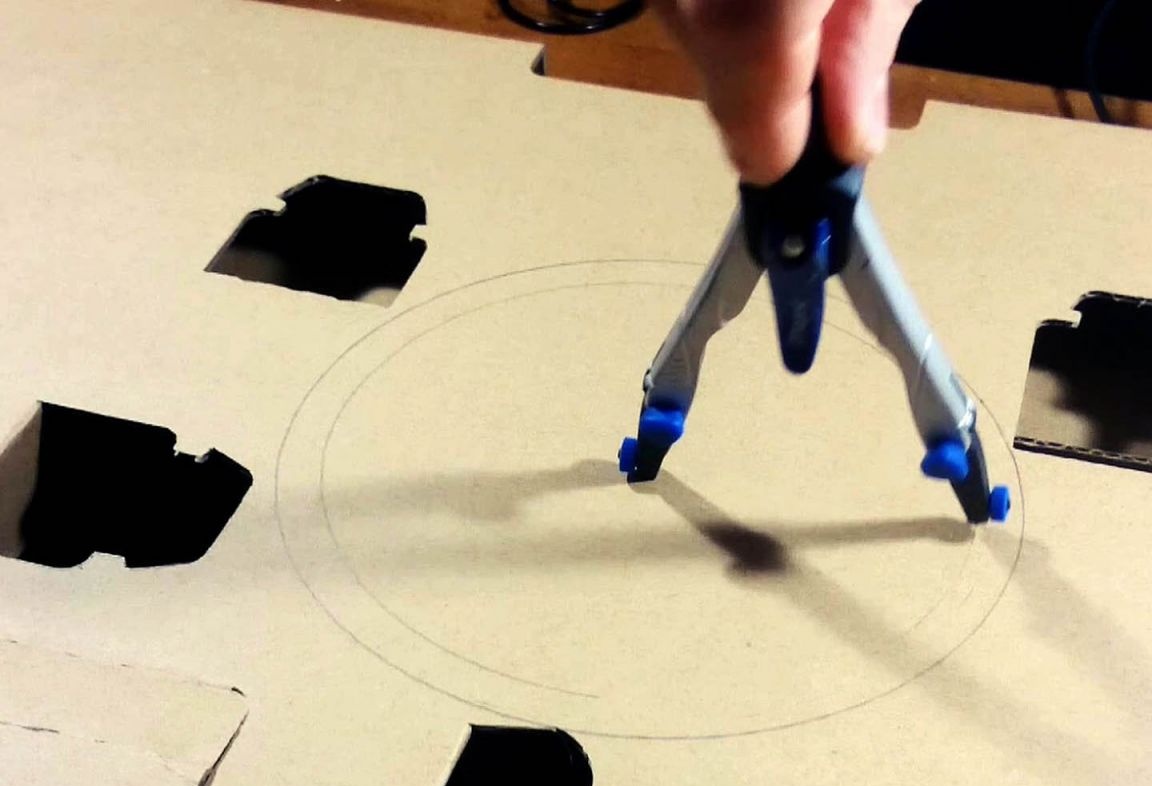
Step one. Compass Work
First you need to pick up the compass and use it to mark the radius of the lamp, which needs to be further developed. To this size you need to add a couple more centimeters. Then, on a thick piece of cardboard, draw a circle with a compass.
After that, inside the circle from the same point you need to draw another circle, but a centimeter less.
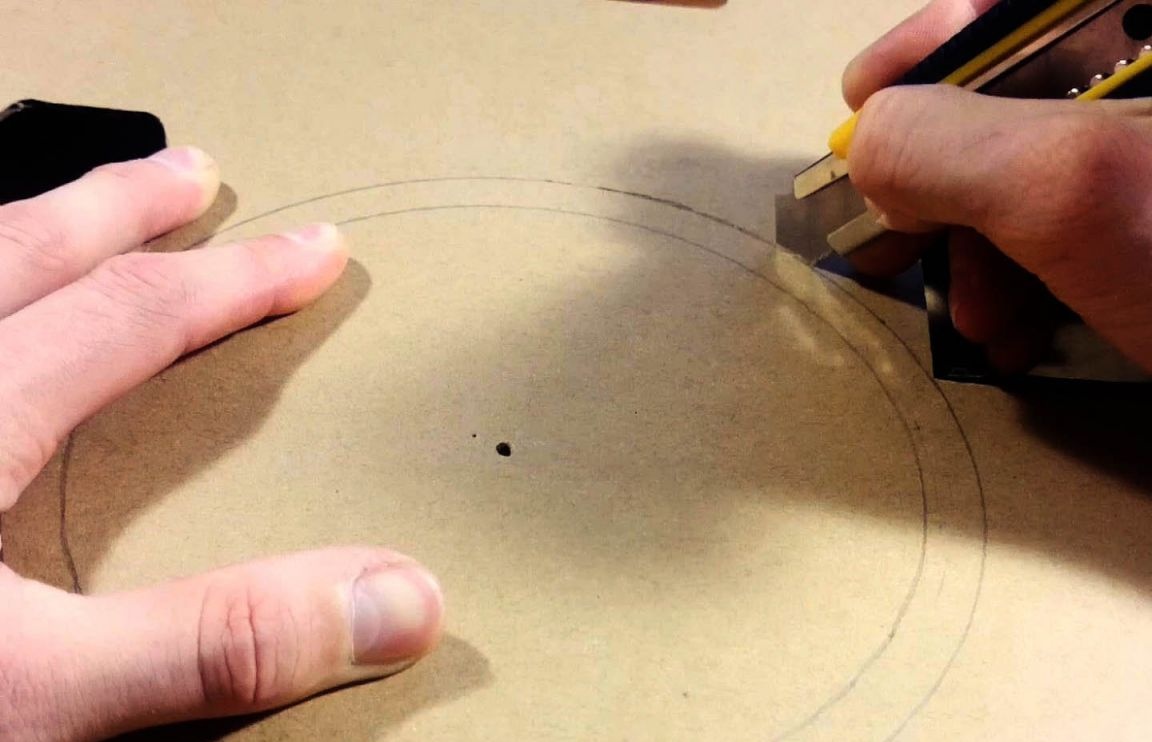
Well, in conclusion, the manufactured ring needs to be cut.
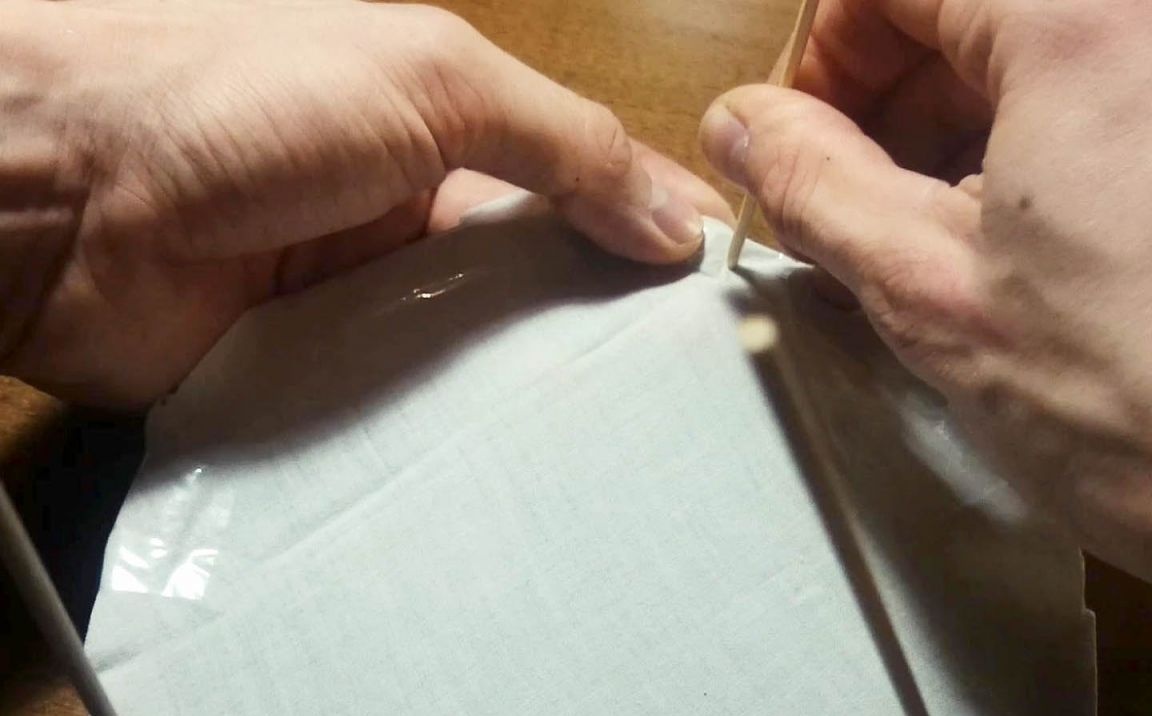
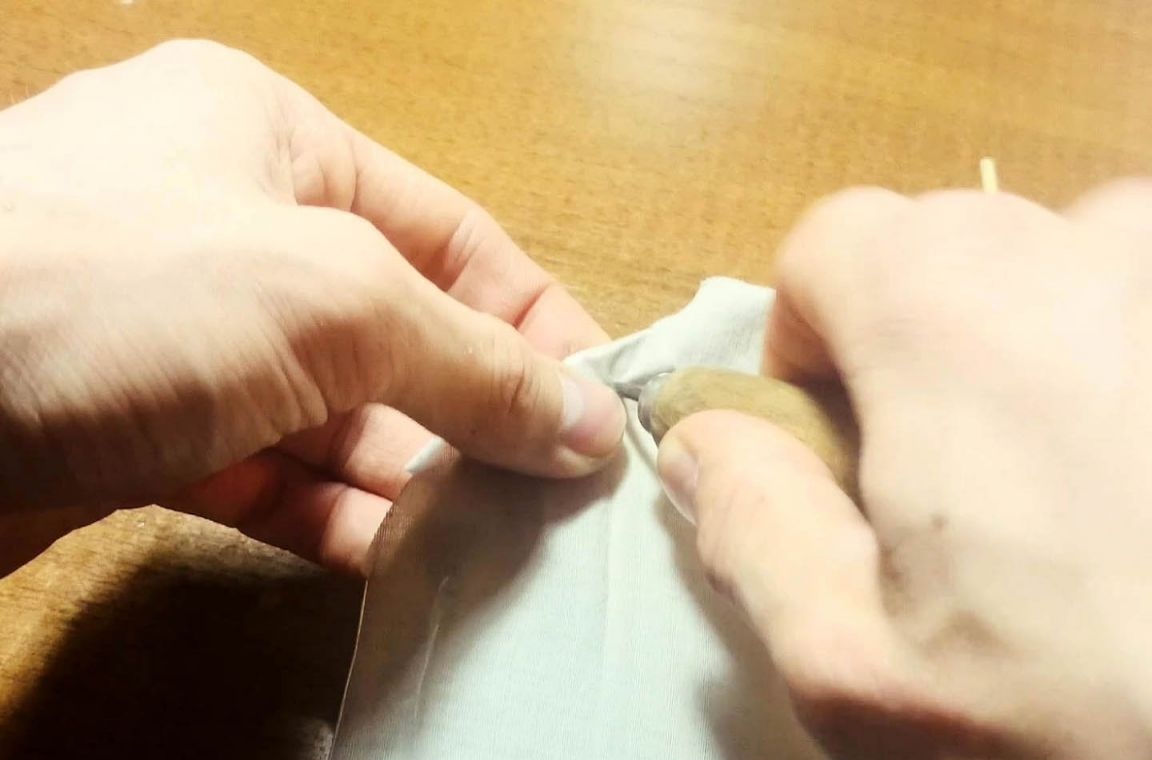
Step Two We tighten the ring with a cloth
Now you need to tighten the ring made of cardboard with a thin cloth. For these purposes, even a handkerchief is suitable. Instead of paper, you can also try using thin paper, white cellophane, plastic or frosted glass. In general, you need to experiment.
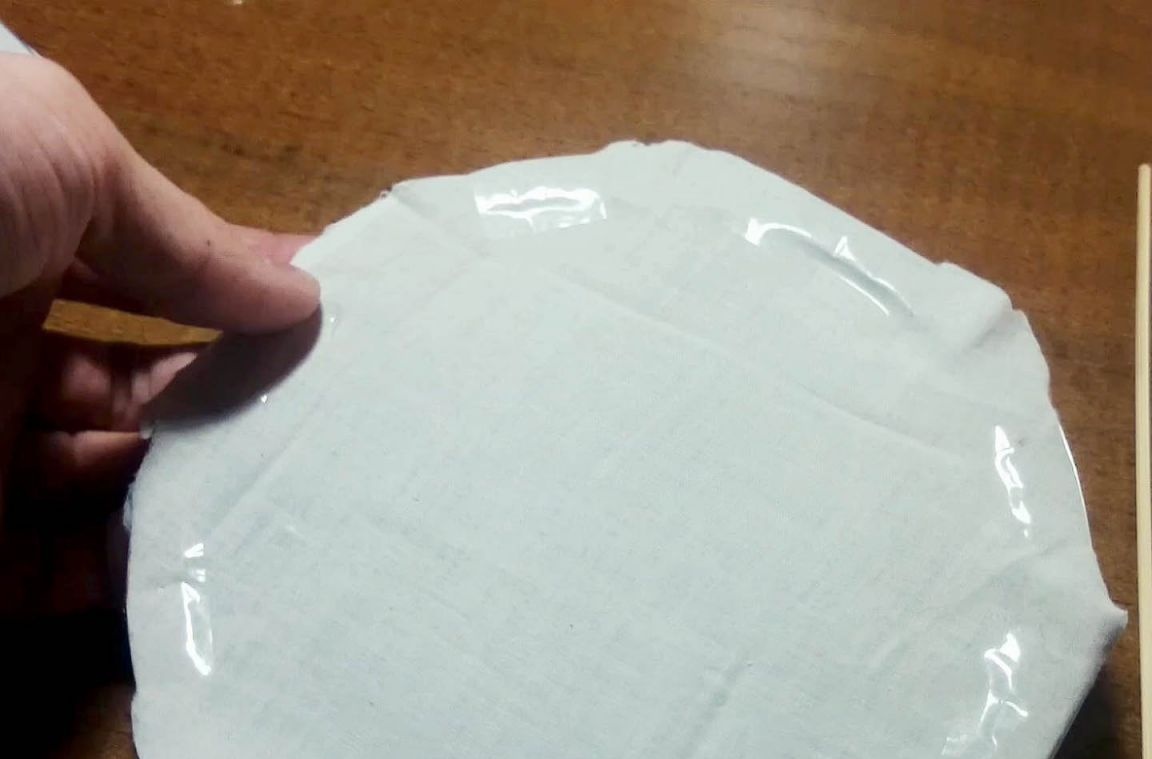

As for the method of attaching the fabric, it can be sewn, for this you need an awl, with the help of it holes are made in the cardboard. You can also use glue, for example, Moment.
Step Three Diffuser legs
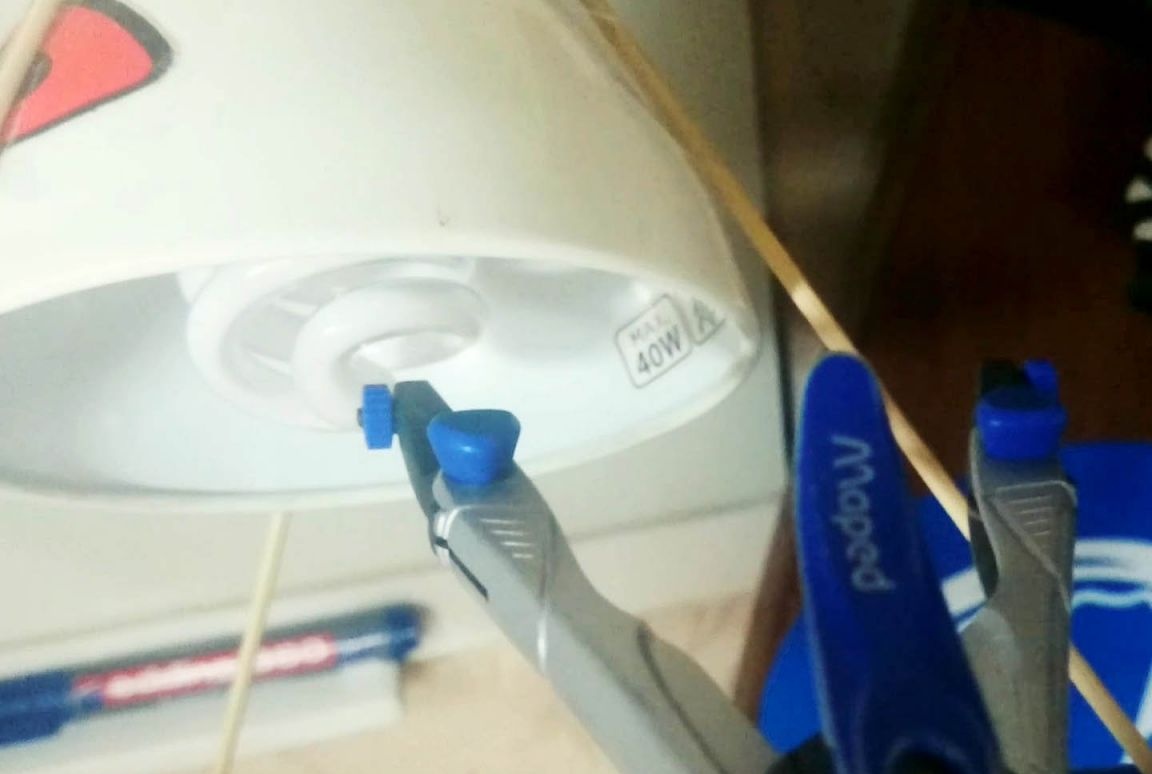
To make the legs, you will need three bamboo skewers for food or other similar chopsticks. Skewers simply stick into a cardboard ring, for this you need to make three holes with an awl at an equal distance from each other. For reliability, skewers can be grabbed with hot glue.
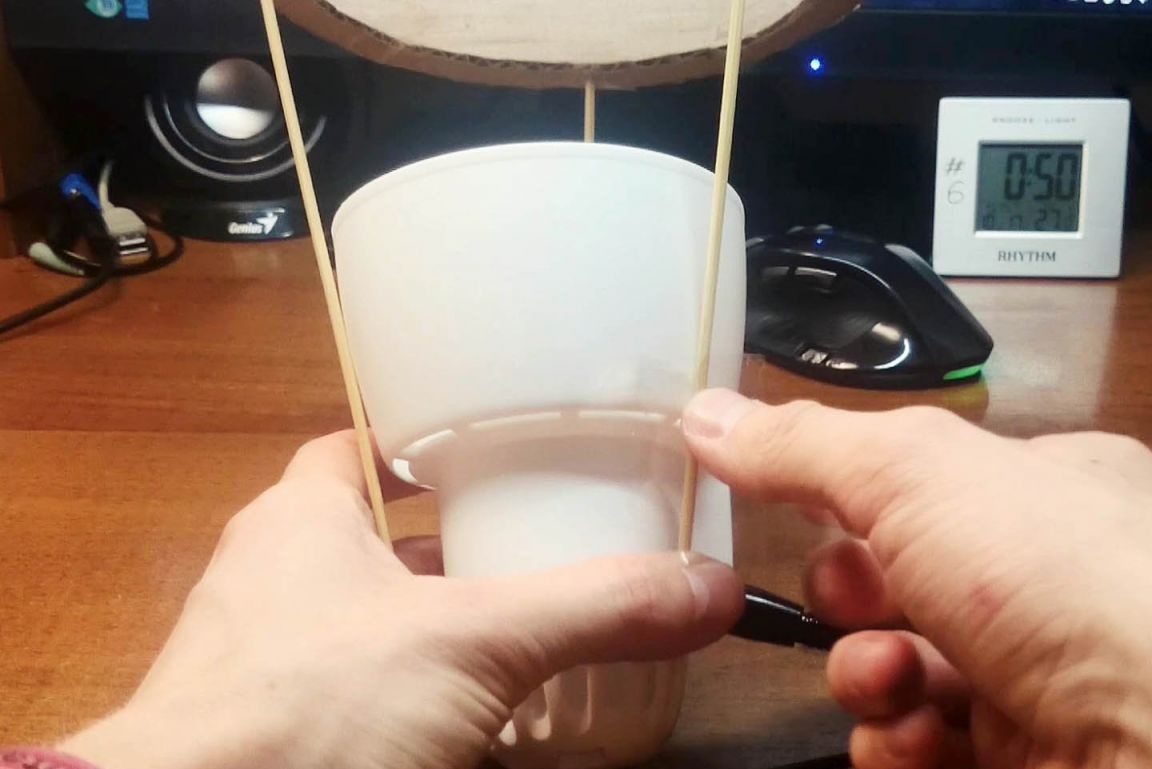
Well, the installation is very simple.Using three legs and a scocht, the diffuser is attached to the lamp at an optimal distance. To completely get rid of the shadows, you need to make a pair of such diffusers, as can be seen in the photo, the author put on two lamps.
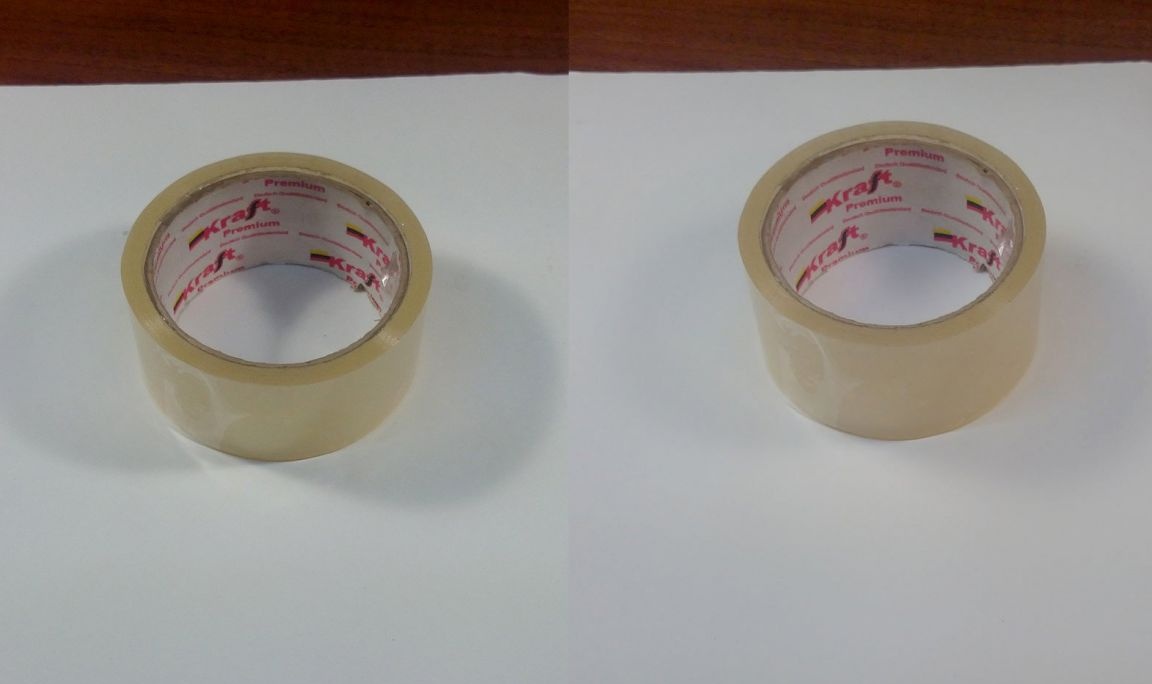
Below in the photo you can see how such a device works effectively. The adhesive tape was photographed on the left and right under the same conditions, the only difference is that the diffuser was installed on the right, but not on the left.
As a result, the shadows, although there are, are very weak and with blurry edges, but much better than before.