
The article will discuss how you can create a boxed snake from improvised materials. The design is very simple, not even glue and nails are used here, everything is collected on threads and scotch tape.
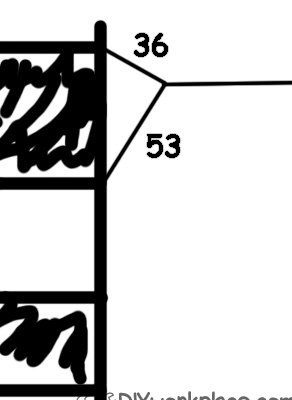
According to the author, the sizes and proportions for such a snake are not very important, everything is going to the eye, the main thing is to adhere to the main structure, and then the snake will fly. The most important condition is that the size of the material that the kite will be sheathed (paper or cellophane) be 1/3 of its entire height. In other words, the snake is divided into three identical parts. It is still important to maintain the ratio of the lengths of the slings to which the rope is tied.
Materials and tools for homemade:
- thin wooden slats with a size of at least 5x5 mm (these may be branches, plastic tubes and other suitable material);
- for the design of the snake you need strong threads (you can use a thin copper wire);
- garbage bags (the main component of homemade products);
- a strong rope to launch a snake (ideally fishing braided fishing line).

For work you will need such instruments: scissors, a hacksaw, an insulating tape and an adhesive tape.
We collect a kite:
Step one. Snake drawing
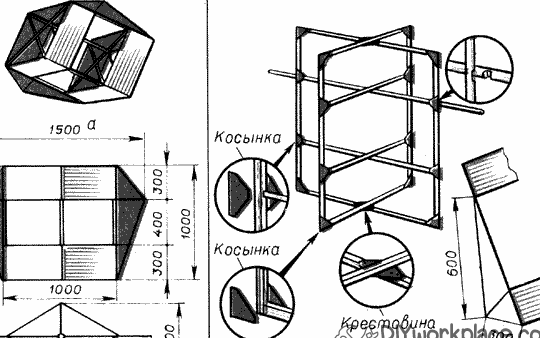
In the picture you can see the original box snake diagram. Here the serpent is more like a cube than the author.
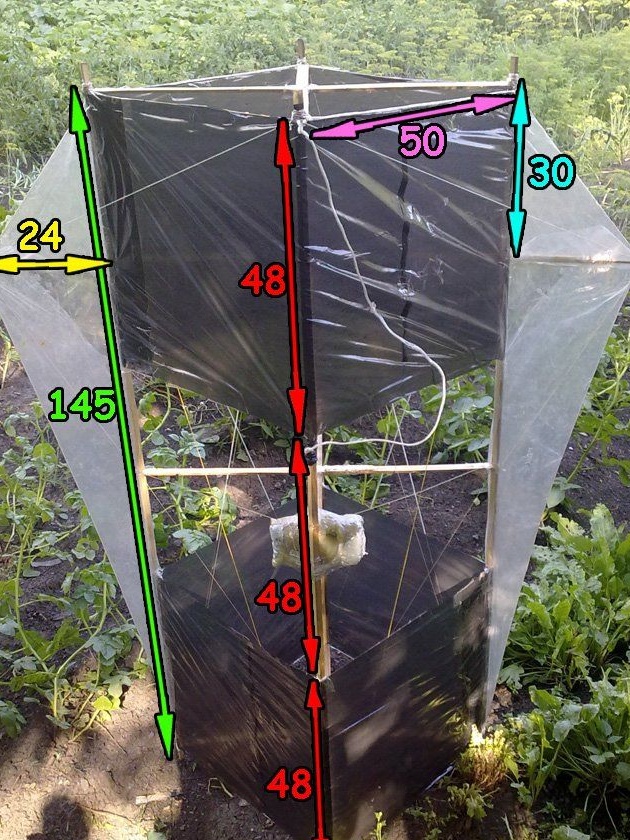
In the photo you can also see the sizes that the author of the homemade chose.
Step Two Making a kite skeleton
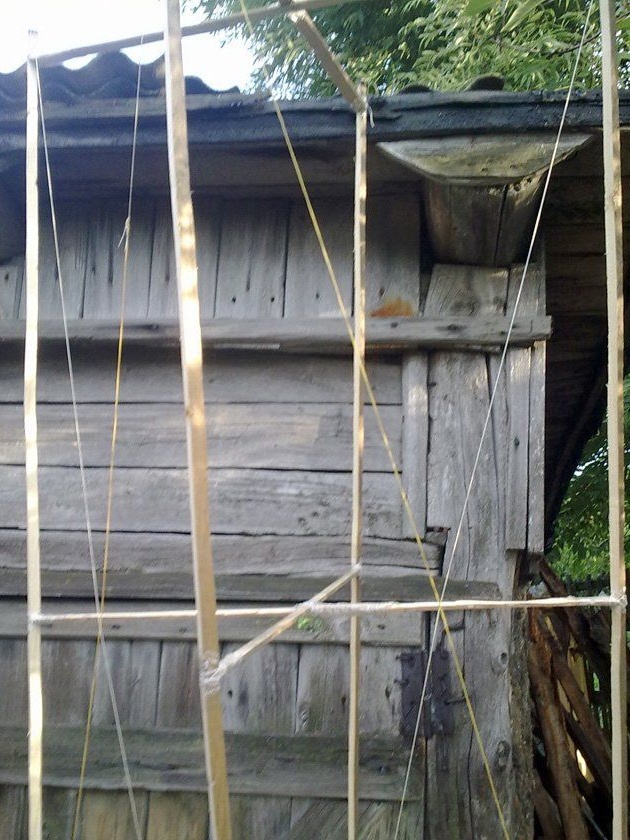
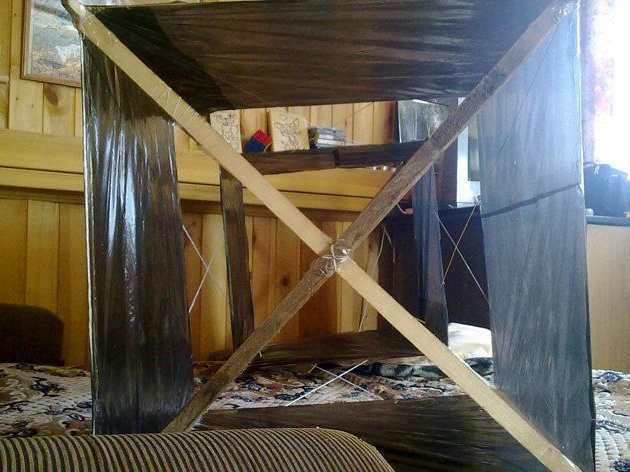
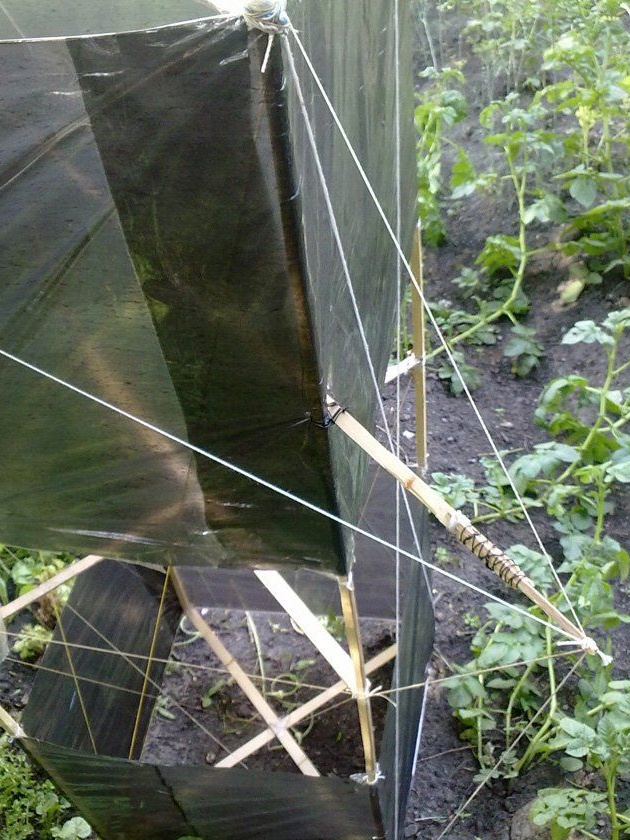
For the manufacture of the frame, you need to cut with a hacksaw 6 short rails and 4 long. All barbs must be filed.
then the short slats need to be folded crosswise and secured with tape or tape. For reliability, the connection point is wrapped with durable threads.
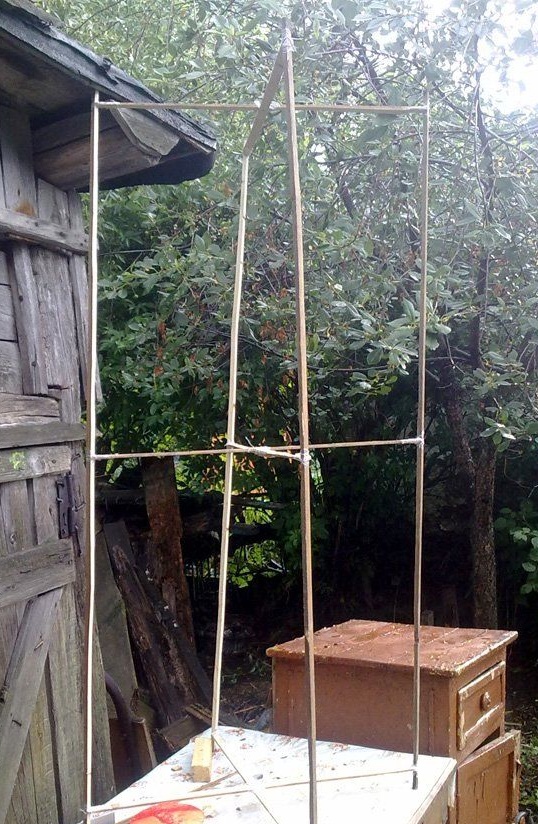
Next, the made crosses need to be connected with four long slats, as a result, one cross is fastened in the center, and two others at the edges. From the edges you need to retreat a couple of centimeters. Everything is fixed in the same way, that is, with tape, tape and thread.
In order to make the construction more durable, on short rails it is possible to make cuts into which long rails will go. How exactly can be seen in the photo.
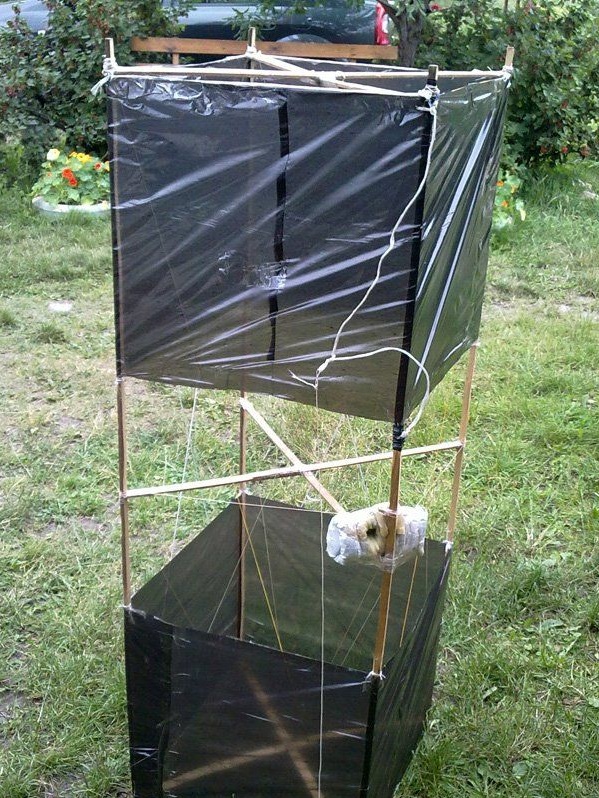
Due to the fact that the design was simplified, it will be rather shaky after assembly. Ideally, the construction is going to corners, scarves, so the result is a fairly rigid frame. Further, the fabricated structure needs to be strengthened, for these purposes strong ropes will be needed.To do this, the ropes are pulled at the corners of all four sides with tension. After the constriction, the structure should be a rectangular parallelepiped, there should be no distortions. It also happens that such snakes are made in the form of a rhombus, not a square.
As a result, the frame should be very tough. You can pick it up on any side and shake it, nothing should hang out. If so, you can proceed to the next step.
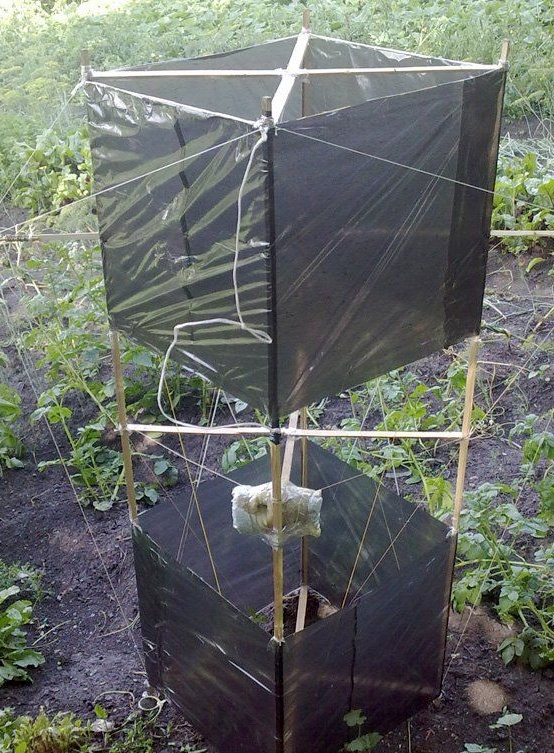
Step Three Making a snake shell
For the manufacture of shell used garbage bags. They need to be cut into such sizes that their width is 1/3 of the entire height of the snake. The length should be slightly more than four lengths of the width of the kite.
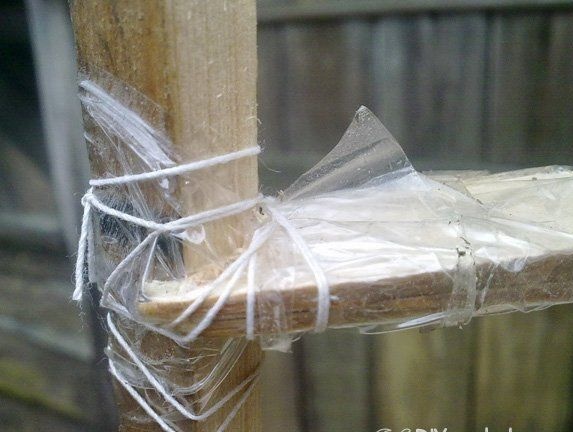
The extreme part of the strip is attached using tape to one long rail.
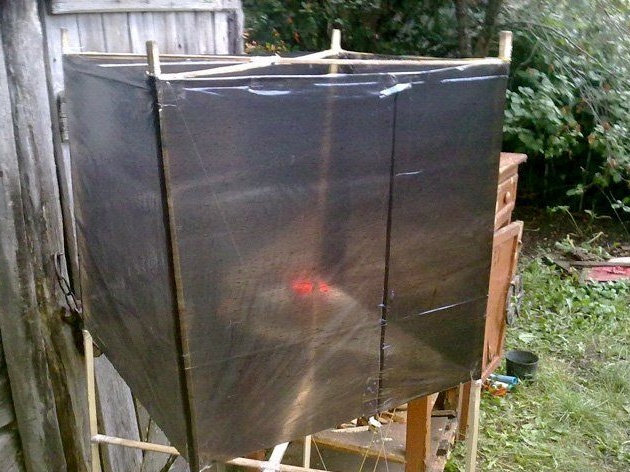
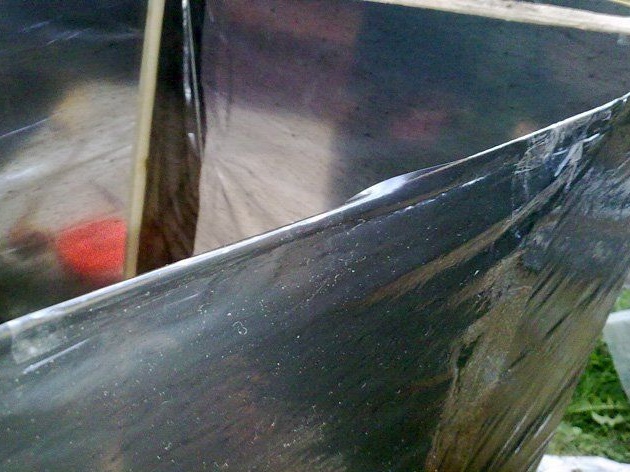
Then you need to wrap the snake once with cellophane and return to the place of attachment. At this point, you need to cut off the cellophane and then glue it with an adhesive tape using an adhesive tape. Before gluing the cellophane, you need to tighten it well. As a result, after gluing, the seam will be visible, as in the photo.
To further strengthen the frame, pull the rope along the top edge of the cellophane. To the same rope you need to glue the upper edge of the cellophane. This will reduce the load that the wind will form during the flight of the kite, as a result, it will fall not on cellophane, but on the rope.
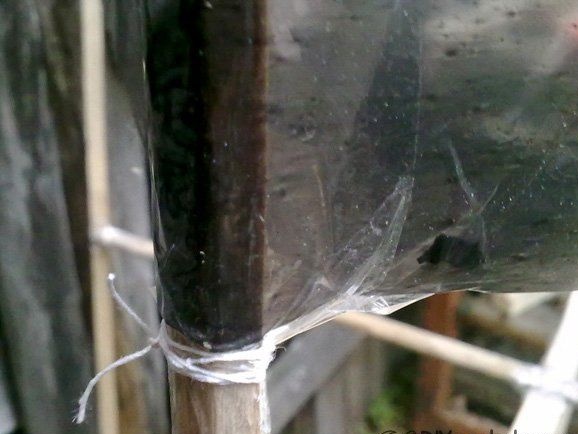
The edge must be bent around the rope, and then sealed with tape.
From the bottom of the snake, you can strengthen the cellophane in the same way, that is, tie the thread, and then attach the cellophane to the thread. But here the author decided to get by with tape, tying it to a long rail.
Since the wind was too strong, it was decided to reinforce the kite design again. As a result, he was pulled over the cross with a strong rope.
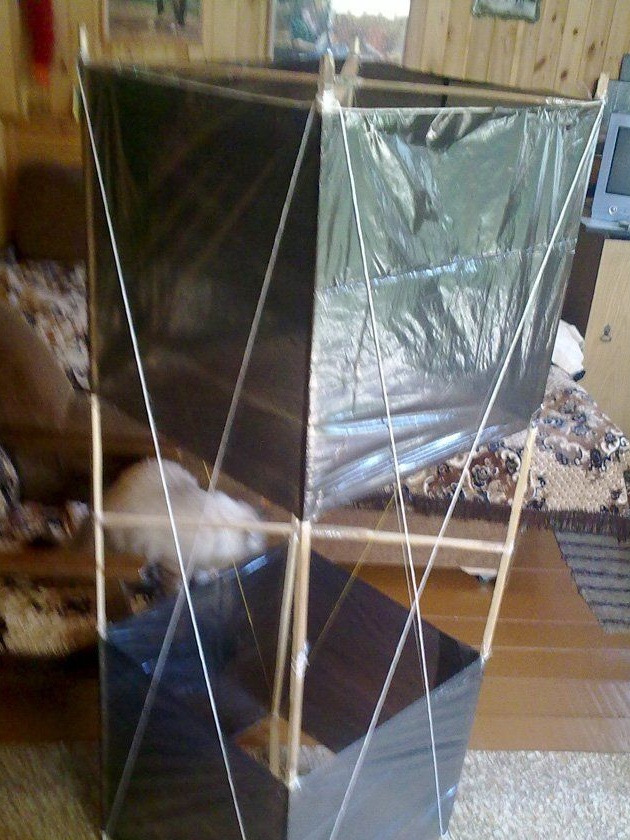
In conclusion, everything should be as shown in the photo. The snake should be tough and without distortions.
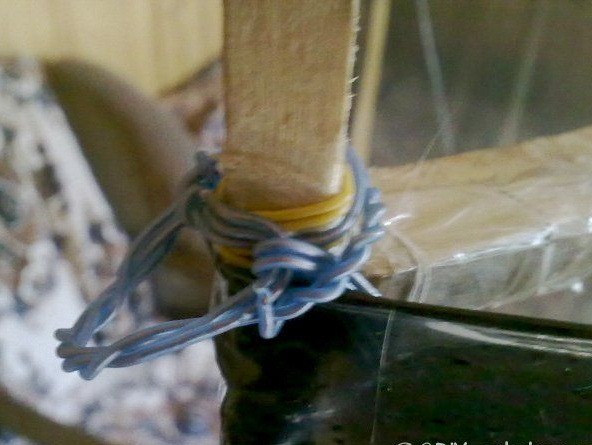
Step Four Hinges for rope
To tie ropes to the snake, you need to make loops. They are made of wire. Also on the diagram you can see how long the slings should be for tying to the loops.
The author also decided to install a soft casing on the snake so that a camera could be inserted into it for shooting during flight. It was made from a washcloth.
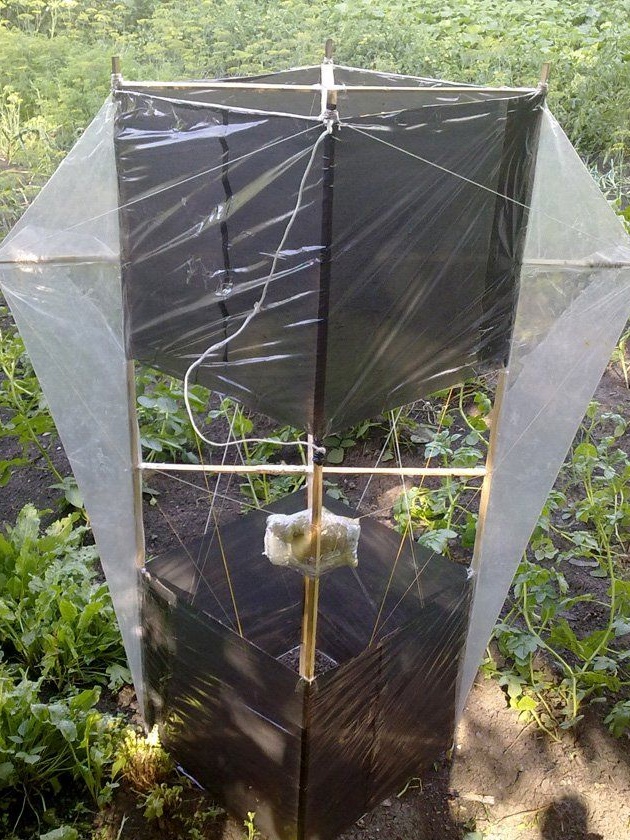
Step Five Kite wings
As an improvement of homemade snakes received two wings. Everything is assembled using a similar technology. That is, you need to install the rails, and then cover them with cellophane. It is necessary to experiment with the size of the wings, in which case it was chosen randomly.
That's all, the snake is ready, you can run. According to the author, it takes off easily and is very simple to control. Even a video was posted that was recorded during the flight of a kite (aerial photography).