
This reduced model The author built the wind generator in order to gain more experience and practice in creating axial generators and to understand the essence of its capabilities and the principle of operation.
Materials and tools that were used by the author to create a prototype wind generator:
1) 24 round neodymium magnets size 20 by 5 mm
2) pipes of various diameters
3) welding machine
4) circular saw
5) concrete pile from a high-voltage support 3 meters long
6) epoxy resin
7) the hub from the walk-behind tractor
8) plywood
9) jigsaw
10) wire 0.5 mm thick
11) duralumin pipe
Consider the main stages and the manufacturing process of this type of wind generator.
Initially, the author had the idea to remake one of autogenerators so that it is suitable as a generator for a future wind turbine. This is a fairly convenient scheme that does not require special labor to create a windmill, but the author still decided to consider other options. In order to learn more about the differences in the design of generators and windmills, the author read a large number of articles and forums on alternative energy and the creation of windmills. Assessing his capabilities, he decided to try a different scheme for creating a windmill different from the original idea.
The reason for this was the fact that an axial wind generator is not much more difficult to manufacture than modifying a car generator, but has the advantage of not sticking with generators with iron stators. Thus, the author decided to build a prototype wind turbine with a stator on neodymium magnets.
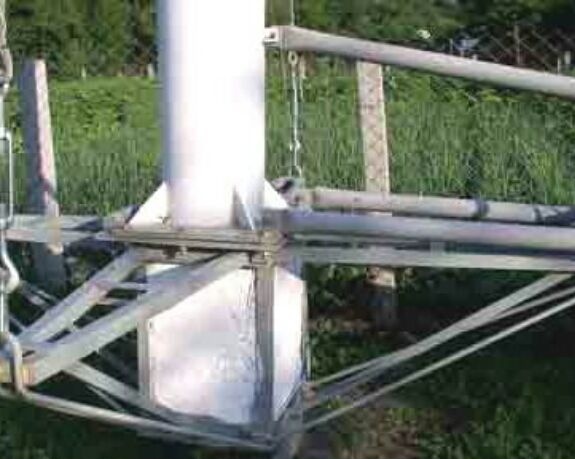
To begin with, the author decided to assemble a mast, on which the generator will subsequently be placed, since this is one of the most simple parts for the construction of a future wind turbine for assembly. The match was made of pipes of different diameters, which were welded together in a mast with a total height of about 12 meters. The author decided to use a concrete pile from a high-voltage support as the foundation of the mast. The total length of the pile was about three meters, and the author decided to dig it 2 meters into the ground, according to his calculations this should be enough to ensure the reliability of the structure.
Then work began on the generator itself.
Two discs with a diameter of 10.5 cm and a thickness of 5 mm for neodymium magnets were ordered from a turner. the magnets themselves were also purchased in an amount of 24 pieces measuring 20 by 5 mm.Thus, on each of the disks should be placed 12 magnets. the magnets were glued so that the poles alternated, after which they were flooded with epoxy resins to give greater strength.
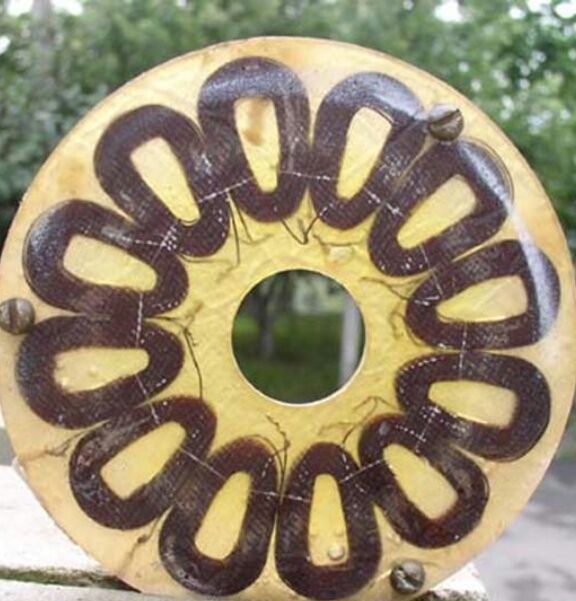
Then, a stator mold was cut from plywood, and 12 coils of 0.5 mm wire were wound. The coils contained 60 turns and were connected in series in one phase. The thickness of the coils, as well as the stator, was 4 mm. After that, the author mounted the coils on the plywood disk and proceeded to fill the stator with epoxy. this was done as follows: for starters, waxed paper was laid on a square of plywood, since epoxy does not adhere to it. Then a square of plywood was laid with a circle cut out under the stator, and a small circle was placed in the center of the circle.
In order to increase strength and avoid stator cracks, the author cut a ring from fiberglass and lay it along the edge of the stator circle. After that, the coils were laid out and grooves were made to output the wires of the coils. Then he poured all this with epoxy resin, placed another circle of fiberglass on top, again poured resin and covered it with wax paper. After that, the whole structure was clamped on top by another sheet of plywood on which the goods were laid.
In this form, the design lay until the epoxy was completely cooled.
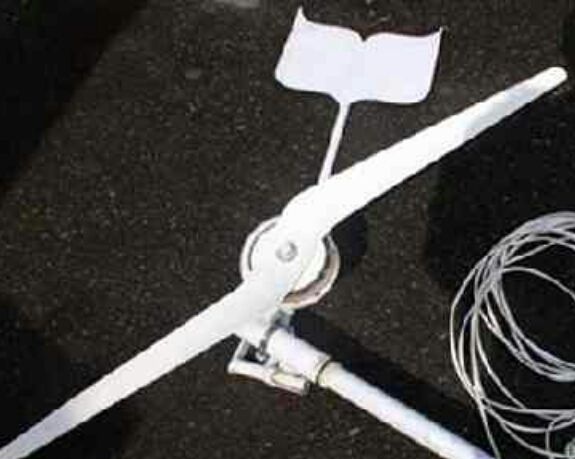
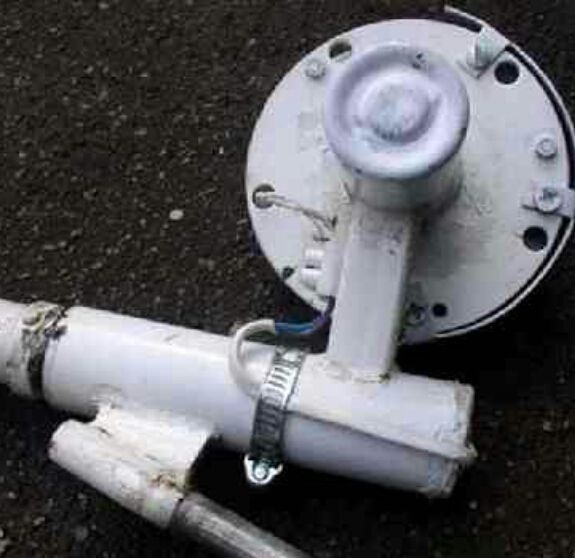
Meanwhile, while the stator froze, the author decided to make wind protection for the future generator. The author decided to do protection from the wind according to the standard tail tailing technique. To do this, a tail mount was welded, and the pin was vertically deflected by 20 degrees, and horizontally by 120 degrees relative to the generator itself. Thus, the tail was made folding, and the generator was offset relative to the axis. Such a design ensures that in strong winds the screw presses on the generator and shifts it to the side, and the tail rises upward, protecting the structure from strong winds.

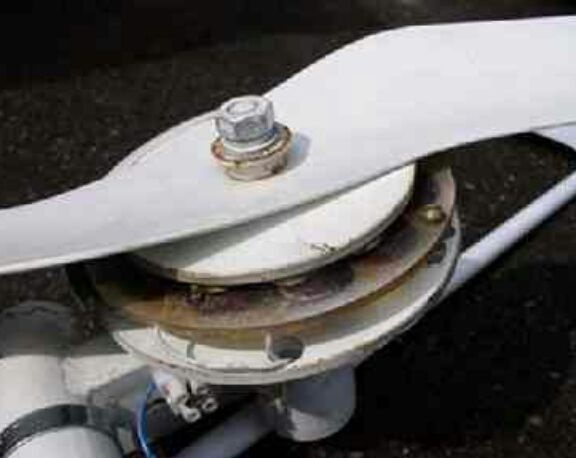
In the next photo you can take a closer look at the design of the stator with disks. The disks were mounted so that they were attracted to each other by alternating poles of magnets.
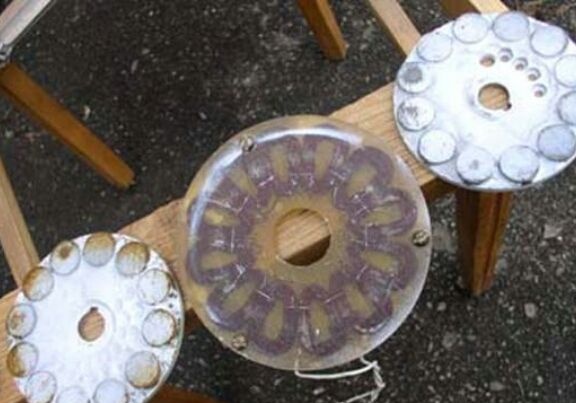
After extracting from the form, we got such a stator, it turned out smoothly and beautifully, all the stator coils are connected in series in one phase:
The author decided to make a screw for a windmill with a two-blade design. As materials for the manufacture of blades, the author used a duralumin pipe with a diameter of 220 mm, which used to be part of a field watering. Moreover, the diameter of the screw itself turned out to be about 1 m. The blades were cut out using an electric jigsaw, and so that a whole structure of two blades was obtained. After that, a hole was drilled in their center for attaching to the generator. In order to properly center and calibrate the screw, the author hung it on a thread through a central hole and achieved a horizontal position, draining the excess as necessary.
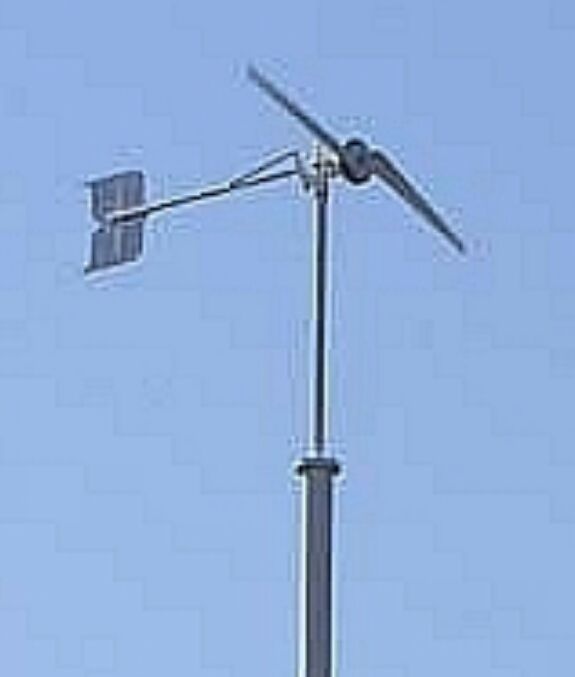
Below are photos of the finished windmill.
Here is a wind generator near:
View from the rear of a windmill:
Mast of a wind generator:
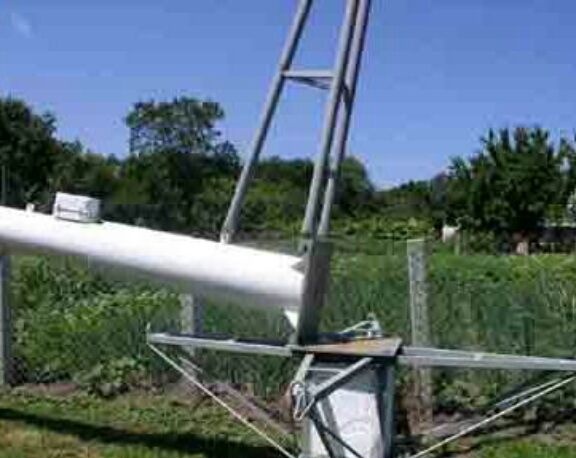
The mast is lifted using a hand winch. In good wind, the generator gave out up to 3 A to a 12 V battery.