
The article will consider an example of creating a one-color kite. Such snakes can be considered one of the simple ones in terms of manufacturing, they are quickly and easily assembled, and also require a minimum amount of materials. Going to homemade according to the drawing, which is attached to the article. But that’s not all, you have to think a little bit about it, since the drawing does not describe all the nuances of assembling a homemade product.
Materials and tools for making homemade products:
- thin polyester or nylon to create a sail;
- kapron (or other similar strong fabric that will be used along the snake);
- one tube with an external diameter d = 5.5 mm (will be the central guide) and one and one with an external diameter d = 8 mm and a length of 900 mm;
- guides in the wings and other connecting elements (fiberglass or carbon with a diameter of 5.5 mm);
- two spacers for kite (fiberglass or carbon d = 3 mm);
- braided cord or kapron thread for the manufacture of slings (braided cord 3 mm);
- reinforced tape (width 15 mm);
- double sided tape;
- scissors;
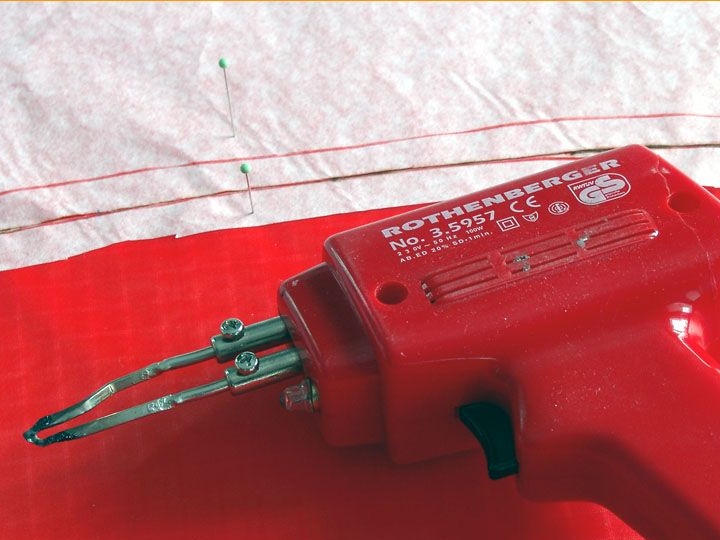
- pulse soldering iron (for cutting material);
- paper for making a template;
- sewing machine.
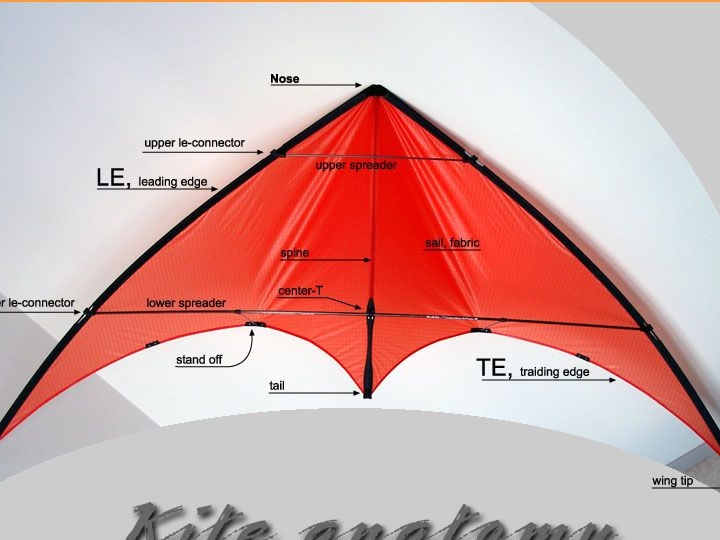
Required Connectors

Kite manufacturing process:
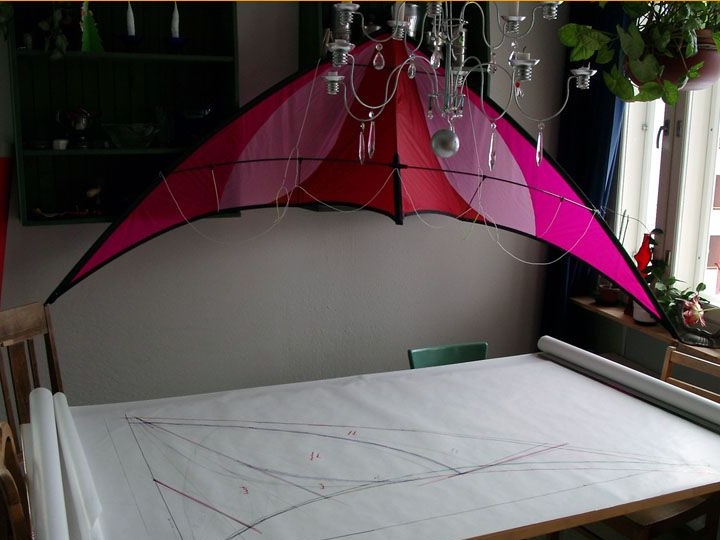
Step one. Drawing drawing
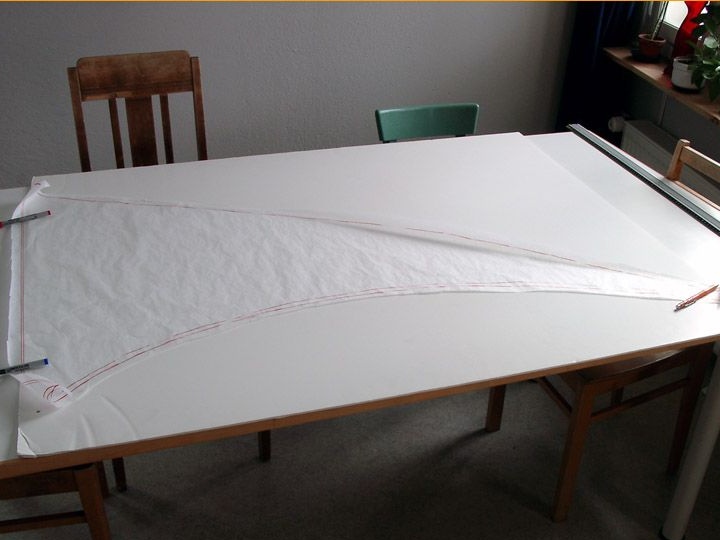
To make a kite, you will need a fairly large table. A drawing will be applied on it, and then snake elements will be cut out. The template is made of paper.
Step Two Making Snake Wings
First of all, on the basis of the kite’s wing plan, it is necessary to draw a contour. In order to make a double fold, you need to add a margin of the order of 12 mm to the edges.
If the snake is planned to make multi-color, then here you will need to make a single pattern. This must not be forgotten in the manufacture of patterns.
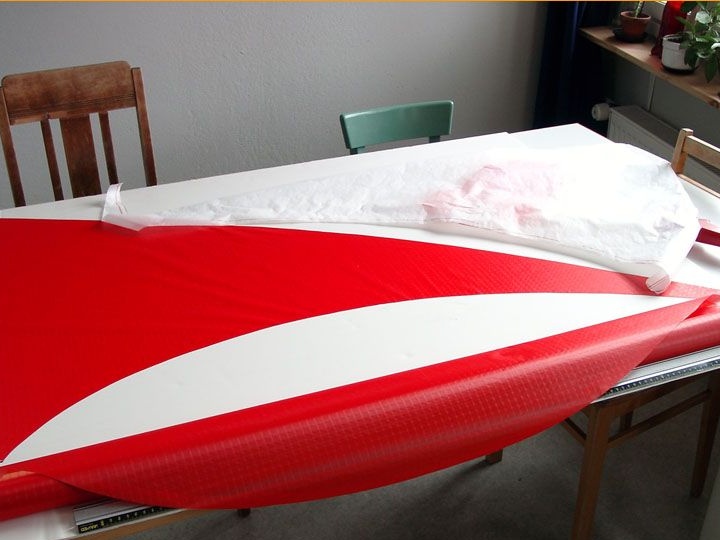
Next, the pattern should be applied to colored matter. Since the pattern is made of paper, it will be folded so that this does not happen, it is fixed with pins.
Now you can cut the wing, a pulse soldering iron is perfect for cutting. Thanks to this approach, the edges of the material melt and then do not fray.
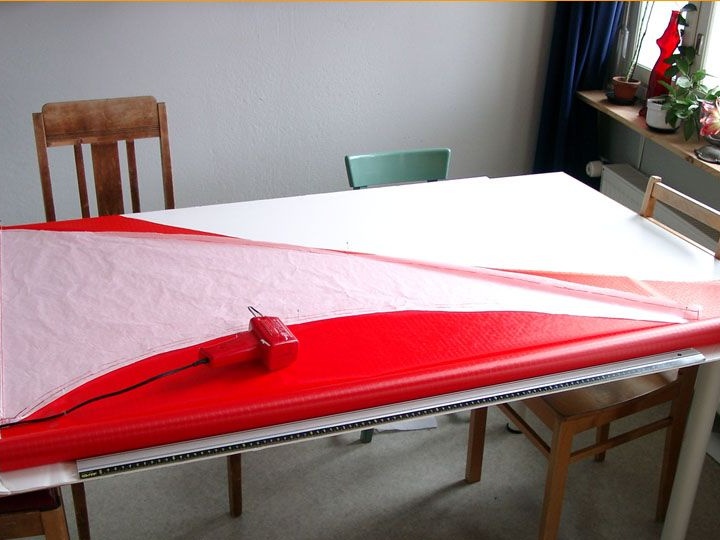
Similarly, you need to cut out the second wing. It must be symmetrical to the first.
Step Two Connect the two halves of the wings
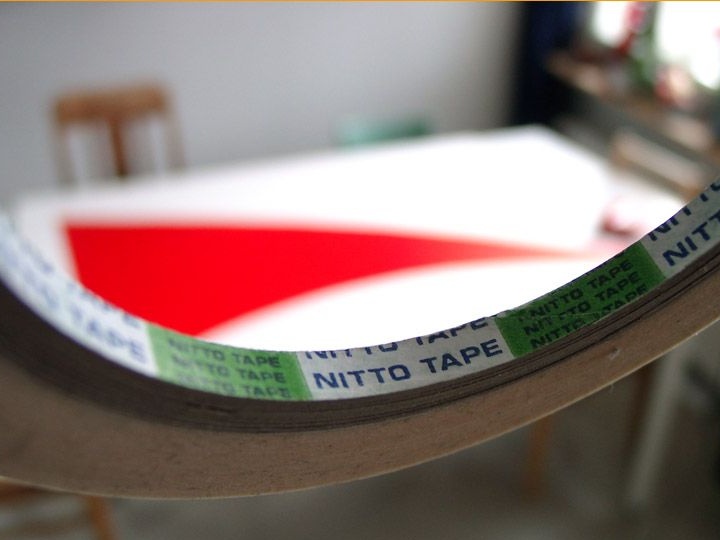
At the next stage, two wings must be combined into one. For these purposes, the author uses double-sided tape, the thickness of which is 6 mm. It is necessary to glue on an overlap of 6-7 mm.
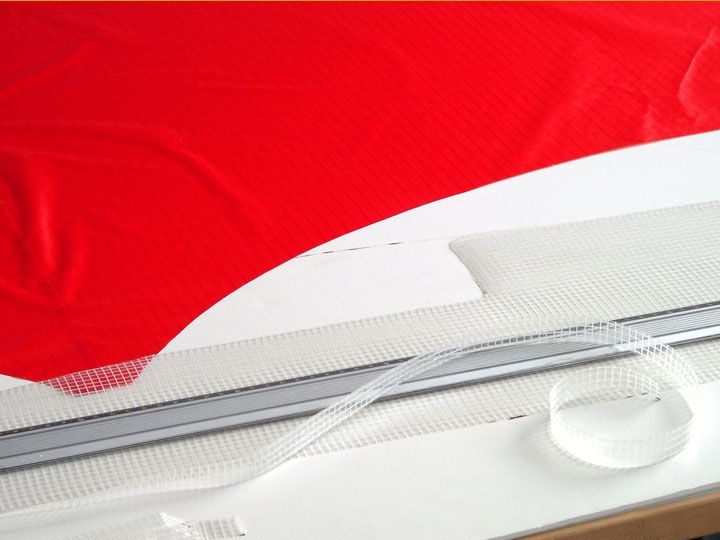
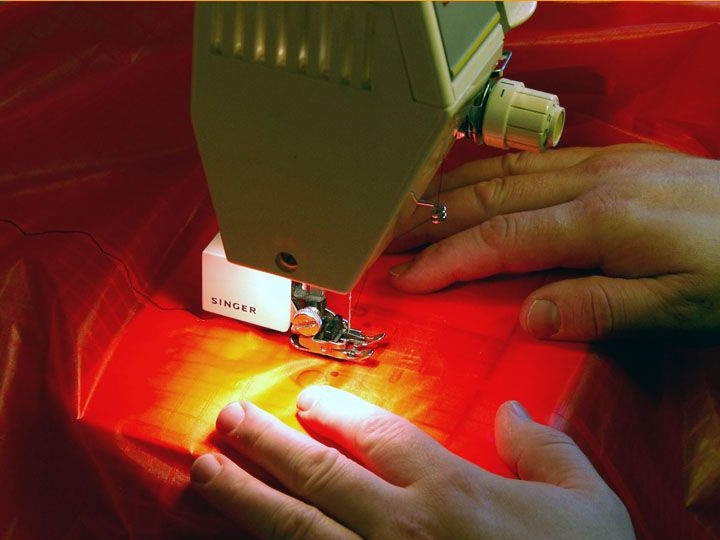
To strengthen the seam of the kite's spine, a reinforced tape 15 mm wide and 800 mm long will be needed. Subsequently, the tape is sewn. For sewing, you need to use a three-point zigzag stitch.
Step Three The back of the kite
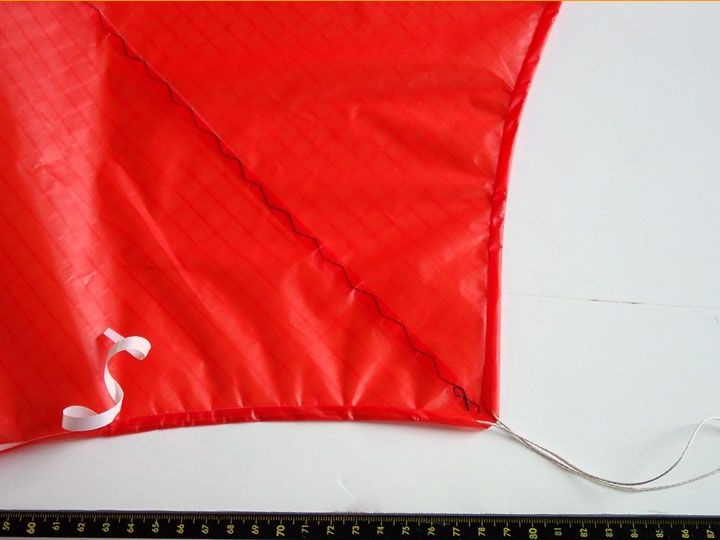
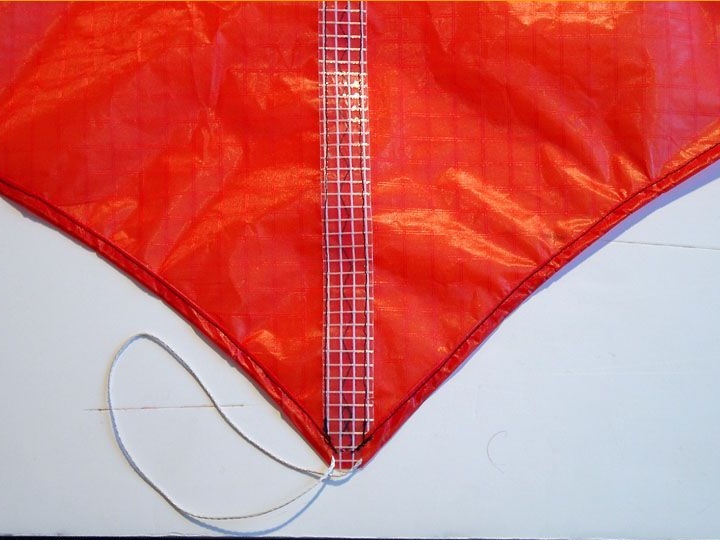
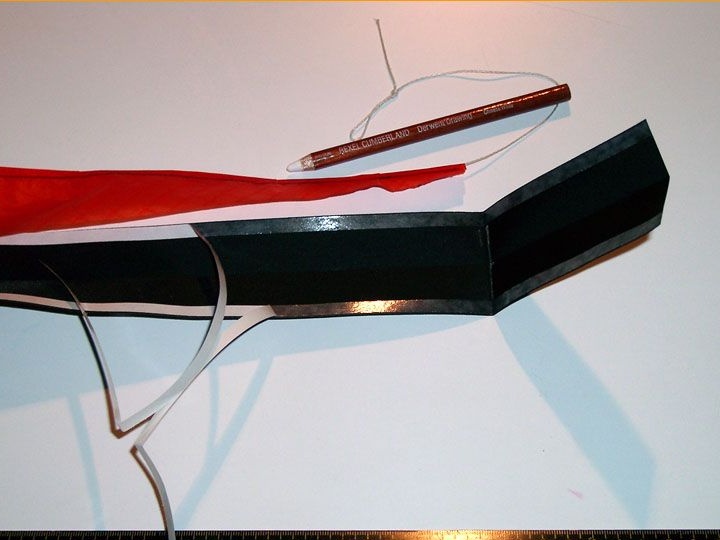
In the back of the kite, you need to sew in a nylon thread with a thickness of about 2-3 mm. How exactly to do this can be seen in the photo. The result should be a loop 10 cm long.
Step Four Front of the kite
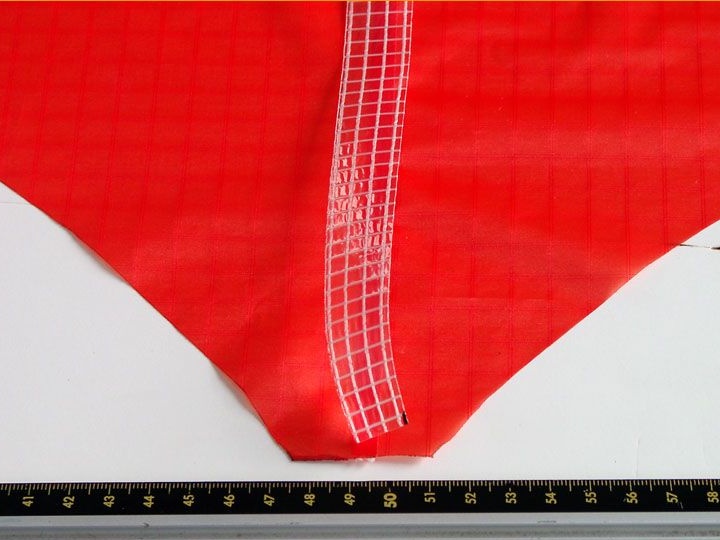
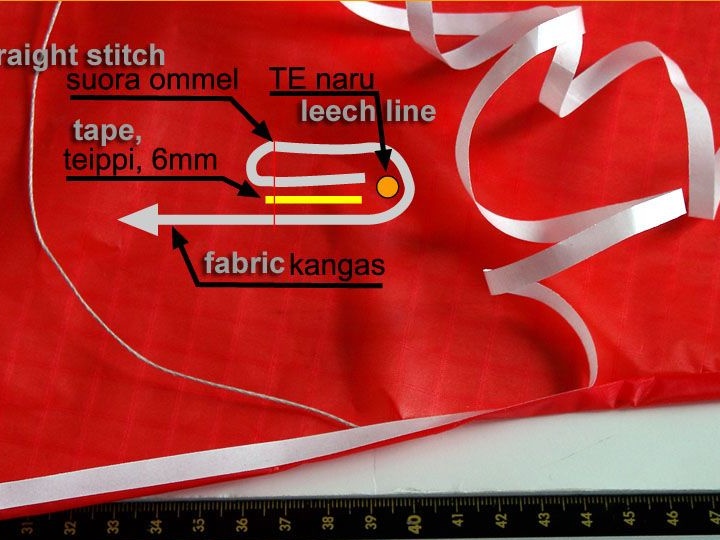
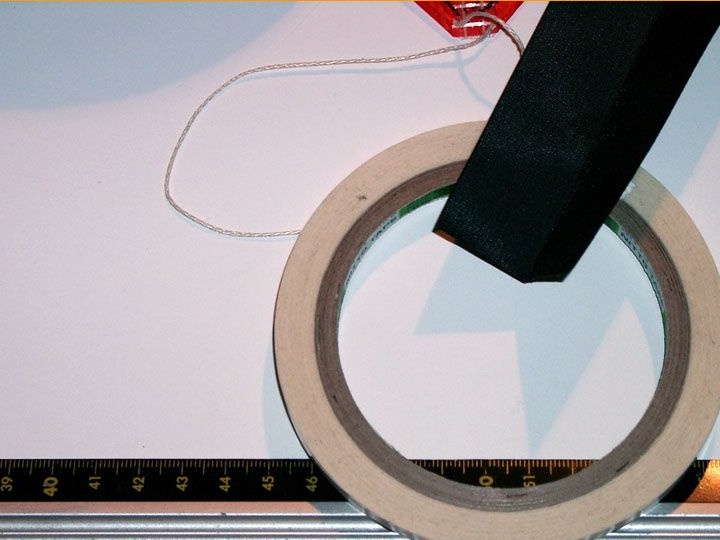
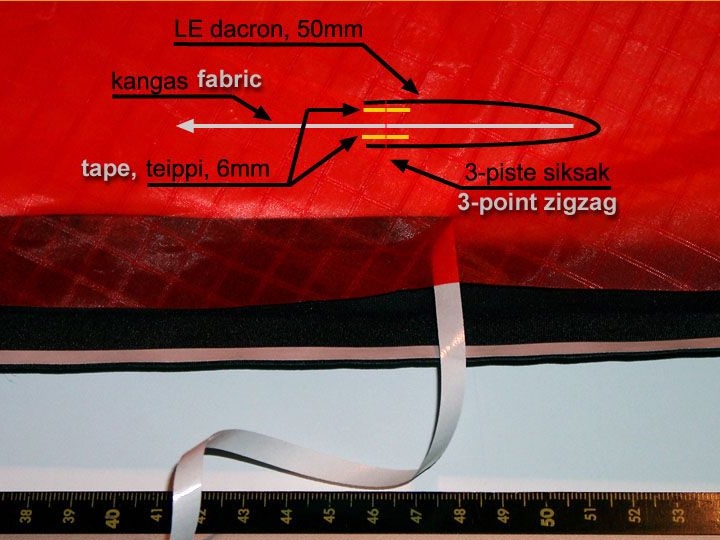
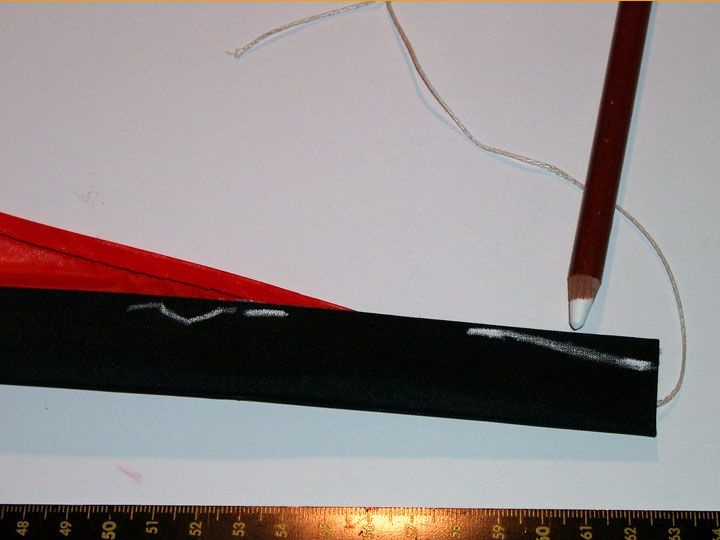
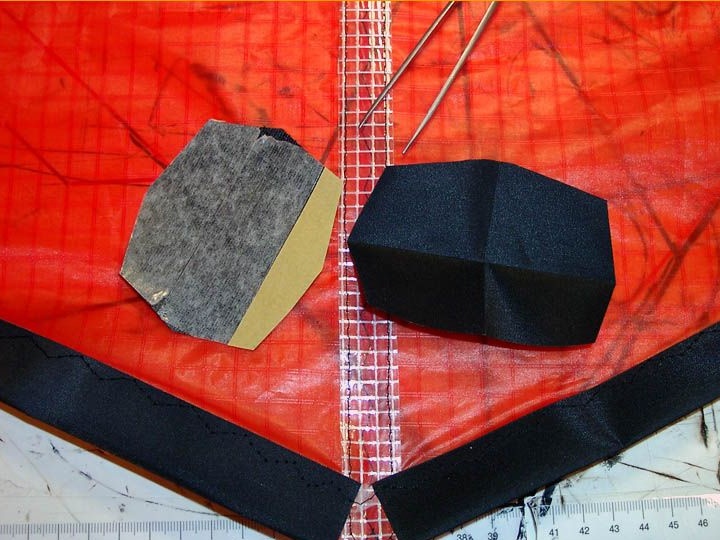
To make the front of the kite, you will need a strong waterproof fabric, the width of which is about 5-6 cm. Also, double-sided tape will be needed. How exactly to work with the leading edge of the kite can be seen in the diagram. Also in the photo you can see how to pull off the accompanying paper tape.
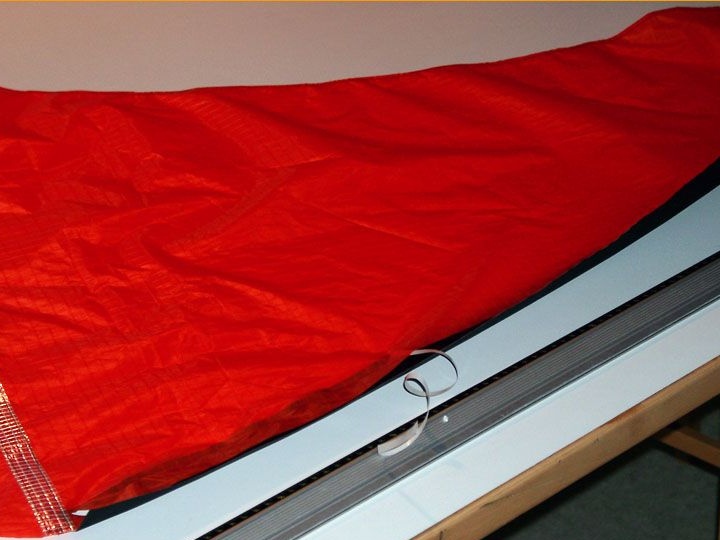
To strengthen the tip, part of the matter (about 10 cm) must be wrapped.
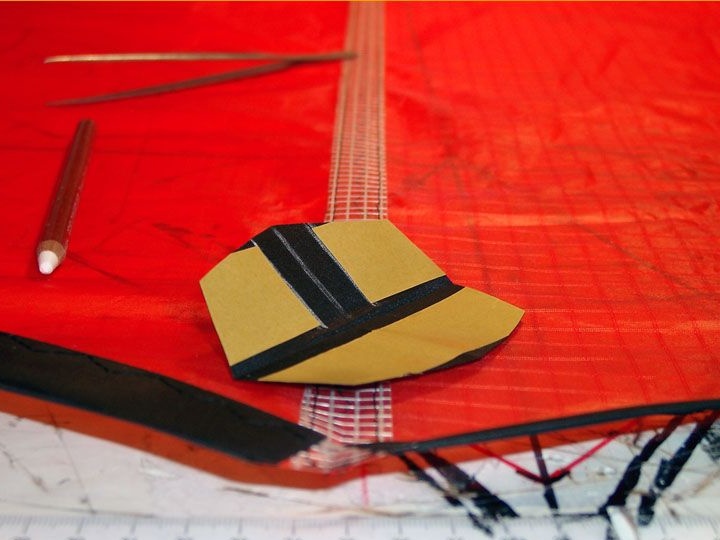
Step Five Snake bridle
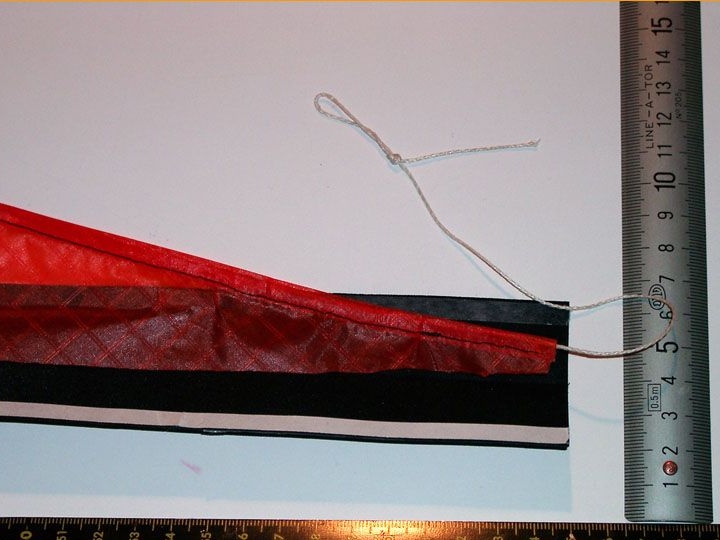
The bridle is made of two parts. Its lower part is a piece of matter 70 mm wide. For the manufacture of the upper part, a piece of a car seat belt or other durable fabric is suitable. To make the pieces easier to process, they must be joined together.
After the bridle is made, it is applied to the nose with a ribbon and make marks in the form of lines for sewing. The edges are cut using a pulse soldering iron.
Step Six Final build phase
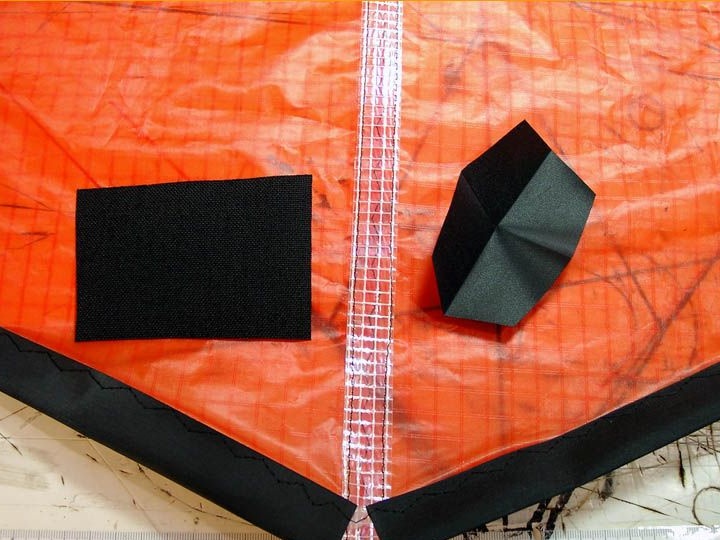
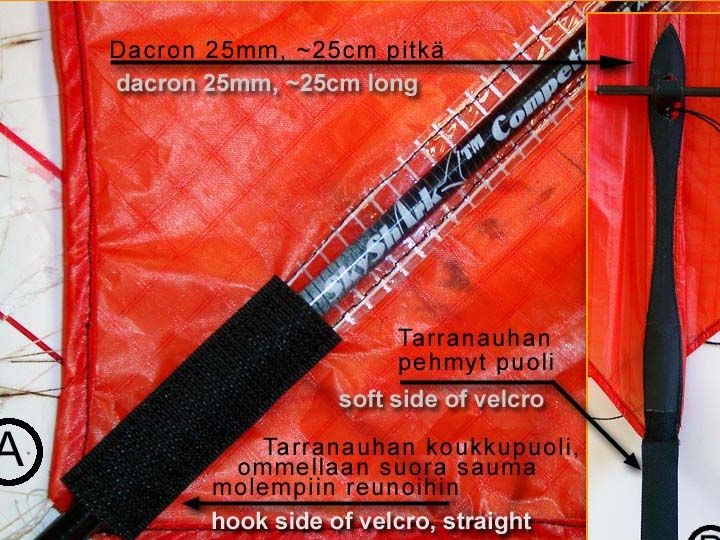
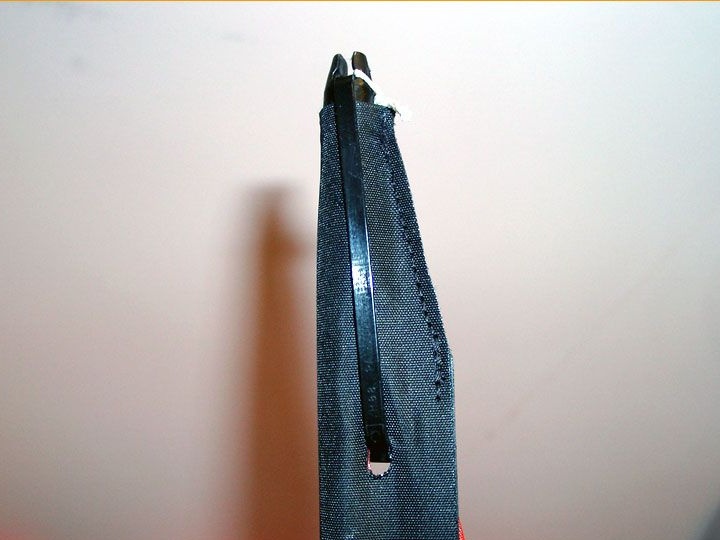
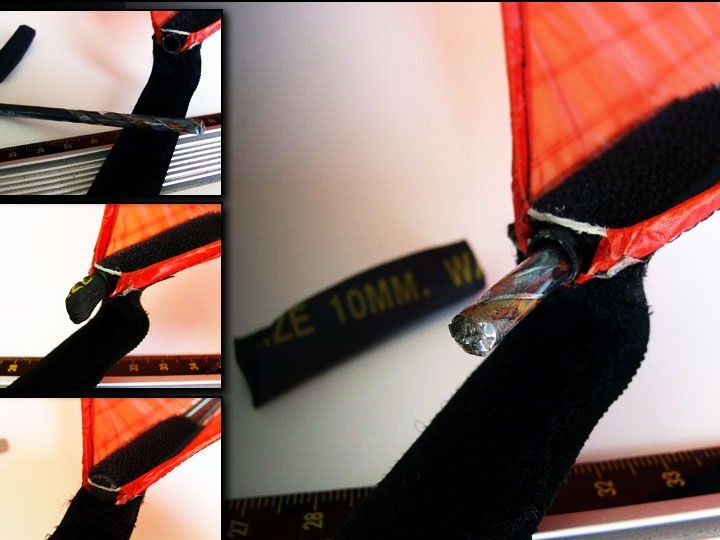
In the tail of the snake you need to sew 7 cm of Velcro, a guide will be inserted here.
To the sail you need to sew a strip of dense matter with a length of about 25 cm, it can be cut in the form of an arrow. The fabric is sewn with a straight stitch. After the mate is sewn to the Velcro, a pocket forms.
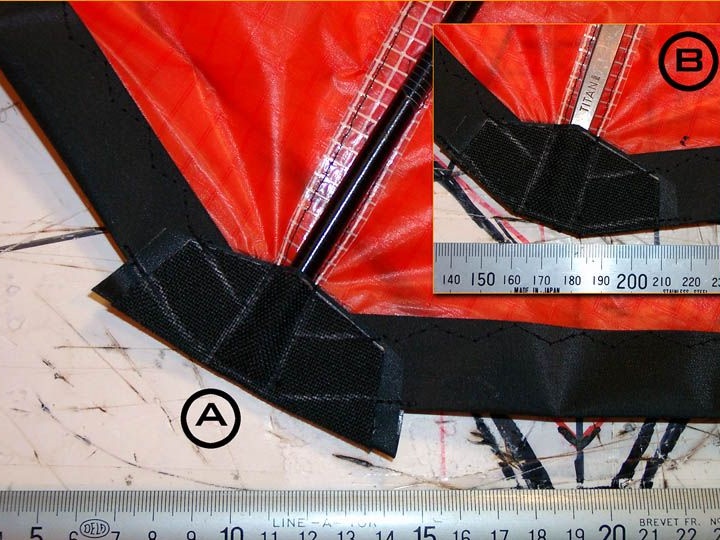
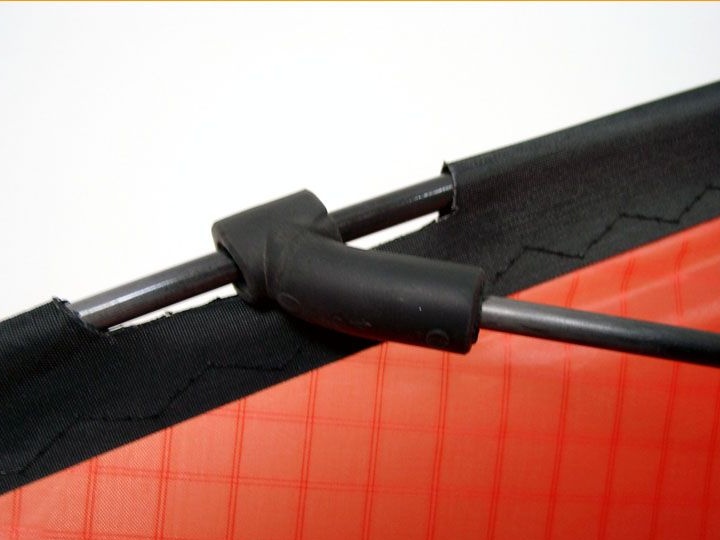
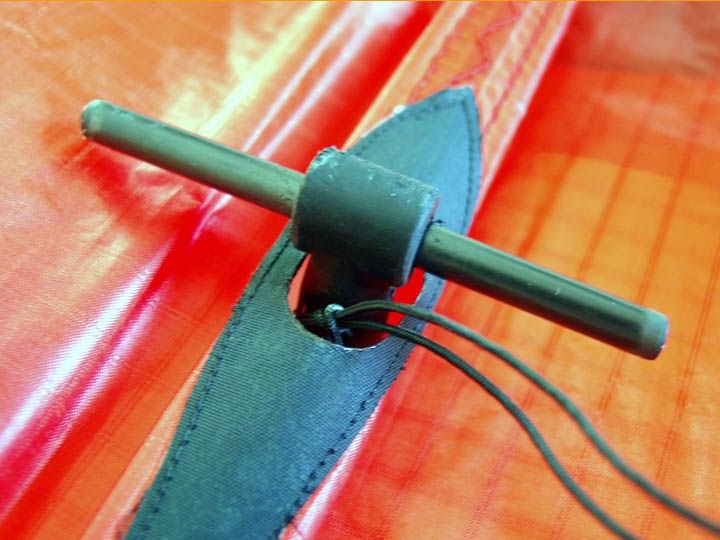
In the photo you can see the place of the connector. Next, you need to make a hole for the T-shaped connector in the marked place. This is convenient to make with a hot cutter.

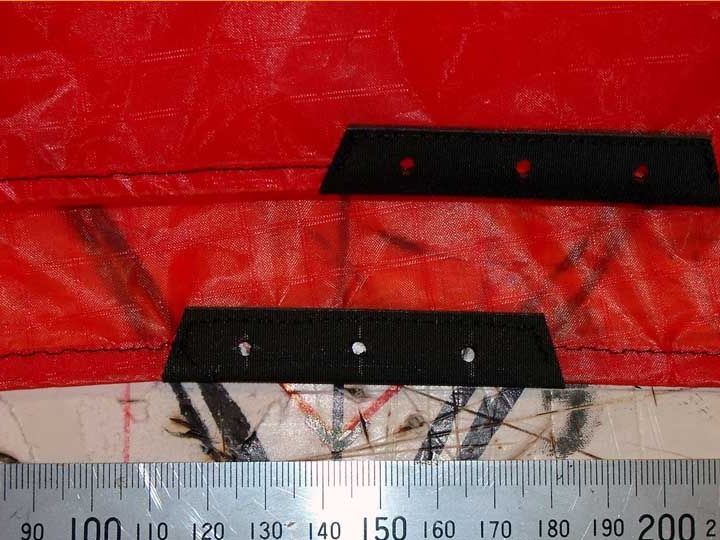
For connectors you need to prepare special places. From dense matter, you need to cut two pieces of 7 mm. Then they need to be folded along in half, and the ends trimmed diagonally. These elements are sewn to the back of the sail. Subsequently, they need to burn holes at a distance of 2 cm from each other.
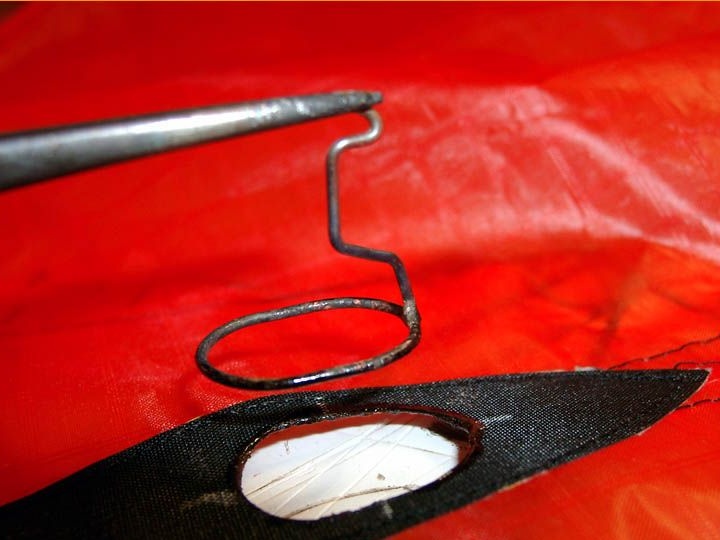
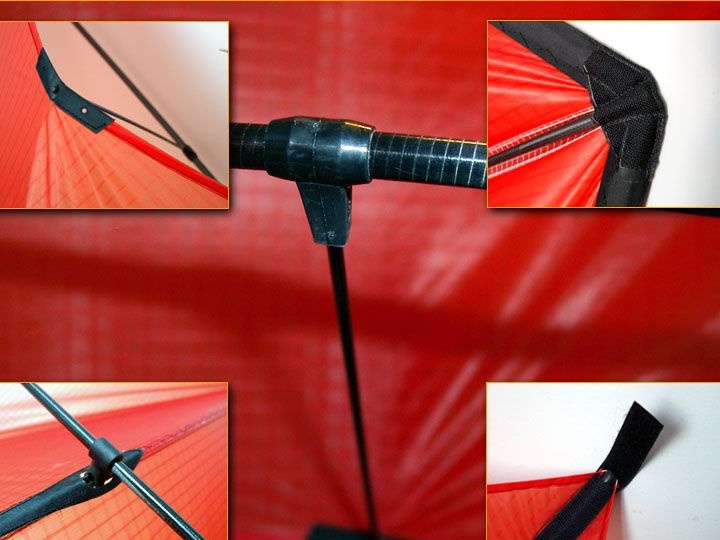
At the end of the wing you need to make a hole. It should be located at a distance of 5 cm from the tip, in this place there is a gap in the stitching. As a retaining ring, a plastic clamp and a nylon thread are suitable.
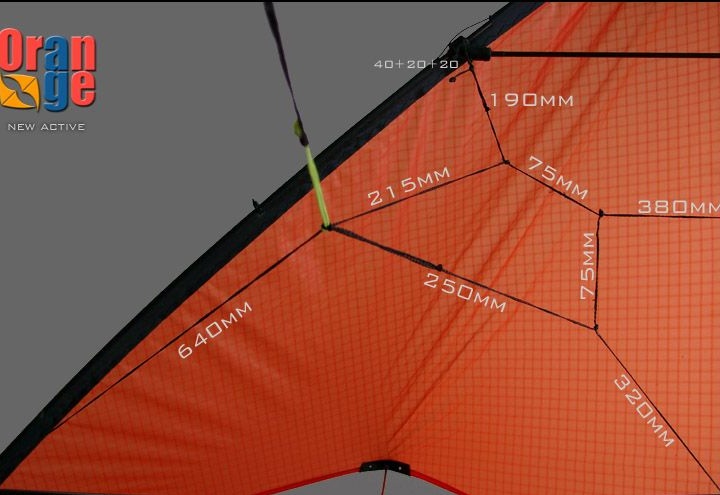
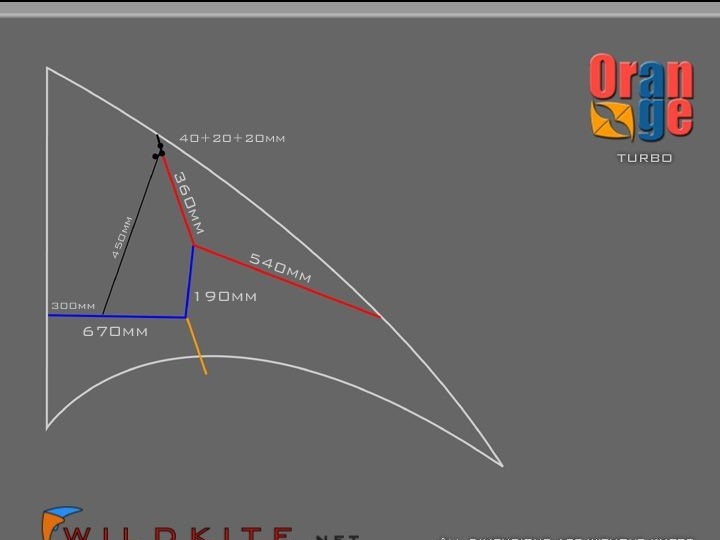
What is the complete kite layout and how the connectors are installed, can be seen in the pictures below:
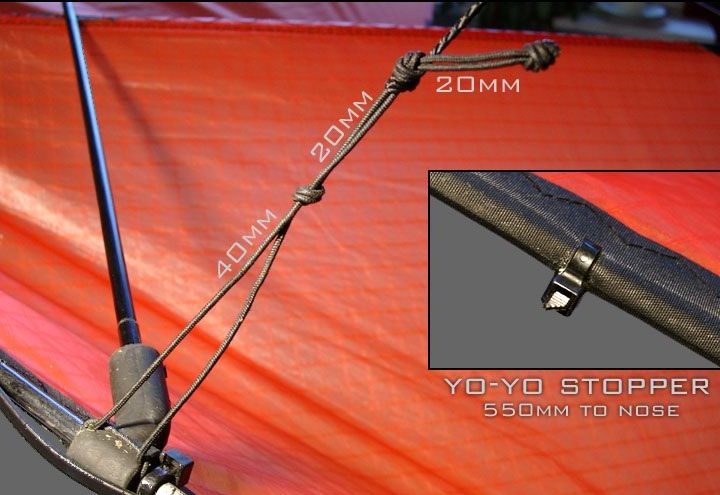
Another scheme for attaching slings:
For kite, you need to make ballast, it weighs 8 grams. Ballast during flight moves along the entire length of the flying kite. At the ends of the axis of the ballast, shock absorbers must be made in with the help of silicone or foam.
Here is the snake’s drawing itself. To make the pattern correctly, you need to apply a 10X10 cm grid to the paper. The drawing is saved in pdf format, in order to open it, you need the Adobe Reader program.
View online file: