
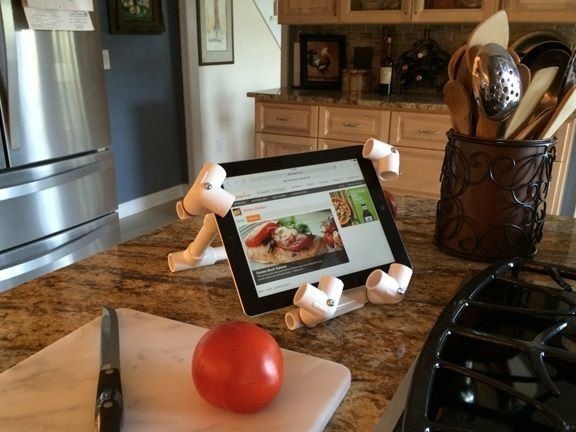
Convenient stand for the tablet from PVC pipes. This stand is noteworthy in that it is quite easy to assemble, does not require large cash costs and is very versatile: it can be used on the floor, at the table and even lying on the bed. The design is lightweight and easily transformed to the necessary needs, it allows you to use the tablet as it will be convenient for you and where it will be convenient for you.
To create the stand you need the following materials and tools:
- PVC pipes 0.5 inches in diameter
- elbows PVC 90 degrees 6 pcs.
- PVC elbows 45 degrees 2 pcs.
- T-fittings 5 pcs.
- 3-way elbows 4 pcs.
- end caps 2 pcs.
- rubber washers for a hose of 6 pieces.
- fine sandpaper
- screws 10-24, 3-inch (4 pcs.), 2.5 inch (1 pc.), 2-inch (1 pc.)
- nuts to screws 6pcs.
- roulette
- drill with drills
- PVC pipe cutter or hacksaw
- wing nuts
- glue for PVC materials
- marker
A detailed description of the assembly of a universal stand for tablets made of PVC pipes.
Before starting the description of the assembly, I want to note that the dimensions of the stand must be customized specifically for your tablet. The author assembled a stand for iPad 2.
Step One: Basic principles of holder assembly.
First you need to cut into pieces of a certain length. The edges of each of the sections need to be processed with sandpaper, however, just like the edges of the drilled holes, you do not want to scratch or scratch the surface of the tablet yourself. In addition, after processing, the design will look more aesthetically pleasing.
In order to make drilling holes on pipes easier and more convenient, it is best to make small notches. The author made such incisions with a hammer and a nail. Without notches, the drill bit can easily slide over the pipe and scratch it.
When the parts will be assembled into a single structure, it is better to put them on the glue, and then fasten it with screws, in places that are suitable for this.
Step two: create a wireframe
Having decided on the principle of assembly and having cut the necessary details, the author proceeded to assembling the frame of the structure, which will hold the tablet.
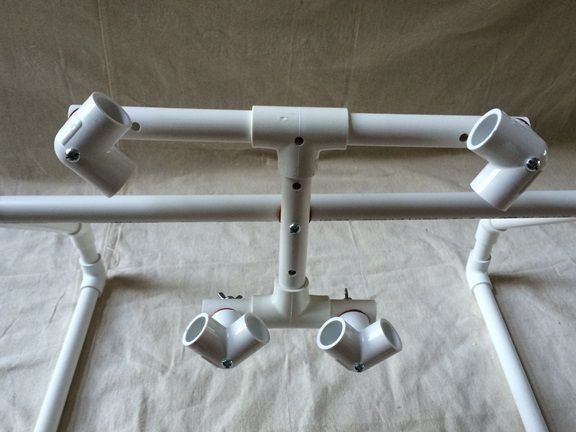
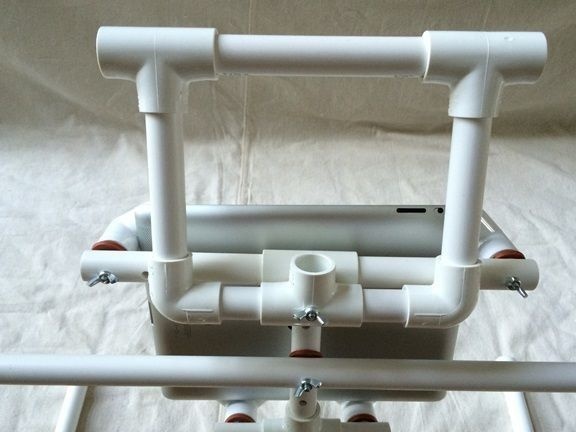
The frame will have a T-shaped figure, and its base will serve as another T-shaped figure, only inverted. To assemble these parts, you need to connect three large parts using a T-fitting to each other. Also, in the lower part of the design, the fitting fastens two smaller parts of the same PVC pipe.
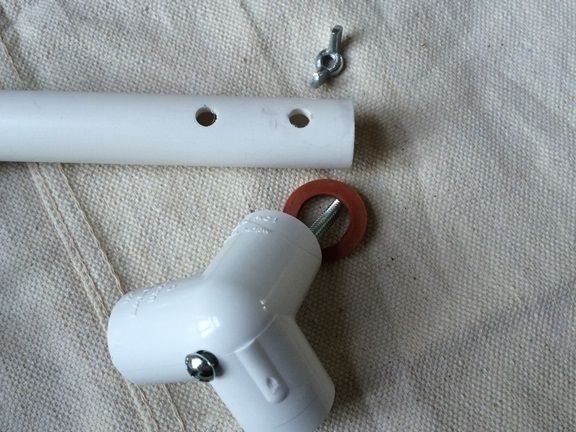
Further, at the ends of the assembled structure, three-way elbows were fixed. They are mounted on screws with wing nuts. In order for the design not to publish vile squeaks of plastic on plastic, you need to attach the parts as tightly as possible to each other, and it is even better to install rubber washers in the places of fastening with bolts.
In order to be able to install the tablet both vertically and horizontally, it will be necessary to make two more holes from each edge of the upper part of the holder construction frame.
Step Three: The Main Stand.
Next, the author began to assemble the main part of the holding frame. He calculated and made the stand design in such a way that it could be conveniently used on all types of surfaces: it was easy to stand on flat surfaces and at the same time it was convenient when working with a tablet while lying on a sofa.
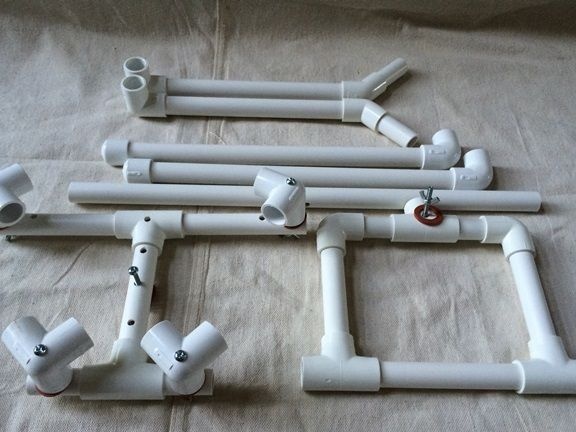
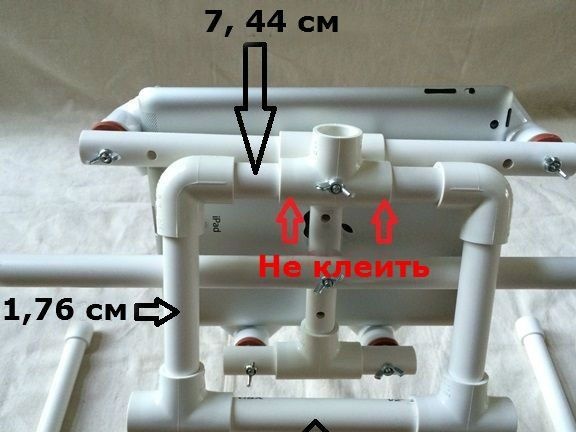
Below will be shown the assembly diagram of the stand, as well as its dimensions. It is very important to pay particular attention to the types that are used in various parts of the holder structure. The author also wants to draw your attention to the fact that in the places indicated by the red arrows in the pictures, you should not use glue when assembling fittings and pipes.

Step Four: Work on creating a stand.
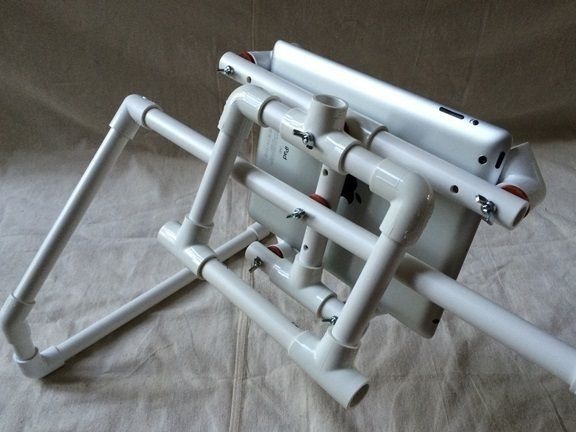
The next step, it was decided to collect some additional part of the holder design, which will help to be more universal. This component of the design will hereinafter be called a mini-stand. the mini-stand will be convenient in order to install the tablet where you do not need an additional lift. Moreover, with its help, the frame will be attached to the stand. The photographs should approximately show the main design parameters, as well as the principle of connecting pipe parts and. during assembly, attentiveness and caution will not hurt: the frame and stand fastened with screws should not be too tight against each other, because free access to the wing nuts should remain. Otherwise, it will be inconvenient for you to adjust the orientation of the tablet in space.
Summarizing.
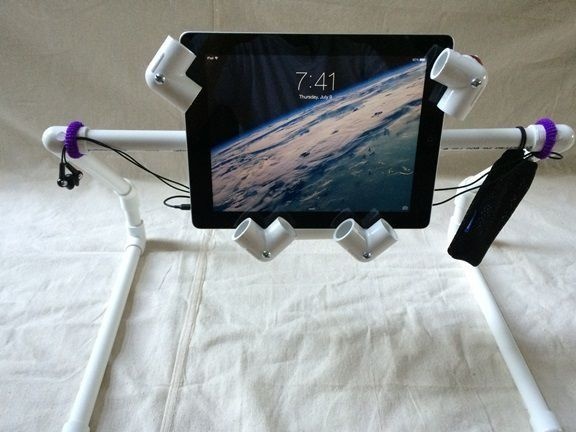
On this, the stand itself will be ready for use. Its design is simple and easy, and it also allows you to make various upgrades that can improve it to even more practical applications. For example, you can add elastic bands that will hold the charger cable or cord from the headphones.