
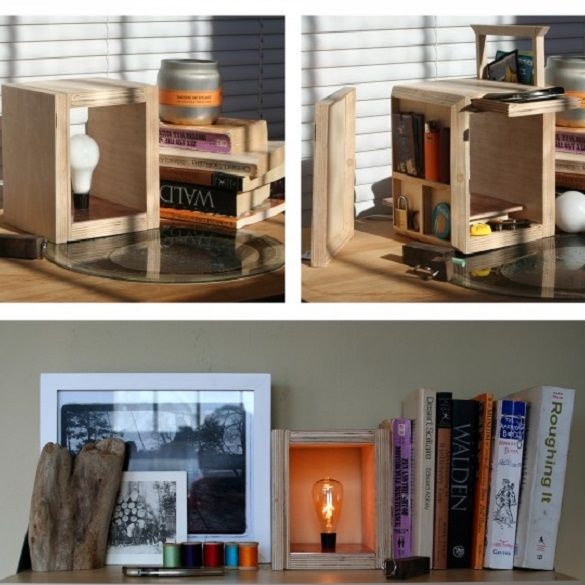
Each of us has our own little secrets. And if there are secrets you need them somewhere to keep. Here is the author homemade decided to make a lamp with a cache to keep his secrets.
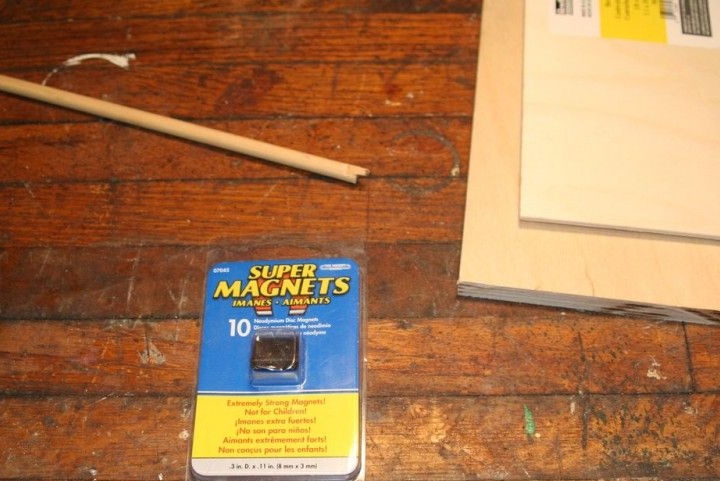
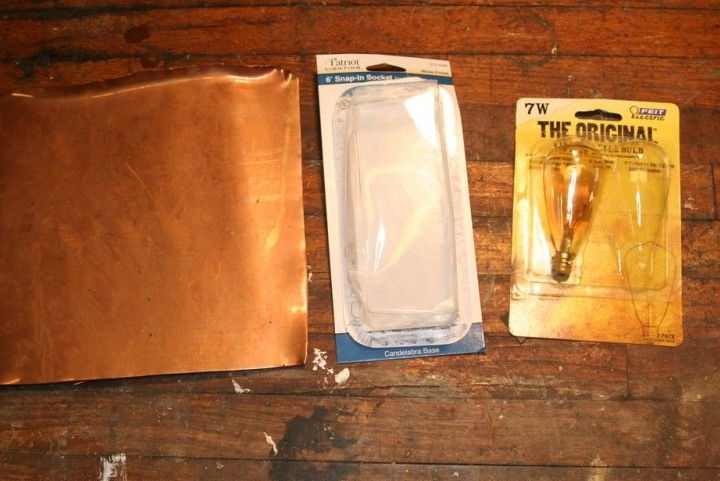
Tools and materials:
- Plywood of various thicknesses;
-Neodymium magnets;
-Spring;
-Wooden dowels;
-Light bulb;
-Patron with a wire;
- A block from a tree of a nut;
- Hollow tube with screw cap;
Keychain ring;
- Clamps;
-Glue;
-Putty;
- Nastchastka;
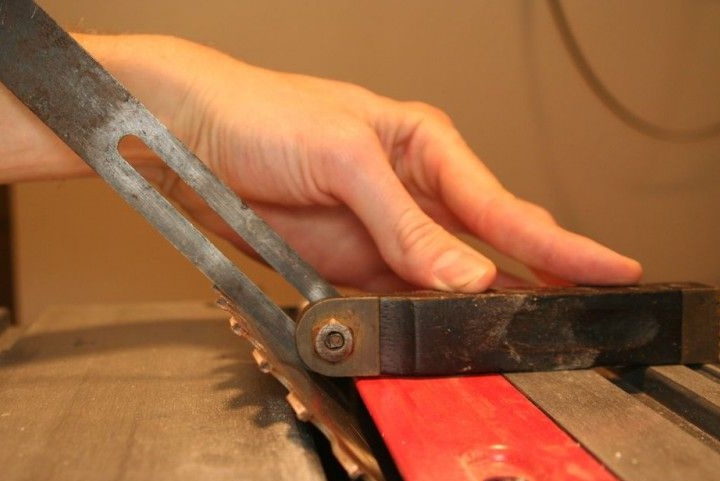
-Circular;
- Band saw;
Drill with a set of drills;
-Rule;
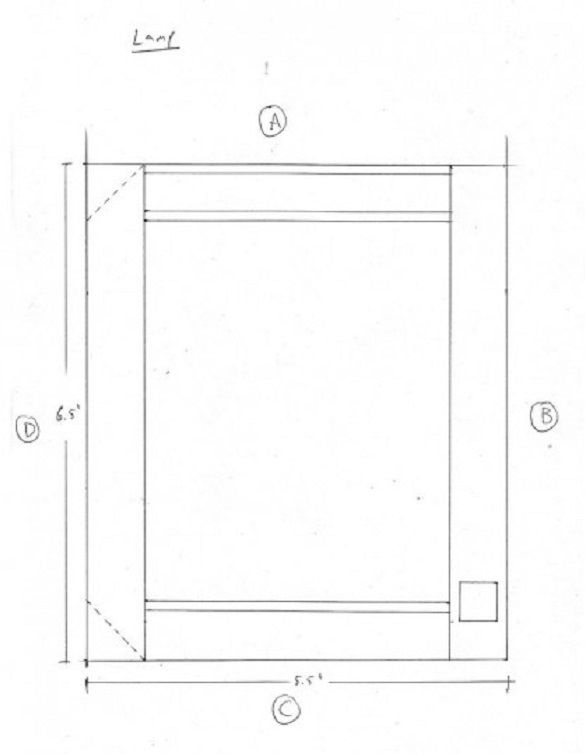
Step 1: Designing a luminaire
First, the author developed a design for the lamp. According to the author, each side of the lamp should be with a cache. At the same time, they must open and close, regardless of each other.
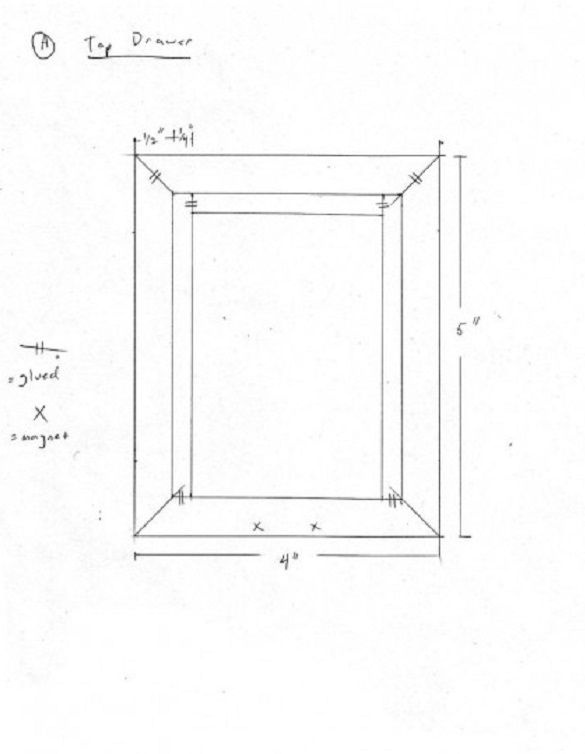
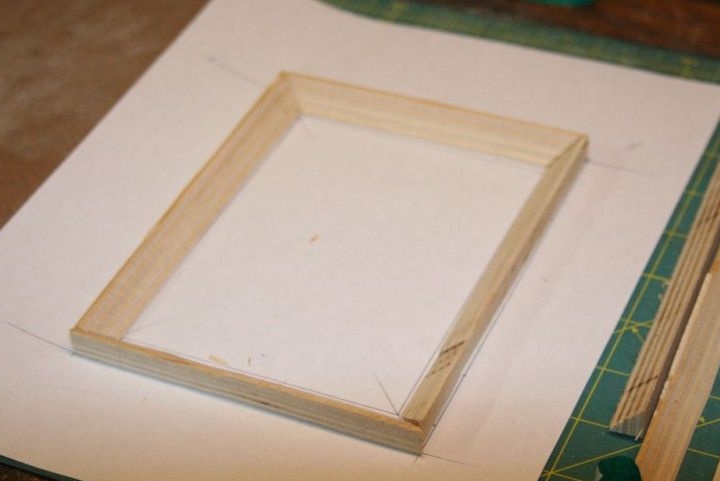
Step 2: Making the Top Cover
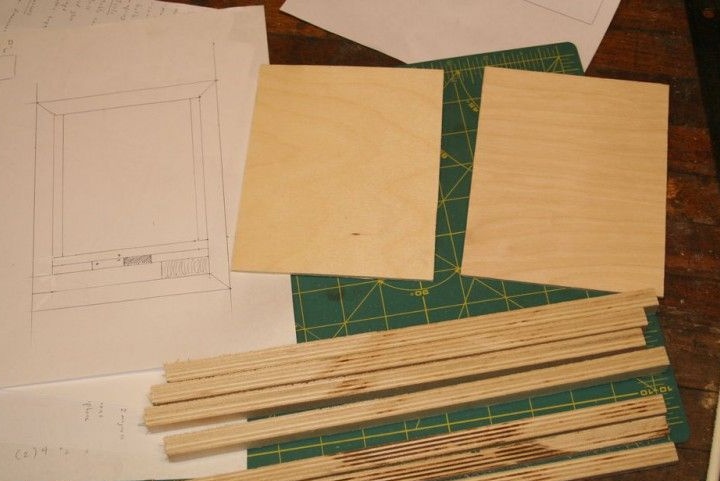
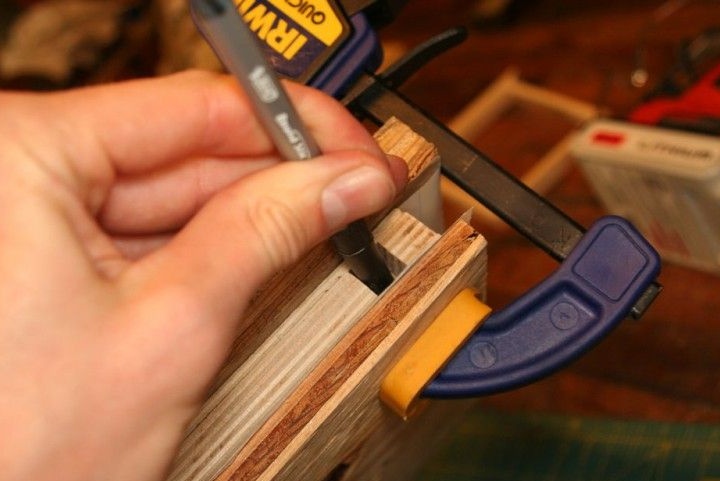
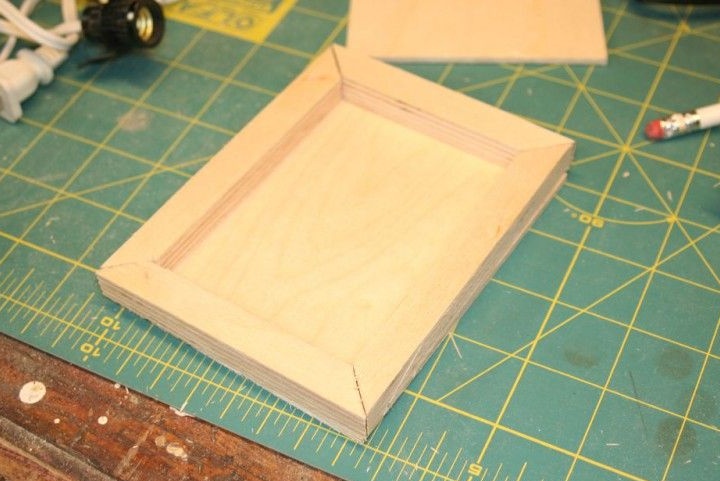
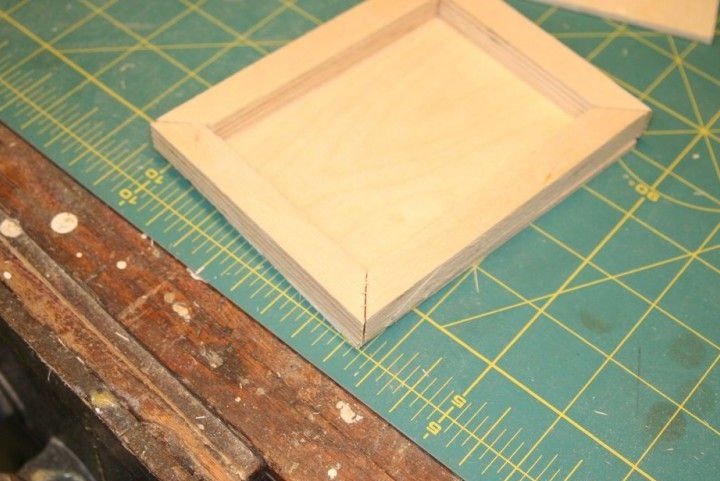
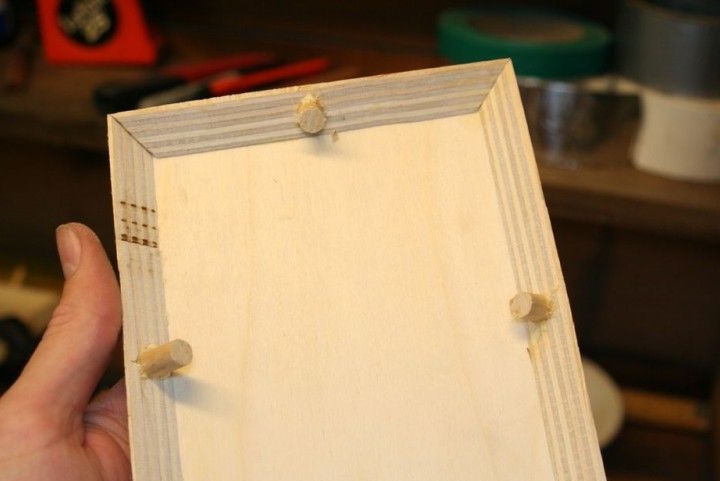
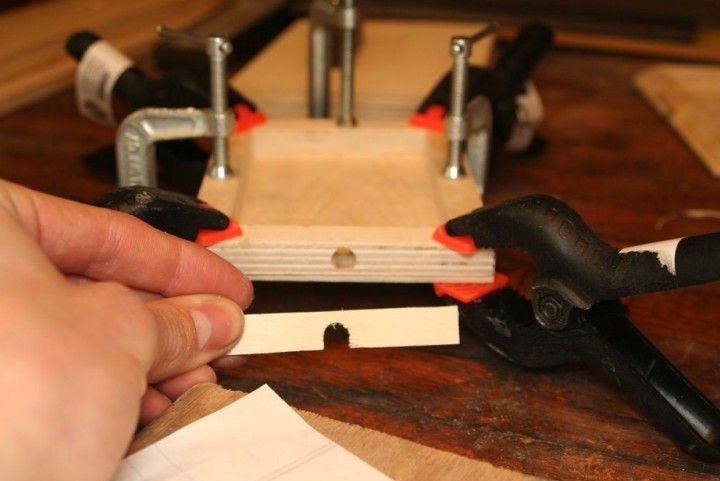
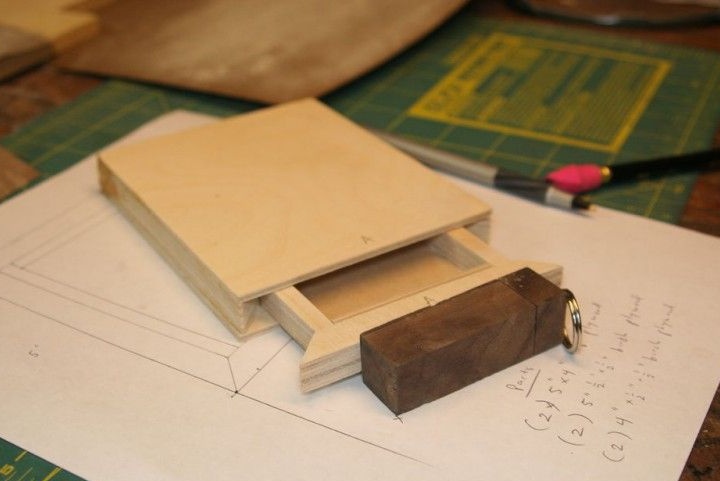
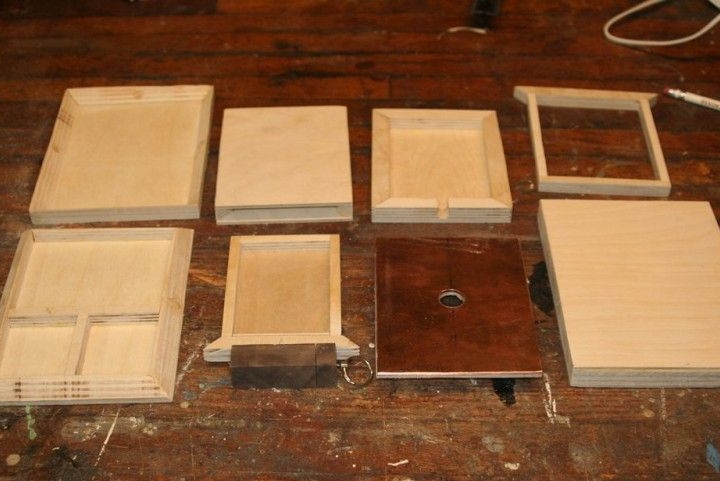
The cache in the upper compartment will open with a magnetic key. She cuts two pieces of plywood 7.5 by 10 cm. She cuts two pieces of 10 cm and two pieces of 7.5 cm, thickness 1.3 cm. Three pieces of wood are glued to one piece.

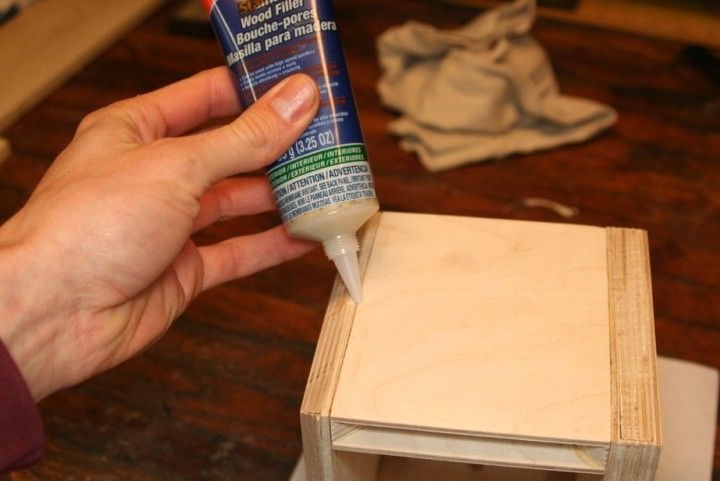
In the last bar, it makes two deep non-through holes with a diameter of 1 cm. It installs magnets in the hole. Closes the hole with dowels. Then cuts them down and putsty.
Collects the inner box. A block of magnets is glued to the front of the inner box. Glues the cover.
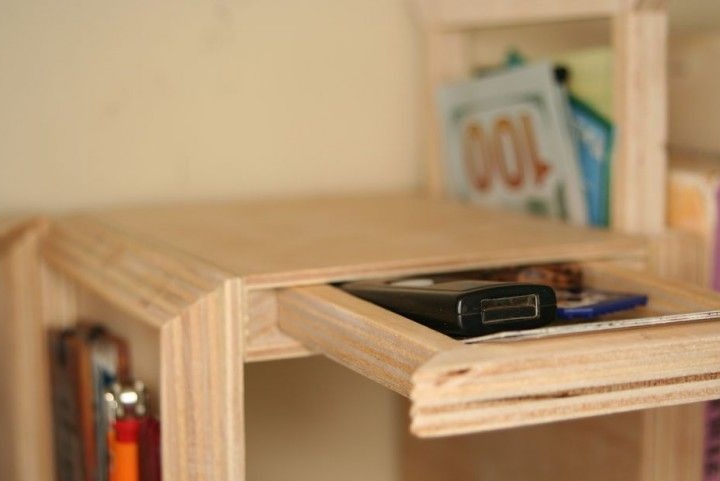
To open the cache, you need to bring the magnetic key to the front wall and pull it towards you.
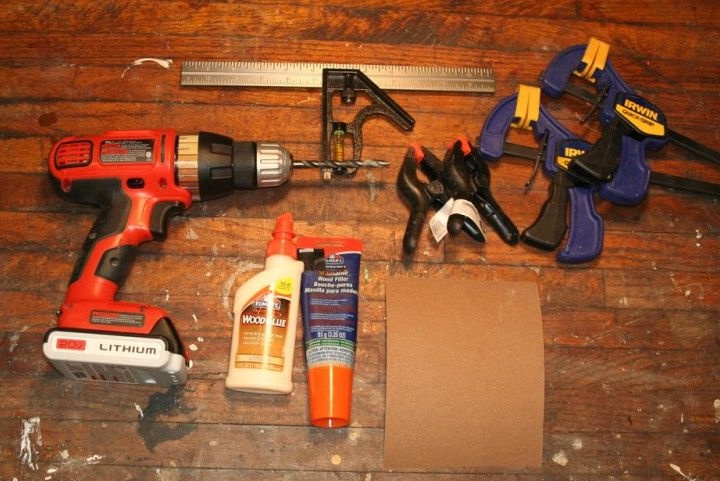
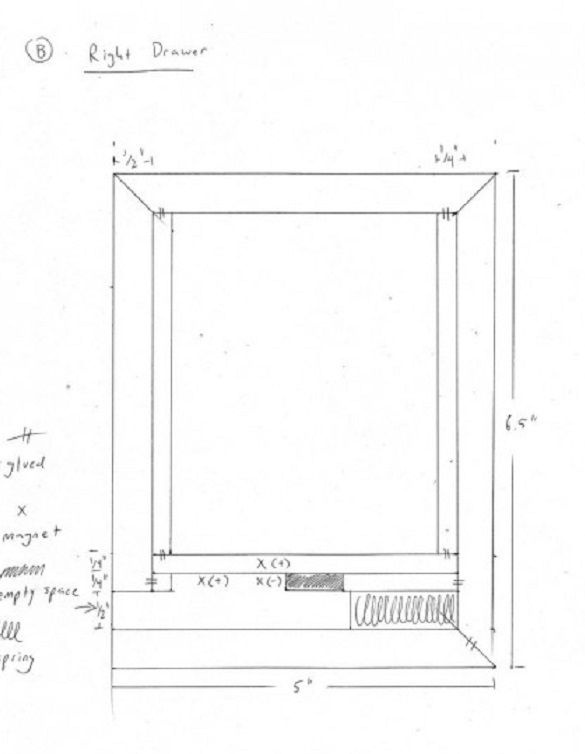
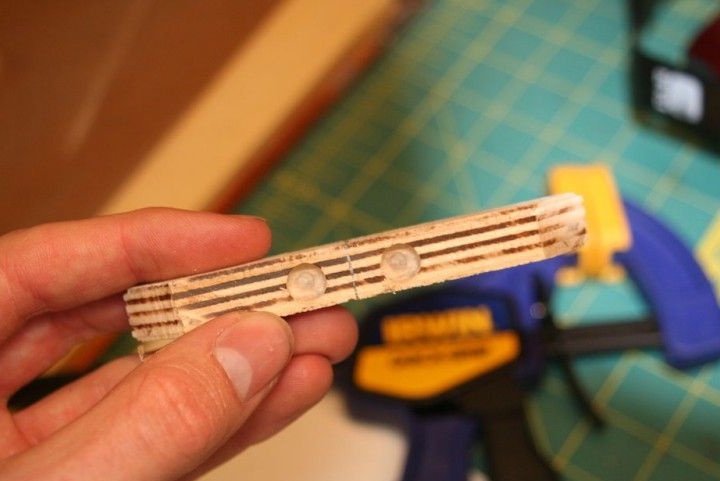
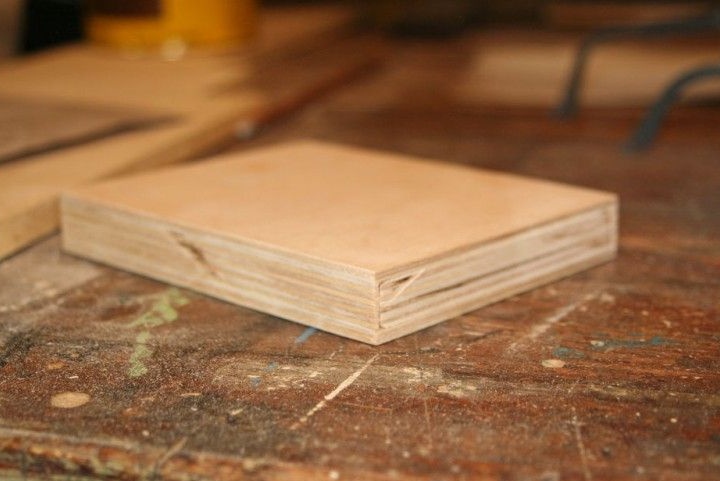
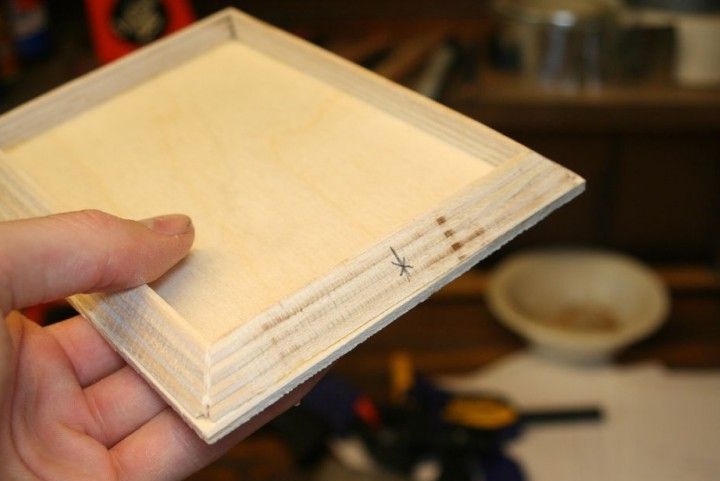
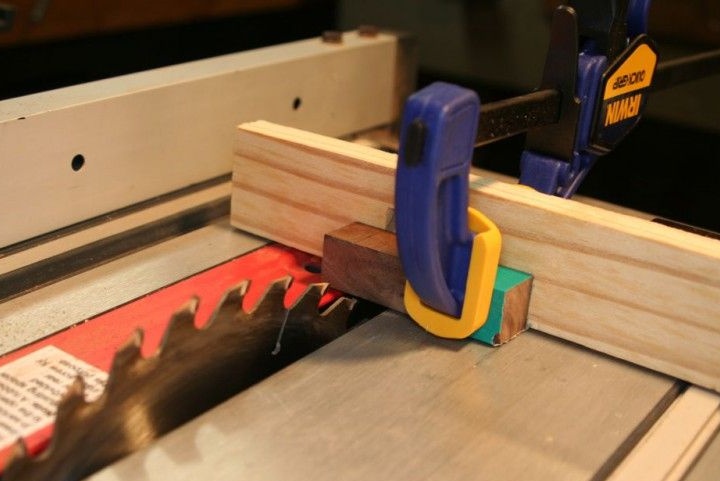
Step 3: Right Side
The secret to opening the cache in the right wall is based on the difference of the poles of the magnet.
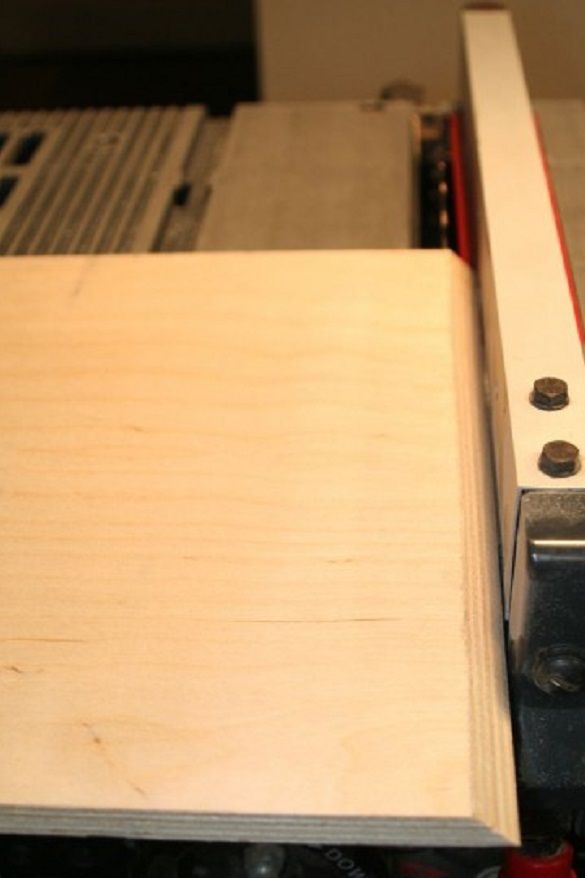
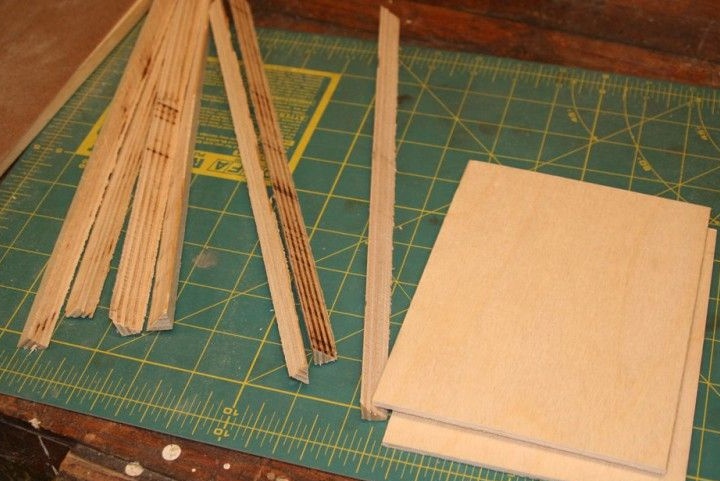
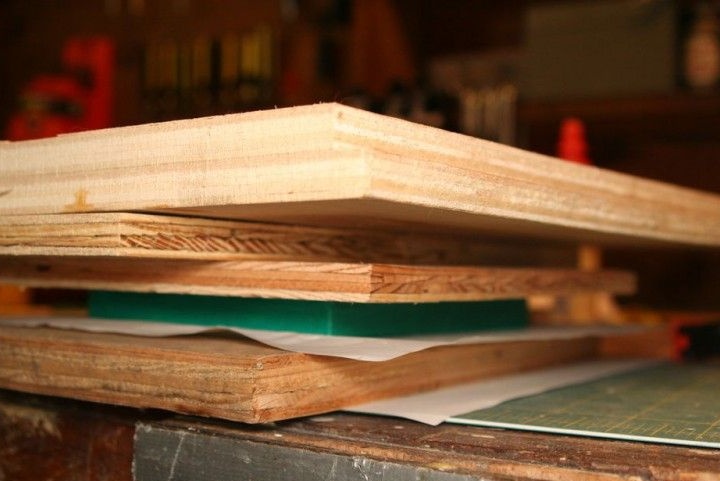
Prepares the material.
Folds it as shown in the photo.
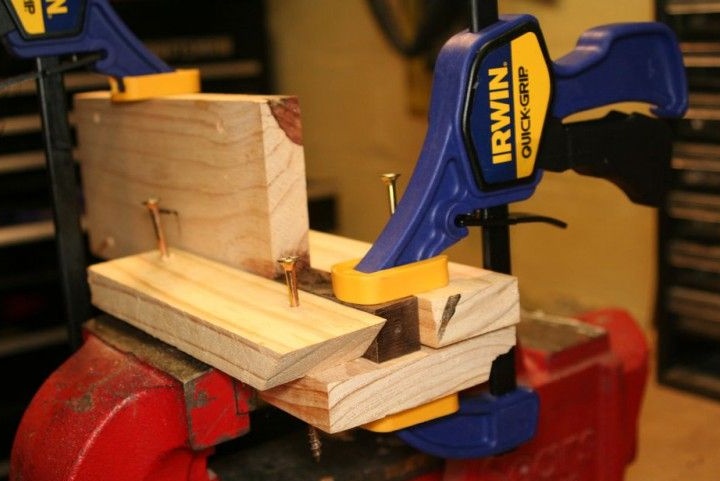
Customize parts. The inner drawer should move freely, without clinging anywhere.
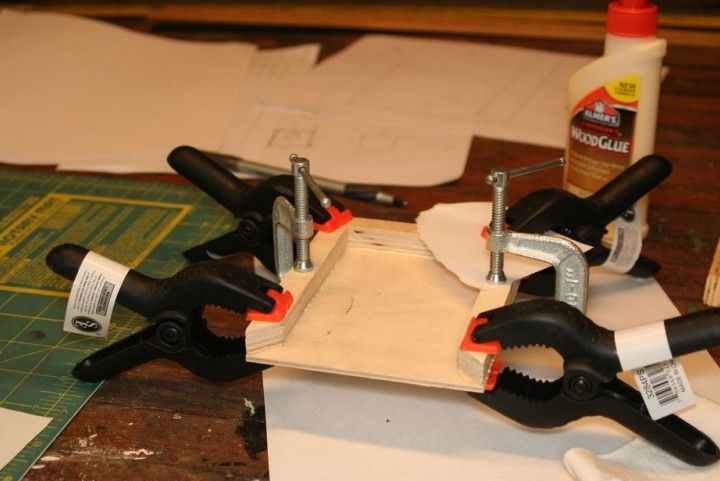
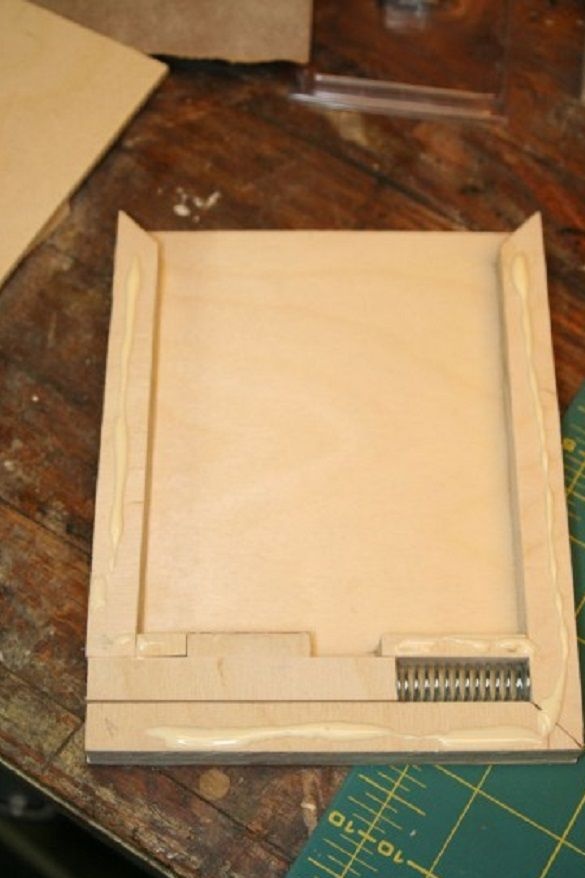
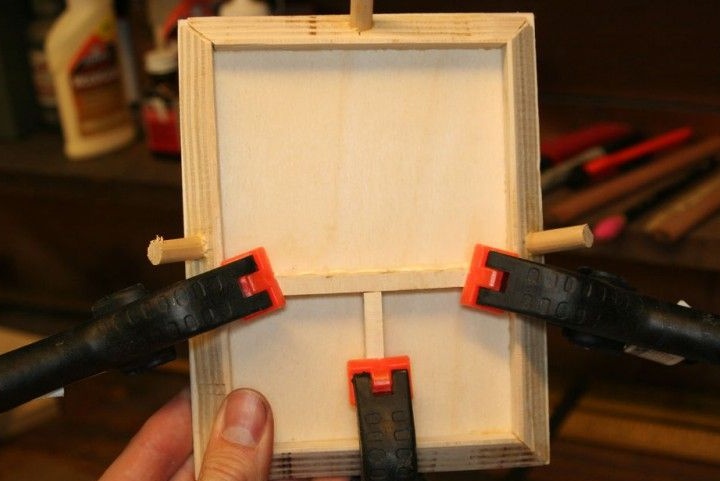
Collects and glues the inner and outer drawers.
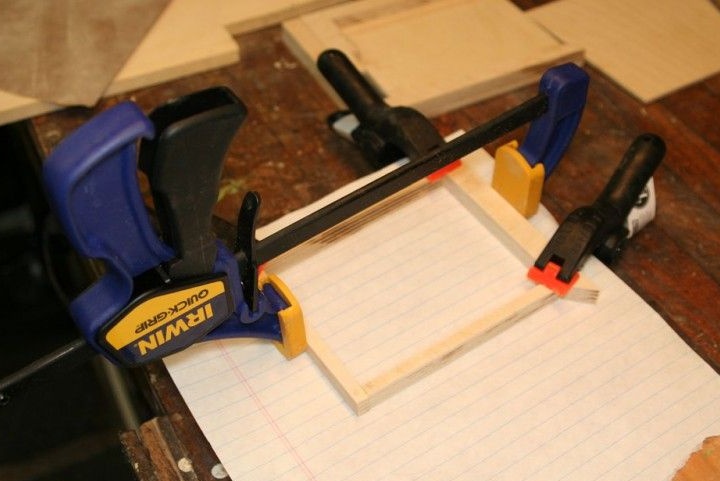
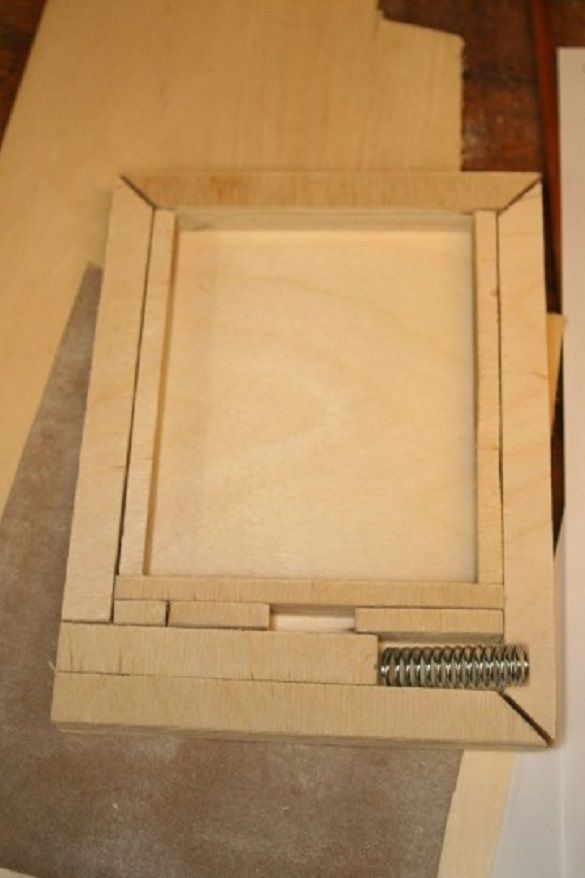
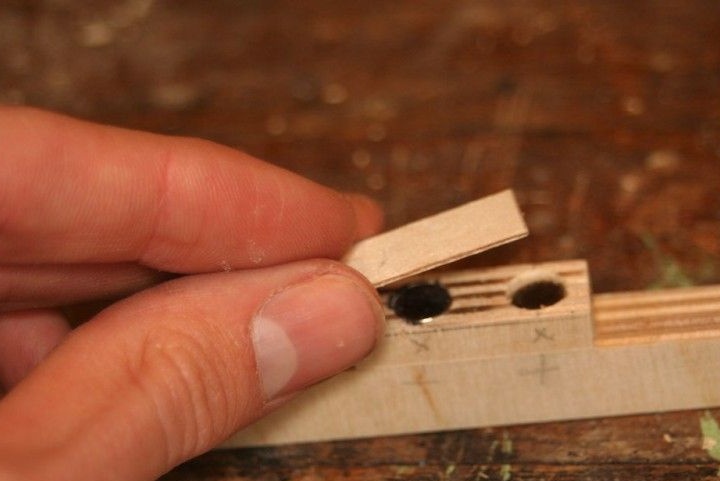
Collects the opening mechanism and glues it.

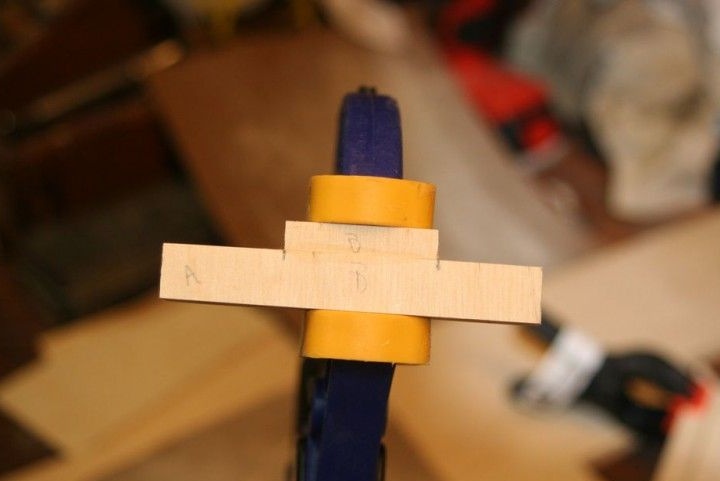
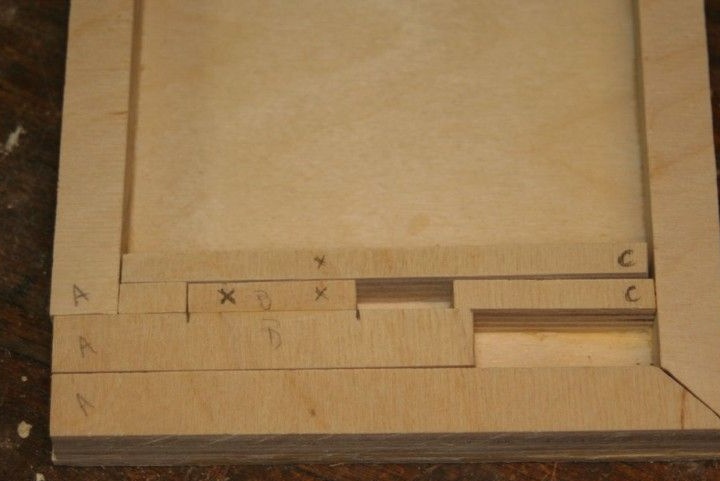
Drills the bars in the places marked with a cross and sets magnets. The magnets are arranged as follows: in the box, positive opposite in the button, negative, then positive.
Glues the cover.
The principle of action is as follows. In the closed position, the positive pole of the magnet installed in the box drawer is attracted to the negative pole of the first button magnet; when the button is pressed, the magnets move, and opposite the box magnet is also the positive pole of the second button magnet. The box is pushed up.
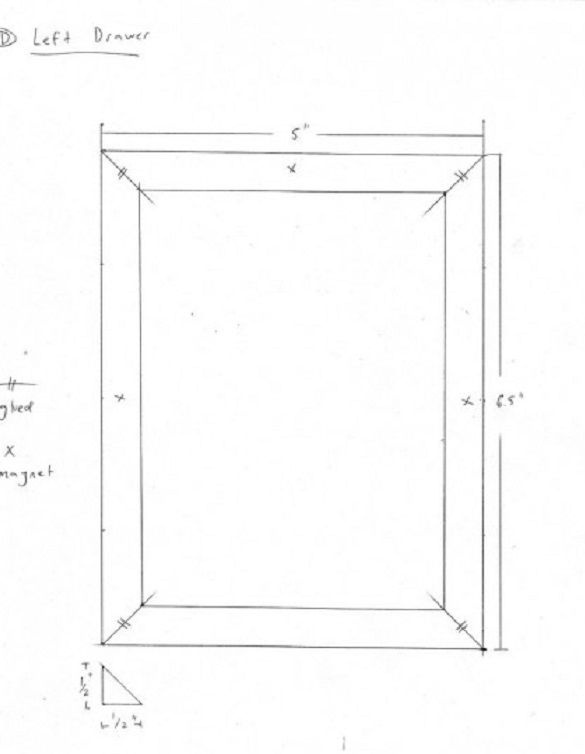
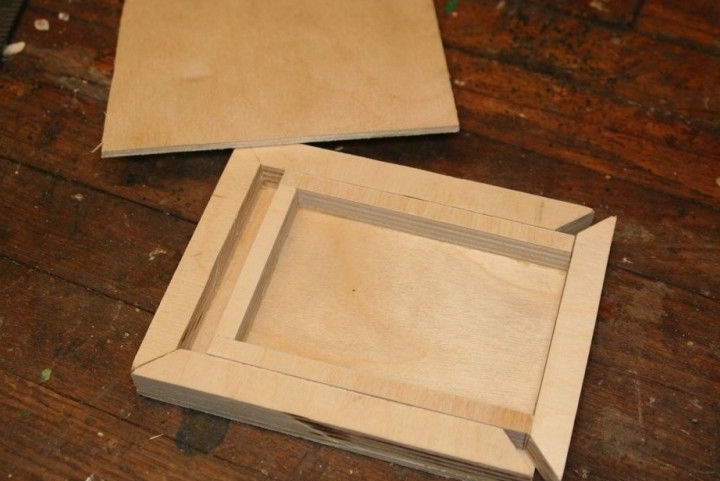
Step 4: Left Side
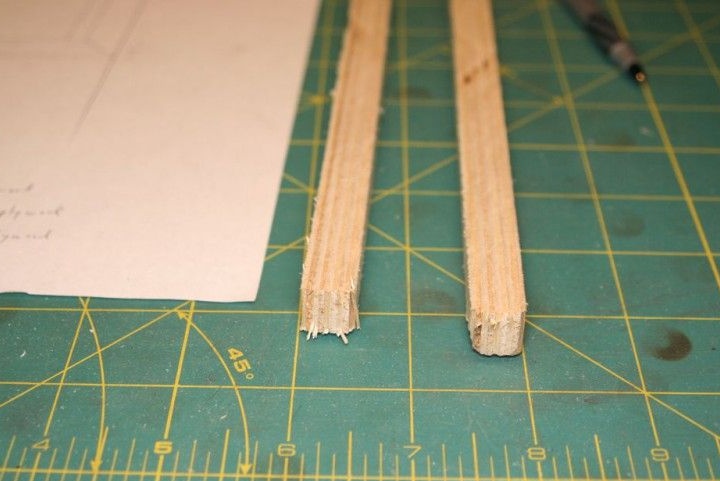
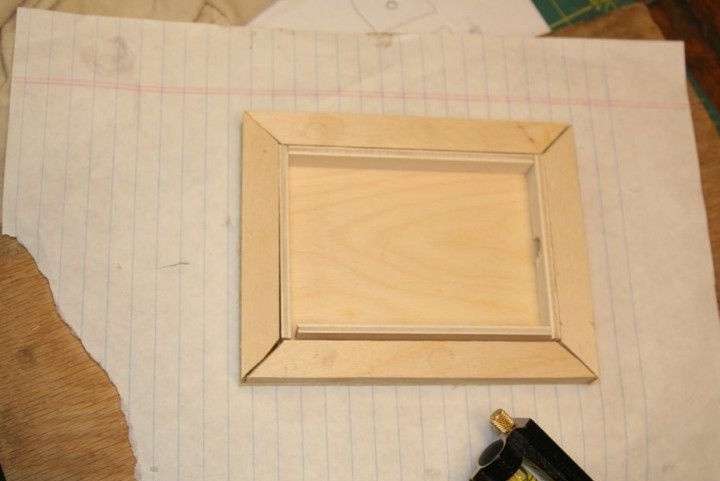
The cache in the left wall of the lamp will open like a door. First, the author on the bars makes a bevel at 45 degrees.
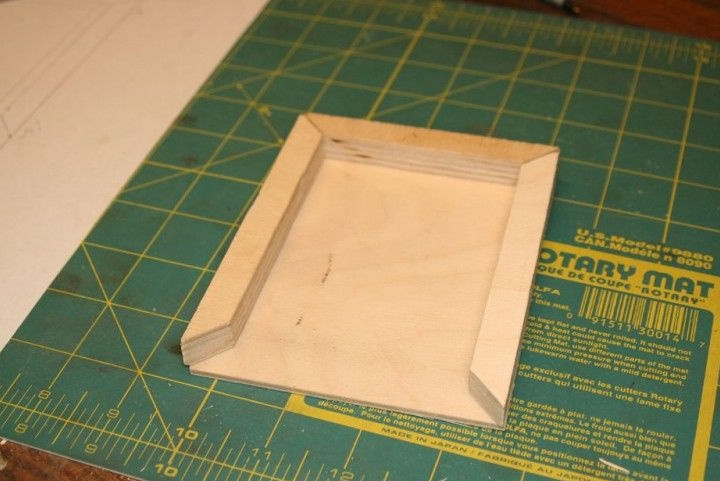
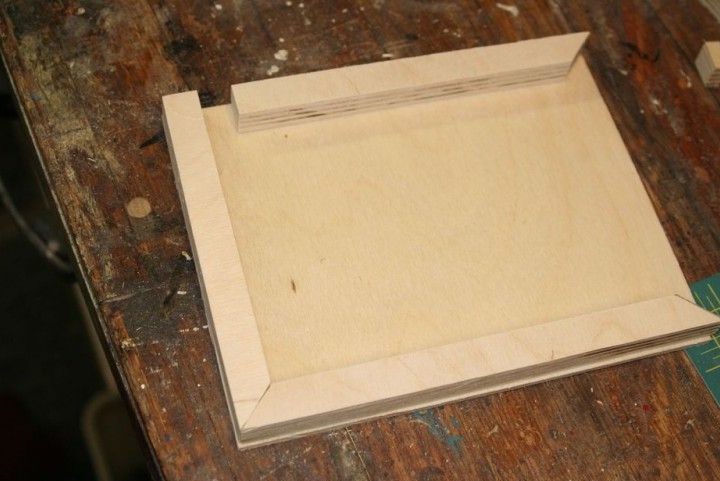
Cuts box lids from plywood.
Glues beveled bars to the lids

Moreover, the bevels on the inner box have an acute angle, and on the outer obtuse. This allows you to make the box space more voluminous.
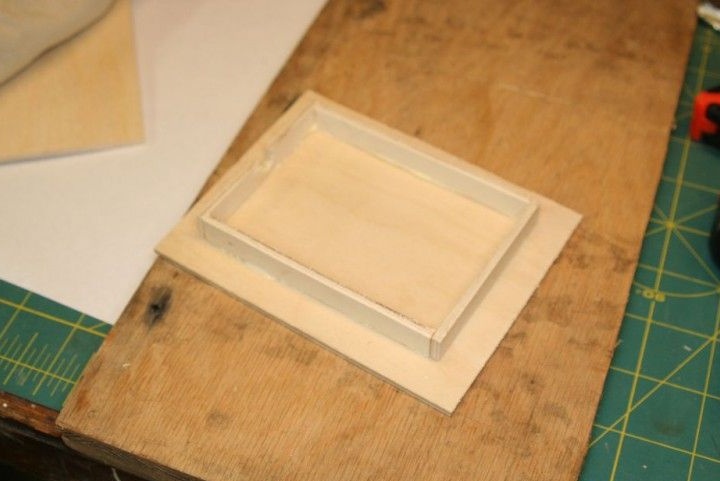
Customizes the drawers so that they fit perfectly together. Glues the slats inward, they will serve as shelves. In the bars of the inner and outer box, opposite each other, sets magnets. Magnets will hold two halves of the cache.
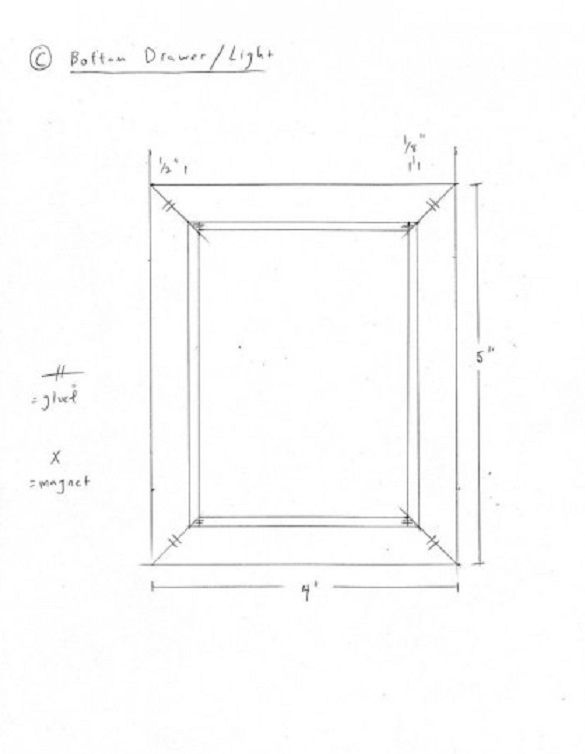
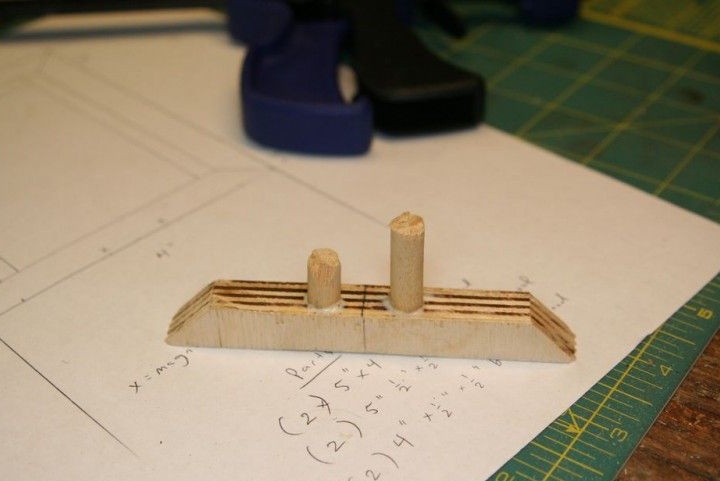
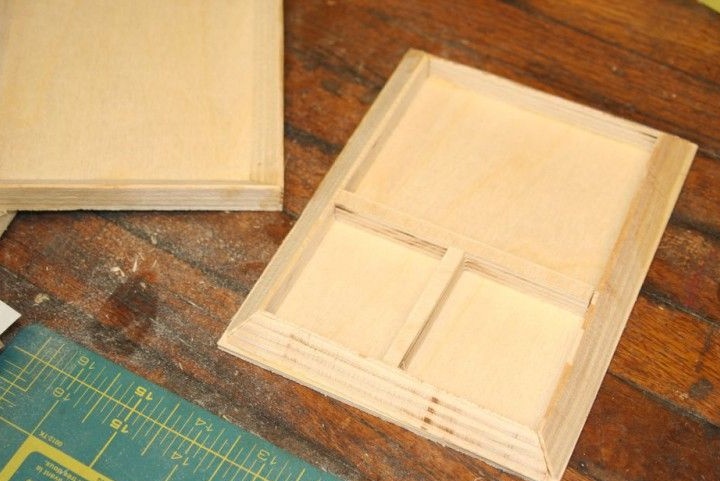
Step 5: Making the Bottom
On the plywood blank glues the bars. In one of the short bars, in the middle makes a through hole (for the wire).
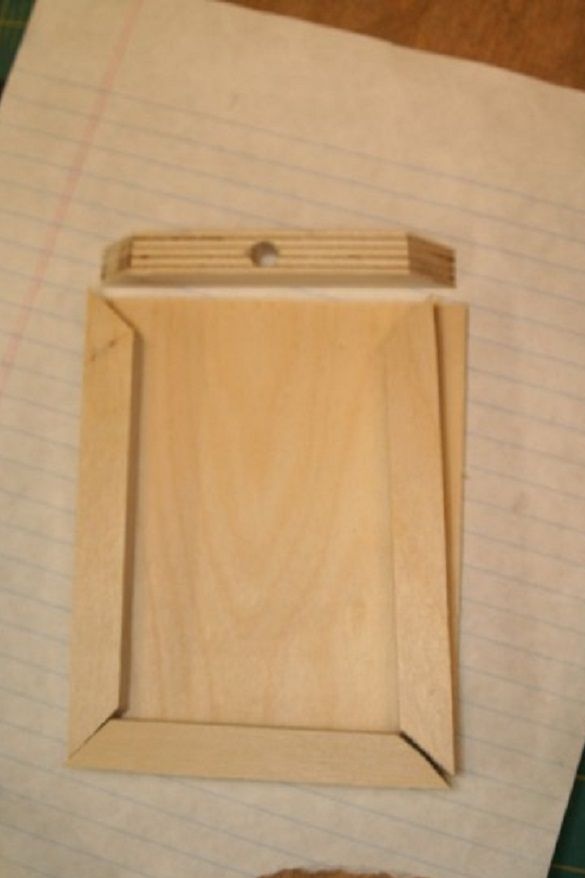
It uses plywood and thin slats to cover the cache. Measures the inner size of the bottom drawer. It cuts and glues the slats on the lid so that the lid fits into the drawer. On one side of the rail makes a cutout for the wire.
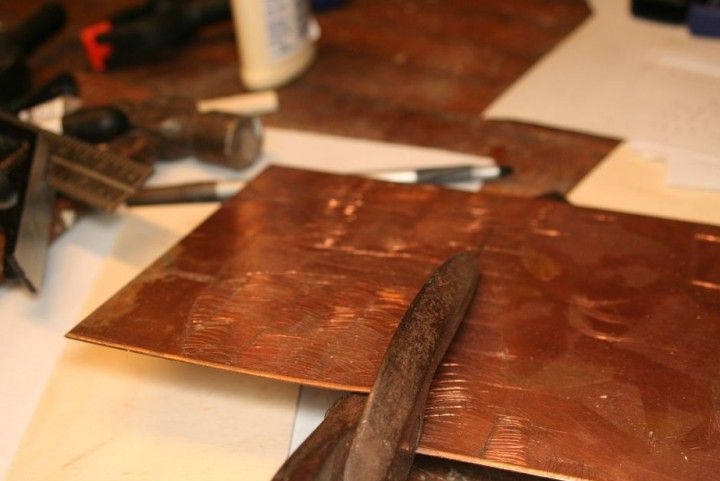
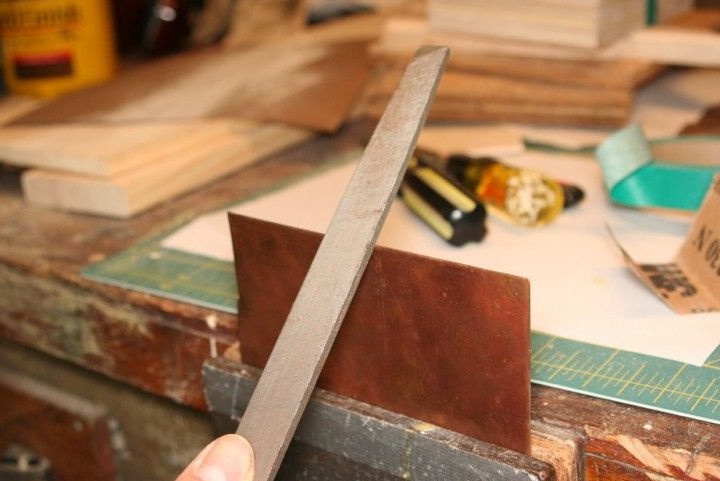
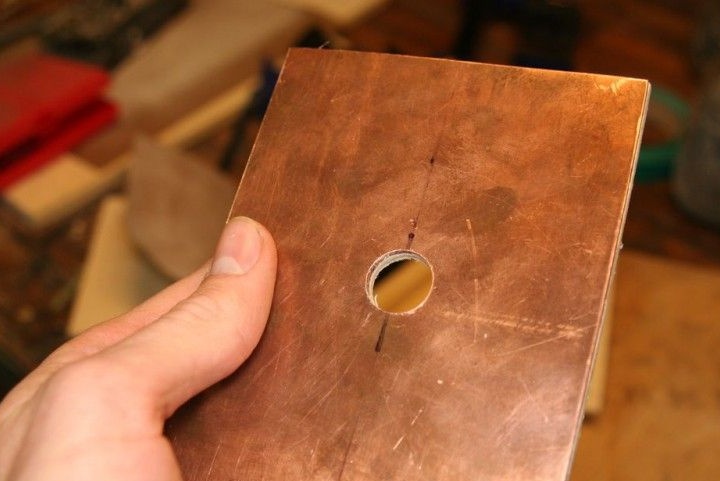
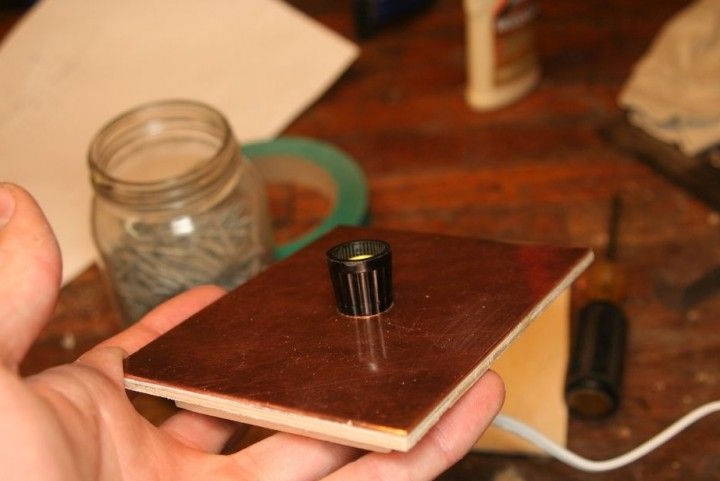
From a copper sheet cuts a rectangle to the size of the lid of the box. He polishes the edges with a file. Glues it on the cover. In the center, drills a hole and inserts a lamp holder there. The wire pulls through the hole in the bar.

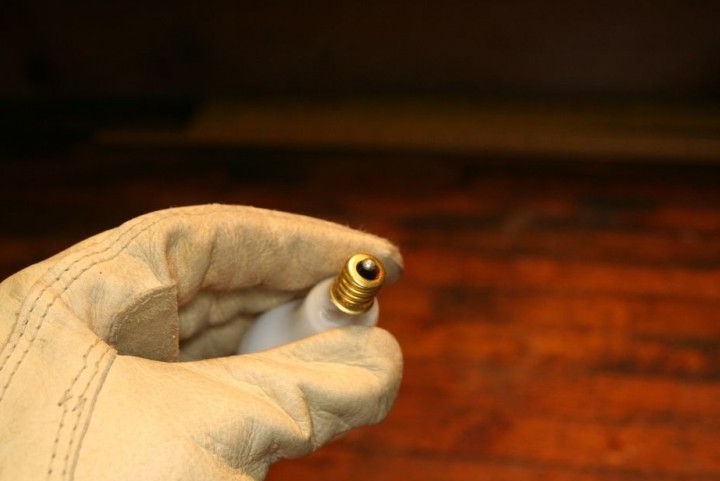
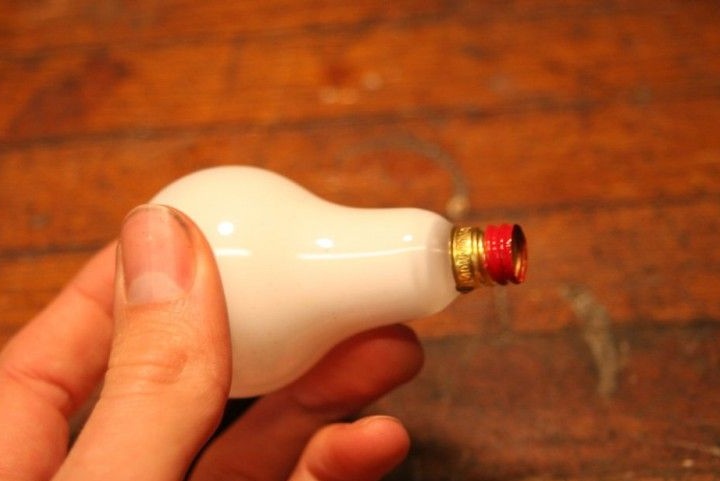
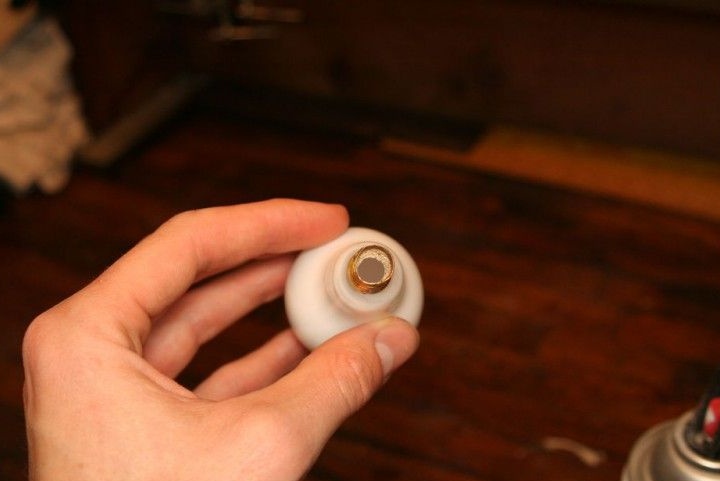
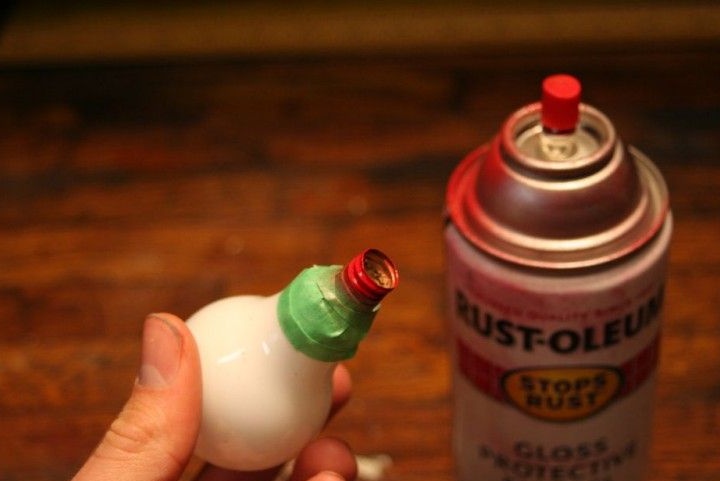
Step 6: Hiding in the Light Bulb
To make a hiding place in a light bulb, the author took a light bulb with white glass. Gently sawed off the soldered contacts and removed the insides of the light bulb. He painted the bottom of the cap in red. The coloration of the base is necessary in order not to confuse the bulb-cache with the usual one.
Step 7: Key Making
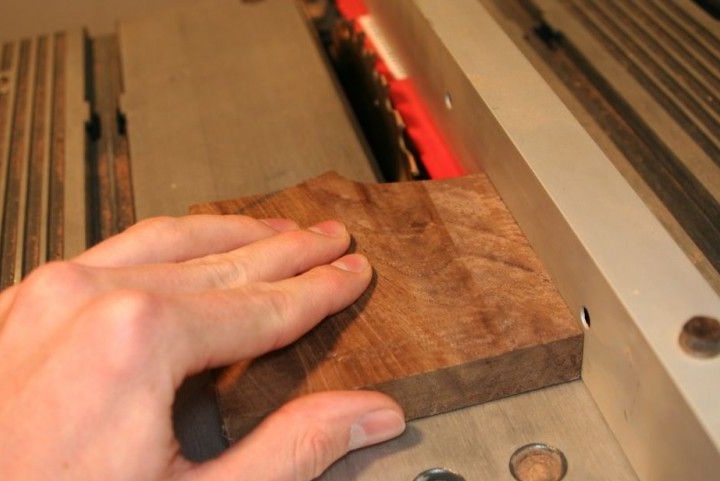
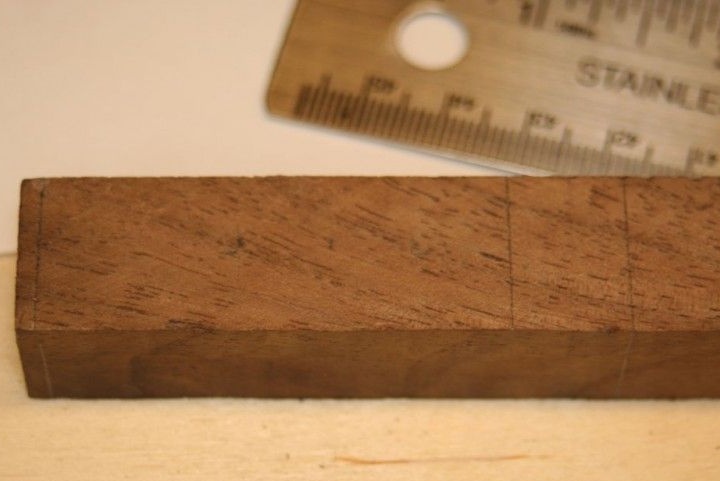
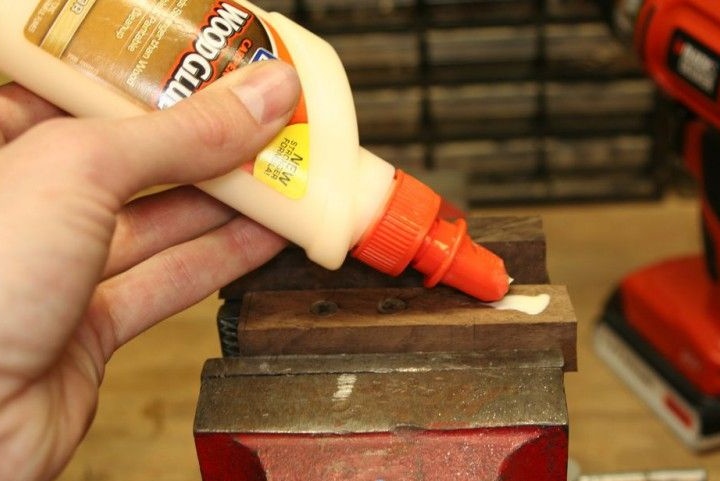
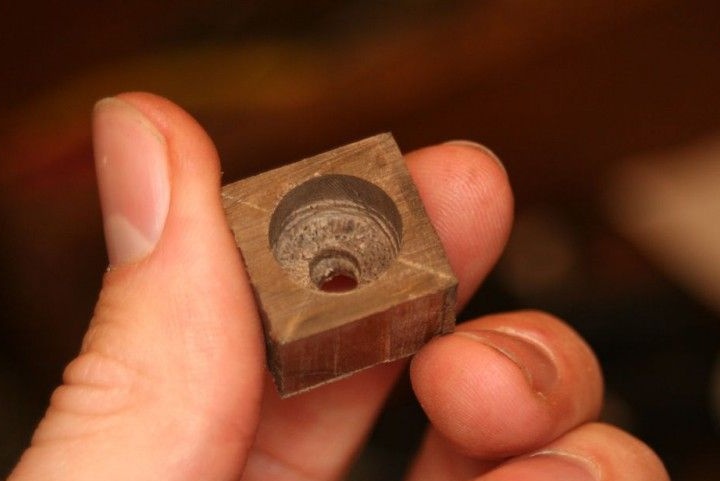
The author made the key from a bar of walnut. I cut two bars measuring 1.9 by 1.6 cm, the length of the bars is 6.25 cm.
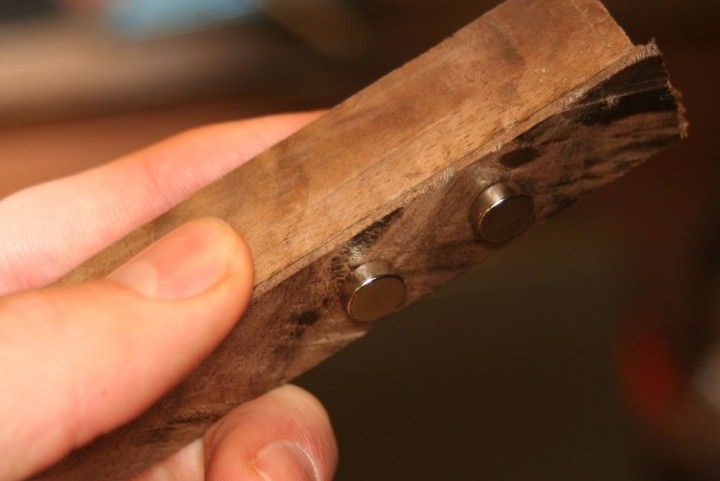
Drills a magnet hole in the bar. The distance between the magnets is 2.5 cm. Inserts magnets into the holes. A second block sticks on top.
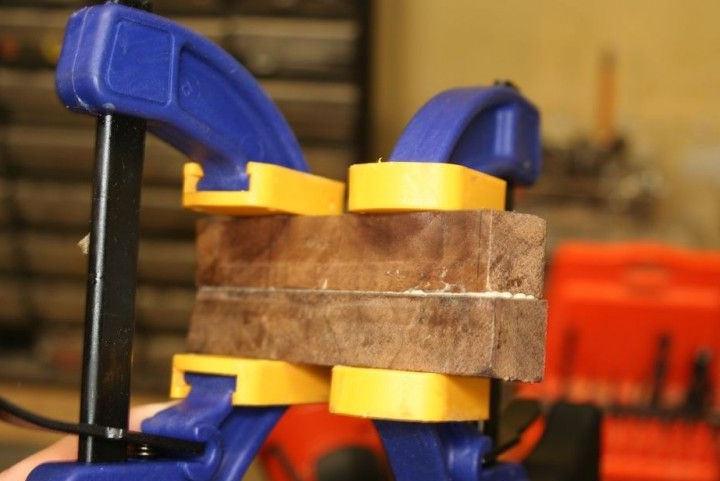
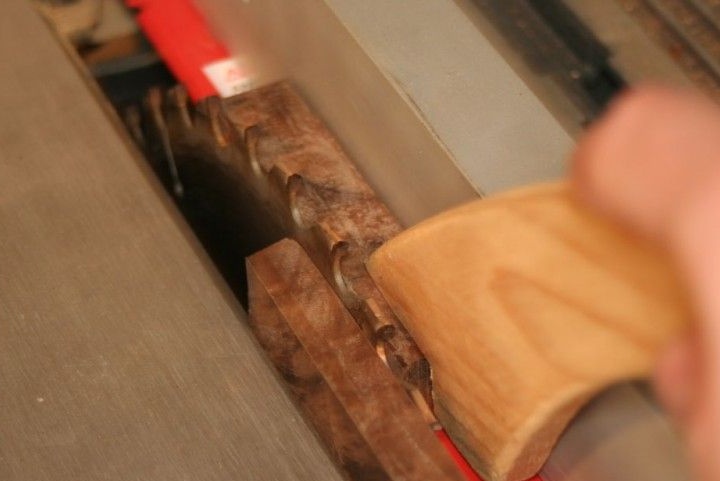
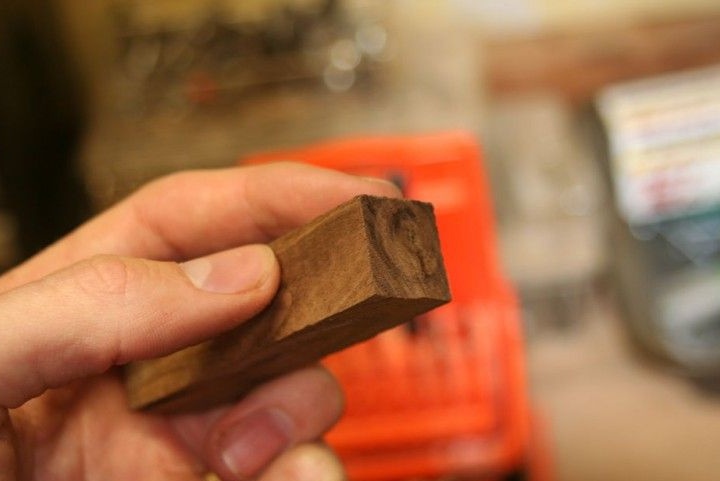
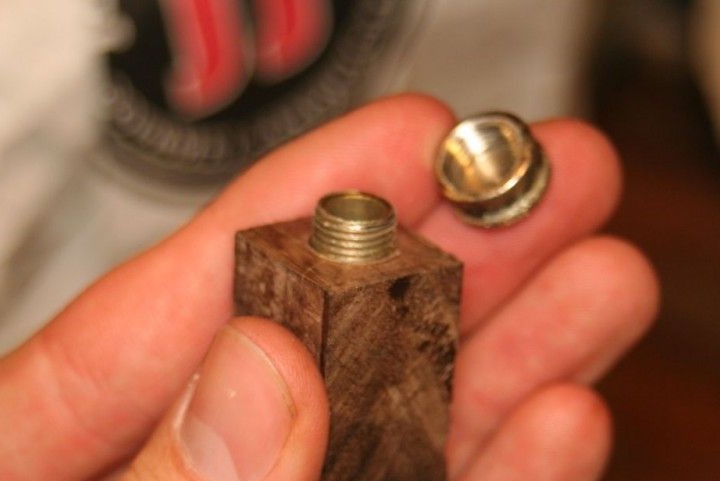
Cuts the sides of the bar to a size of 1.9 by 1.9 cm. Cuts a small piece of the bar.
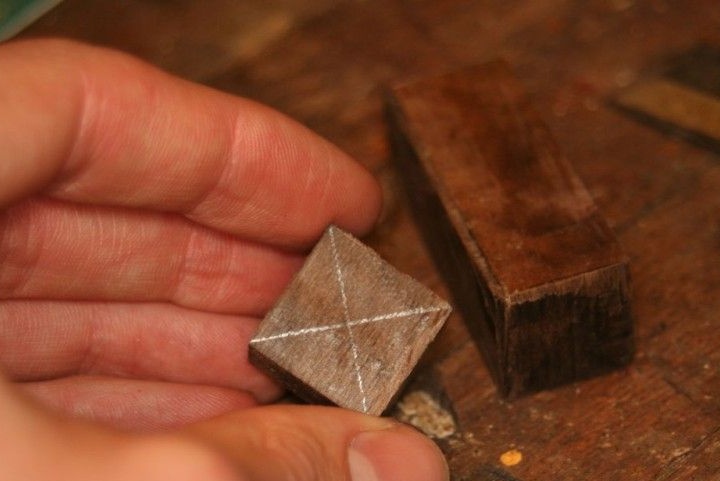
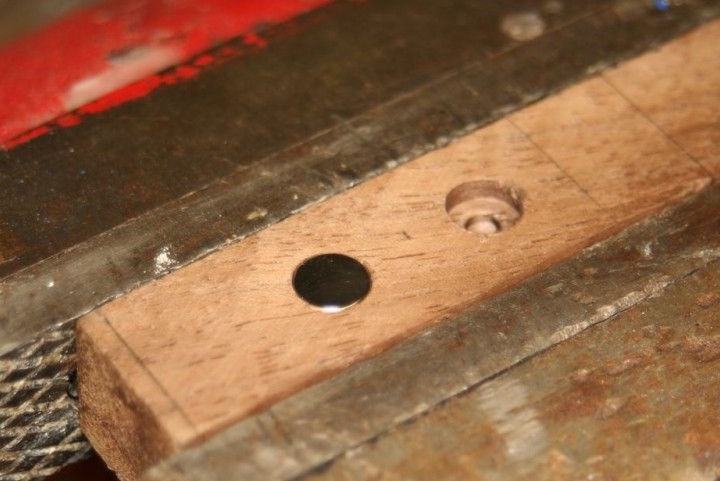
Drills a hole for a tube cover in a small section. Drills a hole under the tube in a large bar (not from the magnets side).
Inserts a cover and a tube into the bars and twists them. Handles sandpaper.
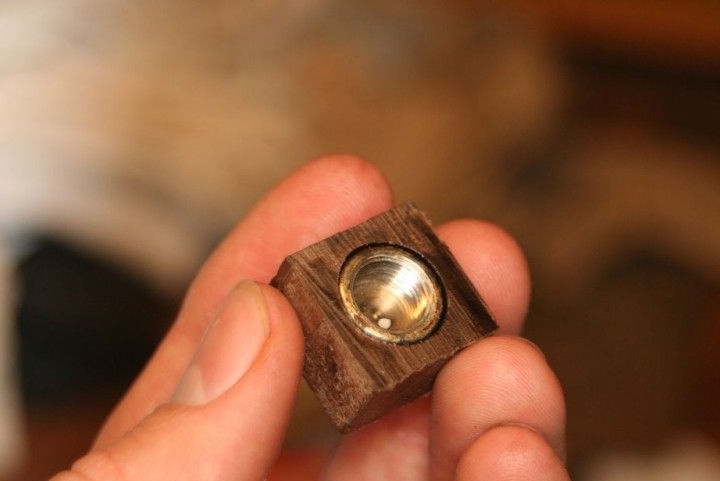
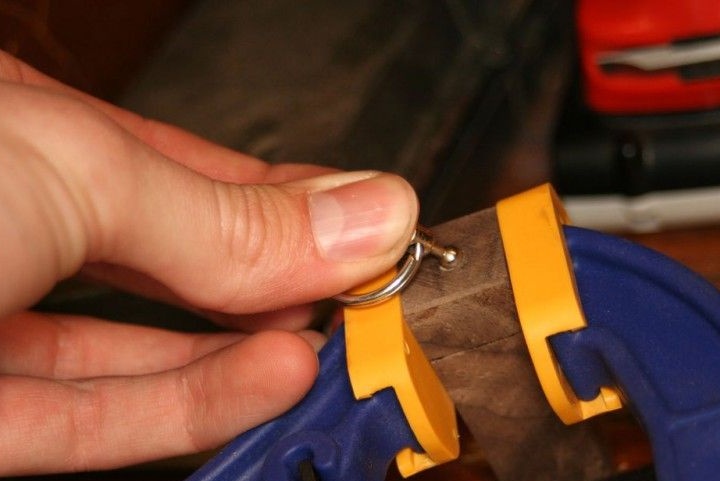
I installed a ring on the top of the key.
The key is ready.
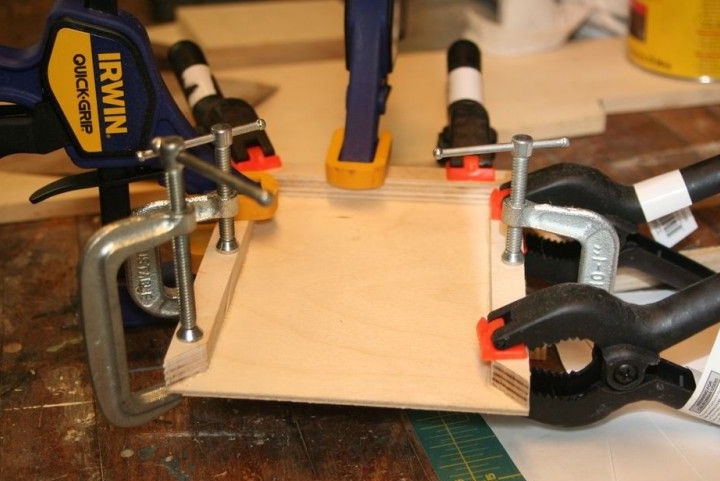
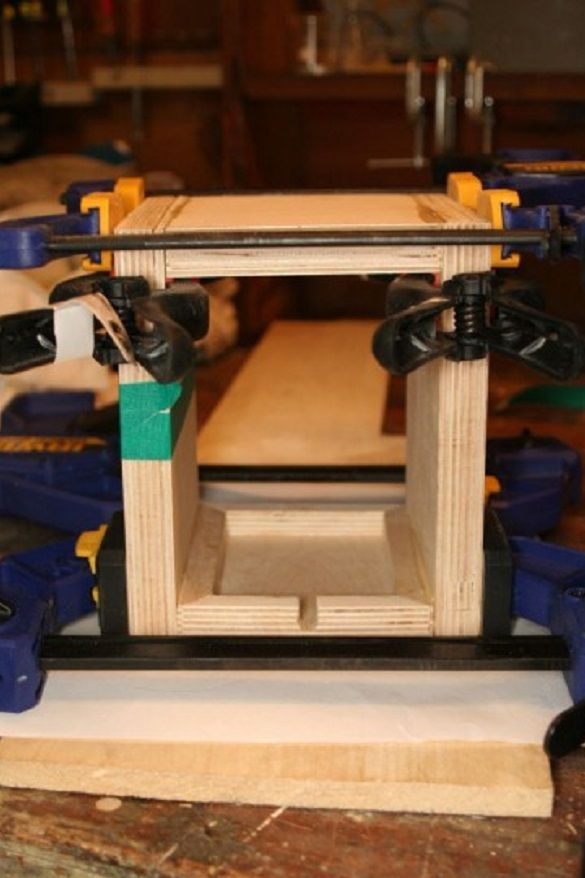
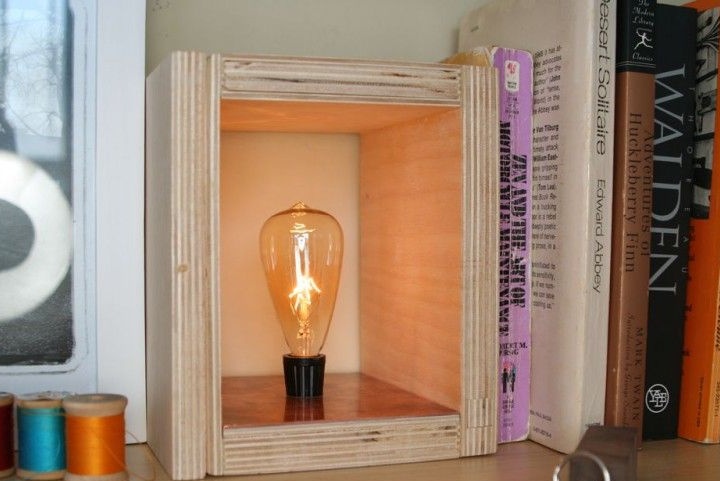
Step 8: Assembling the Cache Lamp
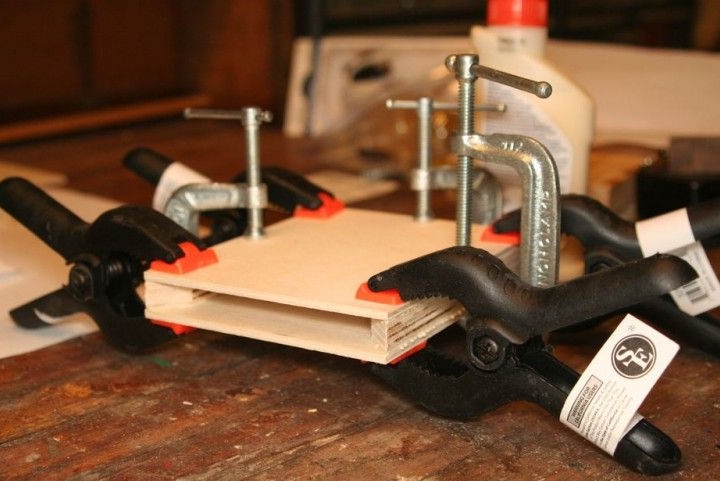
With glue and clamps collects all sides of the lamp.
The lamp with a secret is ready.


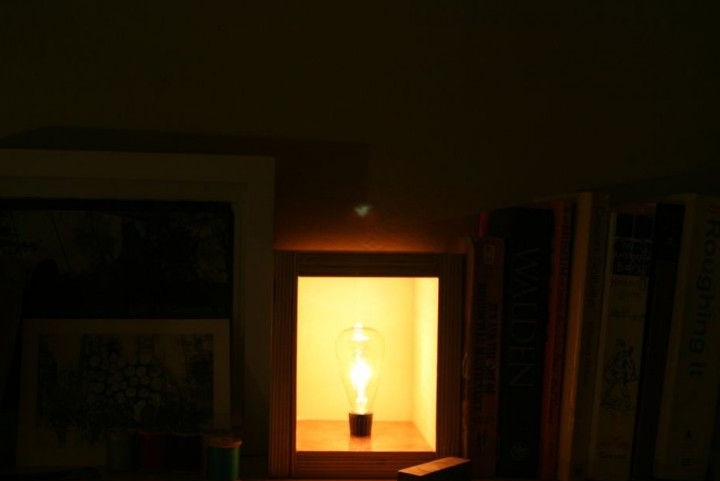
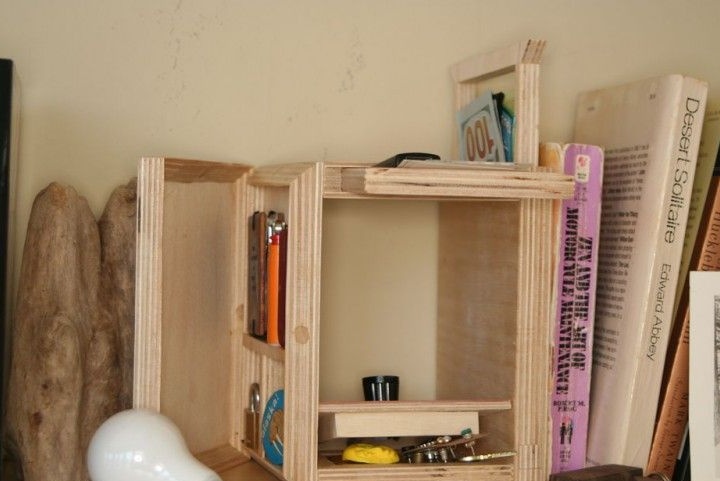
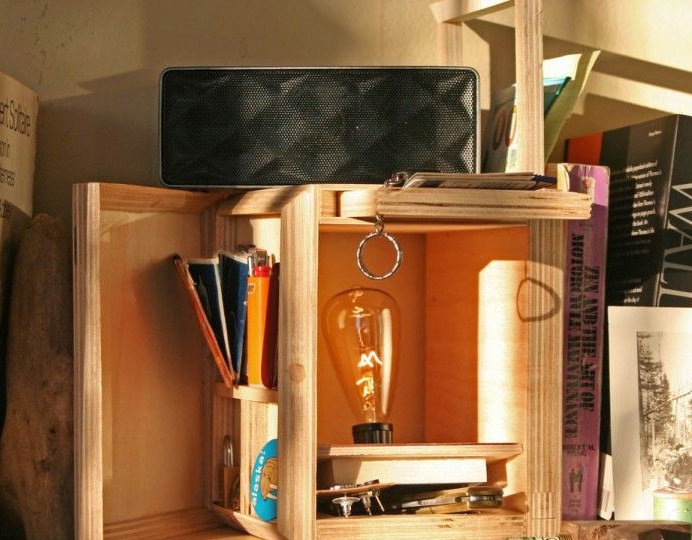
In the recesses of the lamp you can hide small things. At the same time, do not forget that you should not forget if you want to turn on the lamp in the network, change the cache lamp to the usual one.
How the cache works can be seen in the video.