» Construction »Locking box is easy!

Locking in is easy!

Locking in is easy!

The lock in your door is out of order and needs to be replaced urgently? Are you concerned about your safety and have you decided to install an additional lock? There is no need to pay money for this work, because you can do it yourself. How? This will be discussed below.

For starters, a bit of theory. So, there are three types of locks, namely: mortise, padlock and patch. And if with padlocks and overhead locks no installation problems arise due to their simple design, then with mortise locks the situation is more complicated, therefore we will analyze the installation of such locks in more detail.

The mortise lock owes its name to a special type of installation - it completely hides in the door, as if it "crashes" into it. Thus, the castle is hidden from the eyes of possible criminals, which complicates its opening and protects the castle from external damage, because it cannot be torn or knocked down.
The first step is to prepare the tools. To install the lock, we need: a drill, several special pen drills (the so-called "feathers") for wood, a hammer with a chisel, a construction tape measure and an ordinary pencil / sharp knife for precise marking and measurements.

First, you should remove the door from the hinges or fix it in such a way that it does not move during operation, complicating it.

After we begin to carry out marking, taking into account the fact that the locking mechanism of the lock should be located as far as possible in the center of the door leaf. When marking, attach the lock with its internal part, the one that will later be hidden inside the canvas, and circle it with a pencil or a sharp knife, drawing the outline of the lock on the end of the door.

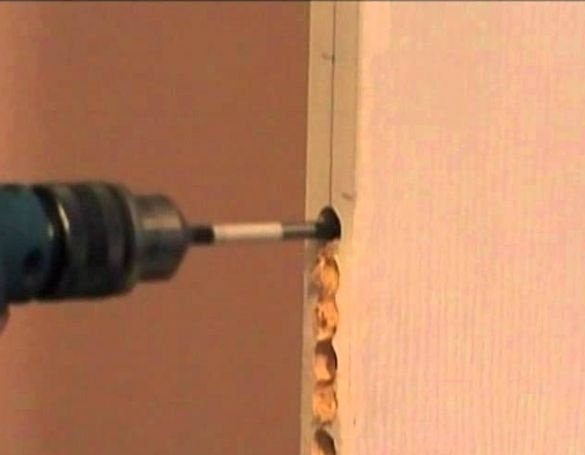
Now you can start drilling the grooves under the lock. To do this, take a drill with a pen drill several millimeters in diameter larger than the thickness of the lock and drill a series of grooves along the entire length of the contour of the lock applied to the blade. Pay attention to the fact that the depth of the drilled holes should not only correspond to the length of the castle itself, but also be a few millimeters deeper so that in the future this castle can be “drowned” in the door to the thickness of the castle bar.Determining the correct depth and thickness of the holes for the lock, you should be guided by the following rule: they must allow the lock to enter the door, while wrapping it tightly; the lock should not hang too loose in the door.


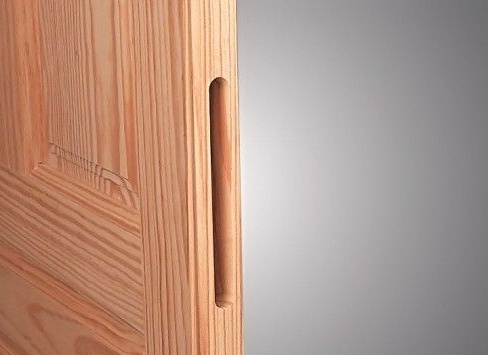
Having received an almost ready hole for the lock, if necessary, correct it with a chisel, removing, where necessary, a couple of millimeters.
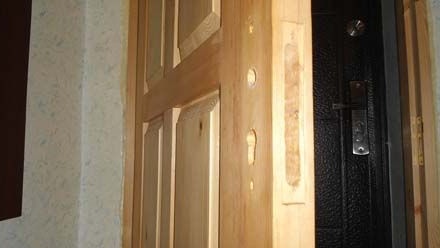
The next step is to drill holes for the lock mechanism (the so-called "larva") and the door handle, if any, in your lock. To do this, you need to attach the lock to the door leaf and make the necessary markings on the canvas with a pencil, taking into account that such holes should be slightly offset, taking into account the thickness of the strip of your lock.

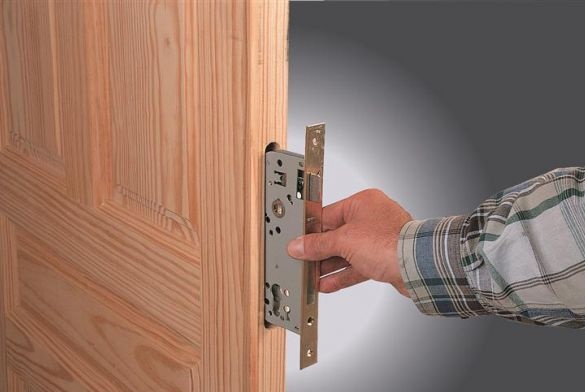
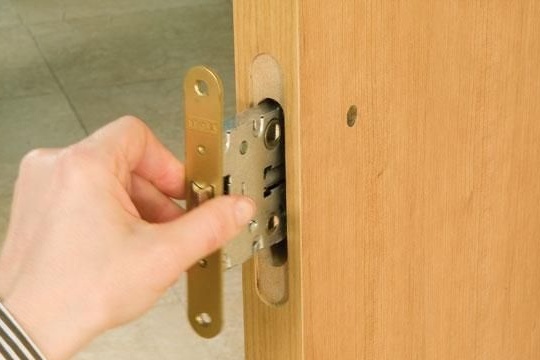
Having drilled all the necessary holes, we proceed directly to the installation of the lock. To do this, insert the locks into the groove we received so that it does not protrude beyond the door line, draw with a pencil the holes that need to be drilled in the door to secure the lock, and drill them with a drill, the diameter of which is slightly less than the diameter of the screws. Having drilled holes, we fix the lock in the door and proceed to the final stage.


Finally, we proceed to install the strike plate in the door frame for the lock. The most effective way to accurately mark the holes for the strike plate is as follows: you need to rub the crossbars of the lock with chalk, close the door and try to close the lock several times, resting the crossbars against the box. As a result, chalky traces will remain on the door jamb exactly in the place where it is necessary to drill holes.

Having decided on the place of drilling, with the same pen drill and drill we make the required number of holes, helping ourselves, if necessary, with a chisel. After we apply the reciprocal level to the drilled holes, and mark its borders with a pencil or a sharp knife.
Having marked the place for the reciprocal level, with the help of a chisel we make the necessary recess for it so that it enters the door jamb flush with it; we fasten it with self-tapping screws, having previously drilled holes for them with a thin drill.
That's all - the installation of the lock is finished!
1
1
1

Add a comment

    • smilesmilesxaxaokdontknowyahoonea
      bossscratchfoolyesyes-yesaggressivesecret
      sorrydancedance2dance3pardonhelpdrinks
      stopfriendsgoodgoodgoodwhistleswoontongue
      smokeclappingcraydeclarederisivedon-t_mentiondownload
      heatirefullaugh1mdameetingmoskingnegative
      not_ipopcornpunishreadscarescaressearch
      tauntthank_youthisto_clueumnikacuteagree
      badbeeeblack_eyeblum3blushboastboredom
      censoredpleasantrysecret2threatenvictoryyusun_bespectacled
      shokrespektlolprevedwelcomekrutoyya_za
      ya_dobryihelperne_huliganne_othodifludbanclose
19 comments
Journalists - these are authors working on special. assignment that have earned the trust and publish without prior verification straight to the main page.
Well, yes ... I admit my mistake - I looked now in the "path" - really "From sites" Special "" .....
And I did not understand the statuses either. I thought that the "Authors" are those who do it themselves, and those who rewrite are the "Journalists" ....
P.S. ..... And the "Journalists" then - who? ))))))))))
Author
Just answer the first paragraph and that’s probably all. If you, dear critic, understand the word somewhat as 7-8-10000, then alas ... I understood the whole word of my life somewhat as "some, small amount", for example, 2-3

And I sincerely do not understand, it is just how much a debater you need to be, when passing by, having seen someone else's article, to find flaws in it, and instead of going further, start to criticize ardently ...

I stop the heated debate on the sim, I'm tired of proving something to anyone
To decide whether you need a link / footnote / something else, there will still be an admin, not you
.... And with this I completely agree ... And indeed, that is why I redirected this question to the Admin in the last post ....
P.S. Why are you trying to see attacks everywhere? )))))) ..... Nobody attacks you! )))). An ARGUMENTED discussion is ongoing ....
.... Well, but about the "asterisk" ("optional") you have already been explained - they use the same form when creating materials for which it is "necessary" and for which "optional" - that is why it is present ... .
What is the attempt unsuccessful?

You are welcome:
1. "... take a drill with a diameter drill bit several millimeters morethan the thickness of the castle ... "." By a few "is how much? Based on your assumption, you can expand the groove by, say, 7-8 millimeters more than the thickness of the castle. 7-8 is also a few.
2. "... with ... overhead locks no installation problems arise due to their simple design," - how does the complexity of the construction correlate with the complexity of the installation? And, then, correctly installing the overhead lock is not much easier than a mortise lock.
3. Photo No. 3 contradicts the words that "the lock mechanism should be located as far as possible in the center of the door leaf" - the shift of the groove to the right is clearly visible.
4. Missed the stage of production of the recess under the bar.
5. "... we drill them with a drill, the diameter of which is slightly less than the diameter of the screws." 2 millimeters less - is it good?

The failure is that the description of the process step is vague. You didn’t say anything new to someone who knows how to do this, and you didn’t help anything to someone who doesn’t: the installation instructions, usually attached to the lock, describe everything briefly, but on the case and specifically.
Of course, it’s better to leave a link to the article you are rewriting - I will decide whether to leave it or not.

It is "not necessary" and there is no "asterisk", because write articles not only on special. assignments, but also your own, which has no source, but you then perform specials. task means the priority requirements described on the page corresponding to the task. And it says "black and white": "5) In the" Source "field, insert a link to the article that has been rewritten."
Regarding this article: she does not have a specific author, this is a "hodgepodge", so I did not require a mandatory link.

Regarding the status of the "author" on the site: such a status is assigned to anyone who posts both his own and other people's home-made products (of course, stating this in the text).

Specifically, this article is in the "Special" section - this section contains articles written as part of the special. tasks, respectively, not copyright.
Author
Decide whether you need a link / footnote / something else, it will still be the admin, not you. And if no complaints came from him, I conclude that everything is in order.
And as for the obligation to indicate the source: “Add homemade” button - scroll down the page and see the “Source” box, a note “optional” to it; in addition, in this form, some fields are marked with asterisks, but the "Source" field is not marked. There is a footnote that the fields marked with an asterisk are required, therefore the conclusion - no asterisk - is optional.
Everything is simple
While the owner of the site to the window with a link to the site, in case the article is from another site, writes that it is not necessary to insert such a link

And here I would ask your phrase to comment on the Admin.
.... Nikolai, is that so? Am I misunderstanding something?
sergey_kosyh,
To summarize, people have always been touched by people who strive to groundlessly criticize everything and expose those around them as fools. Maybe they so assert themselves?

.... I do not know who ALL these people are, I will answer this item only for myself. I do not think that I “criticize” baselessly. (I will give arguments on this subject below). I don’t need to make someone a fool either (By the way, it’s you, for some reason you yourself have seen such an aspect in this conversation). As well as asserting oneself (I’m not 25, and I "asserted myself" without the help of the Internet, believe me -))))).
So ....
Therefore, I decided that this material can be useful to people who first encountered this ...
. I do not doubt that.That is why I decided to supplement about the "tricky" sharpening of the drill, based on personal experience - so that someone would not "invent" it, but immediately apply it with benefit ....
it becomes interesting, who are all these critics who put forward a series of claims such as “where are the inscriptions with the name of the site in the photo” or “unsuccessful attempt passed off as homemade, source not specified”?

.... When I published my first homemade product (the first - on this site, and not in life))))), the admin pointed me exactly this - there was no photo with the name of the site !!!! ... Meanwhile , it was not a lock of the castle using well-known technology, but a home-made false fireplace, FULLY invented, calculated and created by me personally. But the homemade was AUTHOR'S! And in order to "confirm" that it was I who made it, and that it was I who photographed the process, and, accordingly, these photographs are AUTHOR'S, this condition is necessary.
.... Your profile also says that you are the author! And your homemade product is declared as COPYRIGHT. Therefore, if you inserted this lock yourself, then, under the terms of this site, you had to fulfill this condition - add a leaflet with the name of the site!
Your photos are obviously taken from the Internet (at least because they have several different doors))))). Hence the conclusion - homemade NOT AUTHOR'S !!! In this case, it should be either in the “tips” section, or “other sites” (in this case, with the obligatory indication of the source).
..... I do not argue with the fact that you did this operation in your life (inserted a lock), but not in this particular case, reflected in these photos.
Author
I am 25, and for the first time I pushed a lock, this is how my life turned out. That's why I decided that this material can be useful to people who first encountered this ... For example, I was on the Internet and was interested in how this is done, because before that I had never tackled it.
As for the comments on my article, it becomes interesting, who are all these critics who put forward a series of claims such as “where are the inscriptions with the name of the site in the photo” or “unsuccessful attempt passed off as homemade, source not specified”? Despite the fact that the site owner himself to the window with a link to the site, in case the article is from another site, he writes that it is not necessary to insert such a link
To summarize, people have always been touched by people who strive to groundlessly criticize everything and expose those around them as fools. Maybe they so assert themselves?
It's not about complexity. They put everything in locks and put it this way. There is no idea !!! This is just a description of the TECHNOLOGY! And the technology is very widespread! That is why I gave a comic example about "applying paint with a brush"))))). What an idea, if it's just a chore.
And do not be a "miracle master", if you are not 20 years old, then you most likely must have inserted the castle ....
... In the case of the mixer - this is exactly "homemade". Simple. Primitive ..... But homemade. Which allows you to quickly perform work (stir the paint), if you do not have the right tool at hand.

... As an example, if you read my latest publications, you know that now I am engaged in the reconstruction of an old house. I’m doing everything myself, of course (for this I bought this house), but I didn’t even have a second thought to place here, as a DIY, digging a foundation pit, making a foundation, waterproofing, laying walls and so on! Although I have already done all this, and have done it ONLY WITH MY HANDS !. And all this is more difficult than inserting a lock.
.... But this is just technology! And I consider as DIY-made only what I came up with! found a non-standard solution.
Author
https://enm.imdmyself.com/7782-mikser-dlya-kraski-svoimi-rukami-za-10-minut.html - this is a terrific article criticism above. If you describe in a nutshell - "how to bend the wire in 10 minutes", this, of course, is an order of magnitude more complicated than embedding a lock, which is already
Author
What is the attempt unsuccessful? And by the way, for commentators below, maybe they are miracle masters who can embed a castle in 10 minutes blindfolded, but not all of them are. And moreover, builders have a lock-in service, just ask how much it costs
This article is more about tips, it can and will help beginners.

You yourself can add such small moments from the construction - we will accept.
.... I'll start, perhaps, with the article "Paint with a do-it-yourself brush" ....)))))

Such an article definitely will not work: laughing:
: grinning: Not ... Better how to open a can of paint at home?
By the way, yes! .... If the author did it himself, then where are the inscriptions with the name of the site in the photo? ... Most likely, I’ve been picked up from the Internet ....
... Himself chtol such "homemade" spawn? I’m building a second house myself. Now I will look on this topic on the Internet for pictures of everything that I also did, and stamp "homemade" .... Let the admins loot bosh ...))))))
.... I'll start, perhaps, with the article "Paint with a do-it-yourself brush" ....)))))
Not only that, an unsuccessful attempt to describe a technological operation was passed off as a homemade product, but the source was not indicated!
I didn’t think that installing a lock is a homemade product .... What, the time has already come when men don’t install a lock on a door themselves, but call a master ?.)))))
.... Well, okay, not about that .... I want to add, maybe someone will come in handy.
For example, I used the pen drill, which I usually use to install the lock (10 mm), a little improved it: I sharpened its lateral edges. "One-sided" sharpening, like a chisel point. (At the same time, it is necessary to ensure that sharpening is carried out on the left side of the face during the right rotation.) Now I will not only drill a number of holes for them, but also, as a cutter, easily select “jumpers” between them. For a chisel, virtually no work remains ....

We advise you to read:

Hand it for the smartphone ...