
Finally decided to do the old wiring in the house? Or maybe you decided to add another outlet or switch? Often, it is the moment of preparation and installation of the podrozetnik that becomes the very stone that most stumbles about home masters. How not to repeat their mistakes and to prepare a place for a stalk with minimal time and nerves, see below.
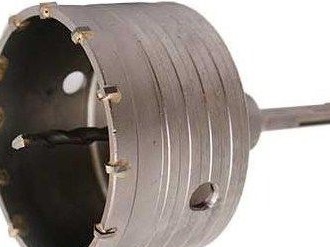
So, the sockets ... The most convenient way to install it is to install it using an electric drill or hammer with a special crown on concrete, having a diameter suitable for our purposes. To install the socket with a drill and a crown, we need the following tools: the drill itself or a perforator, a special crown for concrete, a drill, a hammer and a chisel.
Before starting work, a few words about security.
Remember that an electric drill or hammer is a serious tool that you should not take lightly with. In order not to be injured by flying pieces of concrete, fragments of low-quality drills or crowns, to avoid getting dust in the eyes and lungs, it is necessary to prepare accordingly.
For this we need:
1. Safety glasses, the presence of which is mandatory. Remember that the money saved on refusing to buy such glasses is not worth the possible damage to the health of the eyes or face caused by a flying piece of concrete.
2. Respirator. Here we still have the opportunity to save a little: if you are going to make several holes, you can do with an ordinary paper respirator, the so-called "petal", however, if you set out to arrange a serious repair, in which the drill will be used often, do not waste money to a more expensive respirator option.
3. Gloves. It's not that a thing that is absolutely necessary when working, but working with them is definitely more convenient and simpler. They will protect your hands from possible burns from touching the hot surface of the crown or drill, and will help to keep the drill more confident.
4. Headgear.As in the situation with gloves, they will provide additional protection against concrete dust streaming onto the head.
Having prepared the tools, we proceed to the work itself. First, we determine the place where the switch or socket is planned to be installed, mark this place on the wall. When choosing the best place, remember the unspoken rule: the switch is most convenient for use at a height of about eighty-ninety centimeters from the floor, and the outlet is thirty centimeters from the floor.
Having marked a place on the wall, we cover all things that are in the room with plastic wrap - this applies of furnitureclothes and stuff. Pay attention to this point, since concrete dust has an amazing ability to eat into objects so that it takes weeks to wash it out.
Having covered our things from dust, we also take care of ourselves - we put on a hat and goggles.
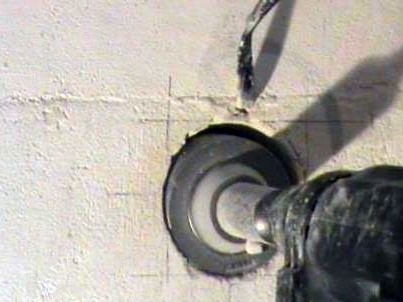
Finally, we turn to the drilling itself. With the help of a crown, we drill a wall, remembering that it is impossible to press very hard on a drill, as this is fraught with its breakdown.
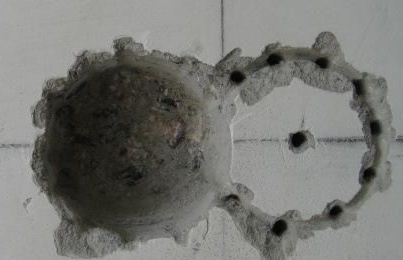
If there are problems with drilling holes in the wall for a number of reasons, such as a poor-quality crown for drilling, a “weak” drill or lack of skills, do not despair. These problems are easily solved. It is necessary, using the same drill and drill on concrete, to make a number of holes around the perimeter of the socket, the depth we need.
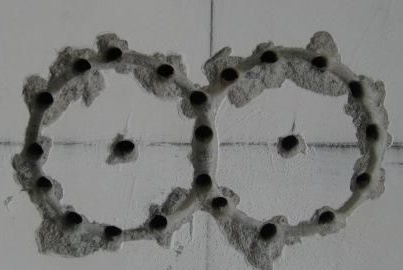
After this, you can again return to the crown and use it to calmly drill the socket.
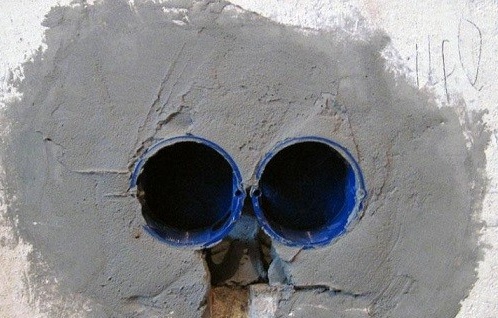
The next question that you may have to face is pieces of concrete in the stalk, stubbornly unwilling to leave the wall. Here, an ordinary hammer and a chisel will come to our aid, with whose help we will knock out excess pieces from the socket.
The hole is ready, install the socket itself and proceed with the installation of the outlet. Have a good work!