
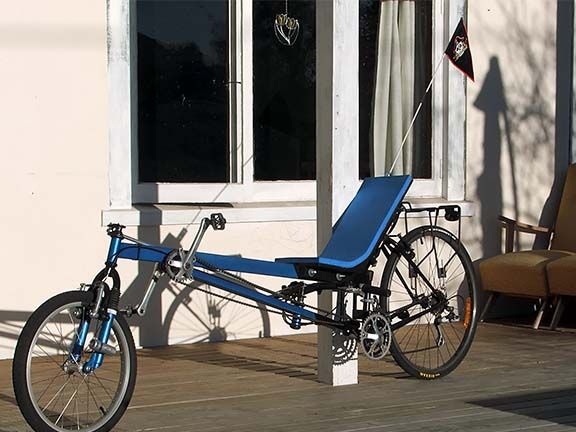
Thanks to this instruction, it is possible to collect the so-called ligrad, or as it is popularly called - "lying bike". This vehicle is unique in its technical data, for example, its control is under the seat and at the same time it is remote.
Still on the bicycle there is an intermediate drive, and the star on it is elliptical.
The bike is going, according to the author, from improvised materials, the main parts are taken from old bicycles. Also homemade easily upgraded and repaired if necessary.
Materials and tools for homemade:
In total, you need two mountain bikes. These details were taken by the author from a mountain bike with a wheel diameter of 26 inches:
- steering wheel, fork pipe, stem, steering glass;
- the back (connecting rods, rear triangle, gear shifters and so on) will be needed.
The following parts were removed from the second mountain bike, which has 20-inch wheels:
- connecting rods;
- carriage;
- the front part (this includes the wheel, steering wheel, steering wheel and fork).
It would be great if the drive gears were triple on both bikes and they were not tightly connected to the cranks.
As additional elements will be needed:
- plywood and foam rubber (the seat is made of them);
- plastic pipes with an inner diameter of 10 mm;
- a rectangular steel pipe 1.2 mm thick, 2.8 m long and a cross section of 50X25 mm;
- steel plate 3 mm thick;
- threaded rod (length 1 meter and width 10 mm);
- lugs for a rod measuring 2X10 mm.
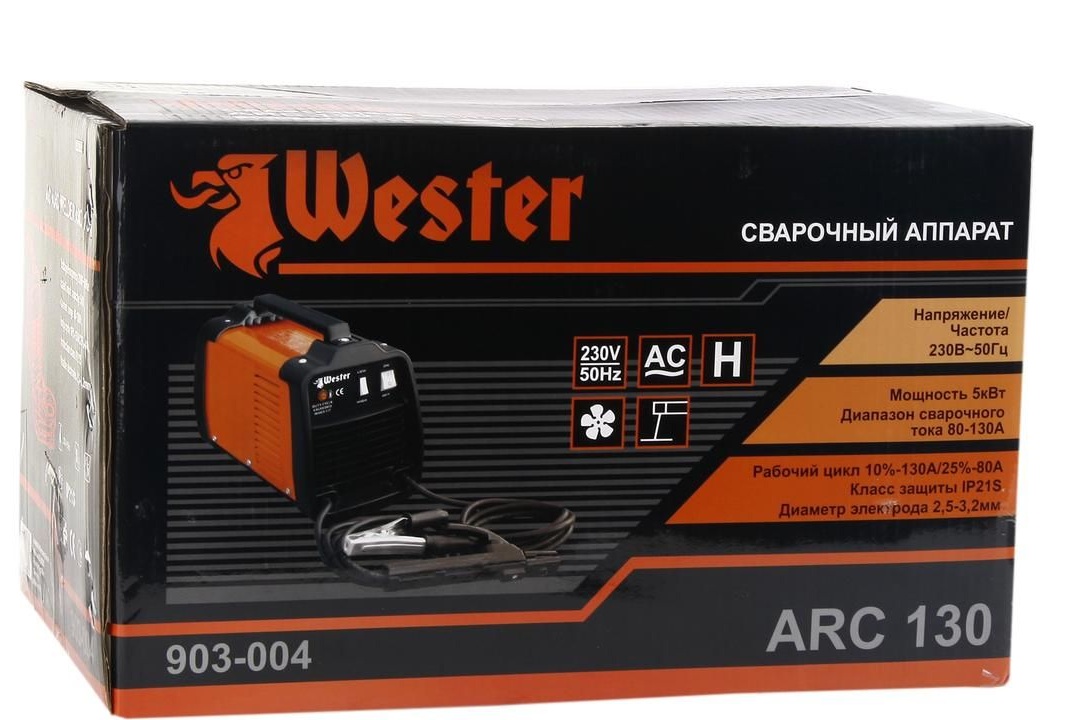
Welding is required as tools, the author successfully used an arc apparatus for this purpose with a capacity of only 130A. Well, they will also need tools for disassembling and assembling bicycles.
Homemade manufacturing process:
Step one. Assembling a frame for a recumbent bicycle
The author designed the frame exclusively for himself, but the seat on it can be adjusted in height to make it convenient. If there are difficulties with calculating the length, then you can take such figures as the author’s as an example. The size was selected for the length of the legs a little more than 80 cm. A bit of free space was left on the frame, so the seat can be moved back if necessary with a margin of 10 cm.
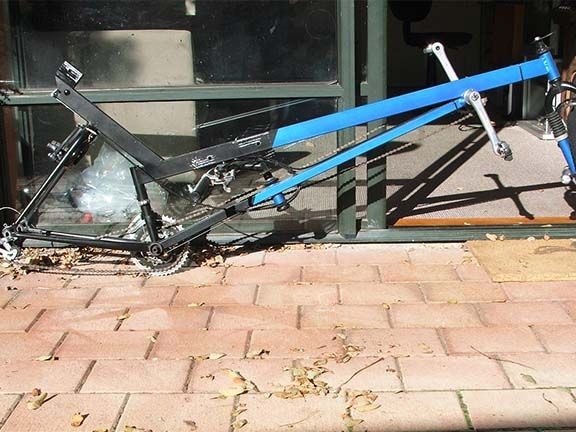
To start ligade assembly, you first need to remove the carriage, triangle, and also the seatpost from a large bicycle. Now you need to weld a rectangular tube 1.3 m long to the seatpost. It should be located 175 mm above the carriage at the required angle. This element will be the top pipe homemade.
Further, from the smaller frame, it will be necessary to cut the carriage, on the new frame it will be used as the front one. To create a new lower pipe, the carriage must be welded to a rectangular steel pipe with a size of 50X25 mm, its length was 1 m from the author.
Now it is necessary to remove the steering glass from the large frame and then grind the cut sections, in the end one pipe should remain. At the same stage, it is necessary to dismantle the bearing race, and the pipe itself is shortened to approximately 75 mm.
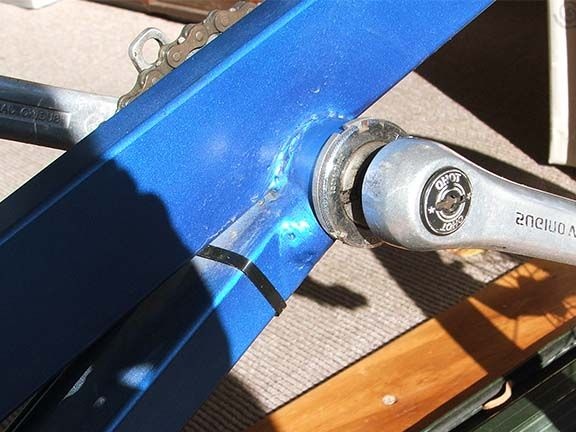
In order for the steering glass to come to the bottom pipe, you need to drill and grind a rather large hole. If you look from the carriage, then it should be located at a distance of about 65 cm. Well, then the steering cup is welded to the lower pipe, and the bearing race is put in place.
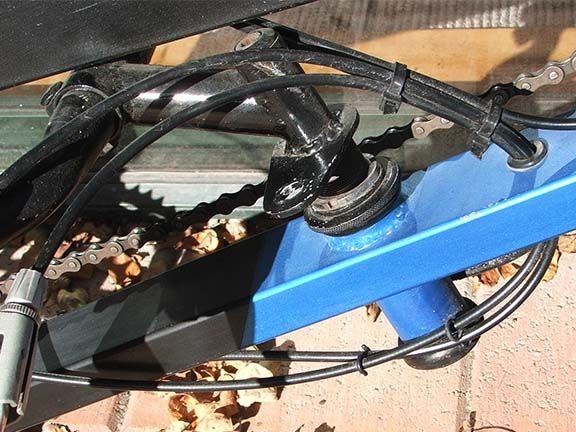
Now you need to connect the upper and lower pipes, for this, in the center of the front carriage, you need to cut a nest 25 mm wide. It is necessary to ensure that the upper pipe enters this nest, while the author welds the lower frame to the rest of the frame. To ensure the operability of the carriage, the pipe that enters it must be sanded at the end.
Even at this stage, the rear seat support is made. To make it, you will need a rectangular pipe, it must be welded to the upper pipe directly in front of the seatpost, as well as to the upper feathers of the rear triangle.
In conclusion, you need to fasten the rear wheel, and make sure that it is level and the rear support does not bother him.
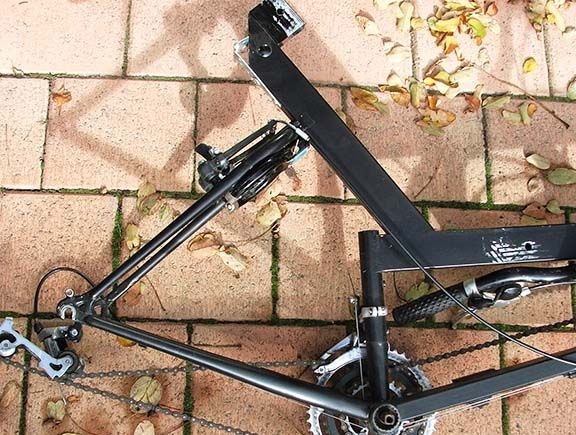
In conclusion, a new steering cup is mounted on the frame. From the smaller frame, you need to cut off the steering cup, and then fix it by welding on the upper pipe. It must be welded in such a way that it stands parallel to the other steering glass. The hole in the seatpost can be closed with a rubber plug from the chair.
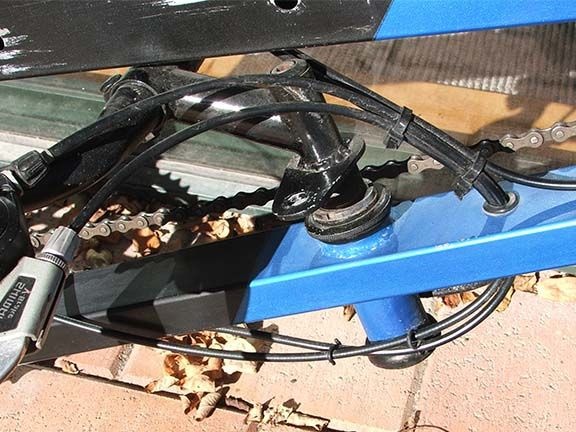
Step Two Bike transmission
This bike is interesting in having an intermediate drive. This allows you to get some advantages if you compare homemade with the design of a regular recumbent bike. First of all, there is no gear switch used, and no connecting rods. Even in this design, the chain sags less. According to the author, here the chain does not fall as often as on other models of bicycles of this type.
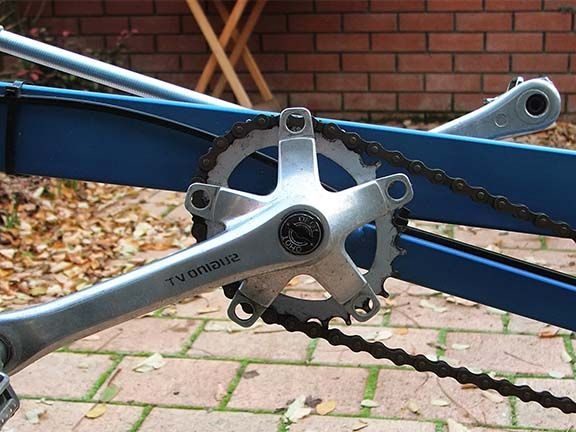
To make the intermediate drive, the connecting rod must be cut so that only the sprockets remain. The cut point must be sanded. Well, the second connecting rod just unscrews.
Still have to modify the stars, because two chains will be used, and since the gap between the stars is small, the chains will cling to each other. To do this, the stars are dismantled and washers are installed between them to achieve the desired width.
On the front connecting rod there will be only one small asterisk, the author used an elliptical one. Finally, you need to tighten the chain and adjust the switch. A special tensioner is used to tension the chain, it is made of a single roller and an asterisk of the rear machine, which switches speeds.

Step Three Bicycle wheel
The steering on this bike also has its own characteristics. Here, the steering wheel is located below the seat, according to the author, it is easier to drive vehicles. The front steering lever is very simple. You need to cut off one end of the outriggers and then weld a piece of steel to create a lever arm. How exactly all this should be can be seen in the photo.
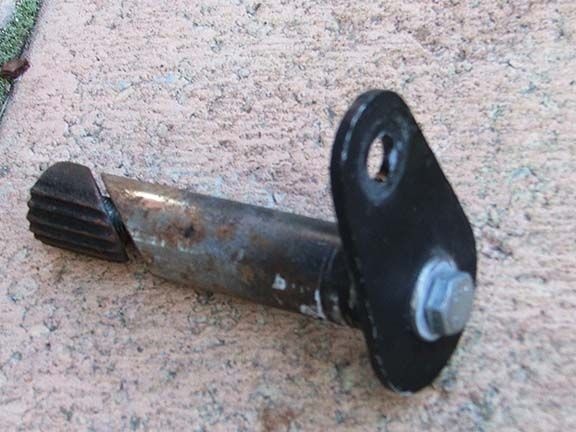
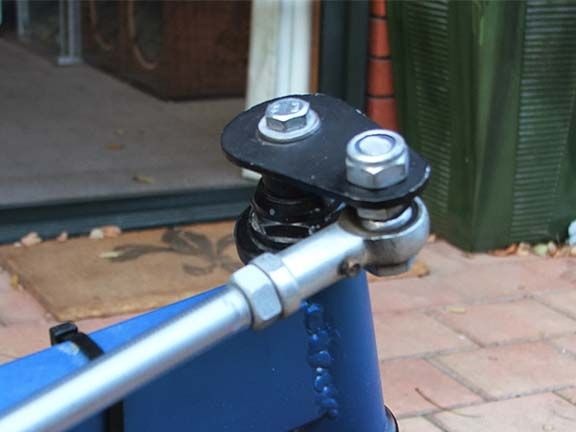
Behind the steering lever is a little more complicated. To make the structure, you need to cut the pipe from the second front fork. Then you need to come up with a new mount for the bearing race, as a result, after the pipe is inserted into the steering cup, approximately 30 mm of thread should remain.
The second take-out must be shortened, this will allow it to be inserted into the steering glass. One must strive to make it long.
Now the stem can be inserted into the steering glass and insert the fork pipe. It is important to note how far the fork pipe rises, and mark this place. The top of the stem should be positioned so that the end of the upper pipe is higher. Now you can remove all unnecessary and weld a piece of steel a little higher than the marked place, this will be the lever arm. Well, then everything is going as it is in front.
As for the tie rod, it is made of a threaded rod, the diameter of the rod is 10 mm. The rod has tips on each side. Further, after making the necessary measurements, the rod must be inserted into the plastic pipe to get a smooth surface. The steering link should be located above the carriage, between the frame and the left connecting rod.
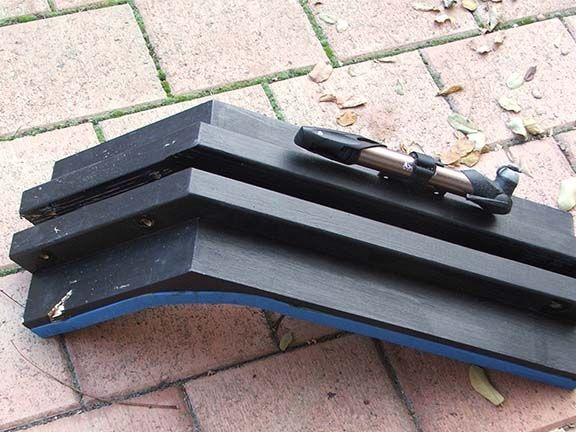
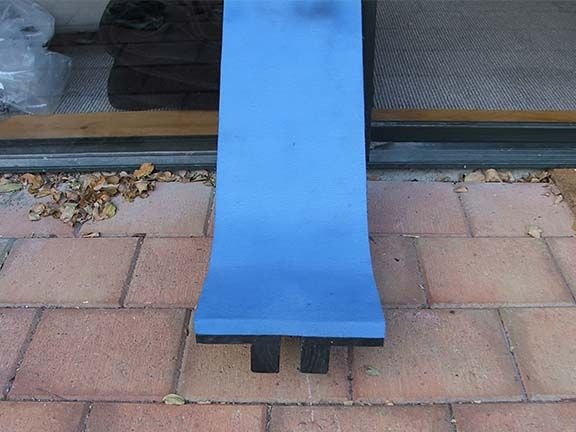
Step Four Ligade seat
The author makes the seat out of plywood; foam rubber with high rigidity (density) is used as upholstery. The seat needs to be installed and then adjusted so that it is comfortable to ride and your arms and legs are not tired. The author made mounts for the seat, with which it is fixed to the rear triangle through the feathers. Bolts are used as fasteners.
According to the author, the home-made turned out to be quite successful, about 5 thousand kilometers have already been run over by such transport. It is easy to ride such a bicycle, while your muscles do not get tired for a long time. In order to set the desired movement, it is enough not to press hard on the steering wheel.
Ligaderad turned out pretty dynamic, despite the great length. And due to its height, it is clearly visible in the stream of cars and excellent visibility comes off when driving.