With the help of this article you can learn how to make a bicycle frame backlight. IN homemade low-cost and commonly available fluorescent lamps will be used. Thanks to this modernization bike It becomes not only stylish, but also clearly visible on the road in the dark, which significantly improves driving safety.
The first attempts to assemble such a backlight were not successful, since over time, the plastic clamps that secured the lamp led to deformation, therefore, the lamp was damaged. Since such lamps have very thin glass, they must be handled very carefully.

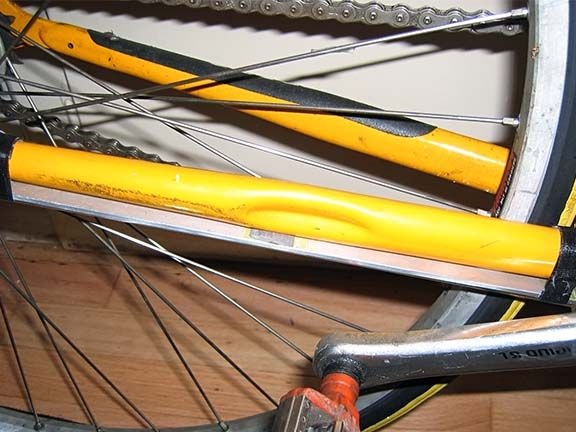
In the future, the design was improved by installing an aluminum strip behind the lamp that was previously polished so that light could be reflected from it. Thus, the design became not only stronger, but also a reflector appeared in it. In addition, here the clamps do not directly interact with the lamp and do not block the light.
Even in the final version, the author replaced the heavy lead-acid battery with a lighter one.
Materials and tools for homemade:
- Velcro fasteners (the author used RipWrap);
- a set with two fluorescent lamps with a cold cathode (such can be bought at a computer store or ordered via the Internet);
- 12V battery (the author assembled a power source from AA nickel-metal hydride cells);
- foam (necessary in order to put under the lamp);
- As a reflector and protection for the lamps you will need a piece of aluminum plate measuring 5/8 "x 1/8" x 2 '.
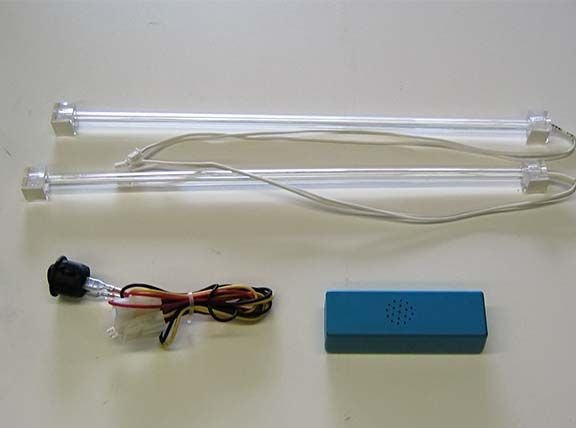
Well, of course, you will need some tools, for example, a cutting tool, a soldering iron, screwdrivers and so on. You will also need wires, screws with nuts and other little things.
Homemade manufacturing process:
Step one. We start with the manufacture of reflectors
First of all, the author cuts out two 12-inch plates from aluminum, then one side is ground with 400 grit sandpaper.In conclusion, the surface is polished to a mirror shine using a trepid mixture. In order for the epoxy to adhere well to the surface, approximately one inch should be retreated from each side and sanding the surface. You also need to strip the area in the center of the reflector.
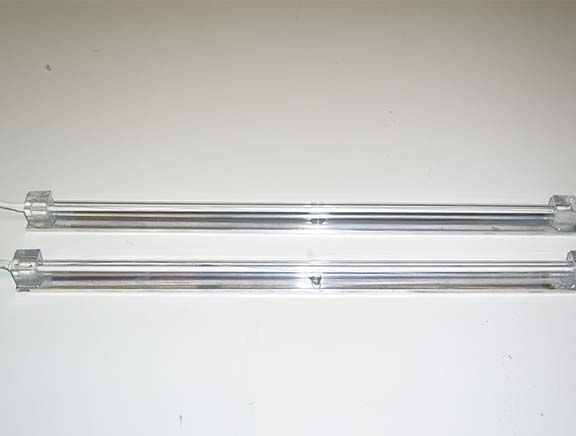
Now it’s the turn of the lamps, they also need to be prepared so that they stick well. The surfaces of the lamp tips must be sanded; for this purpose, the author used a grinding drum. Acrylic must be removed almost to the lamp itself, and then the surface is roughened.
That's all, now the lamps can be glued to the reflectors using epoxy.
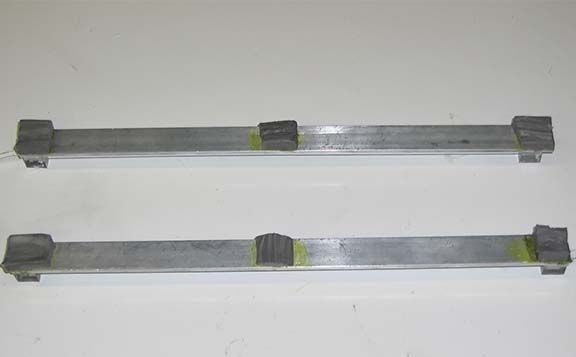
Step Two Making seals
In order not to lose time while epoxy hardens, for homemade need to make seals. To do this, several squares need to be cut out of the foam, and then fixed to the reflector using contact cement.
Step Three Installation of lamps on a bicycle
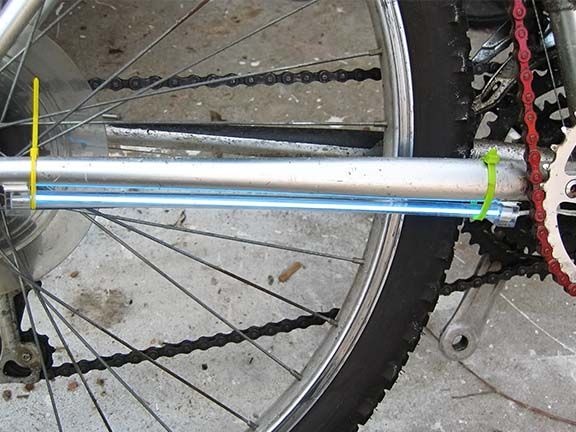
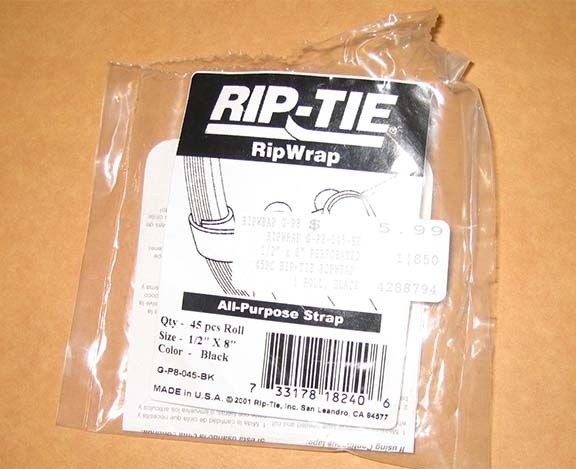
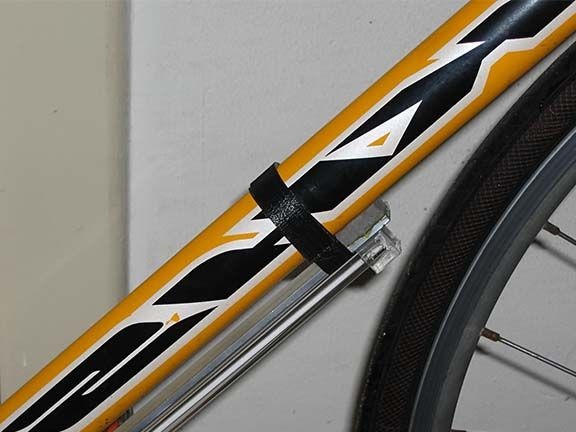
Once the epoxy hardens, you can connect the battery to the Molex connector. Now the backlight can be mounted on a bicycle. For fastening, the author used fasteners. Thin fasteners like RipWrap were perfect for such purposes. A set of such fasteners (only 45 pieces) cost the author $ 6. First you need to separate them. Still for fastening lamps, plastic clamps or Velcro fasteners are perfect.
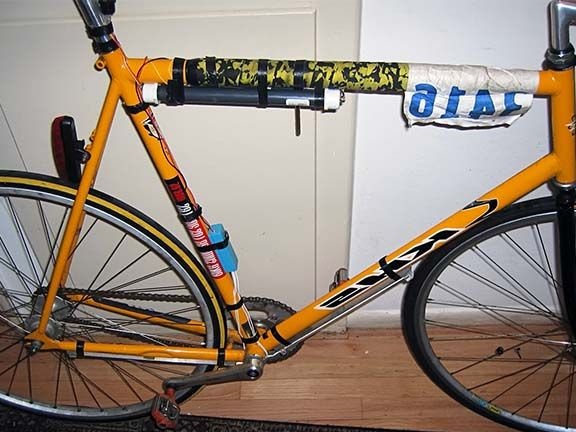
The backlight was installed on a track bike, its feature is that it has a minimum distance between the road and the frame. If the backlight will work without problems on such a bicycle, then, according to the logic of the author, it can be operated without problems on any other bicycle. It should be noted that such a bike could not have been set to factory lights Down Low Glow, as it is too large. This is another reason why the author decided to assemble a backlight for a bicycle. do it yourself.
The backlight is installed quite quickly, according to the author, it takes about 5 minutes.
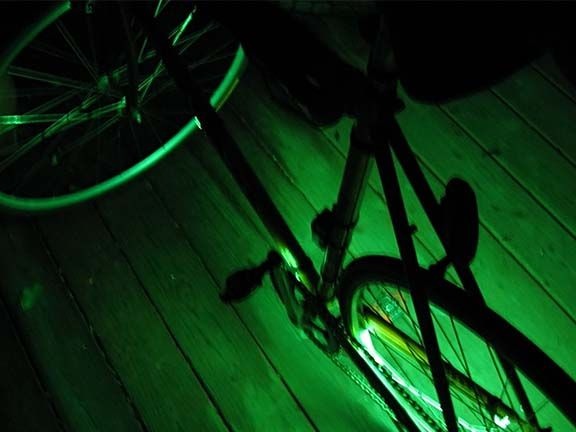
Step Four Homemade backlight testing
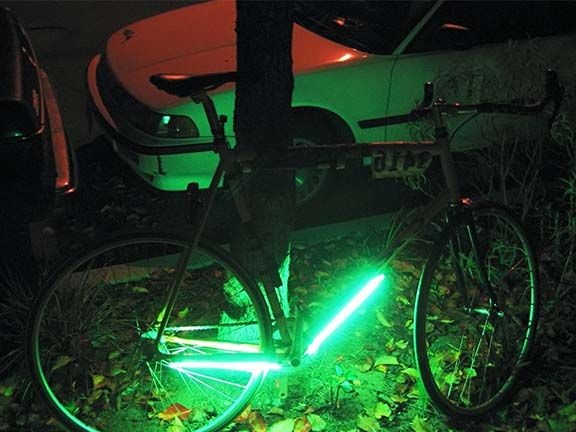
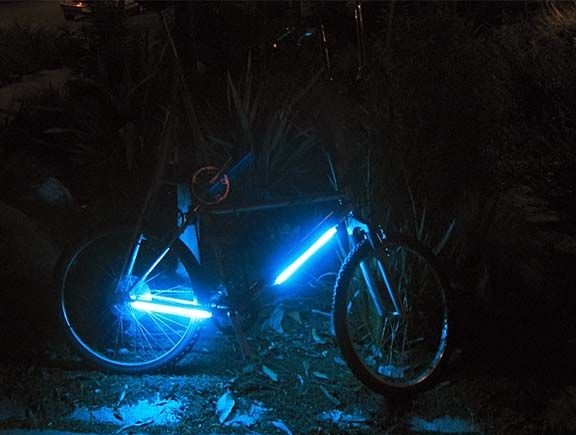
In the photo you can see what the homemade in action. The light from the lamps comes out quite bright so that the bike can be seen in the dark. But he is not so bright as to dazzle, and this is important. The blue color looks most impressive, but the green lamps should shine brighter. White lamps are also quite bright, but they do not attract attention so much. Of course, here everyone decides for himself, what color to set the backlight, but in any case it will look great.
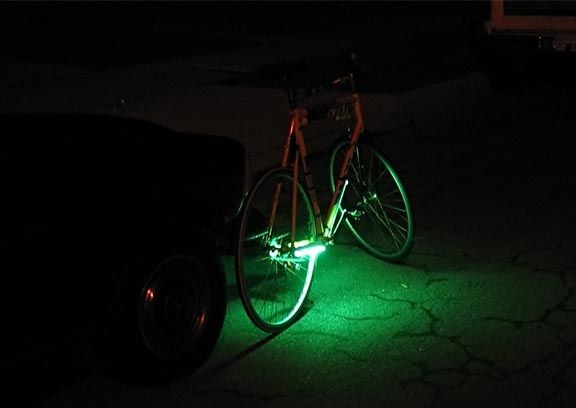
Most of all the pleasure this lighting causes when riding a track bike with a low landing. This creates the impression that you are not riding, but flying on a carpet-plane or other marvelous device.
How else can I finish the homemade product
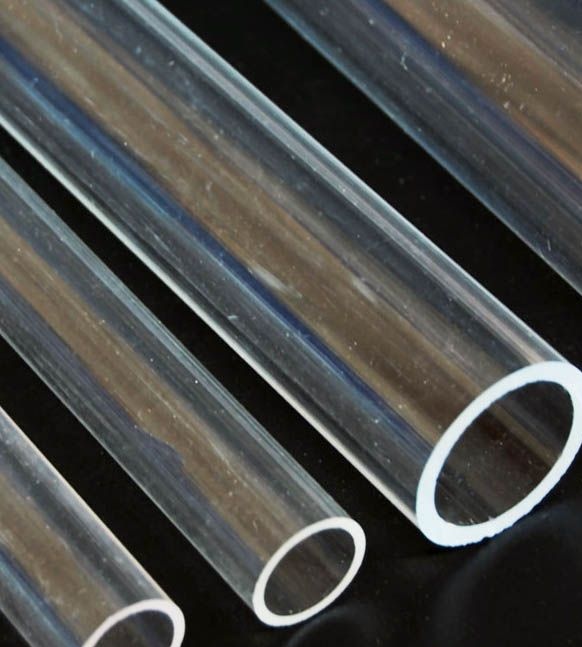
With active use, the structure is quite easy to disrupt, the author had one lamp broken while riding, and a wire came off from one. In this regard, it was decided to strengthen the design. The lamps can be placed in large transparent acrylic tubes. The battery and the converter also need to be placed in some kind of housing. For such purposes, you can use a jar of peanut butter or another, suitable in size.