

On the Internet you can find a lot of videos and articles on how do it yourself can make roman curtains. But a significant drawback of such homemade we can assume that it takes a lot of sewing here, and for such purposes a sewing machine and other fixtures. Also, the manufacture of such curtains often requires quite expensive materials.
Thanks to this instruction, it is relatively easy to make Roman curtains with your own hands and at the same time do without sewing.
How do Roman curtains do in classic ways?
First of all, curtains are sewn from the material, then rails with three rings are attached to these curtains. Then, through these rings, ropes are passed from top to bottom and brought out through the upper hooks in the cornice. Well, then the ropes are pulled out through the side hook. As a result, if you pull on these ropes, the curtain can be raised or lowered.
You also need to make a cornice, for these purposes you will need a wooden beam. The fabric itself is attached to the cornice using a special Velcro tape. Of course, such a homemade product has a number of advantages, but for it you need to stock up on a large number of materials, and the work here is not so small.
A simpler way to create Roman curtains
In the proposed simpler version there is no cornice, but there is practically nothing to sew here. Tissue sections are not processed using stitching, but with a glue web. According to the author, this approach is not much inferior in quality to the “line”.
As for such components as bars, rings, rails, etc., plastic blinds will be used instead, they will cost only 150-500 rubles, and you can purchase them at any hardware store. As you can see, the amount of materials is minimized, however, such a homemade product will look and function perfectly.
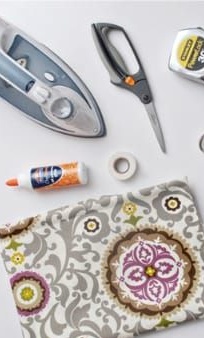
Materials and tools for creating Roman curtains:
- a piece of fabric (it should be sufficiently dense, this will keep the shape);
- scissors, tape measure, chalk, ruler;
- adhesive web-tape on a paper basis (width 0.5-1 cm);
- glue for fabric with a brush (You can buy it at the sewing store. The glue Moment for shoes and the like is also suitable);
- plastic blinds (you can purchase inexpensive windows or use b / y);
- iron with gauze (necessary for iron).
Getting started creating curtains:
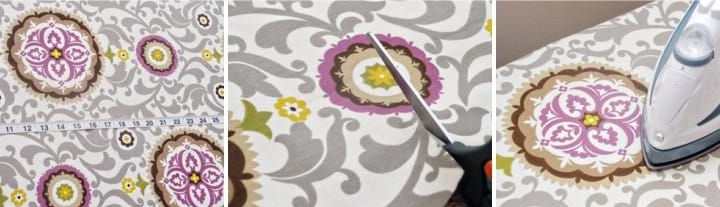
Step one. Measurements and cutting
To make the cut correctly, you must first take measurements.And how to take measurements depends on how you plan to hang curtains on the window.
For example, curtains can be placed inside a window opening. In this case, it must be borne in mind that the finished curtains should be two centimeters wider than the window opening. If we look at an example, then for a window with a width of 155 cm, curtains with a width of 153 cm are needed. As for the width of the fabric, it will be necessary to add 6 cm to it for deflections, in this case we have a fabric width of 159 cm.
As for the cut length, it is also necessary to subtract 2 cm from it, and then add 3 cm for deflection. You also need to consider the height of the cornice, it can be 4 or 2 cm.
In addition, the curtain can be fixed over the window opening. In this case, measurements are made as for ordinary curtains, but there are some nuances:
1. To the desired width of the curtains, it is necessary to add another 6 centimeters under the deflections.
2. As for the length, for it, for the lower deflection, you also need to add 3 cm, well, and take into account the height of the cornice.
That's all, when all the necessary measurements are made, now the fabric can be cut. After that, the material is ironed.
Step Two Side Curtain Processing
There are two ways to process the side edges. In the first case, the edges of the material must be tucked 3 cm. Then a cobweb is taken, placed between the two parts and smoothed with an iron. If there is a sewing machine, then before this, the slices can be decorated with an overlock. The second side of the curtains, as well as the bottom, are processed in a similar way.
Iron the spider line with a well-heated iron and steam, it is best to use gauze or a cotton rag for such purposes. You should not rush here, you need to warm the glue well so that it completely melts. Then the connection will be reliable, and even after several washes, the curtains will not need to be glued. It is best to practice this before on an unnecessary piece of fabric.
The second method is considered more complicated, but after this treatment the edges will look more neat.
1. First you need to take the fabric and put it upside down, then at the edges you need to step back 3 cm and draw a dashed line.
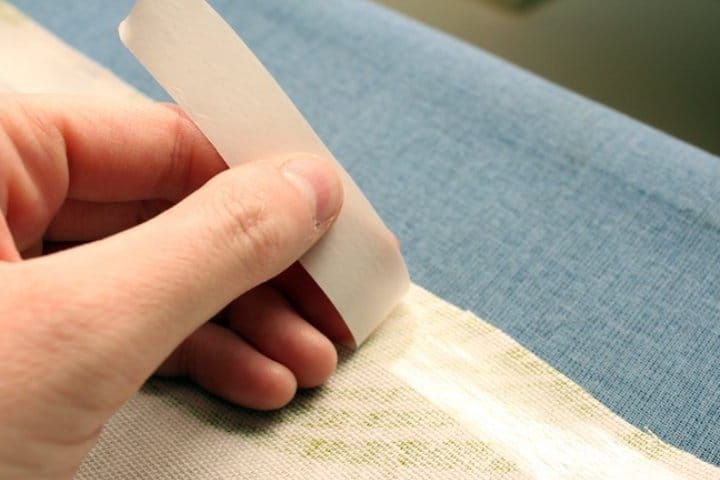
2. Next, the fabric is turned over and placed on the ironing board. Now a glue web with a paper base is taken and applied to the very edge of the curtain with the paper up. Then it can be ironed to warm the glue well, in each area it is necessary to linger for 10 seconds. You do not need to peel off the paper during ironing.
3. At the next stage, the material is turned over again with the back side, and the part with the cobweb is bent up. Now she needs to be ironed again well. After this, the fabric again turns upside down, but now the spider line is bent with an indent of 2 cm, in the end it should be along the marking line. Without removing the paper layer, you need to go over the iron again. When the bend is fully formed, the paper can be removed and now everything is sealed completely.
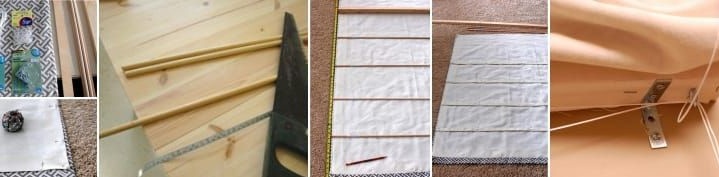
Step Three Fastening fabric to the cornice
The curtain is attached to the cornice with glue. The glue is applied to the front end of the cornice and then the upper edge of the curtains is glued inside out to it. The raw top cut needs a little wrap on the ledge, as seen in the photo.
Before gluing, it is advisable to test the adhesive. Depending on the type of glue, it may need to be ironed or put on a press.
Step Four Jalousie
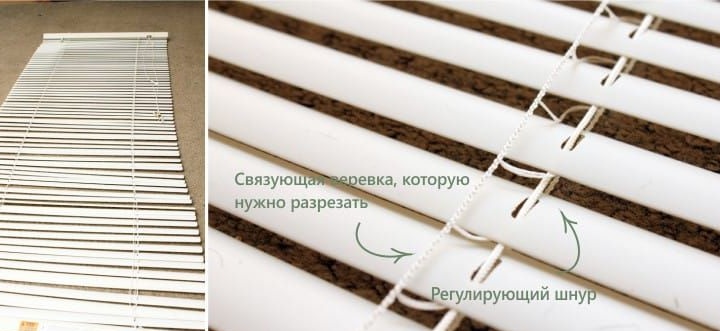
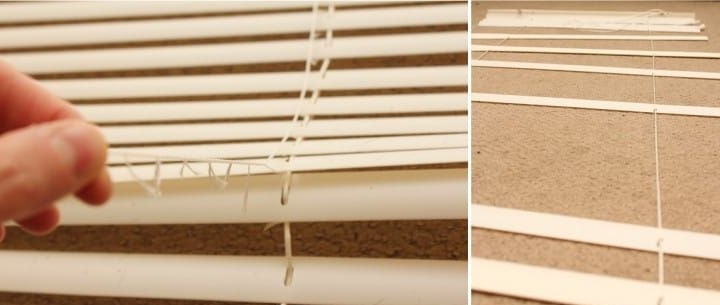
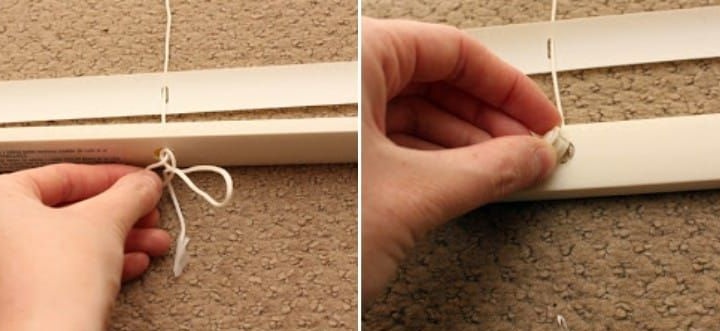
At the next stage, you need to redo the blinds, according to the author, this is done quite simply. The process of work is that you need to remove excess lamellas, as well as shorten the blinds. To do this, you need to remove the rope that ties the lamellas, while it is important not to confuse it with the cord that regulates the blinds.
After that, it will be necessary to determine how many lamellas must be left. If the curtains are short (no more than 145 cm), in total they will have 6 folds, so you need to leave only 5 slats.
As for standard curtains (in the region of 145-225 cm), then they need 7 folds, and this is 6 lamellas.
If the length of the curtains is more than 225 cm, then the folds should be at least 8, that is, the lamellas must be left 7.
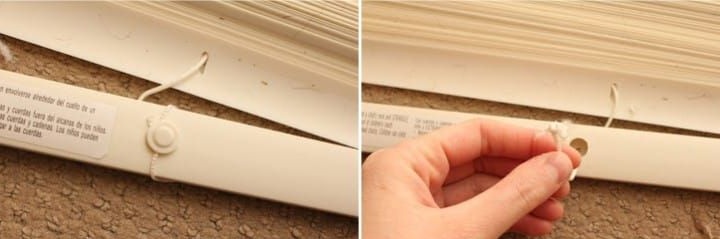
The lamellas are removed very simply, first you need to remove the plastic plug on the weighting bar, and then untie or cut the knot on the cord. Now you can remove the bottom slats.Next, the cord is inserted into place and a knot tied.
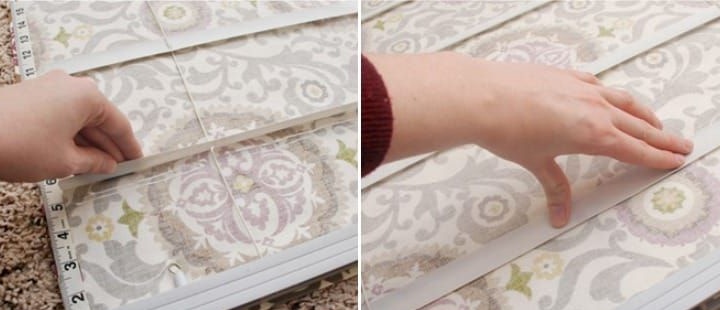
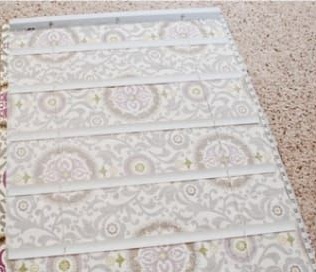
Step Five We attach the lamellas to the bar
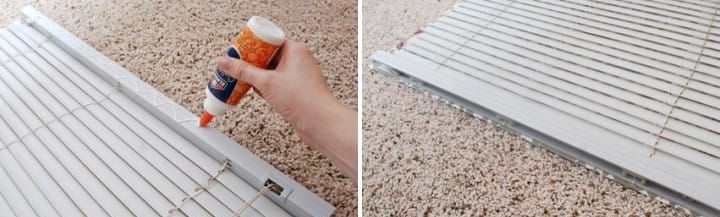
Now you need to distribute the lamellas so that they are located on the canvas evenly. The interval must be the same. The lamellas are glued to the fabric with glue. It is important not to touch the adjusting cords.
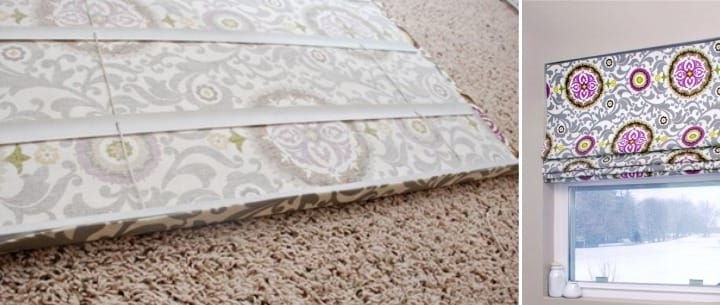
Step Six The final stage. Bottom processing
The lower edge of the curtains just need to be glued to the weight bar, how exactly, you can see in the photo. That's all, the Roman curtains are ready.
Below you can watch a few videos of how you can still make Roman curtains.
In this video you can see how you can make Roman curtains using a factory curtain rod.