

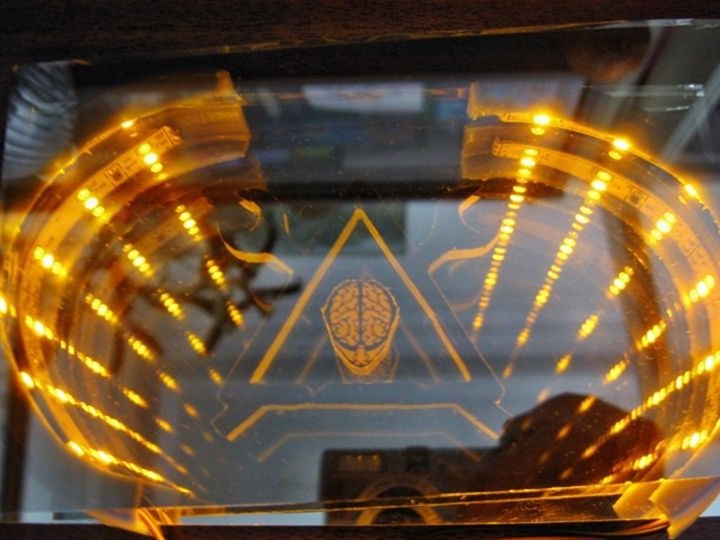
This article will consider an interesting and impressive modernization of a stationary personal computer. To be more precise, the front panel of the system unit will be subject to external alteration. Instead of standard plastic, the author decided to install a glass panel with LEDs and create an endless tunnel effect by mirror reflections.
Below is a list of materials used to create such a modification:
-mirror
tinted glass with mirror coating
-Double-sided tape
- sticker from photo paper
-LED Strip Light
-various wires
-connector for power (molex)
- milk packaging lid
A detailed description of the manufacture and installation of an external modification for a desktop computer:
Step one: collecting the necessary materials.
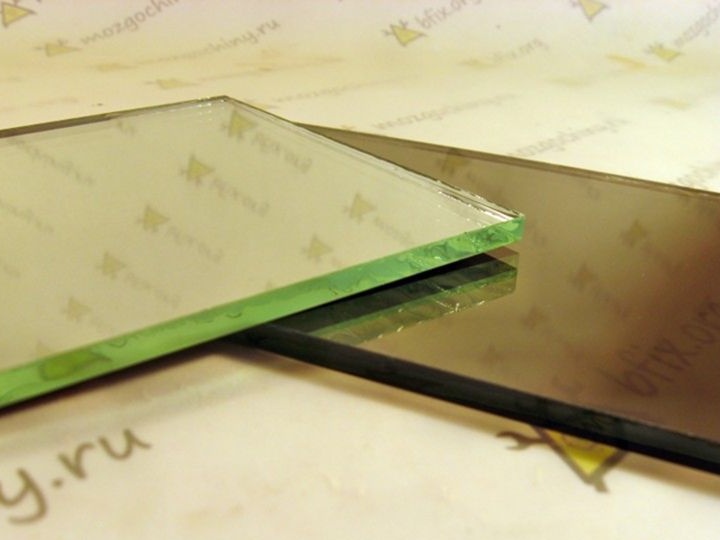
Before starting work, it is necessary to collect and prepare all materials. First of all, we need mirrors. You can find them in any specialized store or go to the workshop, where you will cut the necessary pieces from the existing large mirror. Two small mirrors measuring 185 mm by 85 mm cost the author only $ 2.
It was much more difficult to find glass with a mirror coating, for this I had to delve into some forums, in your city, perhaps this would not be a difficulty. Then a sticker from photo paper was bought on which the logo will be printed. In an electronics store or online store you need to buy an LED strip, you need a small strip, so its cost will also not be large. The author took the wires from the available stocks.
Step two: preparation and fitting.
In order not to stain the existing mirrors, hands must be wiped with medical alcohol, otherwise you will then have to wipe the mirrors from greasy fingerprints.
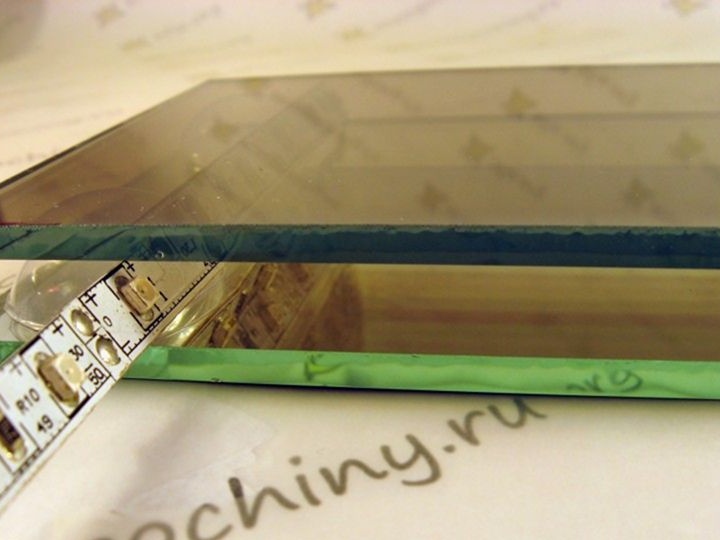
Since the mirrors were already initially the right size, the author decided to figure out how this homemade will look in the assembly. For this, the LED strip was placed between the mirrors, so it became much easier and more convenient in practice to determine the necessary clearance between the mirrors and the optimal distance of the strip to maximize the efficiency of creating the illusion of an endless tunnel.
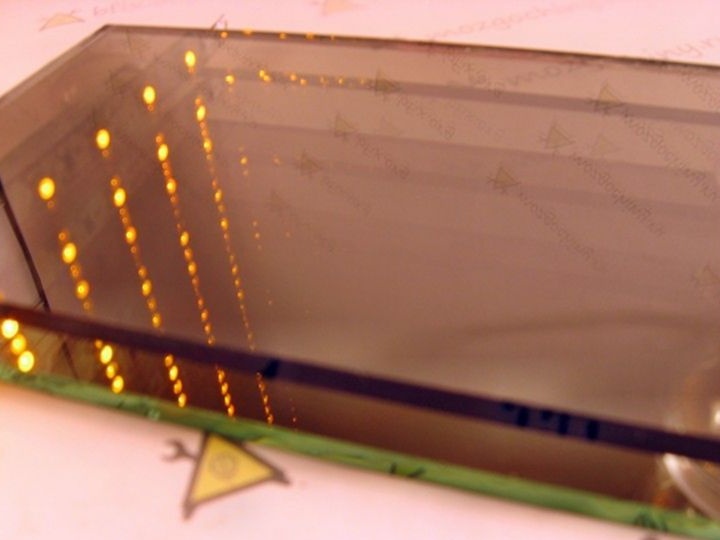
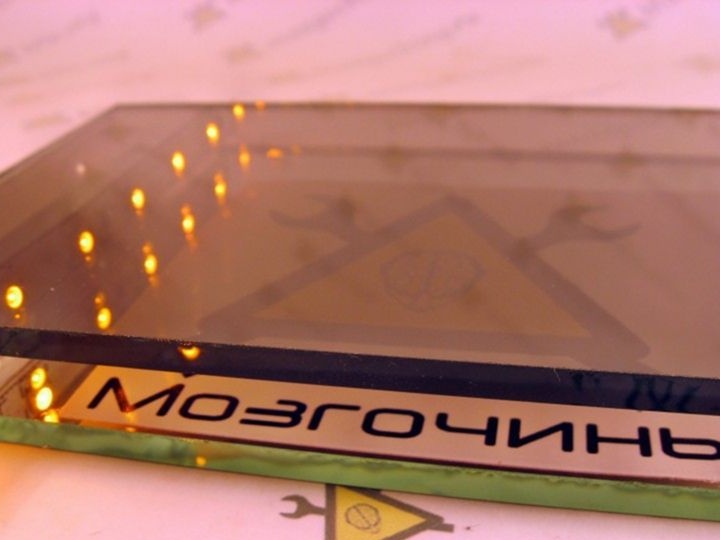
The photos show that the LED strip shines perfectly even when powered at 9V, although according to the instructions it was designed for a voltage of 12V.
The optimal gap to create the desired effect was found in the range from 5 to 8 mm.
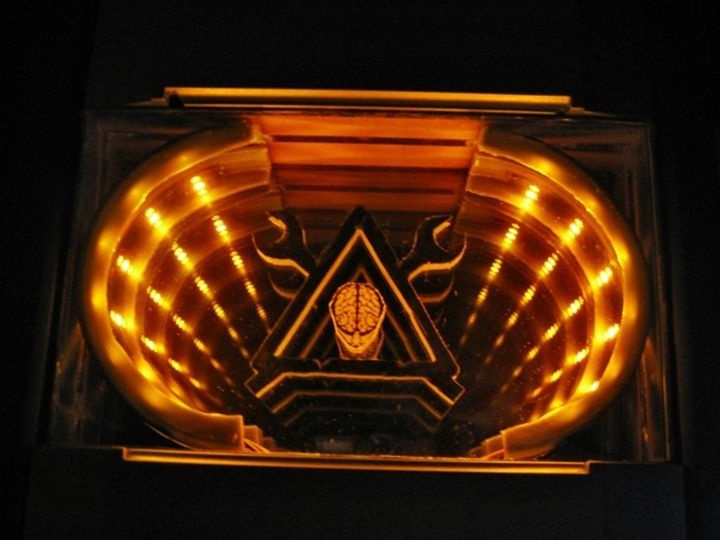
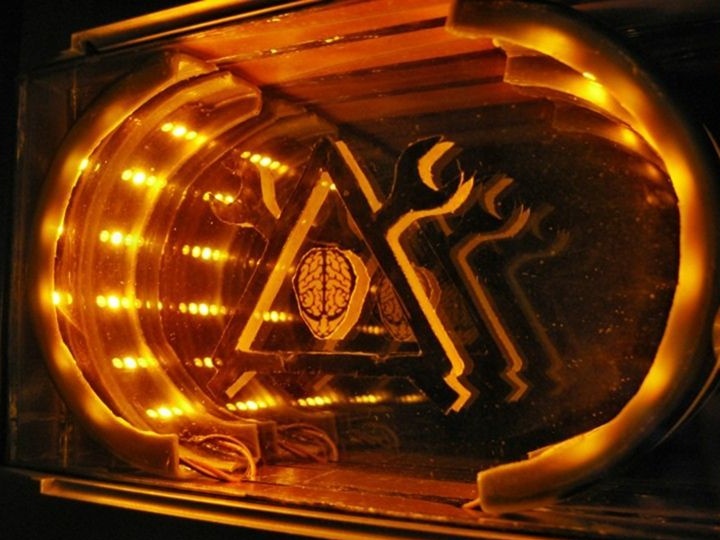
The previously printed logo on photo paper is perfectly visible through the mirror. Therefore, it was immediately cut out and pasted onto the surface. With this action, it is extremely important not to confuse the sides of the logo.
Step Three: Prepare for tape installation.
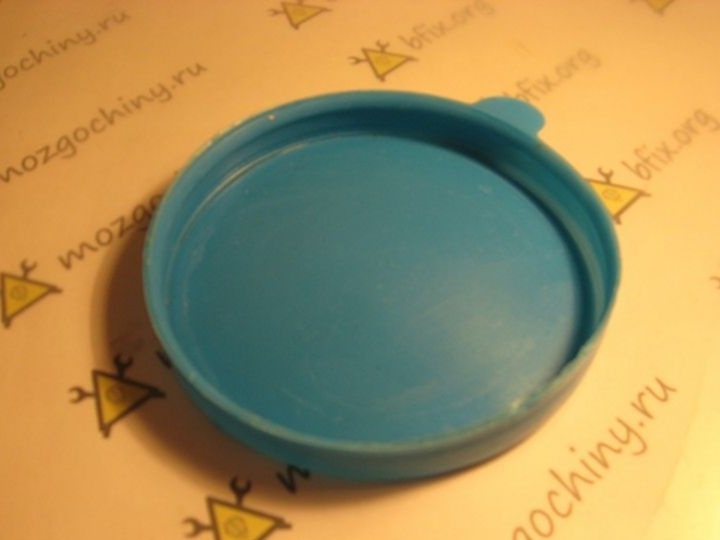
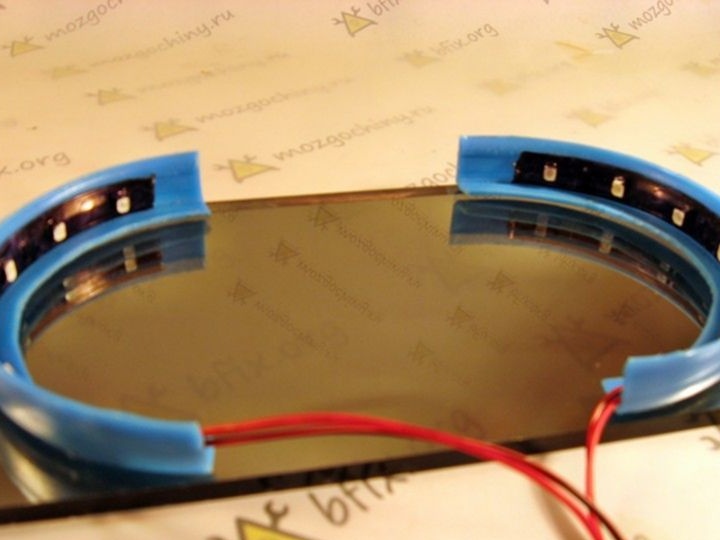
The rounded shape looks more attractive, and also will really resemble a tunnel or portal. Therefore, it was decided to install the tape with two arcs. For easier formation of arches, the author used a lid from a box of milk, the diameter of which so successfully fit the dimension of the mirrors. Further, stiffeners were cut from the existing cover to form the arc of the tape. By itself, the rib should already have sufficient rigidity to hold the tape in the right position, but to be safe, the author left a little plastic on top.
When creating external moddings, it is very important to check how it will look from the side, therefore, after a test fixation of the tapes, the author checked the appearance of the product. As you can see in the picture, the white stripes of the ribbon are too striking, so it was decided to paint over them using a conventional marker. After that, only diodes became visible, and the external effect became even more impressive.
Fourth step: installing and fixing the structure inside the case.
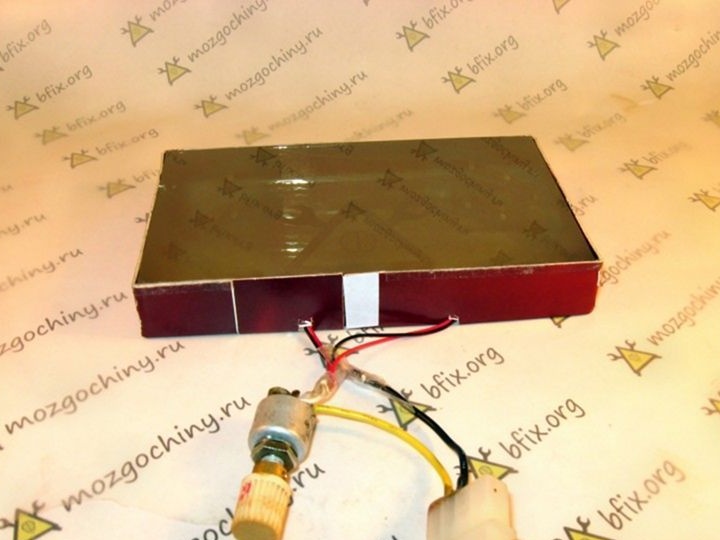
The used LED tape already had a self-adhesive coating, so removing the protective film, the tape was immediately attached to the arcs of the lid. Then wires were soldered, which were then insulated, and a variable resistor. It was decided to use a variable resistor, because at a voltage of 12 V the tape is too bright, so the resistor should slightly reduce the brightness of the diodes.
After that, the structure of mirror glasses is glued around the perimeter with cardboard to give a certain integrity to the structure. In addition, such a solution will help to replace elements in case of their failure without breaking the entire structure, since the cardboard holds on to the edges of the mirrors and can be easily peeled off.
The resulting LED panel must be installed in the housing. Since the dimensions of the mirrors were very precisely matched, no additional materials were required to secure it in the hole.
Thus, from the usual plain-looking case of the system unit, a rather spectacular decoration of the room was obtained. It took quite a bit of money and time, since all materials are quite cheap, and assembly work is very simple.
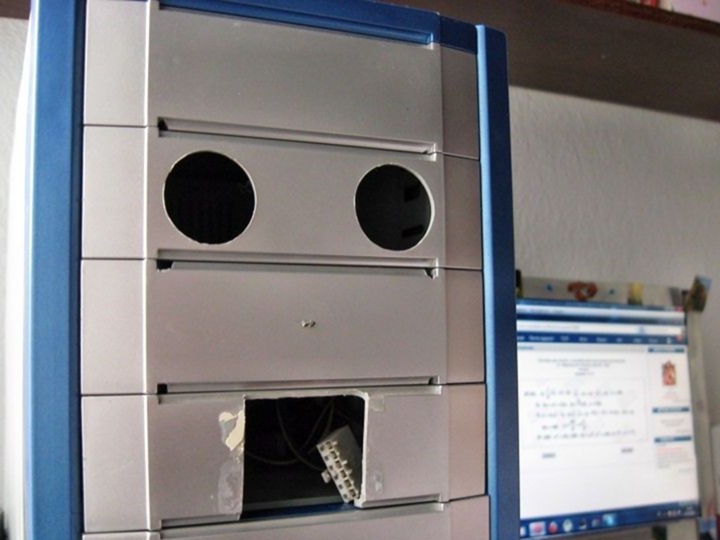
Here is a photograph of the system unit case before the application of the modifications, so that by the end, you can compare how much the external design of the computer has improved.
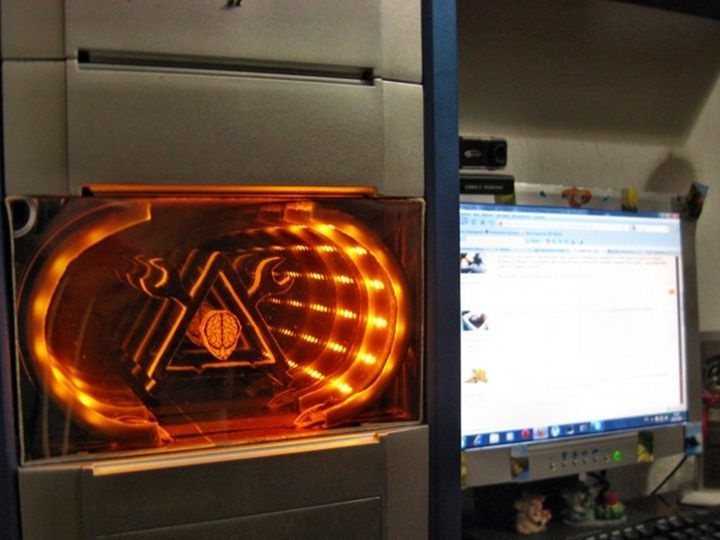
And here you can see the already modified system unit with the installed mirror system of LED lighting.
The author has vast experience in applying various upgrades to a desktop personal computer. Thanks to this, in this work he managed to achieve such high indicators that the modifications used look as if they were made at a factory, where the computer cases are actually assembled, or made by the hands of professionals.
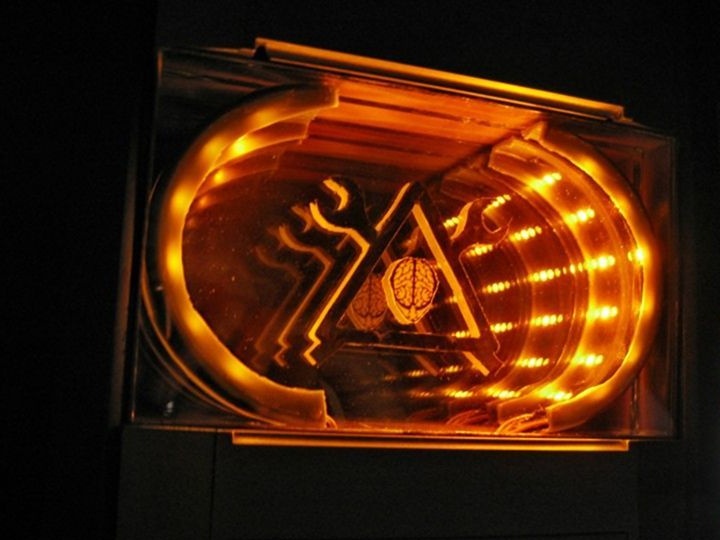
The photo below shows how a ready-made home-made modernization of the personal computer case looks like:
And here you can see the video: