
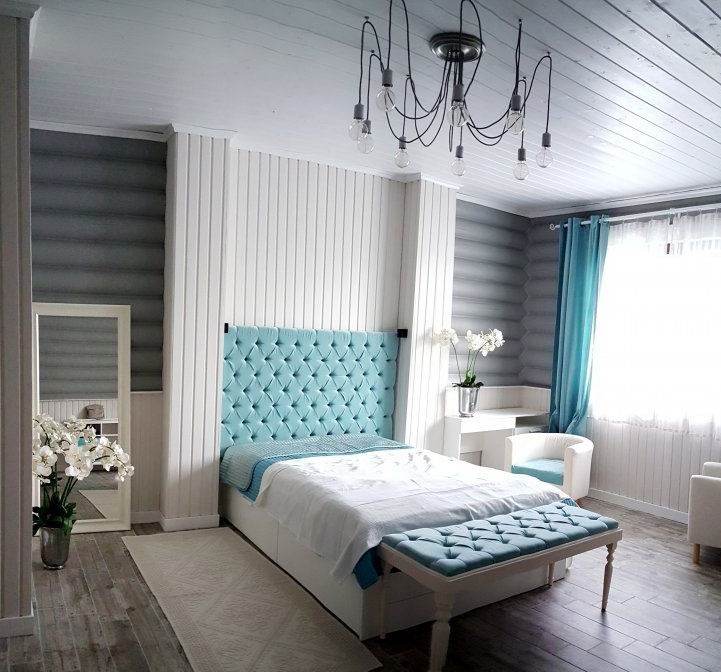
In this master class, you will learn how to perform the carriage screed technique using the example of creating a headboard for a bed.
A carriage coupler or, as it is also called “capitone”, has become a fashion squeak when decorating interiors in Europe following the results of 2012.
No wonder they say that the new is the long-forgotten old. It is customary to call this technique a carriage because in bygone times it was it that was used as upholstery for the salons of the royal family carriages and wealthy gentlemen.
Nowadays, the technology of creating a carriage screed is no longer a secret. Furniture fabrics, fillers, accessories and tools are available all the time in stores “all for of furniture”, And we not only got the opportunity to touch the splendor of furniture luxury, but also personally create it in our home.
In order to make the headboard we need the following materials and tools:
- plywood or any other dense sheet material;
- furniture foam 50 mm thick;
- furniture glue;
- furniture fabric;
- strong threads for making tightenings;
- decorative buttons to taste;
- two large needles;
- furniture stapler;
- electric drill;
- a nozzle for a drill - tsifenbor - for making holes in foam rubber or any similar object with a previously sharpened cutting surface.

Let's get to work. First, determine the size of the head. Usually it matches the width of the bed, and in our case it was 160 x 110 cm.
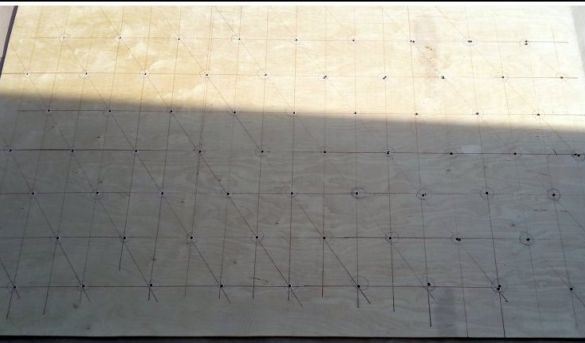
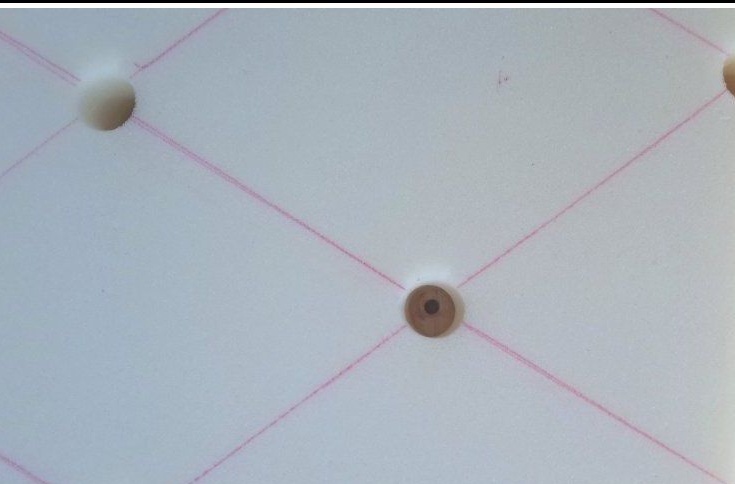
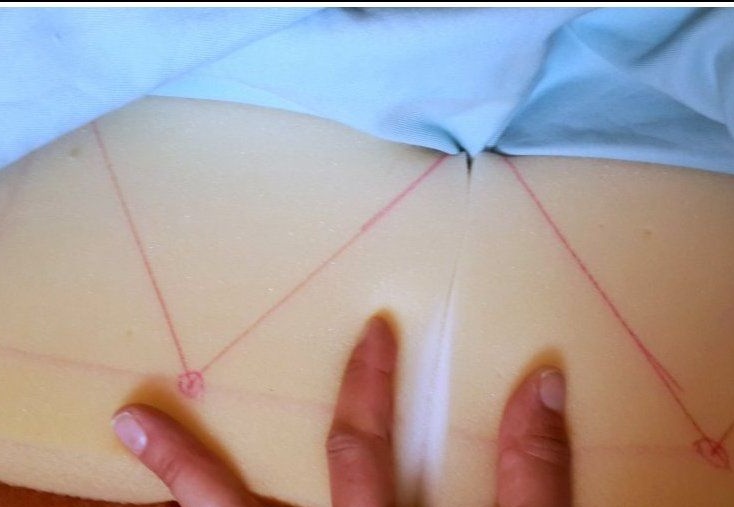
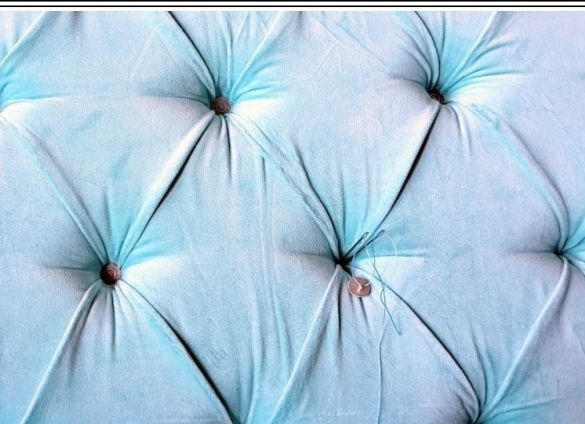
So that the screed has a characteristic shape and volume, we will make holes in the foam. Mark their location with a marker and connect the axes and diagonals with each other. The result will be a pattern in the form of diamonds.

So that the screed has a characteristic shape and volume, we will make holes in the foam. Mark their location with a marker and connect the axes and diagonals with each other. The result will be a pattern in the form of diamonds.
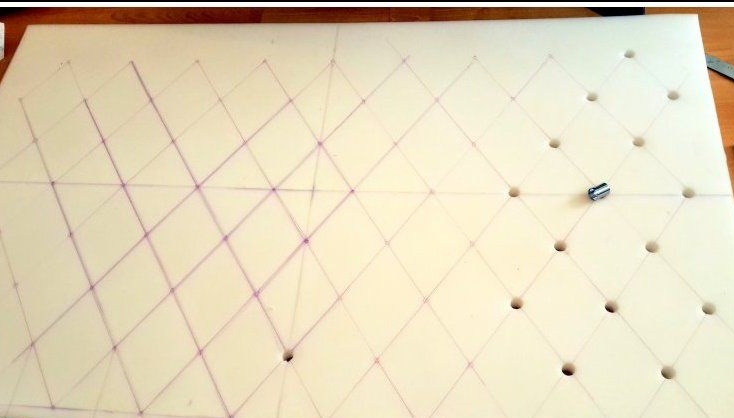
You must choose their size and location yourself. Actually, the appearance of our headboard will depend on this. Whether these will be large elements or small ones, how they will alternate is up to you. And when you decide, reflect your "sketch" on the foam.
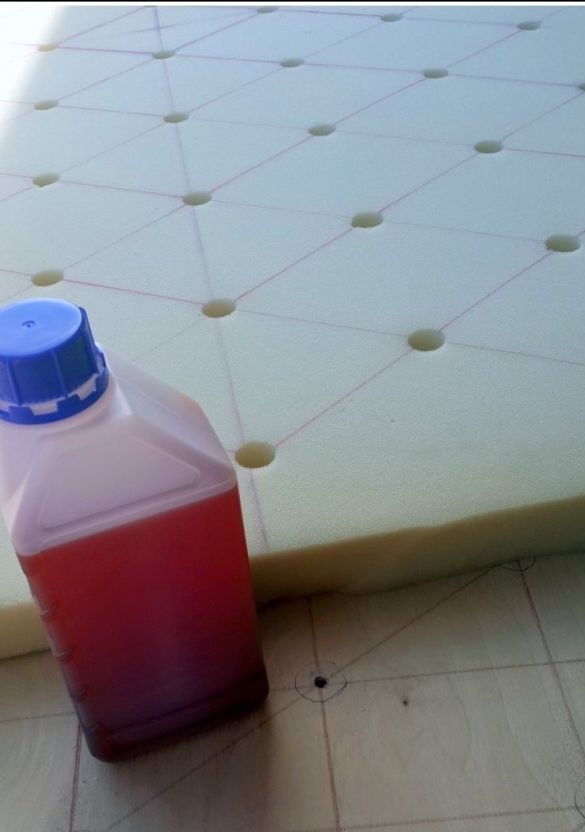
We got 3 rows of 9 rhombs and 3 rows of 8 - that is, 51 elements.
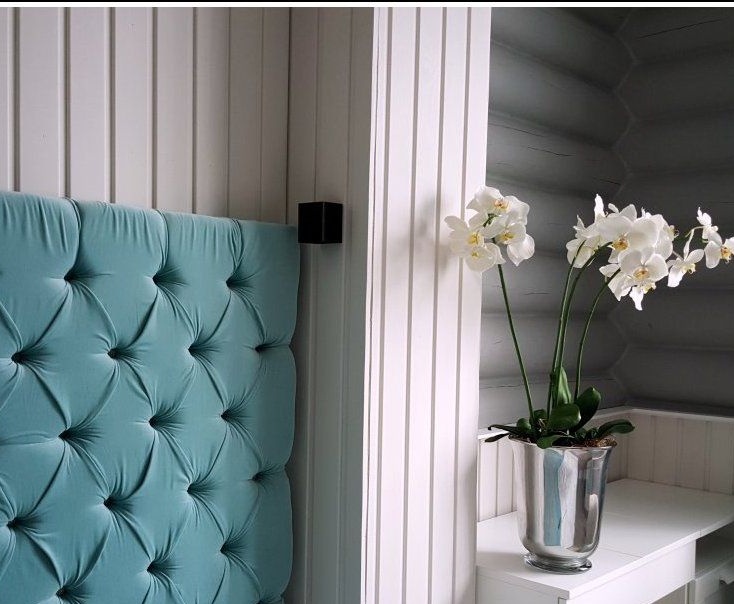
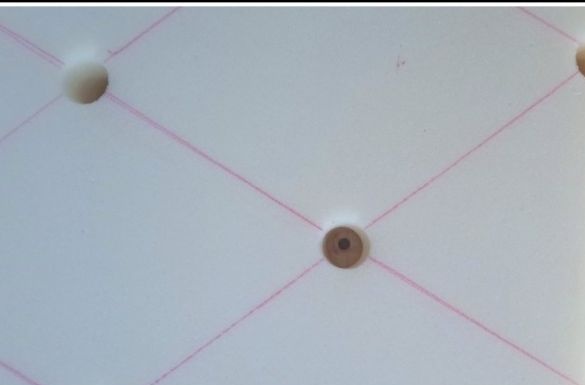
The intersection points of rhombuses can be decorated with decorative buttons, or you can do without them. The latter option is considered more refined, but we will think that this is a matter of personal taste preferences.
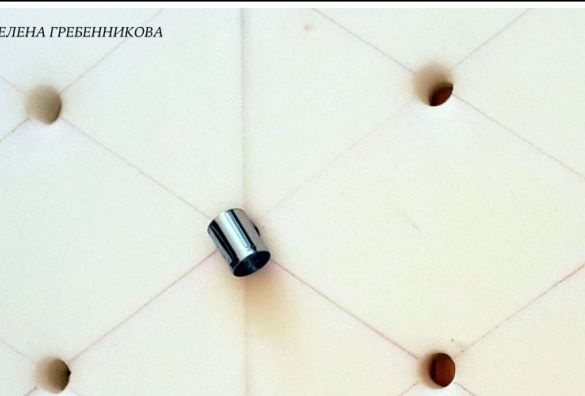
Now, at the points of attachment of the thread for the hooks that we marked, it is necessary to make holes. To do this, use a special nozzle on the drill - the dial.It can be replaced with any other object of a similar shape if you first sharpen one of the sides in the form of a cutting edge.
We don’t have a dial. On the Internet, you can see how someone is trying to cut holes with a paper knife. However, the result leaves much to be desired - it is impossible to work with torn holes of arbitrary shape. How to be No problem! A set of culinary forms for canapes came to our aid, among which a shape of the required diameter was found. So that she acquired cutting properties, we sharpened it with sandpaper.
We got 3 rows of 9 rhombs and 3 rows of 8 - that is, 51 elements.
The intersection points of rhombuses can be decorated with decorative buttons, or you can do without them. The latter option is considered more refined, but we will think that this is a matter of personal taste preferences.
Now, at the points of attachment of the thread for the hooks that we marked, it is necessary to make holes. To do this, use a special nozzle on the drill - the dial.It can be replaced with any other object of a similar shape if you first sharpen one of the sides in the form of a cutting edge.
We don’t have a dial. On the Internet, you can see how someone is trying to cut holes with a paper knife. However, the result leaves much to be desired - it is impossible to work with torn holes of arbitrary shape. How to be No problem! A set of culinary forms for canapes came to our aid, among which a shape of the required diameter was found. So that she acquired cutting properties, we sharpened it with sandpaper.
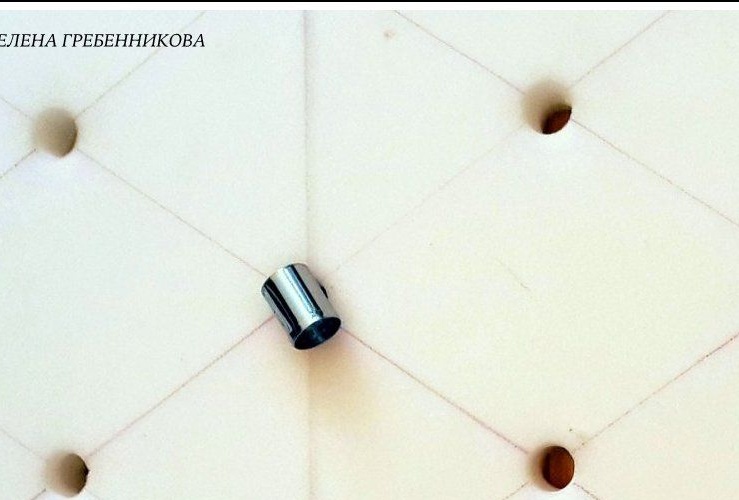
To make a hole in the foam, gently push on the form and simultaneously scroll it.
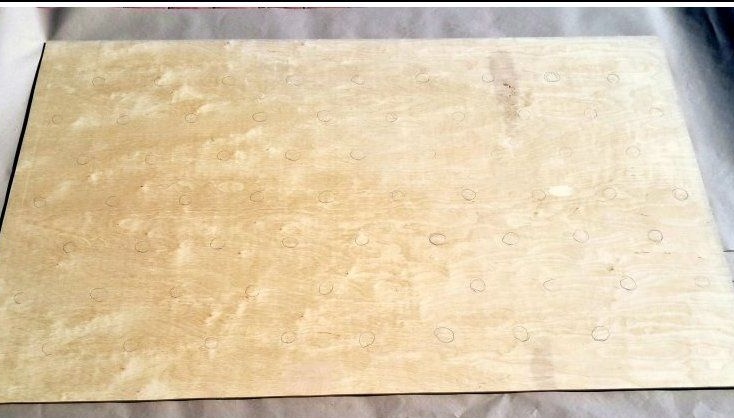
Now cut a sheet of plywood of the same size as the foam mat. Align the two layers together and transfer the marking to plywood.

Strictly in the center of each of the holes in the foam rubber, drill holes in the plywood with a drill.
Now cut a sheet of plywood of the same size as the foam mat. Align the two layers together and transfer the marking to plywood.

Strictly in the center of each of the holes in the foam rubber, drill holes in the plywood with a drill.
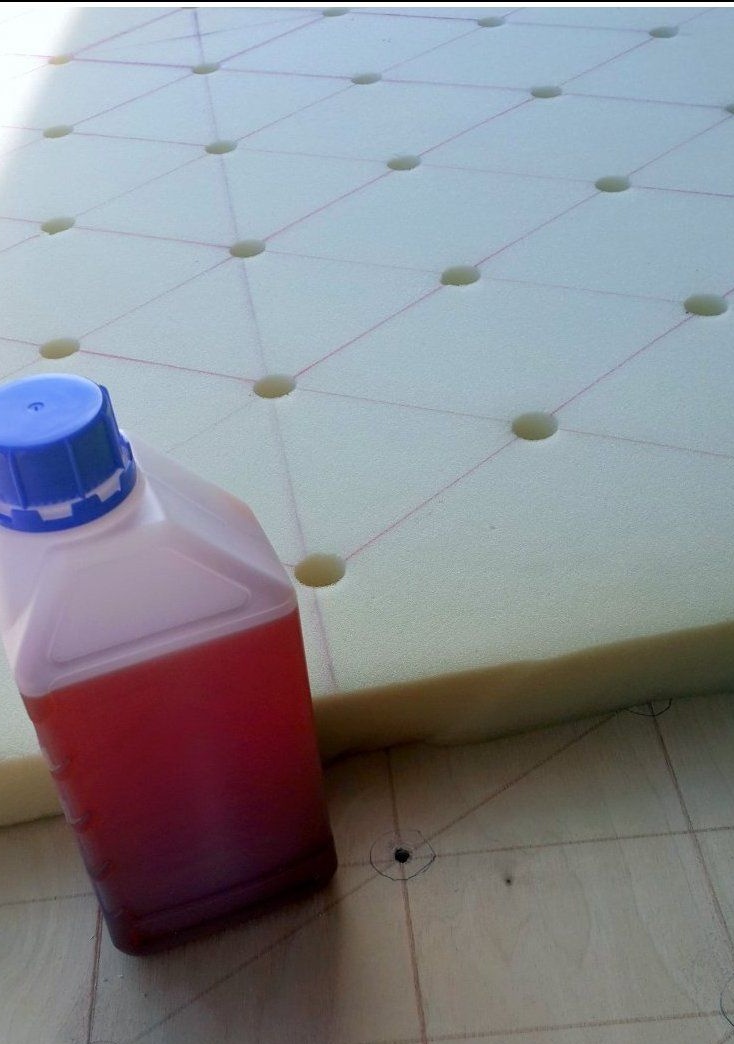
Take the opportunity and for the last time check whether you did everything correctly, are all the holes matching? If so, feel free to move on to the next step - glue the foam sheet to the plywood so that it does not shift during operation. Keep in mind that furniture glue quickly sets and you need to act quickly, otherwise after a minute, even with a great desire, you will not be able to tear off a layer of foam from plywood.

It's time to start the most interesting stage - to fit our headboard with furniture fabric.
Immediately make a reservation that we could use a synthetic winterizer or batting on top of foam rubber to give the carriage coupler an extra volume. However, this was not at hand and we could completely do without it.
Let me remind you that the size of the finished part will be 110 x 160 cm. However, we need much more fabric based on weights + allowance for fasteners with brackets.
By the width of the headboard, the largest number of points for hooks is 4 (we calculate the fabric stock at 4-5 cm per point, that is, 16 - 20 cm, depending on the type of fabric). The length of the number of dots in a row is 10 (fabric stock - 40-50 cm.).
So, by simple calculations, we calculated that the piece of fabric should be at least 144-150 cm wide and 220-230 cm long. If the fabric stretches, it will need less, if the fabric is thick and dense - more.
It is necessary to start laying screed on one side, gradually using the supply of fabric that we have made in our calculations.
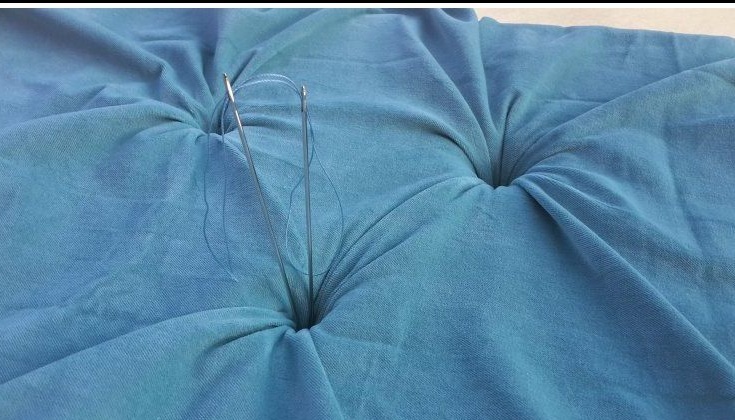
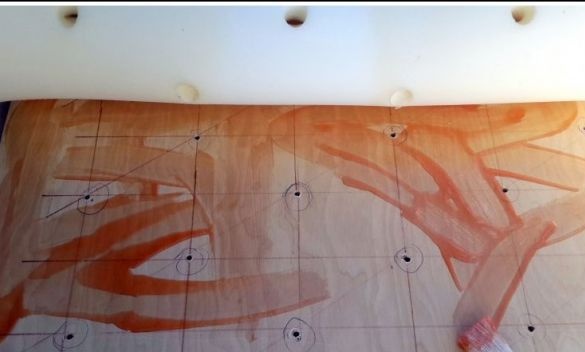
In order not to lift and turn the headboard each time in order to fix the thread on the reverse side, when forming the braces for fixing the fabric, we use two needles simultaneously. We pass the thread folded in two into two needles and insert them into the fabric with some distance from each other. Then we grope a hole in the plywood and thread the needles into this hole.
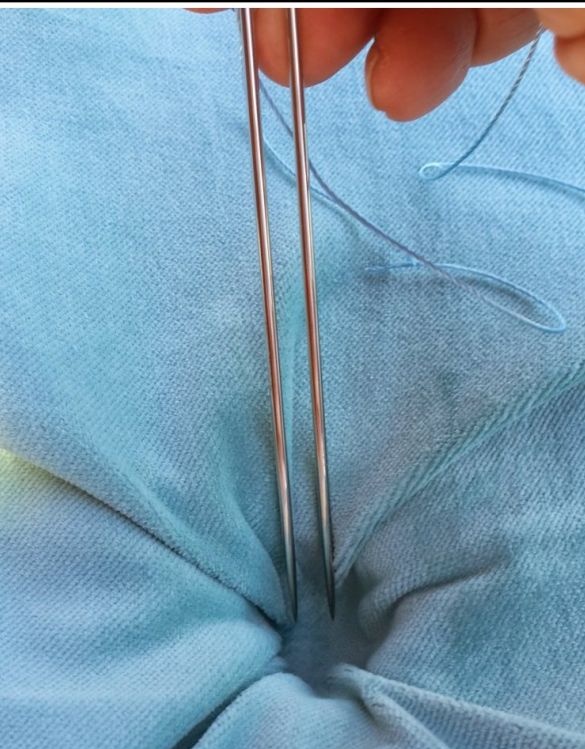

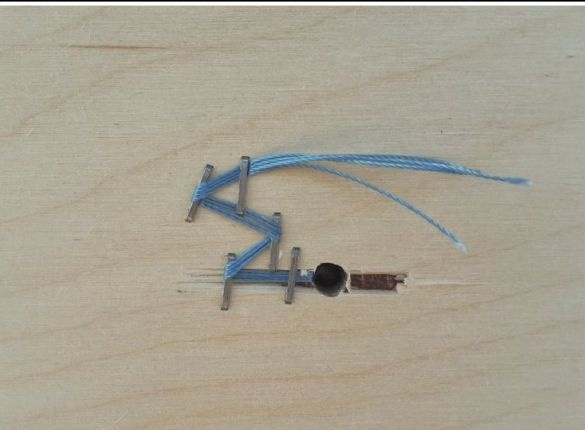
We pull the thread from the back and fix it with brackets using a furniture stapler in the manner shown in the photo. This is necessary so that the thread does not weaken and cannot slip during operation.
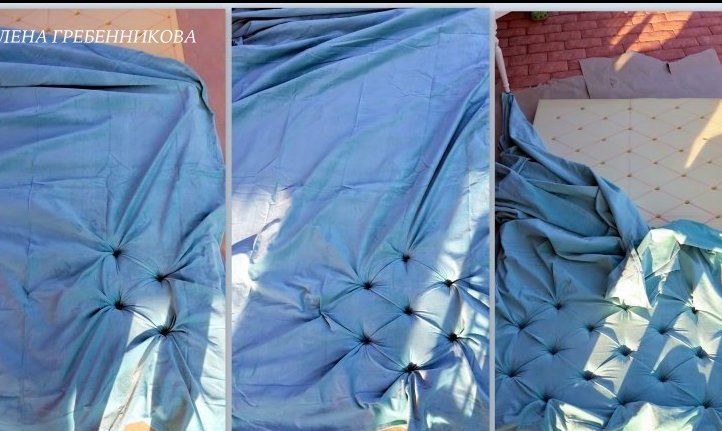
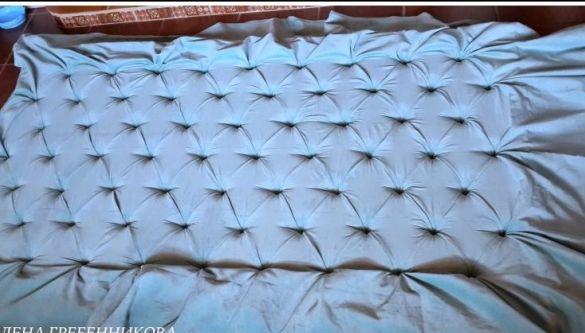
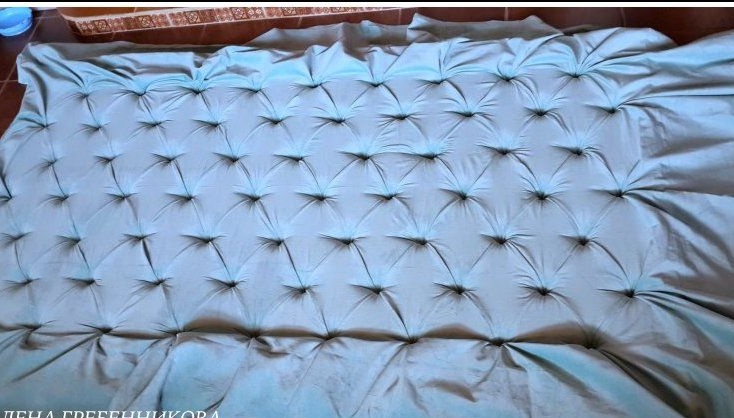
The photo shows how the work is going.
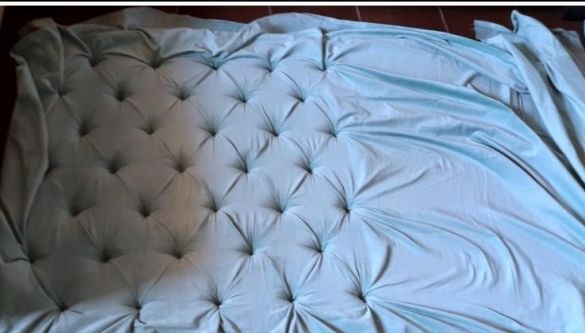

The photo shows how the work is going.

We recommend that you first make the weights with threads, and only then fasten the decorative buttons. All this is because if you fasten the screed directly on the button, its plastic leg can break and ruin the whole product. You can use special furniture buttons, but they are more expensive and it is not always easy to find the right shade and size. Therefore, it is better to sew buttons at the last moment solely as a decorative element.
It remains for us to draw the edges of the headboard, securing the fabric with staples on the plywood from the wrong side.
To hide the excess tissue, we form folds. To do this, we make a shallow incision in the foam rubber perpendicular to the edge and carefully tuck the fabric fold there. We fix the brackets on the back.

To hide the excess tissue, we form folds. To do this, we make a shallow incision in the foam rubber perpendicular to the edge and carefully tuck the fabric fold there. We fix the brackets on the back.
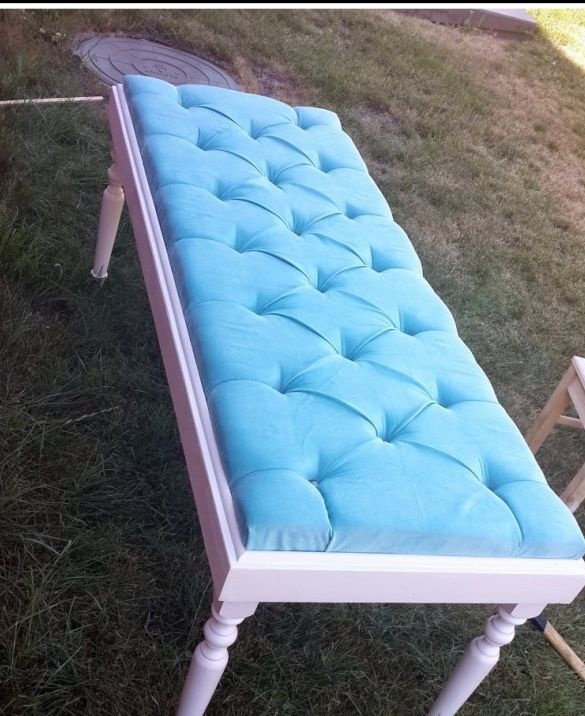
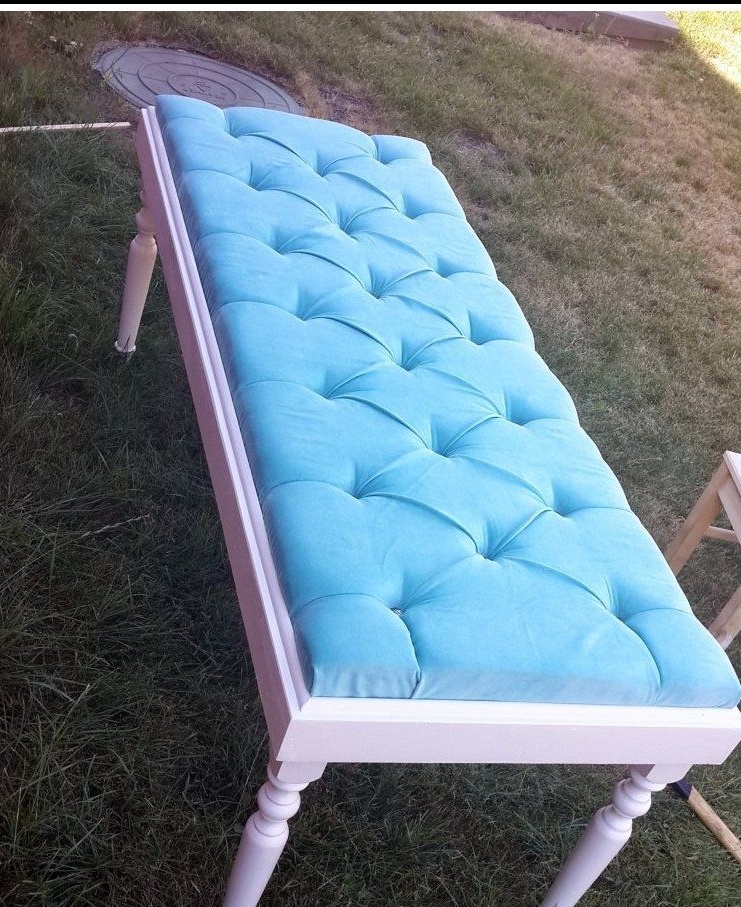
A little patience and zeal, and the technique is not as complicated as it seemed at the beginning.Our work is ready! To complement the picture from the remains of foam rubber and upholstery fabric, you can make a side table for the bed.

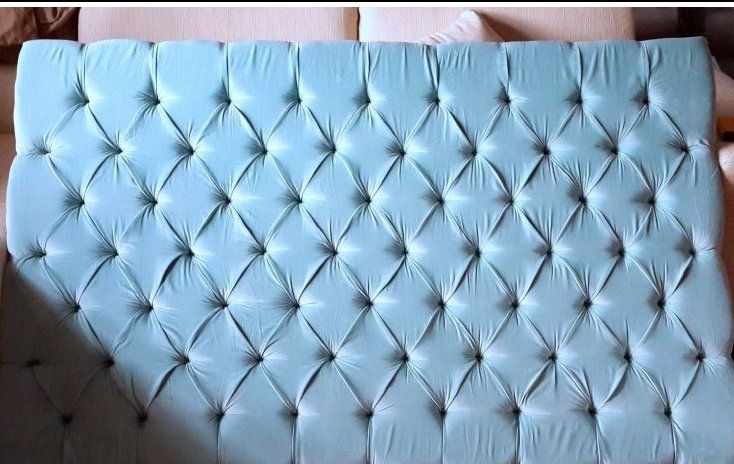

It remains to decorate the headboard with buttons and set it in a place of honor. Beauty - and more!
And we thank Elena Grebennikova for an informative master class.
And we thank Elena Grebennikova for an informative master class.