
Today we will tell you how to build a pergola on your site quickly and relatively inexpensively, without having any special skills and experience. Sophisticated tools we also do not need. From the electric tool we will be limited to a drill and a screwdriver. If you already managed to get an electric jigsaw in the household - excellent, it will save us time. If not, it doesn’t matter either, use a hand-held hacksaw on wood.
For construction, we use pine, as the most inexpensive wood species. When buying lumber, pay attention to the degree of drying of the tree. If the pine is moist, after installation the structure will certainly lead and the pergola will have to be redone or completely removed.
Raw pine need to be bought in advance and left to dry indoors or under a canopy for several months before being put into business. The degree of drying can be judged by the color of the wood and the characteristic muffled sound that it emits when tapped.
If you have dealt with the selection and preparation of the tree, get to work.
To build a pergola we need:
1. Materials:
- a beam with a section of 50 x 100 x 4000 mm. - 4 things.;
- a beam with a section of 50 x 100 x 3000 mm. - 9 pcs.;
- a beam with a section of 100 x 100 x 3000 mm. - 4 things.;
- toner for wood;
- cement - 50 kg .;
- bolts with square headings, nuts and washers for them - 4 pcs.;
- self-tapping screws
2. Tools:
- a manual hacksaw for wood (preferably a jigsaw);
- roulette;
- paint brushes;
- emery paper is fine-grained, and preferably a grinding machine;
- square;
- drill and drill on wood for drilling holes for bolts;
- screwdriver;
- pencil or marker;
- hammer;
- a chisel;
- plumb line;
- level;
- clamps;
- manual drill (you can do without it).
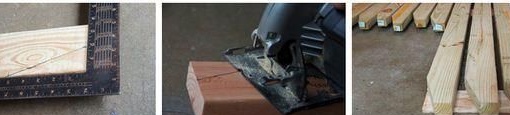
1. Preparation of lumber and individual parts
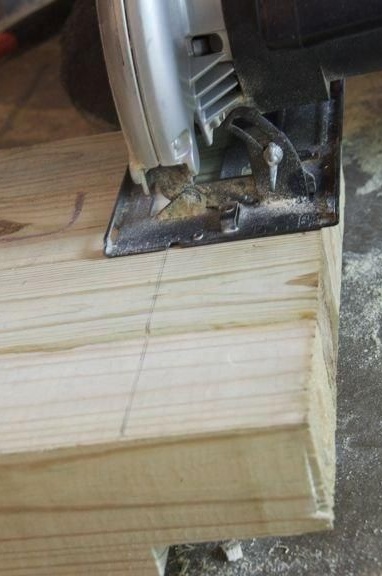
Using a jigsaw or a regular hacksaw on a tree, cut the edges of the floor beams - that beam, which you have 9 pcs., And also a beam with a section of 100 x 100 x 3000 mm. It should turn out, as in the photo below.
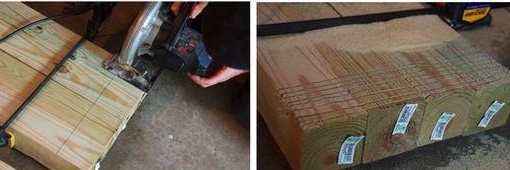
The remaining beam of wide cross section will be needed for racks. On it you need to make recesses, shelves, on which we install the longitudinal beams of the ceiling. To do this, fold 4 racks together, aligning them in height, and fasten with clamps. Make marks - measure 90 mm from the edge of the bars. and mark the cut line with a marker or pencil. The cut depth will be about 25 mm.
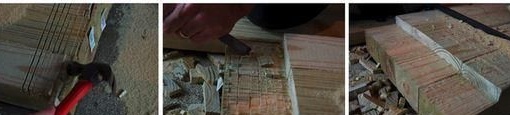
Using a hacksaw, make multiple cuts, starting from the cut line and gradually moving towards the edge of the beams.Carefully knock down the partitions with a hammer and clean the recesses with a chisel.
If you are lucky enough to have a manual router in your household, you yourself know how to use it here for its intended purpose.
The recesses-shelves should be made on both sides of the racks as shown in the photo.
2. Toner Parts Processing
For street wooden structures, and not only long ago, they invented wonderful paint toners that tint wood and at the same time preserve its natural texture. They are not too cheap, but after such paints there is no need to use a fixing layer of varnish, because toner gives the tree a lot of practical properties, such as hydrophobicity, resistance to ultraviolet radiation and others.
True, in such series there are primers and varnishes of various properties, however, practice has shown that even one layer of toner is enough to protect the tree from external influences. Two layers will make the coating much more durable.
But the main convenience is that with repeated staining after a few years, you do not have to peel off the hardened paint. It is enough to just lightly treat the surface of the wood with a grinder and apply a layer of toner.
So, decide on the tone and color the pre-sanded wood details. Wait for it to dry completely. If desired, apply a second coat.
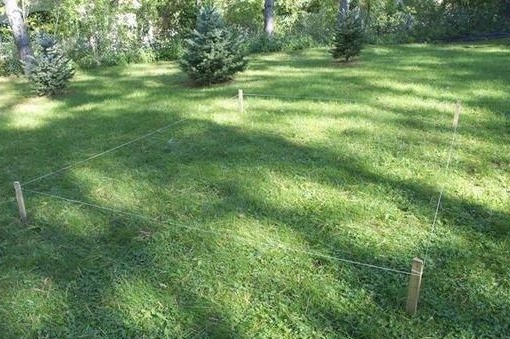
3. Marking on the ground and installing columns
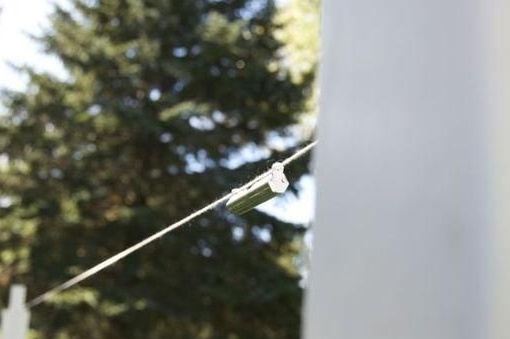
Take the pegs, the rope and mark out a place under the pergola with sides of 2.6 x 3 m on the site. For the rectangle to be correct, measure its diagonals - the values should be the same.
Using a drill or shovel, make holes under the pillars with a depth of about 1 m. Given the installation depth, a drill will be much more preferable. Place the racks in the pits and, using the cord and level, make sure they are at the same height. If the level is different - do not be lazy and adjust the fossa properly.
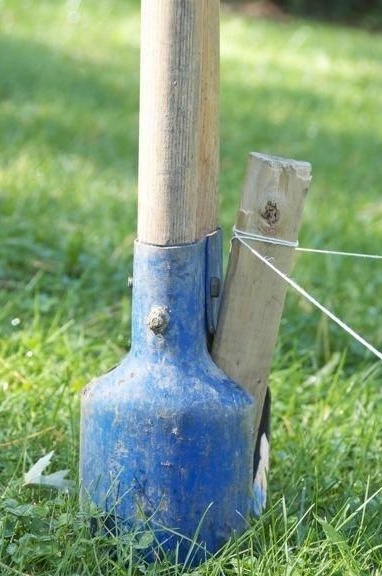
Racks should be installed so that the cuts in them pass along the long sides of your marking.
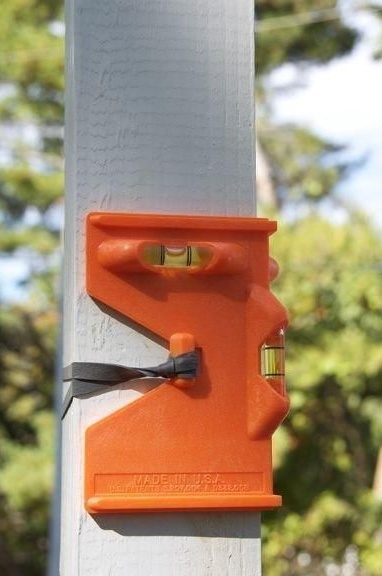
Fill the pits with cement mortar to achieve a stronger fixation in the ground. While the solution is setting, make sure that the racks are placed strictly vertically. Use a level for this. We took a special level for installing columns.
Allow the solution to solidify completely.
4. Installation of the remaining elements
Mount four longitudinal 4-meter beams on sawn notches-shelves in racks. Their edges for additional decorativeness should protrude 40 cm. Beyond the racks.
During operation, use an electric drill to drill through holes for bolts that will pass through two beams and a stand between them, thus forming a reliable connection. Fasten parts with bolts and nuts using washers.
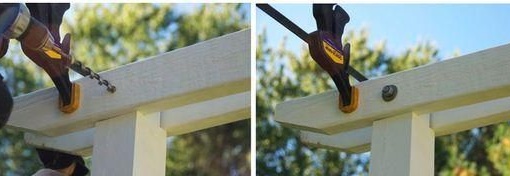
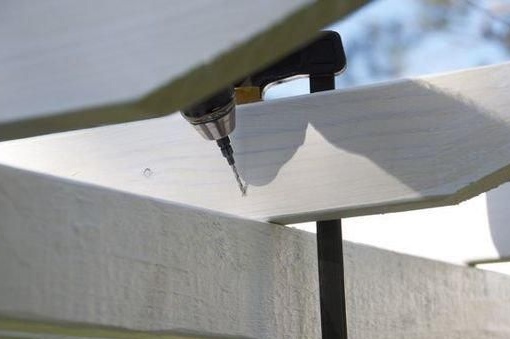
Spread the crossbeams evenly along the top of the longitudinal beams, fixing each with clamps and securing it with self-tapping screws and a screwdriver.
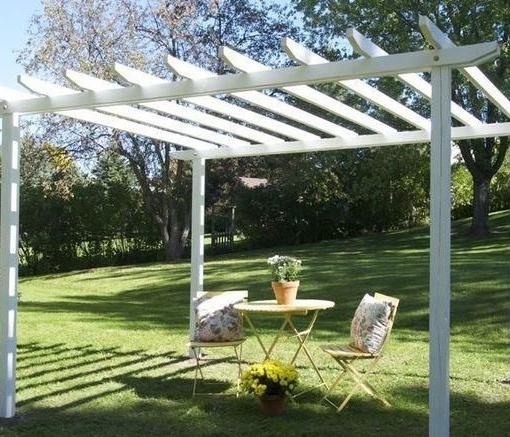
Congratulations the pergola is ready and you have done a great job! It remains to take care of its interior decoration, put here a dining table or deck chair, decorate the space with potted plants.
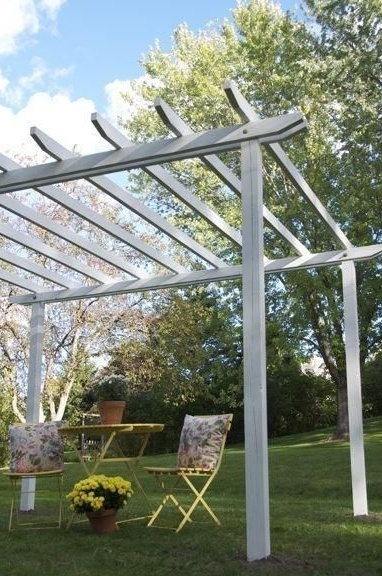
If you are a happy resident of the southern regions and from time to time seek refuge in the cool of summer, drape the pergola with translucent airy fabrics for additional shading or plant weaving plants around the perimeter. Thus, your creation will take on a complete look.