
Country house - This is truly a place for furniture experiments. Simple designs, extravagant solutions, a second life of old things - all this may be appropriate and will not cause any questions. And you will get a unique opportunity to exert your master hand and practice furniture and interior design without risking spoiling anything and being branded as unfamiliar.
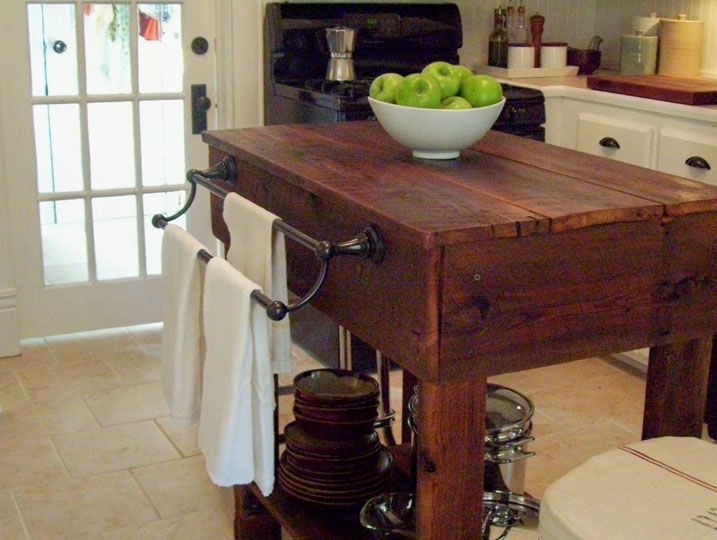
So read our article and go to the cottage to turn a pile of old boards into a wonderful kitchen cabinet.
And for this you will need:
1. Materials:
- old boards;
- stain;
- water-based varnish;
- solvent;
- putty;
- nails and screws;
- carpentry glue.
2. Tools:
- brushes for applying varnish;
- a hacksaw for wood or a jigsaw for sawing boards;
- marker or pencil;
- hammer;
- rubber putty knife;
- pliers;
- square (optional);
- screwdriver;
- sandpaper - fine-grained and coarse-grained.
Step 1. Search for materials
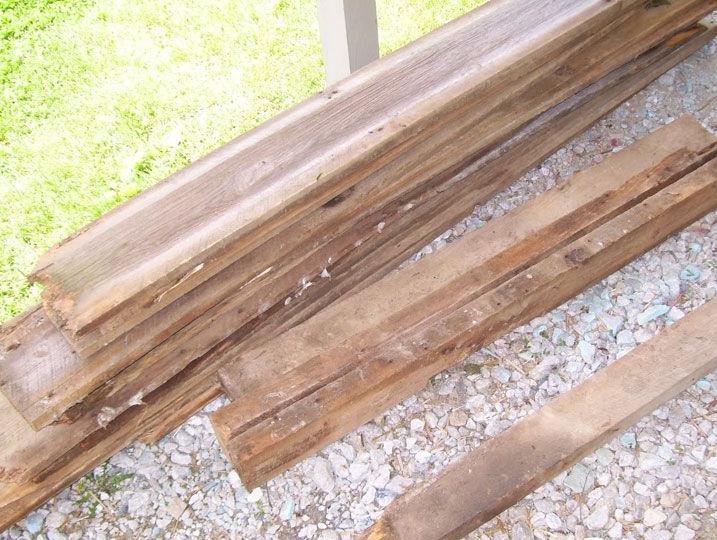
Do not rush to spend money on materials for cabinets. Surely you will find several unnecessary old boards that you forgot to think about long ago. If not, contact your neighbors or friends. We assure you that they will only be happy to get rid of unnecessary trash.
The material will fit pallets, old benches and other products from which you can get a couple of boards. For our master class, we sorted out a malfunctioning bench that was being cooled on the farm.
Step 2. Preprocessing parts
Prepare the boards. To do this, cut them into pieces of the right size, remove the nails, if any, clean from dirt and planing. Grind with a grinding machine or manually with sandpaper - first coarse-grained, then fine-grained.
Step 3. Countertop
Decide on the dimensions of the future cabinet and select the most interesting, textured copies of boards for the countertop, which will add a touch of color and emphasize its deliberately careless rustic style. Put the selected boards on a flat surface, firmly pressing them to each other so that there are no large gaps between them.
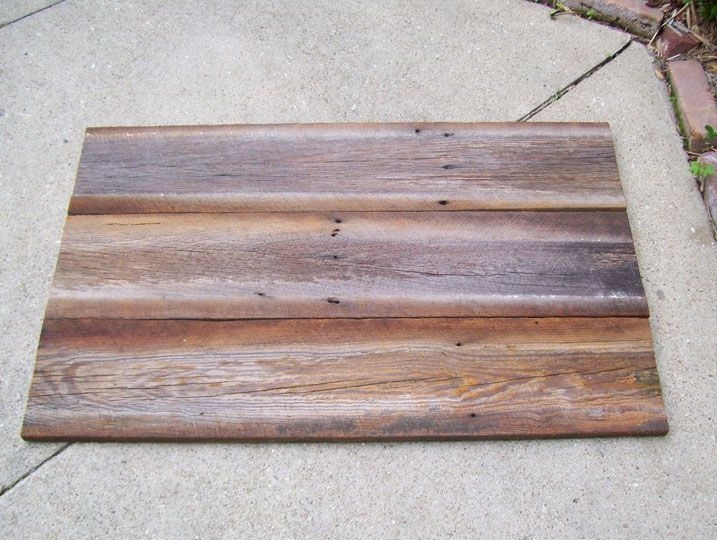
Assemble the shield for the countertops using self-tapping screws and a screwdriver, fixing them with two pieces of boards, which is shorter. Before you twist the screws, you can coat the side joints with carpentry glue for strength. If you did just that, leave the workpiece to dry completely.
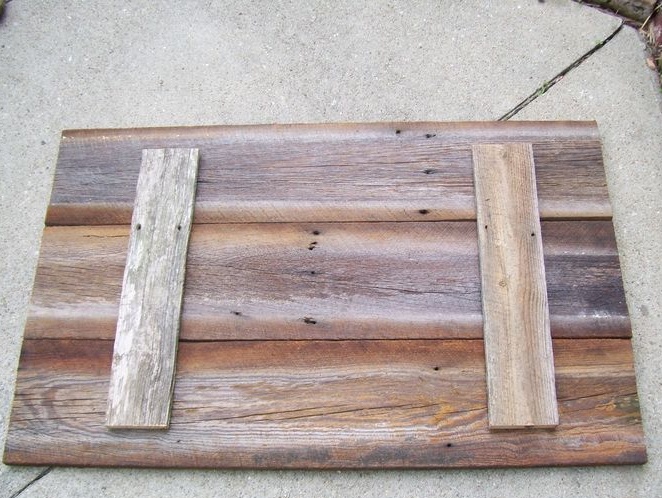
To give rigidity to the countertop, cut off the rest of the boards at an angle of 45 degrees using a square and a hacksaw, and attach them with screws using the screws shown in the photo. Choose the optimal length screws so that they do not pass through from the front.
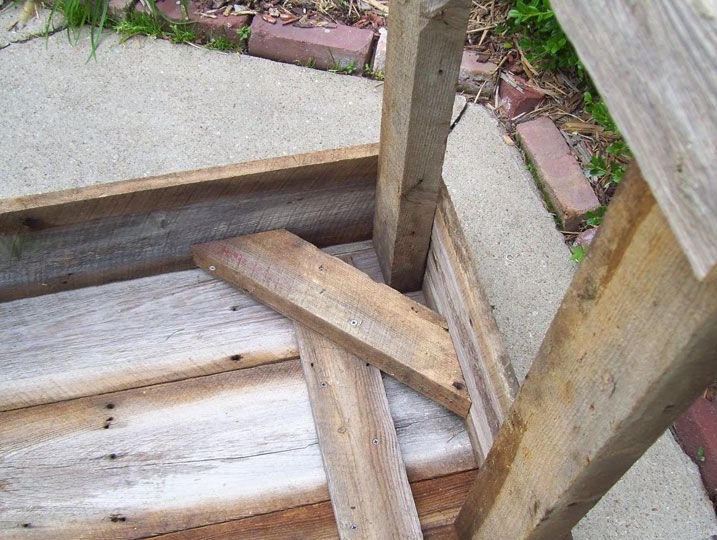
Step 4: Lower shelf and cabinet assembly
The shelf does not hurt, because here you can store dishes, products and various kitchen utensils. Do not approach its manufacture so meticulously. The number of boards may be less, their quality is slightly worse, and the fit here is not so important. Do you want - arrange the gaps between the boards.
Prepare boards for the shelf and set them aside for now. First, determine the height of the product and saw off from the bars pieces under the legs of the required length. It is desirable that the working surface is at a level of 80 cm from the floor. Screw the legs to the countertop with screws. For stiffness, make the crossbars below. They will serve as a support for the shelf.
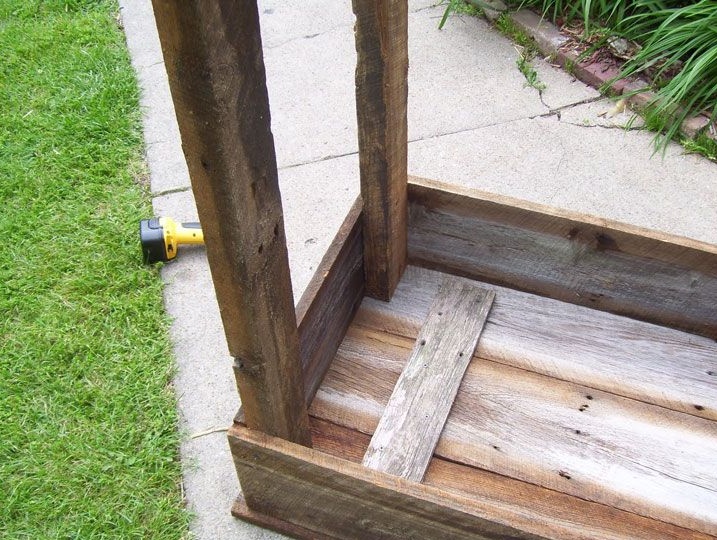
Boards prepared for the shelf, nail with nails or screw with screws to the crossbars.
Step 5. Finishing
Inspect what you got. If you feel the need, sand again with fine sandpaper.
Despite the simplicity of the design and its laid-back execution, we will need putty today. For the convenience of further operation, fill the gaps between the boards of the tabletop with a rubber spatula with a putty knife, wait for it to solidify and carefully grind the surface of the cabinet.
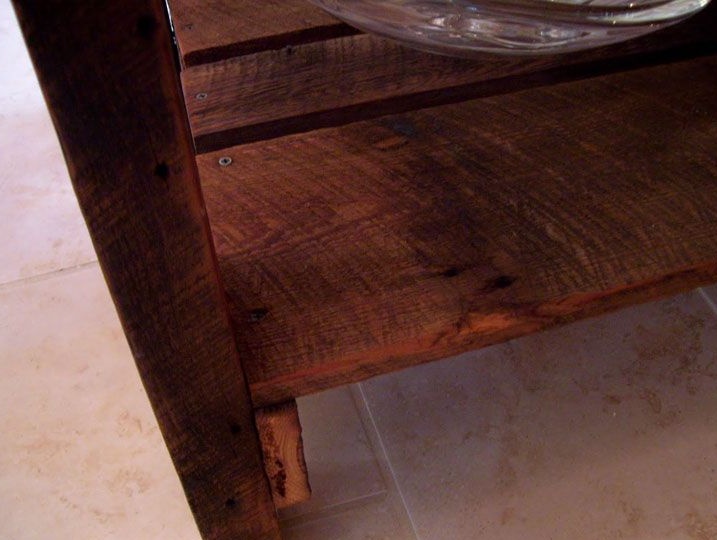
Now clean everything from dust and treat the cabinet with a stain of the desired shade. Let it soak and dry and appreciate the tone. If it is not deep or bright enough, go over the stain again.
Treat the cabinet with solvent to degrease the surface and clean it of dirt and open it with a matte varnish. In this case, we do not recommend the use of glossy varnish, since it is not compatible with the style in which the cabinet is made.
To achieve a dense and reliable coating, sand the lacquered surface to micro-scratch and apply another coat of varnish. You can repeat the procedure for the third time.
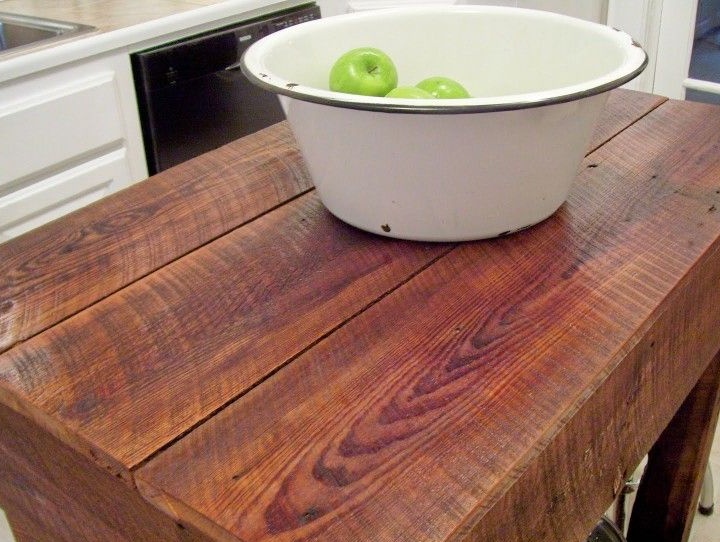
The stand is ready! Let her dry thoroughly, get rid of the specific smell of paints and varnishes and use the pride of the creator in your kitchen.