
There is no nicer in the world than birds chirped in the springtime in our gardens. However, for birds (for example, tits - nurses in the garden) to settle in the district, they need a food base. Moreover, not so much in the summer as during the winter period. We could build a titmouse, but it is not as simple as it might seem at first glance, and it requires skills in working with a tree.
In this master class, we will tell you how to find a worthy use of old dishes and make two options for elegant bird feeders at once, which will not only help them not die during the harsh winter season, but also decorate your garden.
Option number 1
To make a cup feeder we will need:
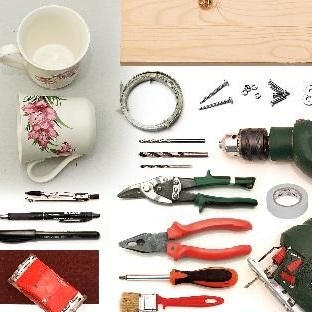
1. Materials:
- a small segment of the board;
- a pair of old ceramic cups;
- galvanized clamp tape or just a piece of galvanized sheet;
- screws and nuts for them - 4 pcs. (you can use wood screws);
- screws for attaching the feeder;
- reinforced washers - 2 pcs .;
- paint on wood or oil (natural drying oil);
- stain at will;
- varnish on wood;
- electrical tape;
- paper.
2. Tools:
- jigsaw;
- electric drill, as well as drills for wood and metal;
- scissors for metal;
- screwdriver;
- pliers;
- ruler;
- compass;
- scissors;
- pencil or marker;
- sandpaper of fine and coarse grain;
- brushes for coating.
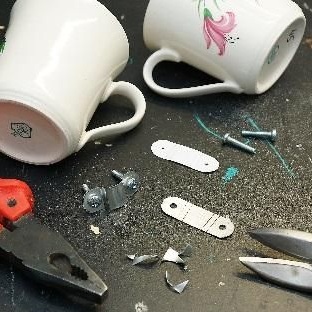
1. The manufacture of brackets for attaching cups
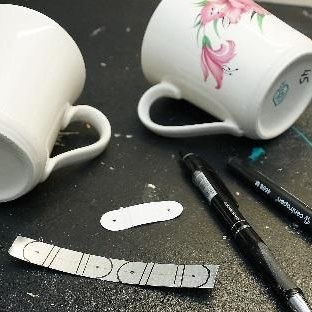
In order to make staples of the same size and shape, make a template. Take paper and cut a strip of 1.5 x 5 cm. Attach the resulting blank to the handle of the mug and make several marks - the length of the bracket, the location of the bends and the point for drilling holes for the screws. Round the edges of future braces.
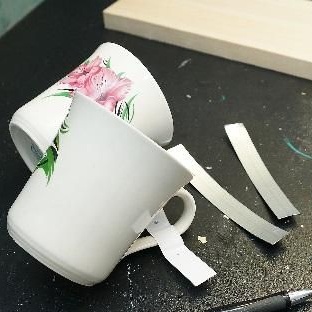
Make paper patterns and transfer them to a piece of galvanized clamp tape. If you did not have a clamp tape, use ordinary galvanized tin and use a pair of metal scissors to cut a strip of the required size.
For the feeder we need two staples.
Using a drill, make holes for the screws using a drill bit for metal. Take scissors for metal and cut 2 workpieces along the marked outline.
Bend the workpieces with pliers, giving them the shape of staples. Please note that the bracket should fit snugly on the handle of the cup.
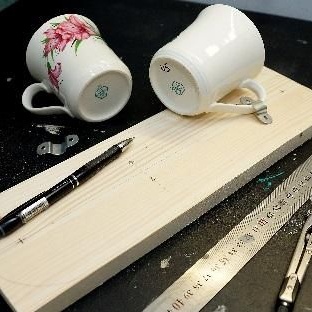
2. Making a wooden base
On the board, outline the contours of the base of our future feeding trough.To do this, use a ruler and a compass - as shown in the photo below.
Marker or pencil mark the mounting screws and brackets. Use a drill on a tree, drill holes. Now if you are using screws, turn the workpiece over and drill holes for nuts to a depth of 3-4 mm. drill with a larger diameter. This is necessary so that the nuts go flush.
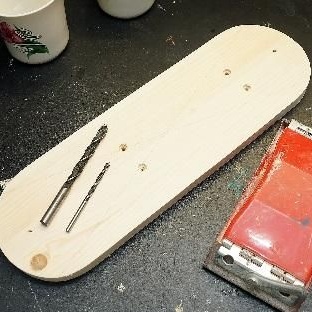
Instead of screws with nuts, you can take simple screws. In this case, use a drill to make holes with a drill of a smaller diameter than the screws themselves. This will prevent cracking of the workpiece during the screwing process.
With a jigsaw, cut the workpiece and grind it carefully, using first coarse-grained emery paper and only then fine-grained. This will significantly speed up the process, if you selected used material for the feeder. Use a grinder in case you have such an opportunity. However, such small parts are easier to handle manually.
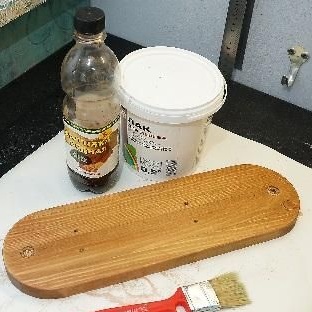
Now you need to protect the tree from external atmospheric influences. To do this, process the wooden base at your own discretion:
- toner;
- paint on wood;
- stain;
- oil or natural drying oil.
If you have chosen one of the first three options, use a topcoat. If possible, apply it in two layers.
If you settled on more natural materials, such as linseed oil or linseed oil, remember that they do not protect the wood to a sufficient degree. Oil, for example, requires coating in several layers paired with a solvent so that each new layer penetrates deeper than the previous one. And only in this case will it serve as a protective coating.
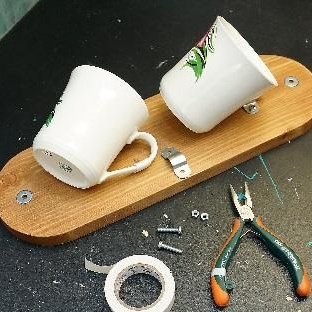
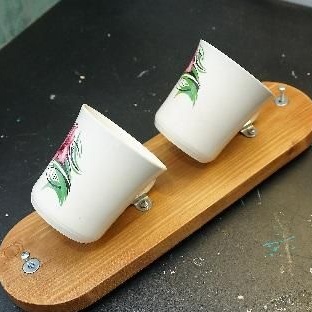
3. Finish assembly
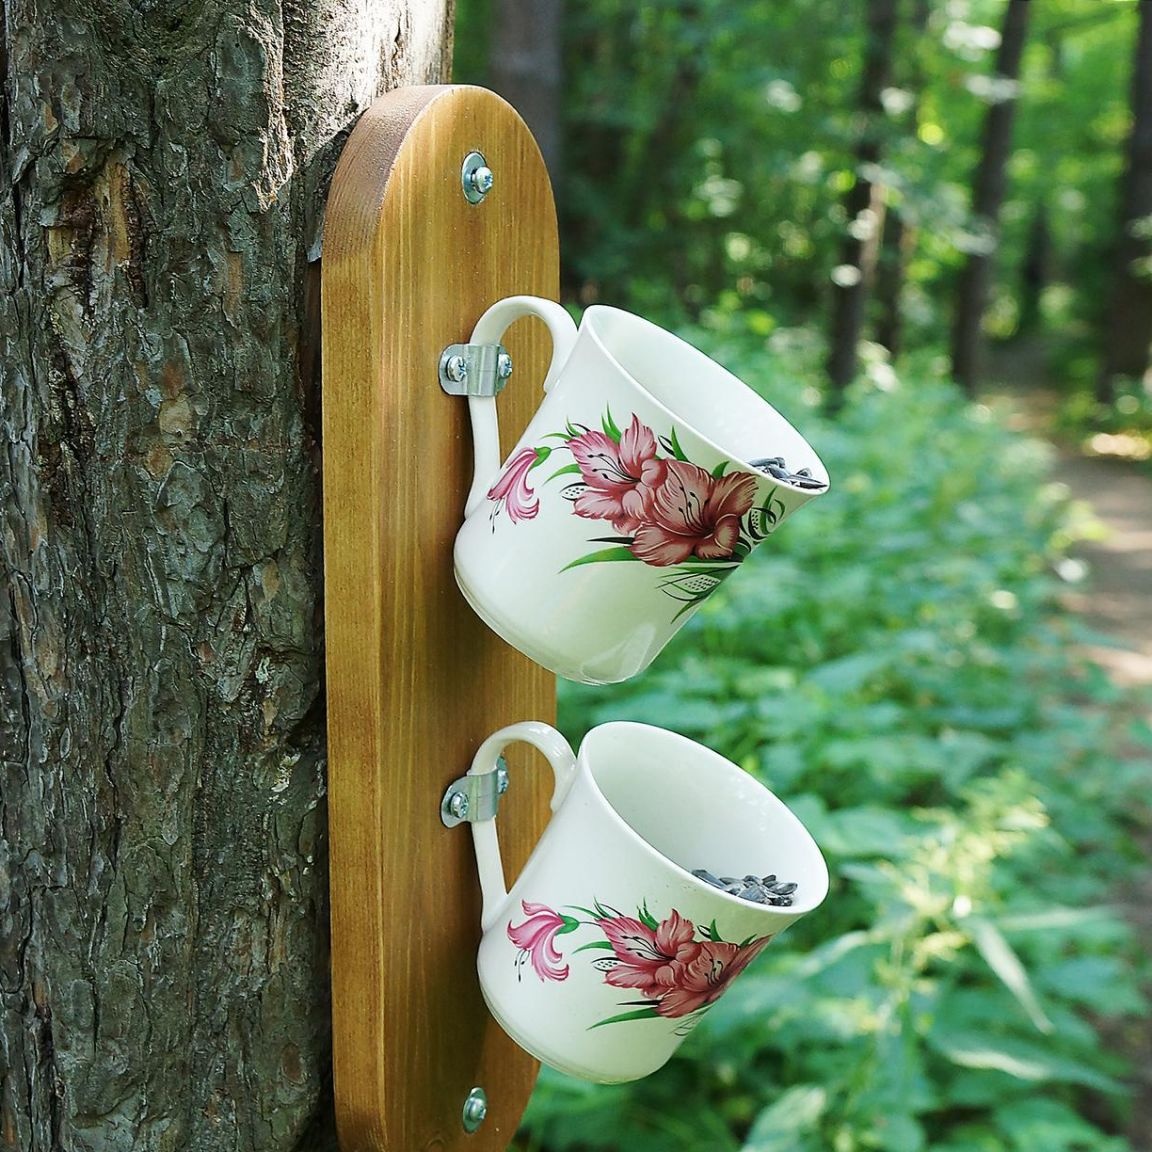
In order not to damage the ceramics and avoid its splitting, you can wrap the cup handles with several layers of electrical tape. Then pull the cups to the wooden base using staples, screws and nuts. Lock them in the correct position.
You can mount a ready feeding trough to any wooden structures - whether it be a fence or an arbor, a wall of a house or its porch. We secured our own on a tree.
Option number 2
Now let's try to make another wonderful feeding trough using old plates. The process is different and we need a few others materials and tools.
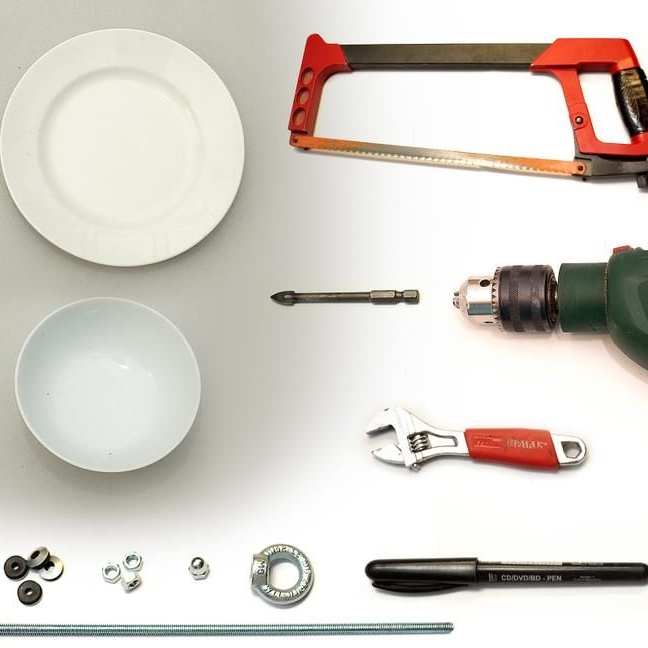
1. Materials:
- flat ceramic plate;
- deep ceramic plate of smaller diameter;
- metal stud with thread, 30 cm long;
- nuts for studs - 3 pcs.;
- rubberized washers - 4 pcs.;
- a nut cap for a hairpin - 1 piece;
- eye nut for studs - 1 pc.;
2. Tools:
- a drilling machine or a conventional electric drill;
- a drill for ceramic or glass (the diameter must match the diameter of the metal studs of the base);
- adjustable wrench;
- ruler;
- marker;
- a hacksaw for metal or grinder.
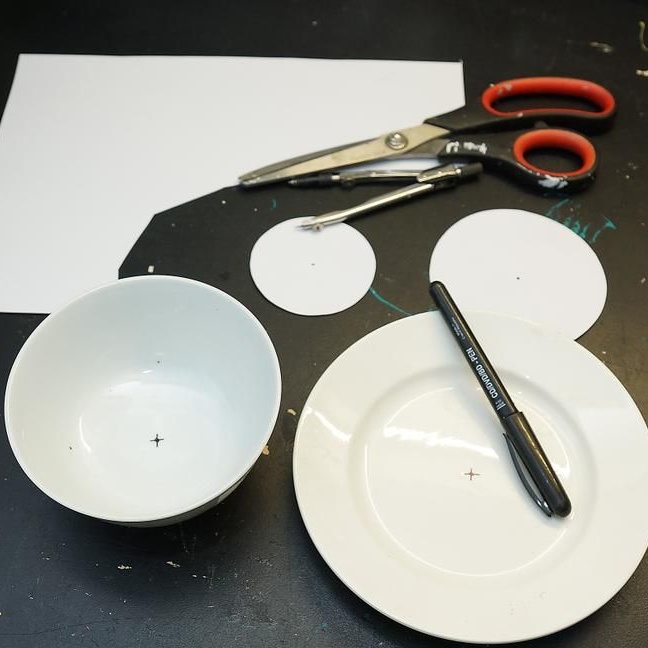
1. Preparation of items
On both plates, calculate and mark with a marker the center.
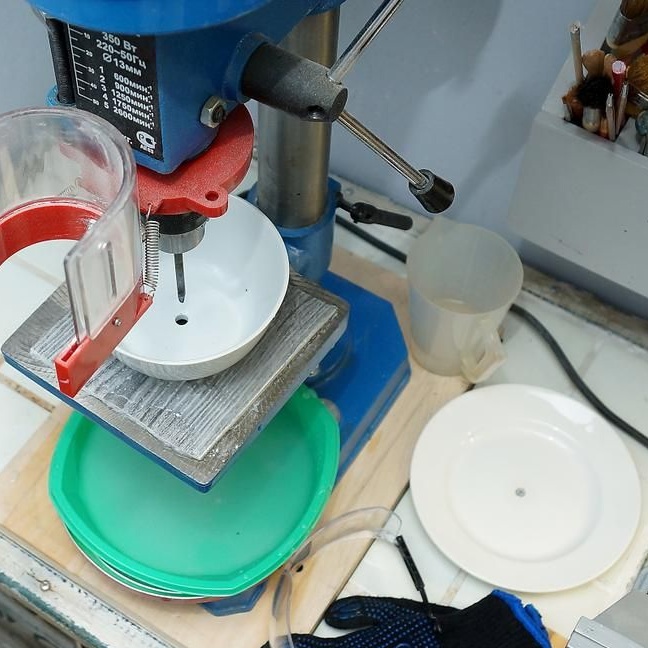
Fill the plates with water so that the drill does not overheat, and make holes with a drill or using a drilling machine. We used the machine. Place an unnecessary piece of wood or plywood underneath to prevent damage to the workplace.
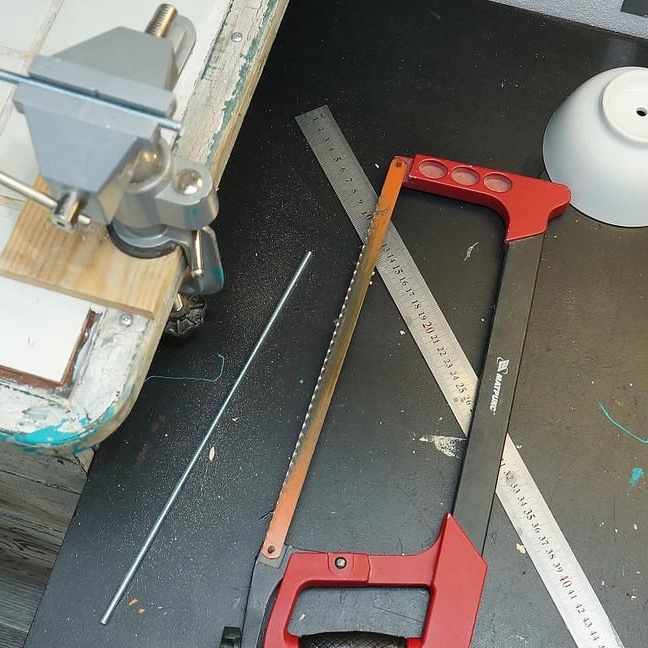
Saw a length of 30 cm from a metal stud with a hacksaw or grinder. It will become the base axis of our future feeding trough.
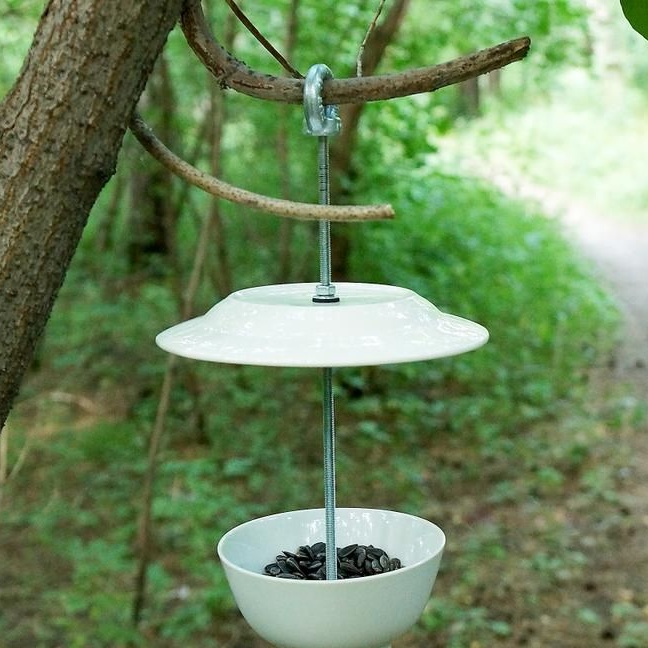
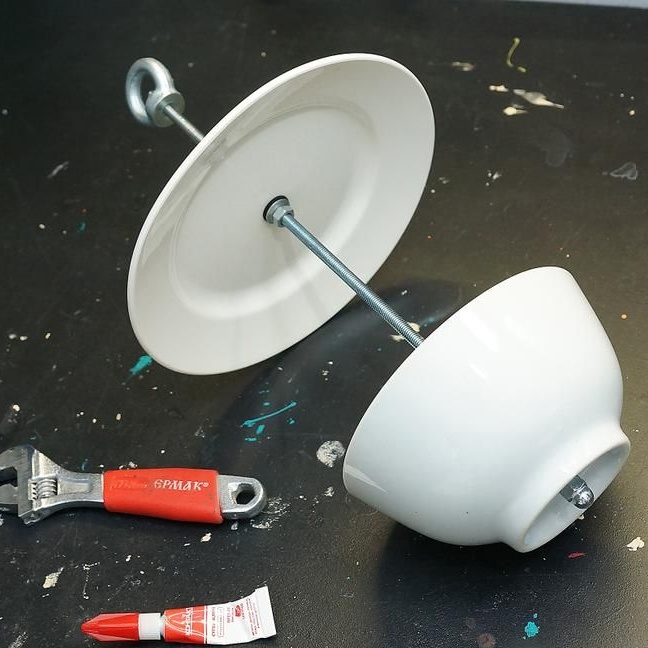
2. Assembly
Everything is ready - you can start assembling the feeder. About how to do it right, our photos will tell.
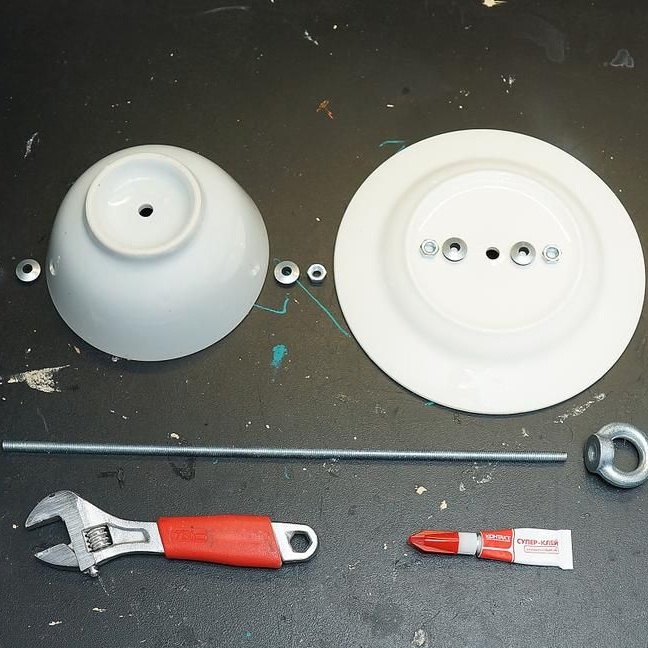
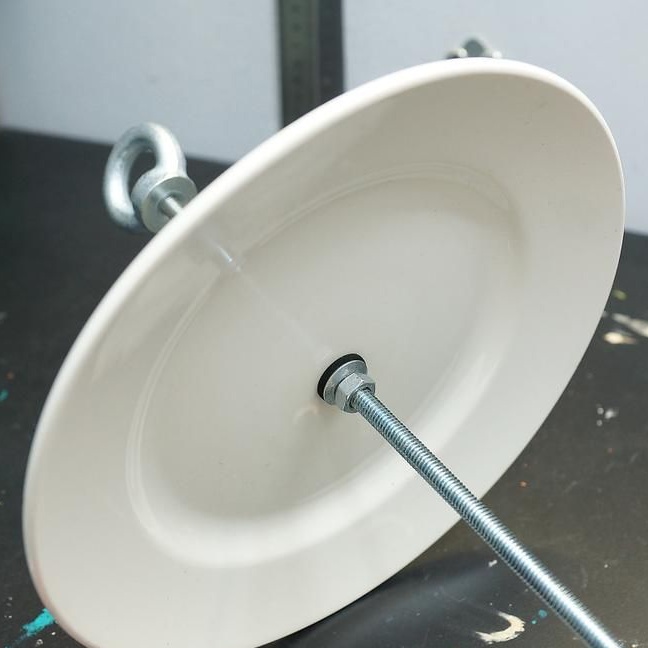
If you did not find rubberized washers, use the usual ones paired with rubber gaskets of your own manufacture. They will help protect ceramics from mechanical damage during assembly and use.
The second feeder is ready. We placed it on a tree, using an eye-nut for fastening, and twisted the hairpin until it rested against the base of the branch (see the 1st photo).