
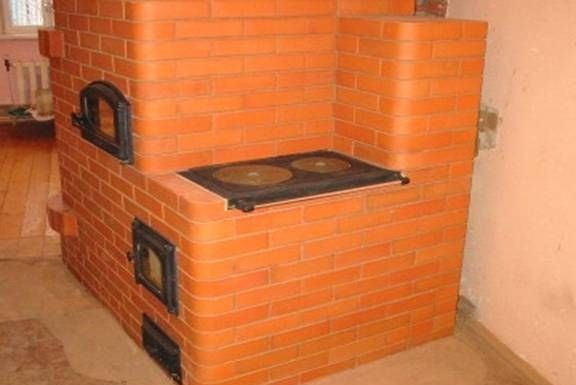
One type of furnace
In the cold season, in the country or in the village can not do without a stove. After all, with the help of it it is convenient to cook food and warm the room using a commonly available type of fuel - firewood. To build a simple furnace, you do not need to be a professional, it is enough to know the basics of physics, have straight arms and at least a little understanding of the types of furnaces, their structure. In this article we will look at how you can build a small oven yourself cottages. Such an oven will have a stove and a cooking chamber for cooking, and will also be able to heat the room in which it is installed.
Materials and tools for the construction of the furnace:
Materials:
- red brick 500 pieces and plus another 600 pieces for the pipe;
- red clay (6-8 buckets will be needed);
- 0.5 cubic meters of sand;
- 3-4 bags of cement;
- water.
Metal elements:
- furnace and blower doors;
- three doors for cleaning the chimney;
- grate;
- 4 cast-iron valves;
- cast iron plate (dimensions 710 × 410 mm);
- two steel corners measuring 55 × 55 × 3300 mm;
- four steel corners measuring 45 × 45 × 850 mm;
- four aluminum corners measuring 45 × 45 × 1550 mm;
- two aluminum corners measuring 25 × 25 × 1200 mm;
- eight steel strips 370 × 60 × 2 mm.
Tools required:
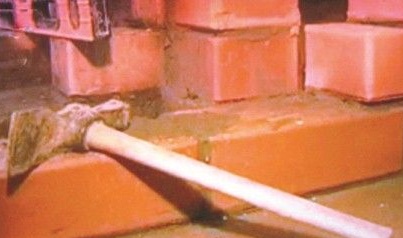
- rectangular sledgehammer;
- acute-angled sledgehammer;
- combined trowel;
- wooden and metal tamper;
- A template for marking openings and masonry channels;
- pickaxe hammer;
- a blade for the solution;
- Stitching for concave and convex seams;
- mooring brackets (from a metal bar with a latch and a galvanized sheet with a cord);
- level;
- roulette;
- plumb line;
- folding meter;
- square.
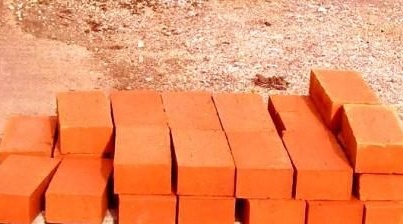
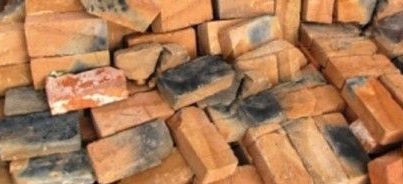
The reliability of the furnace directly depends on the selected brick. First of all, it must be durable, otherwise the oven will not last long. The strength of a brick can be determined by color, if it has a purple hue, then the brick was burned. If the brick is orange, then it is likely to have been too weakly burned. If you hit a quality brick with a hammer, you should hear a clear sound, and the color of such a brick is pink.
The author recommends using the Vitebsk brick for such works. Chips and cracks should not be present on bricks, at least they are not desirable. It is also good that all bricks are the same size. If it turned out that defective bricks were caught during the purchase, they should not be used in the construction of the chimney and furnace.
The device of the Russian stove is such that it has a foundation. The author uses a foundation pit with a depth of 1 meter as a foundation using a sand cushion 11 cm thick. The upper part of the pit was filled with concrete. According to fire safety techniques, the foundation should be at least 250 mm from the wall of the house.
Furnace assembly process:
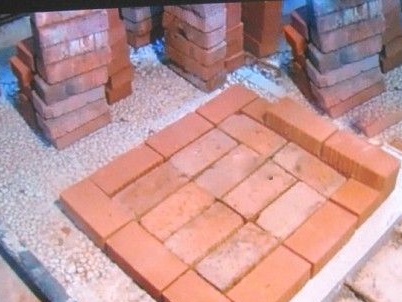
Step one. Spread the first row
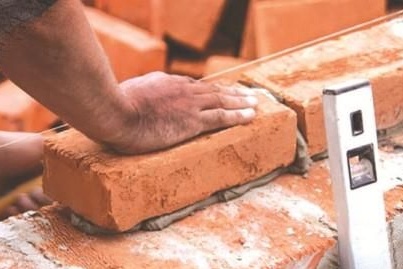
First, you need to lay out the first row of bricks on the prepared foundation. As a result, you should get a regular quadrangle. Accuracy is extremely important here, since it will depend on how smoothly the entire furnace is built. The first layer is first laid without mortar, the horizontalness of the row can be checked with a level. It is important to note that each row is assembled strictly according to the drawings created earlier. The author got only 20 rows.
Then, when they are determined with accuracy, you can proceed to masonry on the solution. To do this, you first need to take a couple of bricks and put them in water for several minutes. This is necessary so that the solution is most effectively connected to the bricks. The solution is put on an empty place, and then on top it is pressed by a brick. The excess solution that comes out at the junction must be removed. In this way, all other bricks are installed. It is important that all joints are filled with mortar.
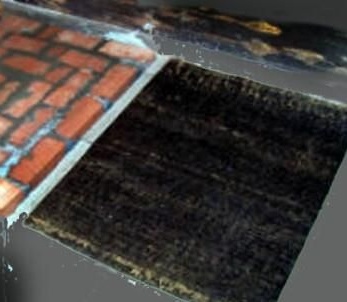
Step Two Waterproofing
At the next stage, the author makes a waterproofing, for such purposes roofing material is suitable. Just need three layers. The material is placed on top of the laid out row of bricks. Well, after that you can start laying out the second row of bricks, which, according to the rules of masonry, is usually called the first. When laying out each row, it is important to check its horizontalness.
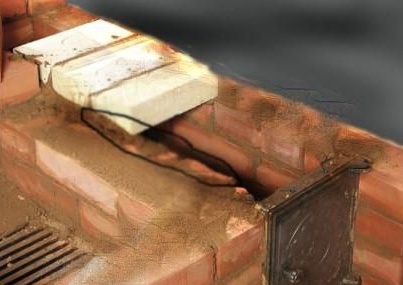
Step Three The second row of masonry
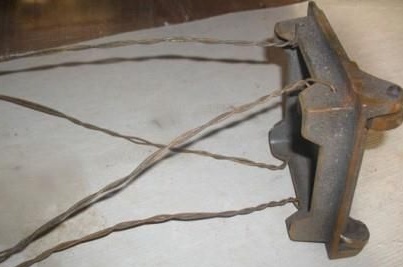
When laying out the second row, it is important not to forget to install the blower door. Before installation, it is wrapped with asbestos wet cardboard or cord. Such a door is fastened, like all others, using special brackets. In extreme cases, for such purposes, a steel wire is suitable, which is laid in the seams between the bricks. Well, then you can finish the assembly of the second row.
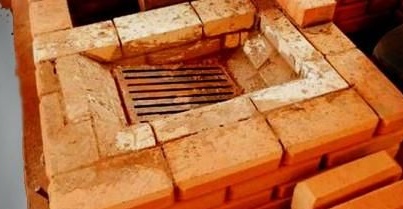
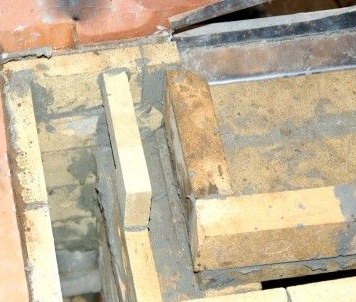
Step Four Third and fourth row
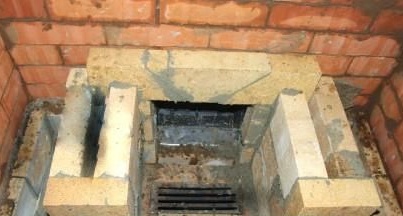
The third row of the furnace is made of fireclay bricks, after it is laid out, a grate is installed on top of the blower. The fourth row of the furnace must be laid out on the "rib". Inside, a chimney is made for an internal stand, partition. On the back wall, the bricks must be laid out without mortar in such a way that their extreme part only protrudes slightly from the masonry. This is done in order to clean the chimney from construction waste.
Step Five Further assembly process
Now you can install the firebox door, you will need wire or special brackets. In order for the door to open freely, it must be wrapped with an asbestos cord. Next, the fifth row is laid out, the bricks are installed flat.
Then the grate is installed, it is placed flush. To do this, you need to chuck the edges of the bricks of the sixth row. A number of bricks need to be put “on a spoon”. The chimney should be wiped with a damp cloth. The next row is laid flat and the back wall is made, two bricks are placed “on a spoon”.
The eighth row is responsible for the furnace door, it is he who closes it. When the stove works like a fireplace, that is, it burns with the door open, the flame should move toward the center of the hob. To achieve this, a beveled brick is installed over the firebox.
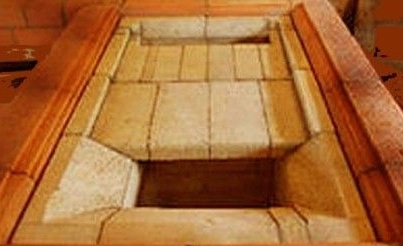
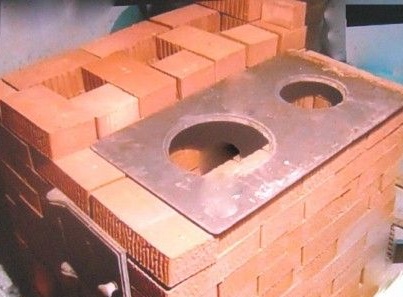
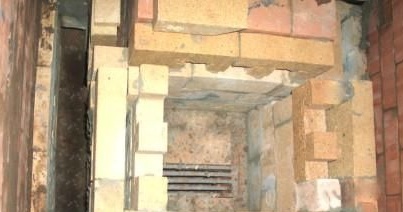
Step Six Plate installation
A cast-iron plate is installed when the eleventh row is laid out. The plate is placed on the solution. The plate is installed so that it does not reach the front edge of about 16-21 mm. On the perimeter of the slab, the author lays an asbestos cord, strips of sheet asbestos are also suitable.From above everything is covered with a frame from a corner measuring 55X55 mm.
In order to install baking sheets in the oven, special steel strips are installed in the cooking chamber. They need to be mounted after 14 rows every two. For seams, you can protrude up to 20 mm.
After the twentieth row has been laid out, a 55 × 55 mm corner is installed above the door of the cooking stove. Further, from the same corner, the frame is installed with the edge up, and also a sheet of the exhaust channel 2 mm thick (hole 120X120 mm)
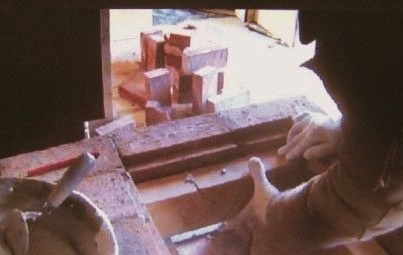
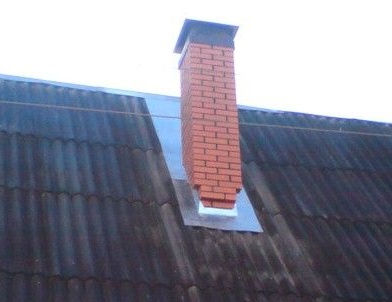
Seventh step. The final stage of assembly. Trumpet
When building a pipe, it is important to take care of fire safety. Between the brick and the floor you need to make an insulating layer of asbestos. The height of the pipe should be at least 5 meters, the countdown must be carried out from the grate.
After the stove has been built, you can remove construction debris and remove the bricks. Then the painting work begins. The stove needs to be plastered and whitened. To create a stucco mixture, you can take clay and sand in a ratio of 1 to 2, add 0.1 part of asbestos and one part of cement. Before applying the solution, you need to wait until its surface becomes dry. The first layer will be liquid and not thick, and the second, when the first sets, can be applied already thicker.
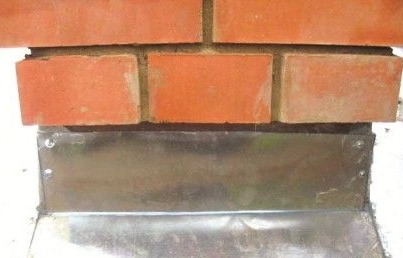
To hide the gap between the floor and the first row of bricks, a submerged metal sheet is installed. A plinth can be installed around the perimeter of the furnace.
It is not recommended to immediately heat the furnace, it should be allowed to stand for about a week. After all, the slower the solution dries, the stronger it becomes. Then you need to slowly warm the stove with chips until it is completely dry. If you immediately heat a stove, it can crack.
If there is a desire to protect the corners of the masonry, then they can be trimmed with a corner. In the same way, you can equip the cooking chamber from the inside.